Cropping a video in Adobe Premiere Pro is a useful technique that can help you to focus the viewer’s attention on a specific part of the frame, or to remove unwanted elements from the edges of the video.
This helpful feature can also be used to adjust the aspect ratio of your video to create a more visually appealing composition. I particularly find that cropping a video can be useful when I need to resize or reposition the video to fit a specific aspect ratio or frame size. For example, I might need to crop a video to fit a widescreen or square format for social media.
Cropping a video in Premiere Pro is an easy and effective way to improve the composition and focus of your video and I’ll show you how to achieve it.
How to Crop a Video in Premiere Pro
Let’s start with your footage. First, you need to get whatever footage you have recorded into the timeline.
Step 1:
Import your video into Premier Pro by hitting [Ctrl + I] for windows and [Cmd + I] for Mac. Or you can go with File > Import.
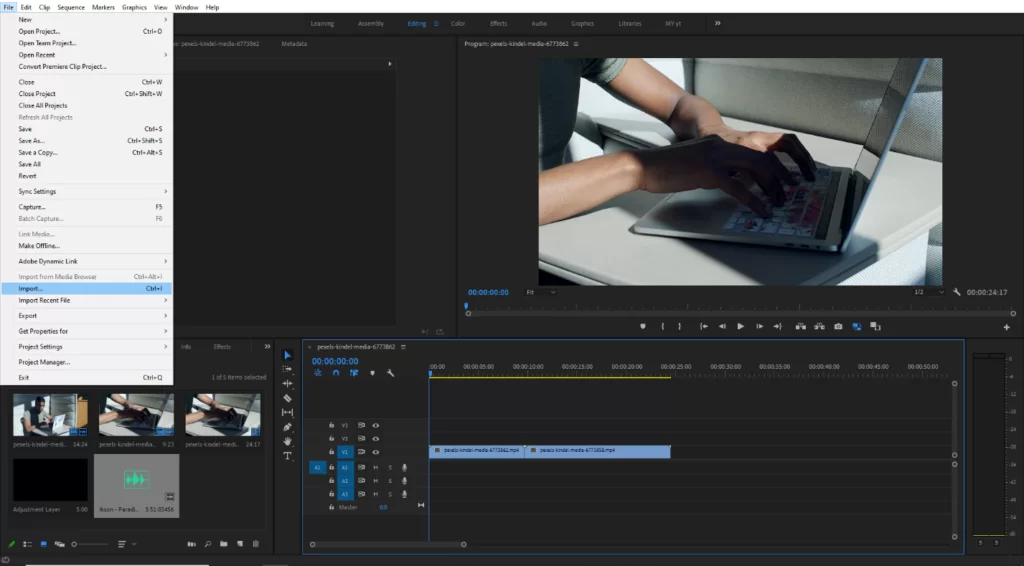
If you already have an existing video in your project panel, then drag the clip onto the timeline.
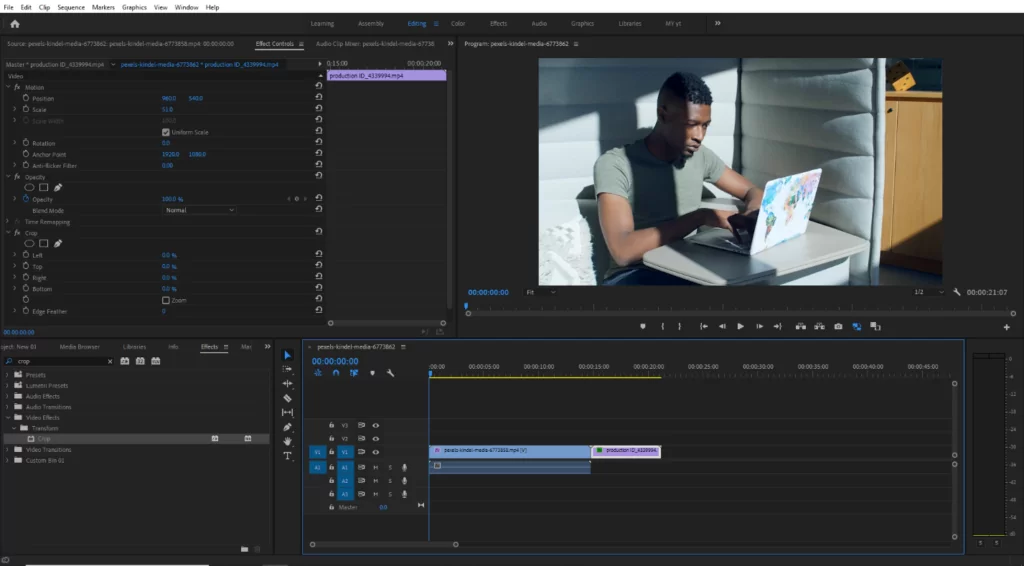
Step 2:
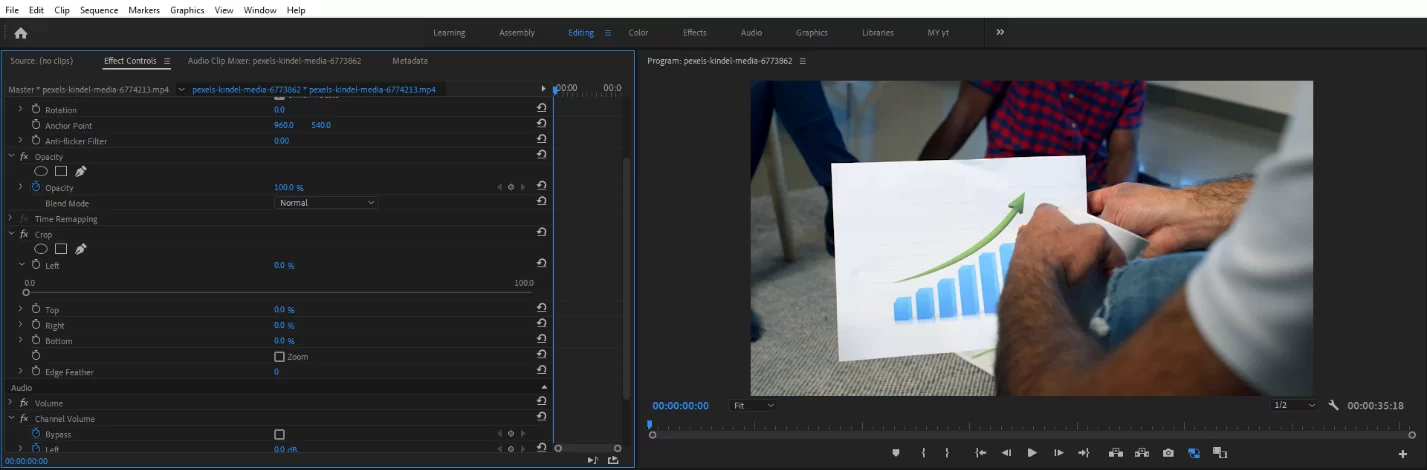
Now navigate to the Effects Panel, to find it go to windows > Effects. Select the video Effects > Transform > Crop.

You can search the effects panel search bar for the effects

Click and drag the crop effect on the video that you want to crop. Alternatively, you can select the clip and double-click on the crop effect.
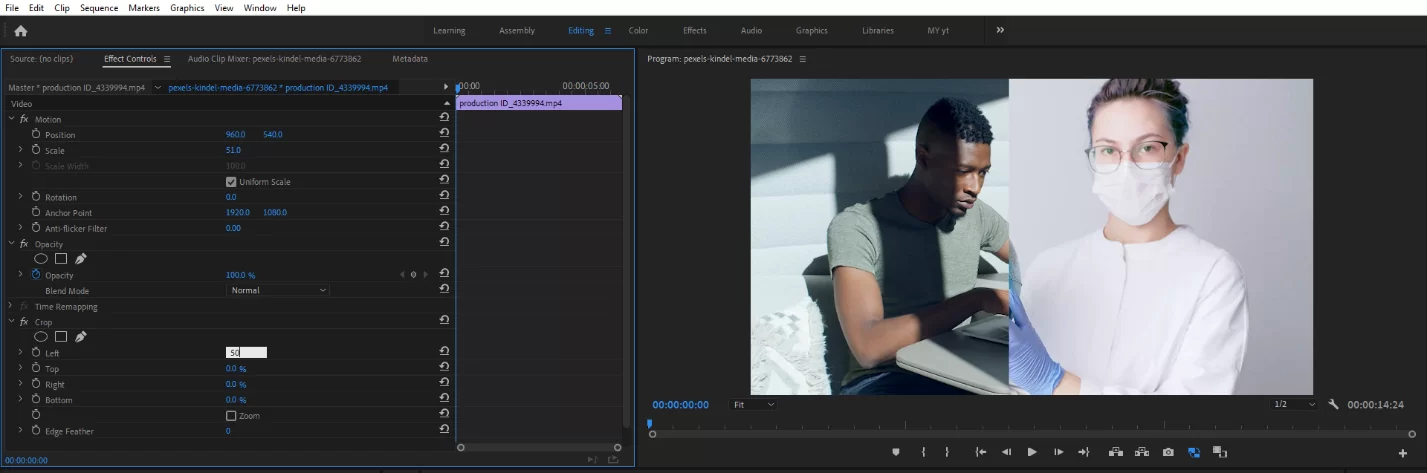
Step 3:
Once you’ve added the crop effect to the video, the crop function will appear in the Effects Controls panel of the clip you have selected. You can crop the video Left, Right and Top, Bottom. Also, you can crop your video in 3 ways: Using percentages, the slider, or the crop handles.

Step 4:
Percentages
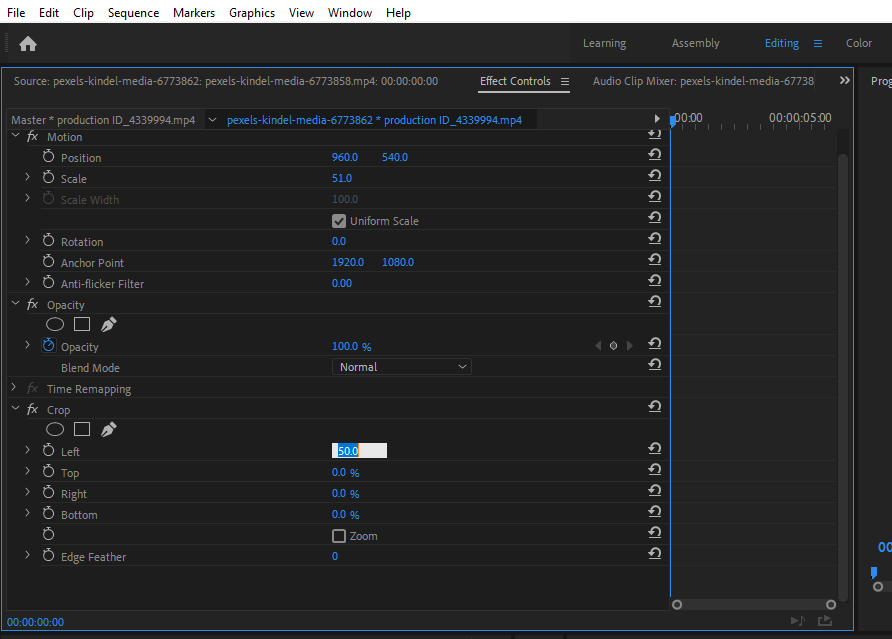
If you have two clips to show one window you can choose the percentage crop, For example, If you want to show two video side by side just increase the video’s left crop value to 50 % for one video.
The Slider
You can use the slider to adjust the crop of a clip. Click the drop-down arrow on the Left crop this arrow will reveal a slider.

The slider gives you a more Smooth crop percentage. Use the slider to increase or decrease the crop percentage from 0 to 100%.
You can use other slider crops such as Right, Top, and Bottom as the same method.
Crop Handles
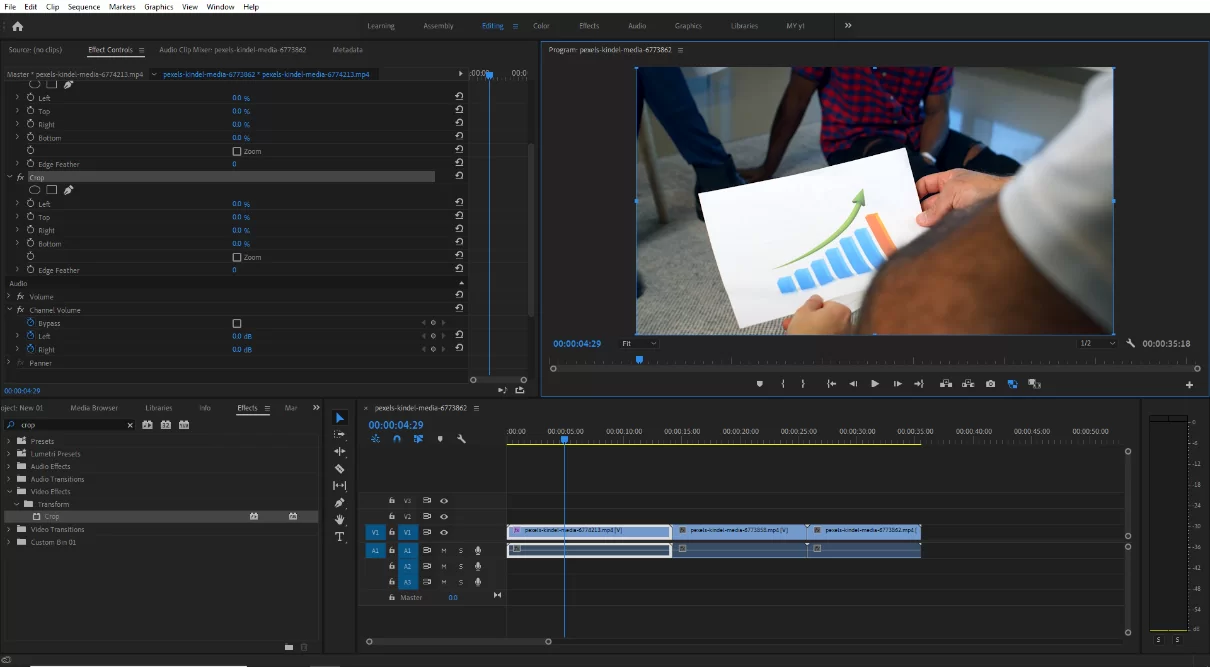
Put your playhead to the video clip you want to crop, and then select the clip. From the Effects control panel select the Crop Effect.
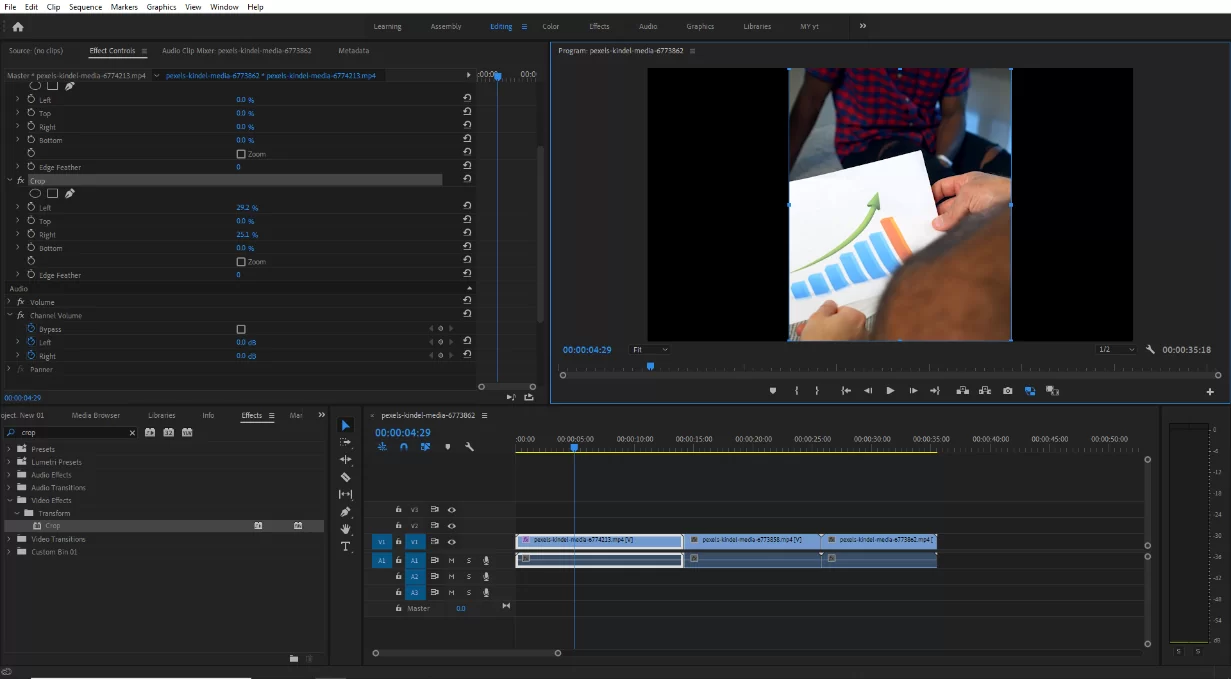
This will add handles to the video clip in the video preview window so you can manually crop your video. Once you are done with your cropped Footage, you can position it on the screen as you want using the position controls in the Effects Control panel. Awesome! You’re now a cropping master in Premiere Pro!
Also, read this step-by-step guide on how to duplicate a clip in Premiere Pro.
Cropping a Video in Premiere Pro: What You Should Know
You see, being able to control what viewers see is the key to becoming a successful video editor. By effectively zooming in on a smaller area of the frame, cropping a video clip directs the viewer’s attention to what you want them to see.
In Premiere Pro, there are several reasons to crop a video. When you trim two videos to fit next to one another, you can make a split-screen. Also, you can use the Mask tool to limit the special effect to a certain area of the frame if you’re trying to composite it into your video clip. Alternatively, you might incorporate a clipped video into a scene change.
Tips to Crop Like an Expert
Now that you know how to crop using Premiere Pro, I know that you want to go out there and crop every single picture and video you can find. Hold on champ, there are some tips you need before you head out.
- Crop Only What is Necessary
If you crop your footage too much, the resolution will be lost. Cropping your footage too much will also make them lower quality and blurrier than the rest of your footage. A good rule of thumb is to only crop if you have the extra megapixels available and only when necessary. So, unless it is necessary, don’t crop too much.
- Tell a Story
Don’t just crop for the sake of it. Whenever you are cropping, ensure that you are telling a story that the audience will be able to understand. The crop tool gives you the ability to turn words into a story. Don’t start cropping if you don’t have a plot in your mind.
What point are you attempting to make with the audience? Think about this. Make sure that after cropping, your image still conveys the narrative that you are attempting to pass. You don’t want to exclude any information from the story or affect the meaning in any way by cropping unnecessary.
- Eye Level Cropping
If your subject is meant to be centered, just the way it is done on a portrait, the rule of thirds is still valid. Be sure the object is centered and at eye level. You can know that the object is centered by checking if the image is one-third down the canvas or the top horizontal line on a rule of thirds grid.
The top two crossings on the grid created by the rule of thirds should be where the subject’s eyes should be placed. Your audience should feel as though they are making eye contact with your picture. Also don’t forget to edit texts when you are done cropping.
When your picture is at eye level, it captivates and motivates your audience.
Did you enjoy this read, check out our in-depth article on cutting a clip in Premiere Pro.
Leave a Reply
You must be logged in to post a comment.