The main determinant of aspect ratio is the size of the camera’s sensor obtained from the width and height of a picture. Your camera sensor would have a 3:2 aspect ratio if it were 36mm wide and 24mm high.
Most photographers didn’t pay much attention to aspect ratios before now. This is because they were constrained by the format that their equipment supported. Photographers will take square (1:1) images if they have a medium format camera. They also had rectangular images (3:2) if they had a 35mm version.
Today, formats that were popular during the film photography era have been adopted by their modern digital successors. Let us take the contemporary full-frame DSLRs for example. The DSLR continues to employ the 3:2 format even though it is an “old” format. Digital photography has also embraced the usual medium format aspect ratios of 1:1 or 4:3. However, the majority of contemporary cameras now offer two or even more formats, including square, rectangular, and even panoramic.
The good news: it’s very easy to change Aspect Ratio!
How to Change Aspect Ratio in Premiere Pro
The Aspect ratio is the video dimension height and width. You might need to change your video dimension for another platform. For example, your video dimension is 1920×1080, which means the aspect ratio of the video is 16:9. But you want to upload the video on TikTok or other platforms that support vertical video which is usually 1080×1920 with an aspect ratio of 9:16. You can simply change the aspect ratio of your video in Premier Pro.
Let’s start with uploading whatever footage you have recorded and getting it into the timeline.
Step 1:
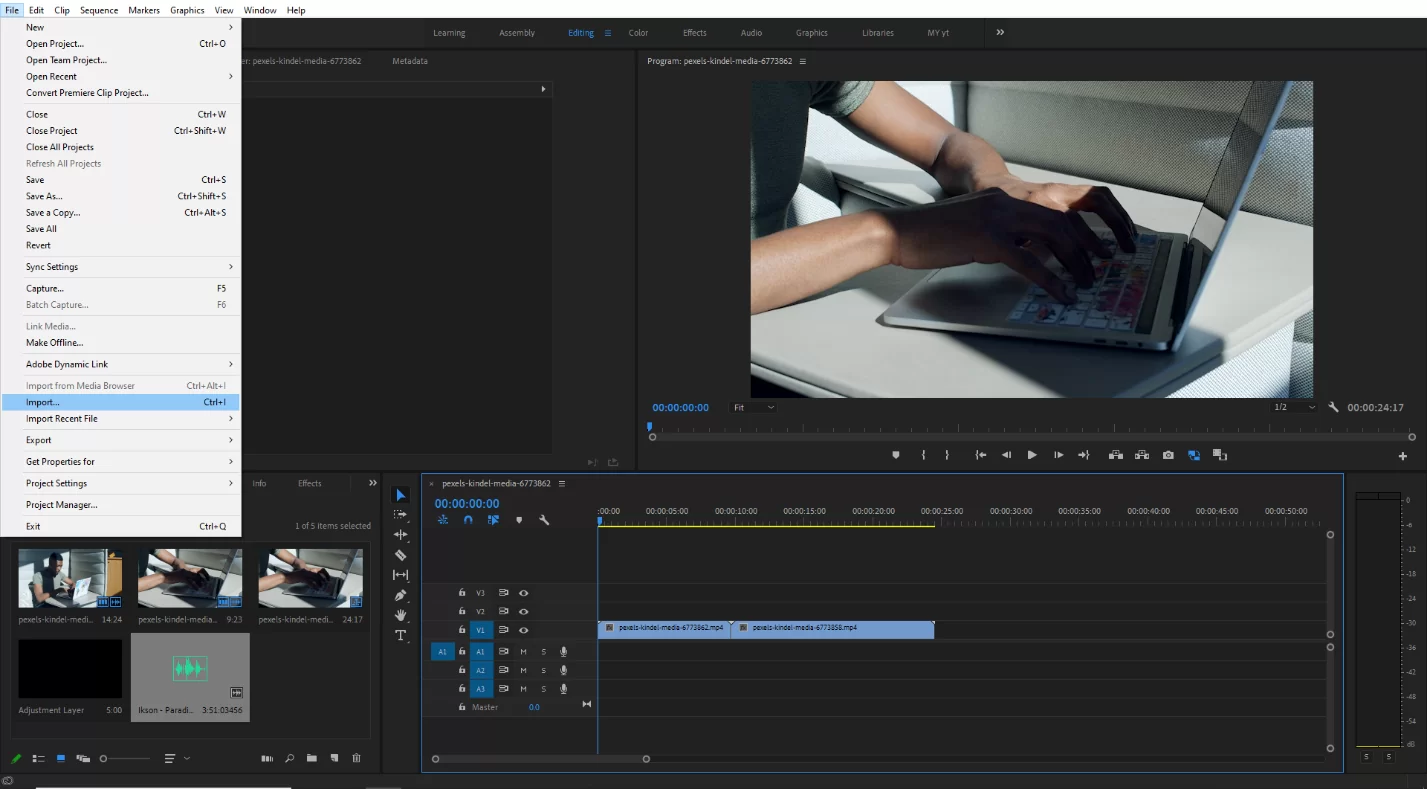
Import your video into Premier pro by hitting [Ctrl + I] for windows and [Cmd + I] for Mac. Or you can go with File > Import.
If you already have an existing video in your project panel, then drag the clip onto the timeline.
Step 2:
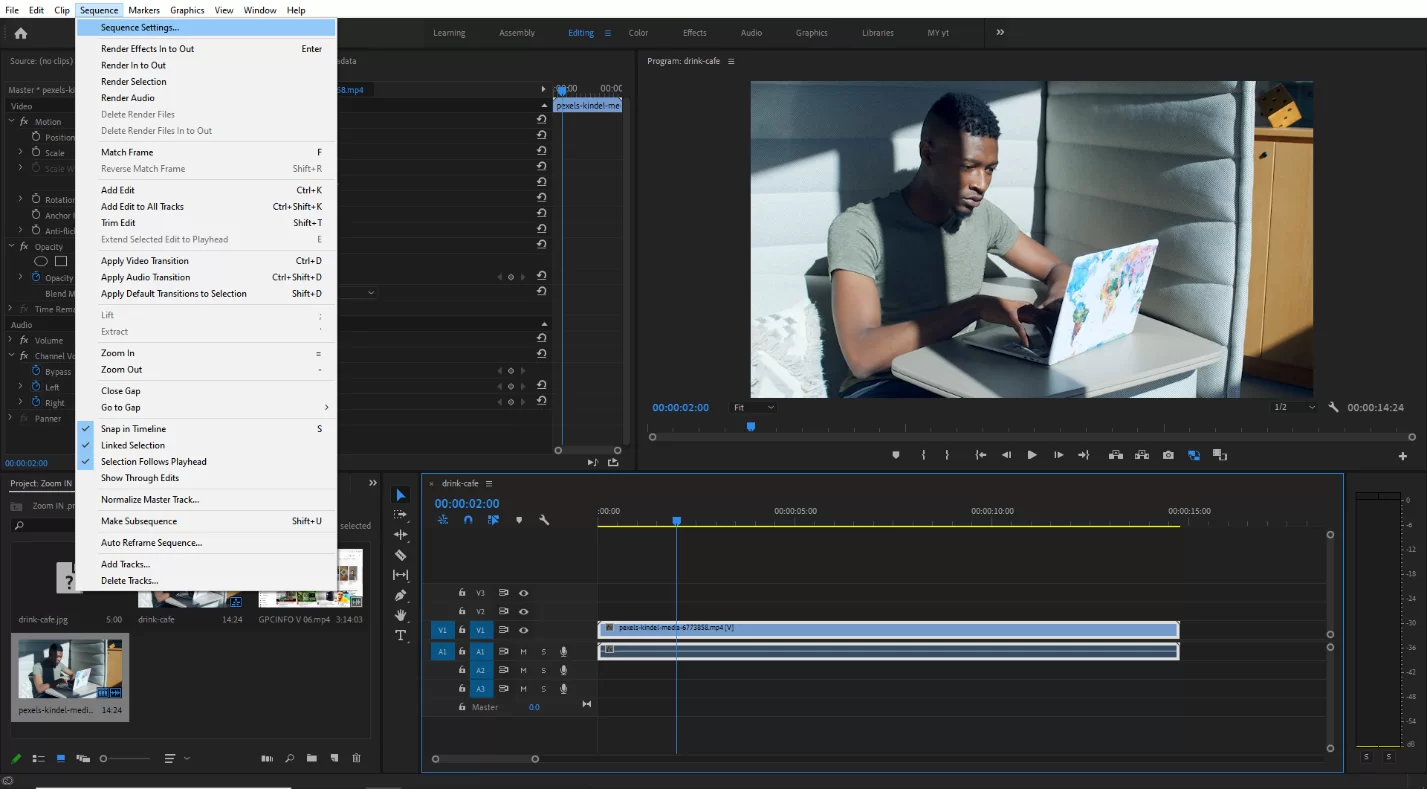
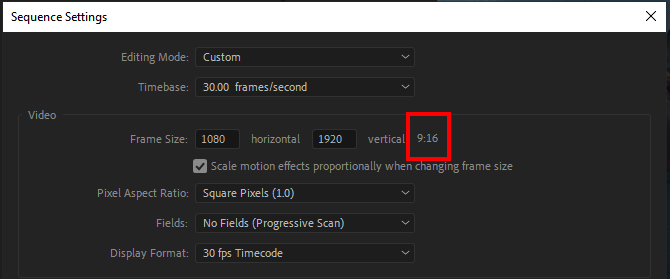
To change the aspect ratio of a video select your clip from the timeline. Go to Sequence on top of the menu bar then Sequence Settings. And a window will open
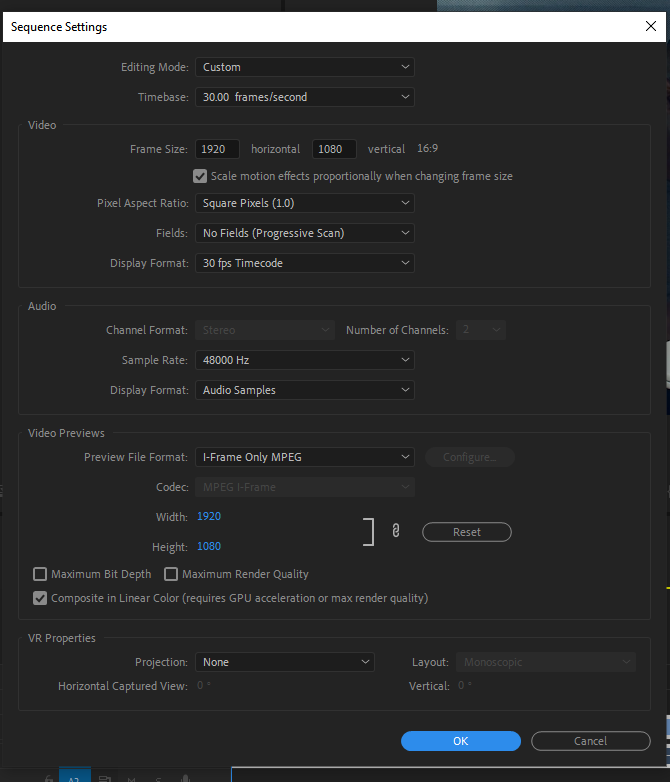
You’d notice the aspect ratio in your video is set by default. My video is 1920×1080.
Now Select your video dimension, for example, I am using 1080×1920 which is 9:16. It’s for a verticle video. You use your own video dimensions for your desired Aspect Ratio.
Now click Ok and you will see a warning, but don’t worry, just click ok.

Your video is ready to use and the Aspect Ratio should be changed. See? That was very easy. In addition to changing your video aspect ratio, you can also export your video and add transition effects to your videos!

How To Change Aspect Ratio For an Existing Sequence in Premiere Pro
Follow the steps below to change the aspect ratio for an existing sequence using Premiere Pro
Step 1
Start by going to the Project Panel. The Project Panel is in the Editing workspace.
Step 2
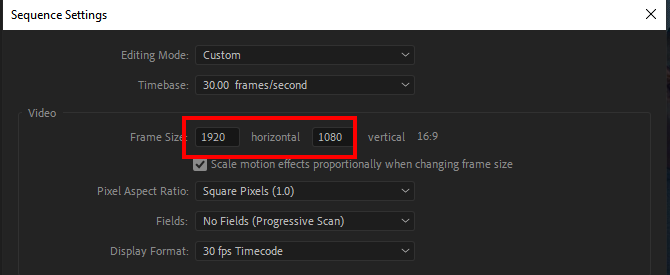
The next step is to update a sequence. To update a sequence, right-click on it and choose Sequence Settings. A window called Sequence Settings will appear. Now change the horizontal and vertical resolutions for a 1080p HD project. You can change it to 1920 and 1080 against Frame Size. Then, click OK and you are done.
How To Change Video Frame Size in Premiere Pro
Step 1
To change a video frame size start by creating a new Sequence. You can create a new Sequence by selecting File -> New -> Sequence to alter the frame or video size. S
Step 2
The next step is to select the Settings tab in the New Sequence window. You must ensure that Editing mode is set to Custom. Finally, change the horizontal and vertical resolution.
Aspect Ratio: Why is it Important?
Did you know that your video’s shape is determined by aspect ratio? Whether your video is square, rectangle, vertical, wide, extremely wide, or cinemascope, they are all determined by aspect ratio.
By being aware of the importance of aspect ratio before filming, you may frame your action appropriately and choose the appropriate resolution when building a new sequence in Premiere Pro.
We also recommend that you see our step-by-step guide on adding fonts in Premiere Pro.
Leave a Reply
You must be logged in to post a comment.