Adding transitions in your videos has many advantages. Smooth transitions can help to create a more professional and polished video. Transitions can also help to guide the viewer’s attention and make the video more engaging.
I find using Premiere Pro transitions helpful for masking jump cuts or other abrupt changes in the video. I’ll show you how I add transitions in Premiere Pro. You can use a sample video to try it out before implementing it.
How to Add Transitions in Premiere Pro
You will find all the adobe Premiere Pro pre-installed Transitions on the Effects panel. To add these transitions, follow these 3 steps.

Step 1:
Open the effects panel
Drag your video onto the timeline and open the effects panel. To Find the Effects panel, go to Window > Effects. Here, you’ll find the video transition. There are many transitions in premier pro chose your desired one.
Step 2:
Select any transition
After selecting a transition, click and hold and then drag it to the beginning or end of the clip you’d like to use it on. Or, place the transition between two clips the end of one clip and the beginning of another.

Step 3:
How to use preset transitions
If you install some transitions on Premiere Pro, you can easily use this in your video. Go to the Effect panel once more and then you can find your installed transition on presets. For installed preset transitions, some of them are used with an adjustment layer.

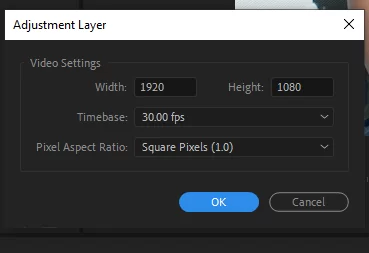
To create an adjustment layer, go to the project panel. At the bottom of this panel you’ll find a New Item option. Click the New Item and you can find the adjustment layer.

Click on that and set your adjustment layer resolution and then click ok. Your adjustment layer will be created on the project panel.
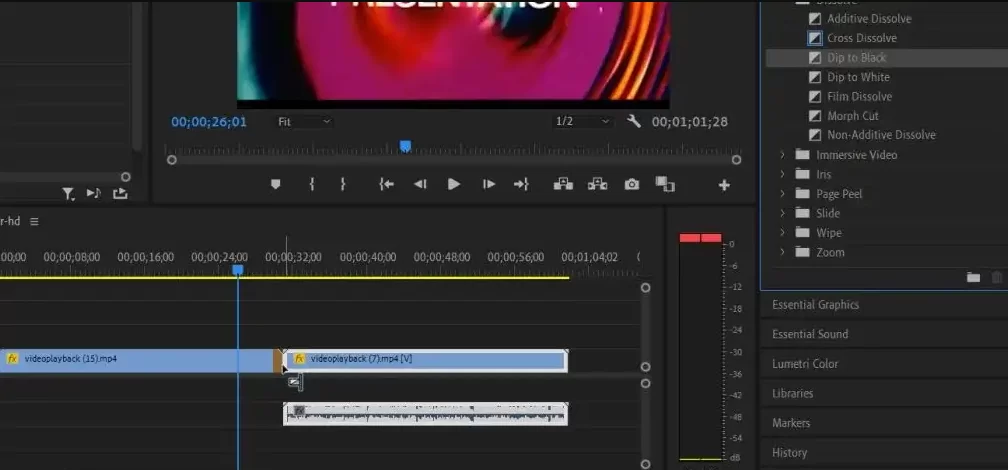
Now drag this adjustment layer onto the video where you want to add the transition.

And then go to your presets and find your respective transition and drag it to the adjustment layer.
You can also check out our in-depth article on how to add keyframes in Premiere Pro.
Understanding Transition Effects
One of the uses of transition effects is to blend the contents of two sequence clips gradually. This is used to smooth out edits or add visual interest. To overlap the content for the duration of the effect, transition effects employ handles, which are the empty spaces at the beginning or end of a clip.
The default transition can be applied to each selected edit if more than one clip is selected in the Timeline. This can also be done if you lasso many edits while pressing Command (macOS) or Control (Windows).
These transitions which are occasionally less evident to the viewer, are still useful for connecting images and ideas. An aural cross-fade, for instance, can occasionally hint to a viewer that something sinister is going on.
All About the Default Transition in Premiere Pro
The process of adding transitions also adds standard transitions—which will be a straightforward cross-fade transition unless you’ve somehow reprogrammed Adobe Premiere Pro to use a different default. Don’t be in a hurry to criticize these default transitions because they are there for a reason.
Cross-fades are frequently utilized to effortlessly join two separate images in all genres of film and video. It can be utilized for dramatic effect to link topics in each shot and is less harsh on the viewer than a standard hard cut.
By clicking the default transmission on the timeline, you can easily move the preset transition. Additionally, you can alter its length by shifting one of its ends to the left or right.
Great Tips for Working With Transitions
If you are feeling adventurous, there are many more advanced and experimental transition types that you can use. Consider the Morph Cut. The Morph Cut is a transition that can be utilized when attempting to combine two quite identical clips.
The Morph Cut works well when you are attempting to join different parts of the same interview. This transition combines your clips using AI learning so that it doesn’t even resemble a cut at all.
Experiment with various transitions. Finding the best tools to assist with your editing and storytelling is the true goal when you are choosing a transition. There are moments when you may want your transitions to be obvious and cinematic, and there are times when you don’t want your audience to see any transitions at all. The more you experiment with transitions the better you’d understand when you should deploy them.
You might also experiment with adding various audio effects to your transitions to help them seem more colorful and realistic. Before adding any transition effects to your audio, ensure that you also learn how to duplicate a clip. It would save you a lot of work!
Leave a Reply
You must be logged in to post a comment.