Keyframes are used in Premiere Pro to indicate the start and end points of a change to a layer property, such as position, opacity, or audio volume. They allow you to create a gradual change over time, rather than a sudden change all at once.
If, for instance, you want to animate a text layer so that it moves across the screen, you can set a keyframe at the starting position and another keyframe at the ending position, and Premiere Pro will automatically interpolate the values in between. This allows you to create complex animations without having to manually set the values for every frame.
How to Add Keyframes in Premiere Pro
Start with getting your footage into the timeline.
Step 1:
To import your video into Premier pro, use [Ctrl + I] for windows and [Cmd + I for Mac. Or you can go with File > Import.

If you already have an existing video in your project panel, then drag the clip onto the timeline.
Step 2:
Go to the “Effect Controls” panel
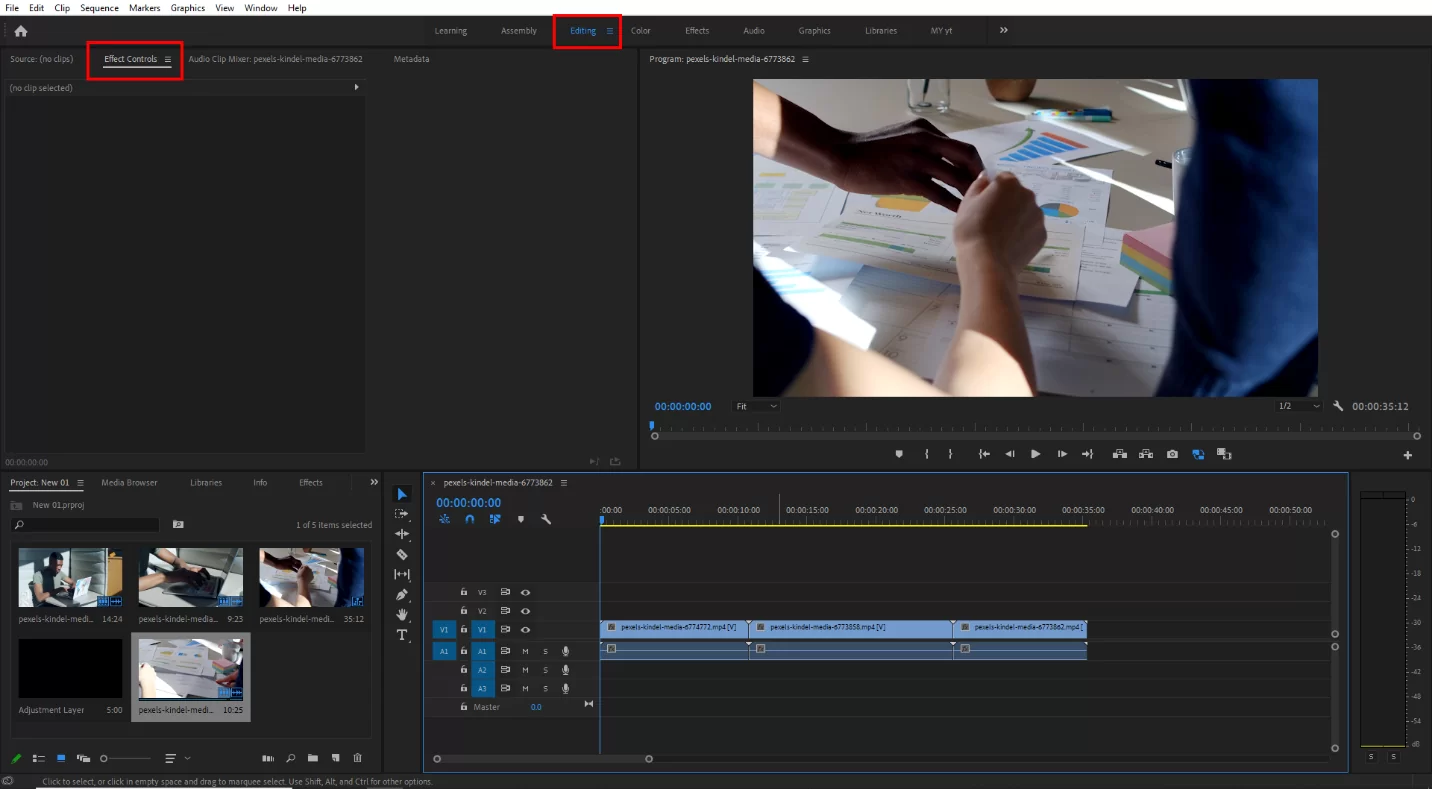
First, ensure you are on Editing Panel. This is where you can find the Effect of Controls. If you can’t find the Effect Controls go to the top menu bar and click Window > Effect Control.
Step 3:
Adding Keyframes
Select the clip to that you want to add keyframes. When you’ve selected the clip, you will see some settings appear in the Effect Control tab.

You will find stopwatches next to all the Motion settings; these are options to add different types of keyframes to your video.

Click the stopwatch to create a keyframe and you will see the watch will turn blue. On the right side of the Effects panel, the keyframe should be created.
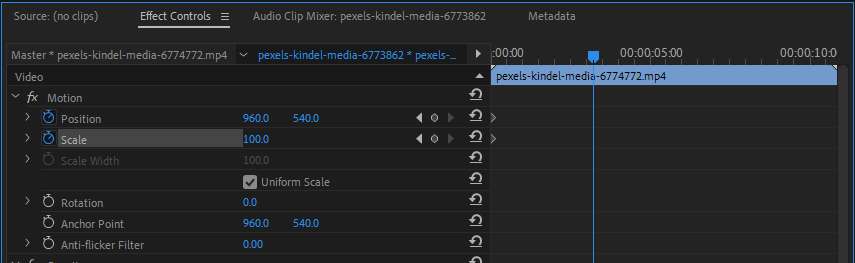
The keyframes should look like the Diamond icon,
Move your play-head forward to make another keyframe. If you change anything in the value of the first keyframe the second one will automatically create the keyframe into your clip.

Step 4:
Adding multiple keyframes
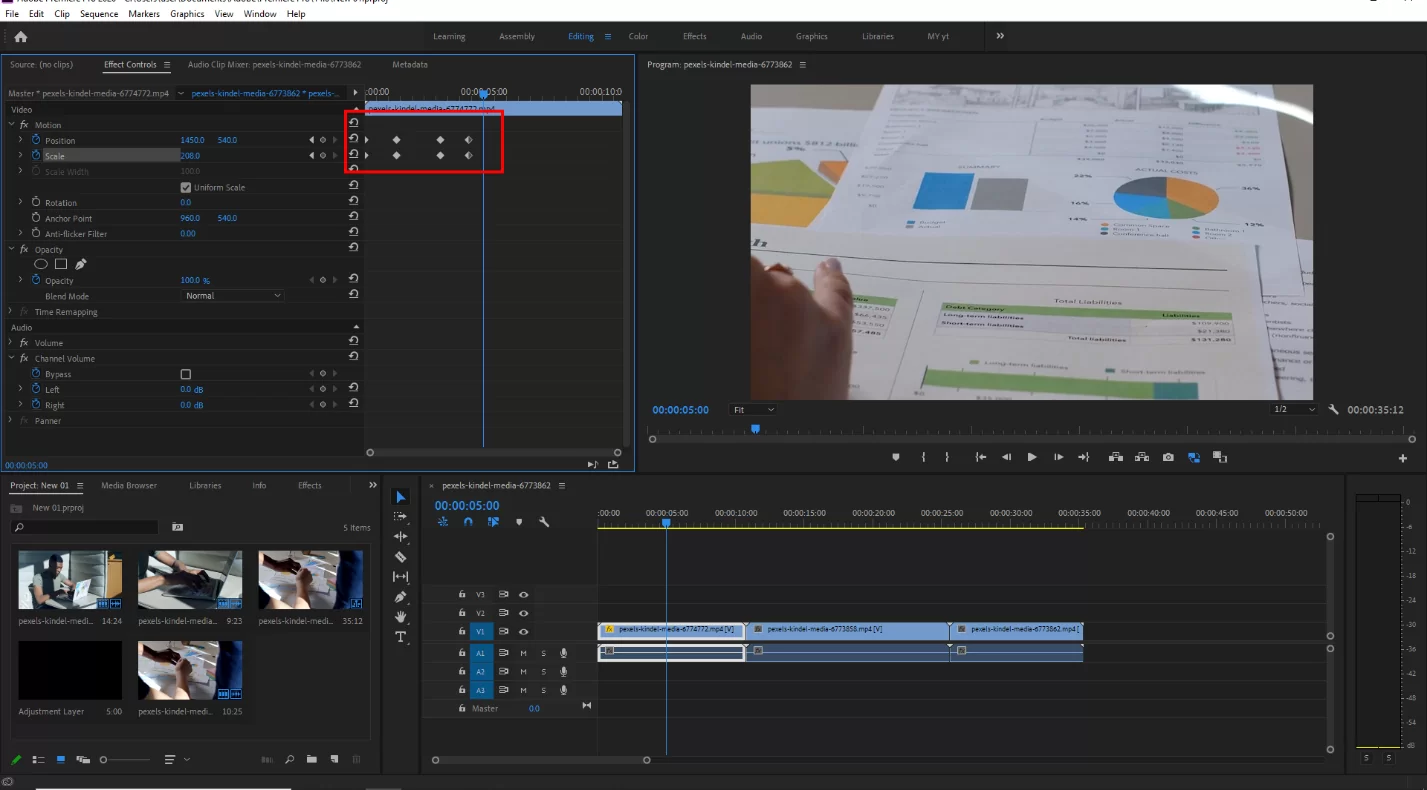
You can add multiple keyframes to one clip. There is no limit to the number of keyframes you can add to your clip.
You can also check out our in-depth article on how to render a clip in emiere Pro
Using Keyframe to Add Rotation to Your Clip in Premiere Pro
This is a very straightforward process. Simply go to the Effect Panel after selecting the clip. Then, move your playhead bar on the effect timeline about five seconds forward.
However, you must remember that the end of the clip might not appear on that timeline. If you wish to see the end of the clip, move the bar forward. You may need to enable Keyframe Animation.
To do this, click on the stopwatch icon next to Rotation Effect. Then, adjust the parameters so that the animation begins in the manner you desire.
Once you’ve decided how you want the animation to end, move to the conclusion of the clip and add a keyframe! Finally, rescale your clip to 200% or higher to avoid having a black display in the corner while it is being played back. This is also important if you want to avoid the black display throughout the course of the recording.
You may also like our guide on how to split clips in Premiere Pro.
Adding Scale Animation to a Clip
Your footage’s size will change when you add the scale effect. Your clip will gradually zoom in and get some life and emotion when a scale effect is included.
To add the scale effect, select the video in the timeline, go to the Effect Panel, and enable Keyframe Animation. Keyframe Animation is enabled by clicking on the stopwatch icon next to Scale Effect. Then, adjust the parameters to how you want the animation to begin or enter the precise value you desire.
Keyframes: When is It Important To Use Them?
Keyframes can be added to your texts and you can keyframe in various ways. Keyframing can be done regardless of how well you comprehend its rationale. For your main title, you can keyframe by making dynamic motion graphics.
Using position and scale keyframing, you can also encourage camera movement or give your picture life. You may also animate the audio volume and pan it however you like using Keyframe.
When you utilize the power of a keyframe, you may be as imaginative as possible. Through the good use of keyframes, you will become more distinctive and expert in your editing.
How To Use a Preset Keyframe Animation in Other Clips
One of the advantages of using your keyframe as a preset is that it will reduce stress and speed up editing. I’ll demonstrate the quickest method for using your keyframe animation in other clips.
Step 1
Start by holding down the Ctrl key while picking each effect in the Effects Panel. This will get you the outcome that you desire. After selecting them, right-click and select Save Preset. You can go ahead and name the preset.
Step 2
If there is only one effect, you can save it by right-clicking on the effect. Also, you can drag the preset onto the chosen clip or double-click it to apply it by going to the Effects Panel.
After you locate the Effects Panel, then you should navigate to Presets Folder, and search for the preset name. When you get to the folder, you will see the effects and keyframes you initially configured in the Effect Controls panel. You may select to read only if it’s necessary.
Check out this information packed article I wrote on changing font in Adobe Premiere Pro.
Leave a Reply
You must be logged in to post a comment.