Rendering is an essential step in the video editing process that allows users to preview their work and export the final project. Premiere Pro rendering can help improve playback performance and is also necessary for exporting and finalizing your video. I created this easy guide to show you the process of rendering in Premiere Pro
Premiere Pro – How to Render
Here are the two methods I use to render in Premiere Pro:
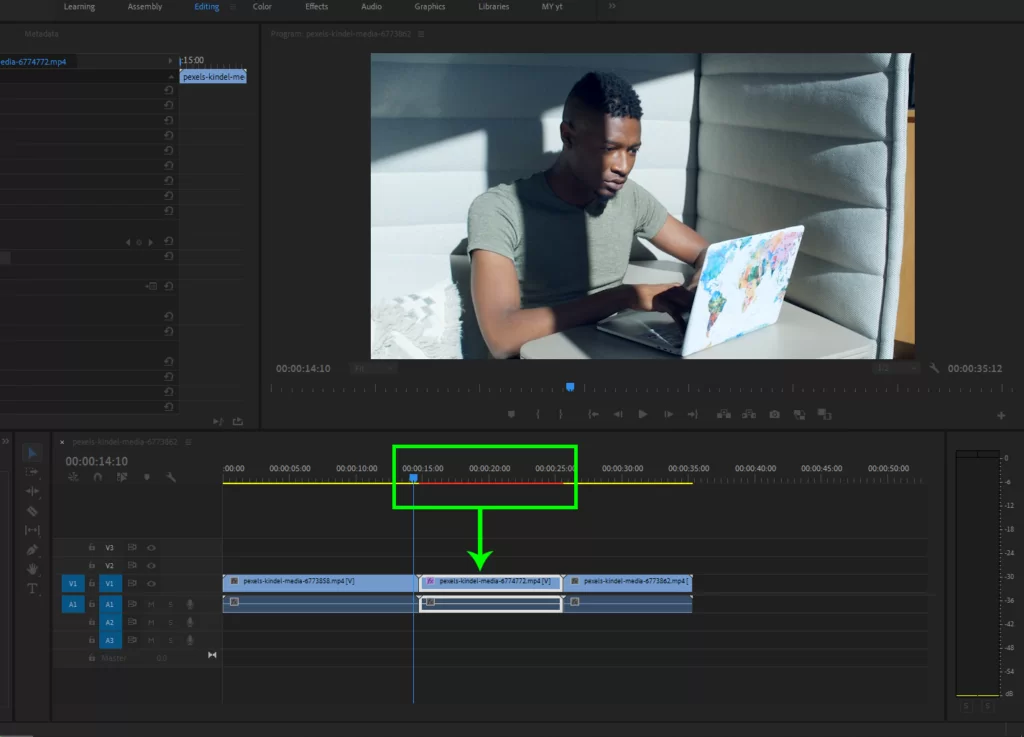
Sometimes, when you apply more effects to your clip or video the playback is not smooth and has lagging issues. When this happens, you’d notice that at top of the clip, a red bar will appear. A red line above your clips in Premiere Pro indicates that the effects applied to the clips beneath that line are currently being processed by the CPU (Central Processing Unit). This interrupts your editing.
You should simply Render the clip for a better editing experience in Premier Pro.
To fix this follow these two methods.
Method 1:
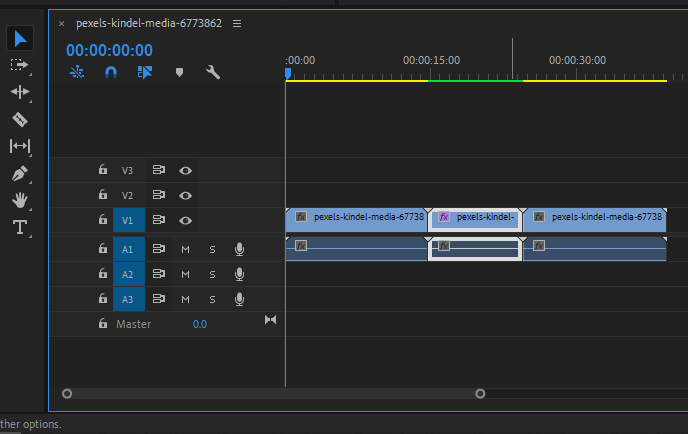
To render an individual clip select the clip and press Enter on the keyboard.

When you click to enter the process will start and after that, the red bar will turn green. It means the rendering was completed. Now you can see your video playback will be buttery smooth. If your video isn’t buttery smooth and lagging, don’t worry, we have an article on how to fix laggy video in Premiere Pro.
Method 2:
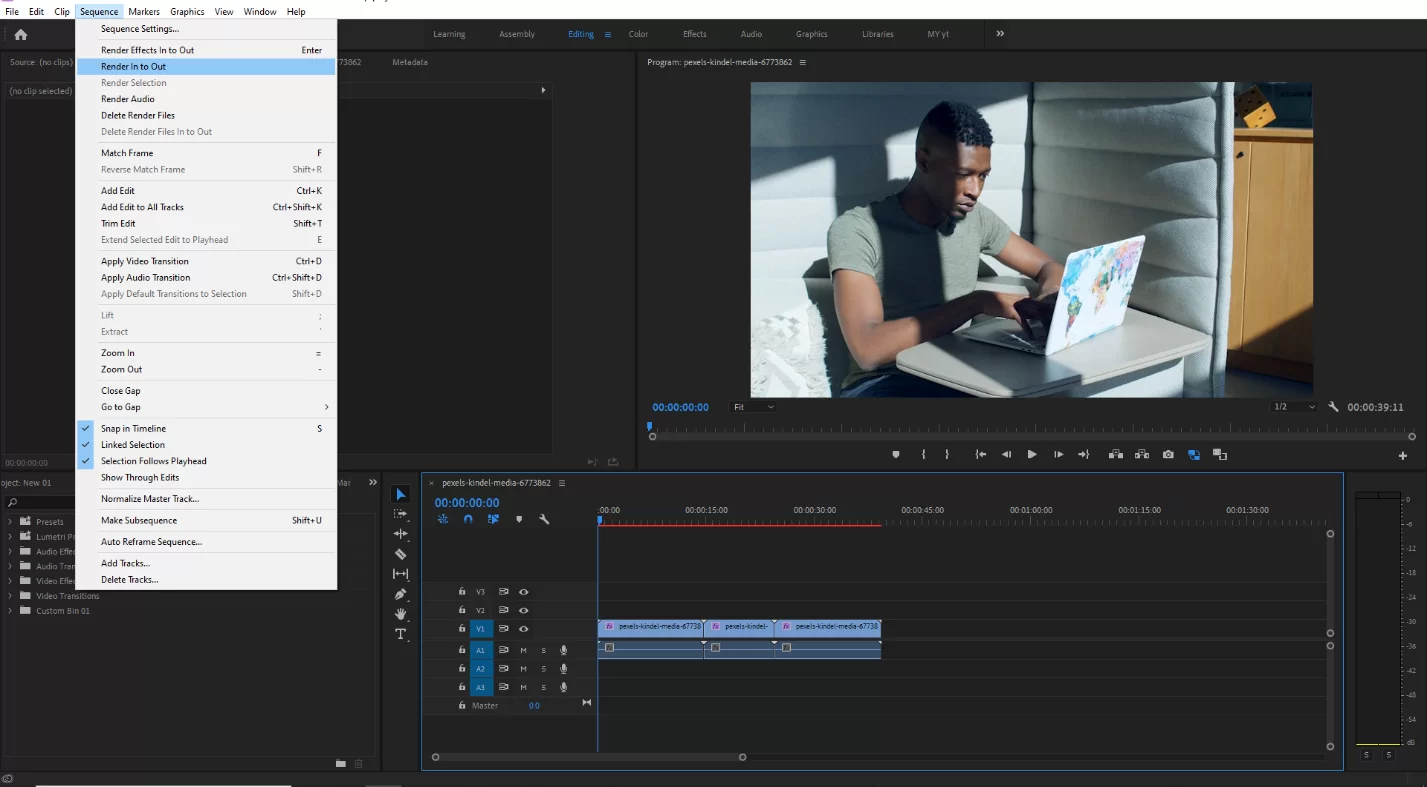
You can do this manually. To do this, first select your clip and then go to Sequence > Render Selection. Your video will start rendering.

To render all the clips go to Sequence > Render in to Out
All clips from start to end will be rendered. And the red bar will turn green.

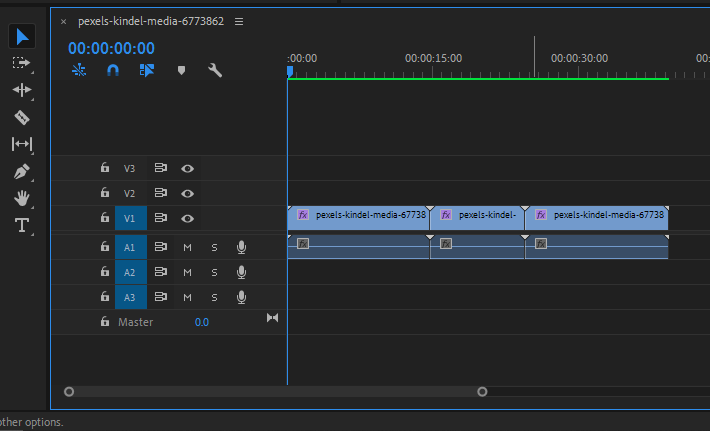
Now you have a smooth playback.
What Happens When You Render in Premiere Pro?
Premiere Pro uses projects from the saved folders. While doing so keeps project sizes reasonable and manageable, it may cause problems with how your project plays back. Premiere Pro will be able to playback your project for you to view immediately as you add video clips, effects, or transitions to your timeline.
When you render a portion of your project, Premiere pro makes a sneak preview clip in the background. Then, when it’s time to play that clip, Premiere uses the clip’s preview version, which includes all of the color, effects, and transitions.
To allow Premiere pro to generate a fresh preview file after you make changes to a clip or effect, you must render that portion again. The clip will continue referencing the preview file if no changes are made, allowing for full-speed and high-quality playing.
Rendering Color Indications on Premiere Pro
When rendering is required, Premiere Pro will display a sequence of colored bars at the top of the timeline. Below are some of the colors that are displayed.
- Green indicates that the footage has been rendered and that a preview file is connected to the segment. If you have a green bar at the top of your timeline it means that the footage is rendered. Also, when you see the green color, it means that your project will be able to playback at full speed without any pauses.
- Yellow indicates that a rendered preview file for the clip is not present. Shortly before that point during playback, Premiere will produce the clip, effect, or transition frame by frame. If the unrendered clip is relatively simple, a yellow bar will show up, and playback should proceed with little to no problems.
- Contrary to the yellow render bar, the red render bar indicates that there is no preview file associated with the clip. However, unlike the yellow render bar, the red render bar indicates that the clip is likely to be severely complicated or affected, which will undoubtedly cause lagging during playback.
- The absence of color on the timeline indicates that there isn’t a rendered preview file for the clip, but the media codec you’re using is straightforward enough to serve as a preview file. Also, when color is absent, you won’t have any problems playing back.
Why Rendering Might be Taking So Long
Your project may take a while to render for several reasons. Your project may be taking a long to render because you are using an old device or because of the sheer size of the project. Your rendering may begin quickly and then slow down dramatically—this is one of the frequent rendering-related complaints. If this happens, the Render Progress bar is often the culprit.
When you render, Premiere calculates the progress meter as percentages. The calculation also depends on how many clips are being rendered in the work area. No matter how long a clip is, if you have 4 clips in your timeline, each one will account for 25% of the final product.
Each clip will take up 25% of the progress bar if it is 5 seconds long for the first and 20 seconds for the second. In other words, it will take less time to complete the first quarter than the second. Rendering is one of the tasks that can be done using Premiere Pro.
You can also check out our in-depth article zooming in Premiere Pro.
Leave a Reply
You must be logged in to post a comment.