Understanding how to zoom in on your footage in Premiere Pro is an important skill for both amateur and professional video editors and can help you create polished, professional-looking videos.
Zooming in on footage in Premiere Pro can also give you a closer look at the details in your video and help you make precise edits. In this guide, I’ll show you some ways to zoom in on your footage in Premiere Pro, including the zoom tool, and keyboard shortcuts to achieve the level of magnification you need.
How to Zoom in on Adobe Premiere Pro
Here are five steps to zoom in Premiere Pro:
Step 1:
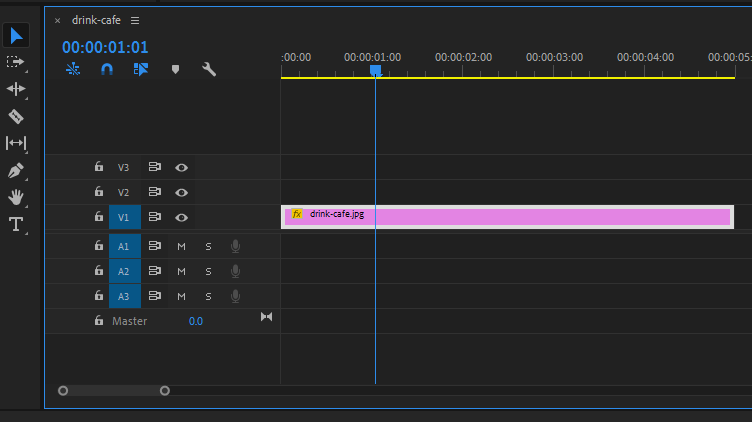
Add your clip to the timeline
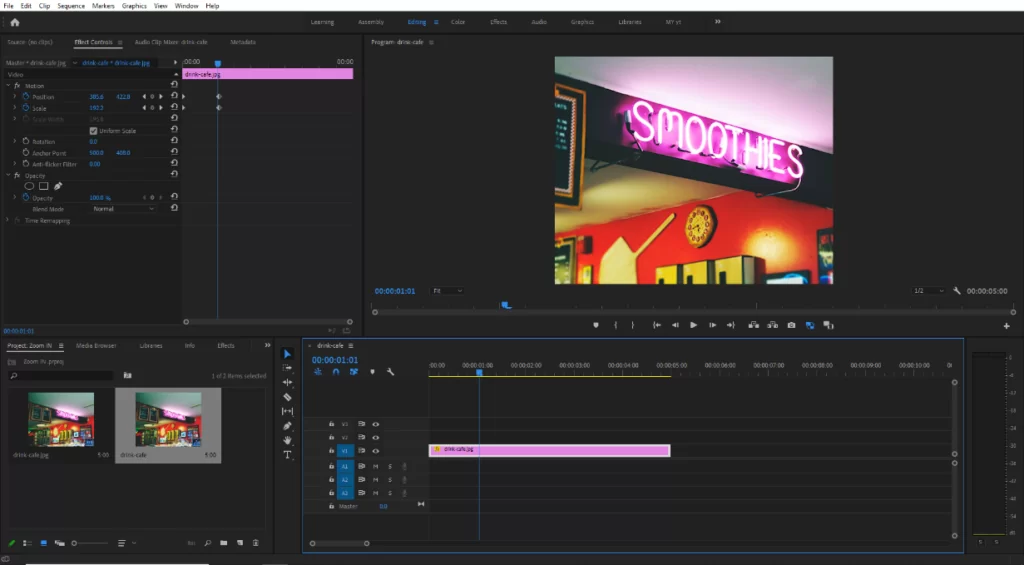
To create a zoom effect in a video or image, I’ll be using keyframes for the zoom and position parameters. You need to drag your video or image onto the timeline. Then select the clip or image that you want to zoom in on.
Step 2:
Set the Starting Point for Your Zoom
Position the playhead where the movement will begin. Then open the Effects Controls panel and here you can find Position and Scale under Motion.
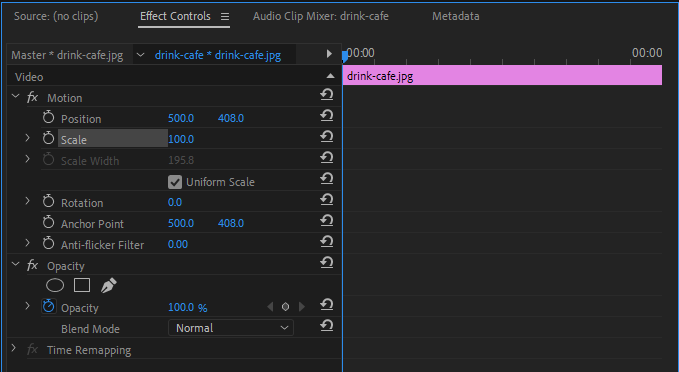
Click the stopwatch icon to turn on keyframing and set a keyframe for both scale and Position. The stopwatch will turn blue which means your keyframing is on, and any further changes or adjustments made to those properties will be recorded via keyframe.
Step 3:
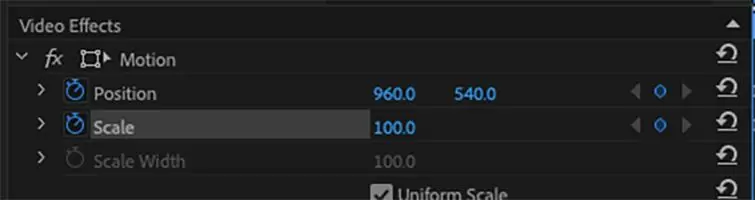
Adding Keyframes to Scale and Position
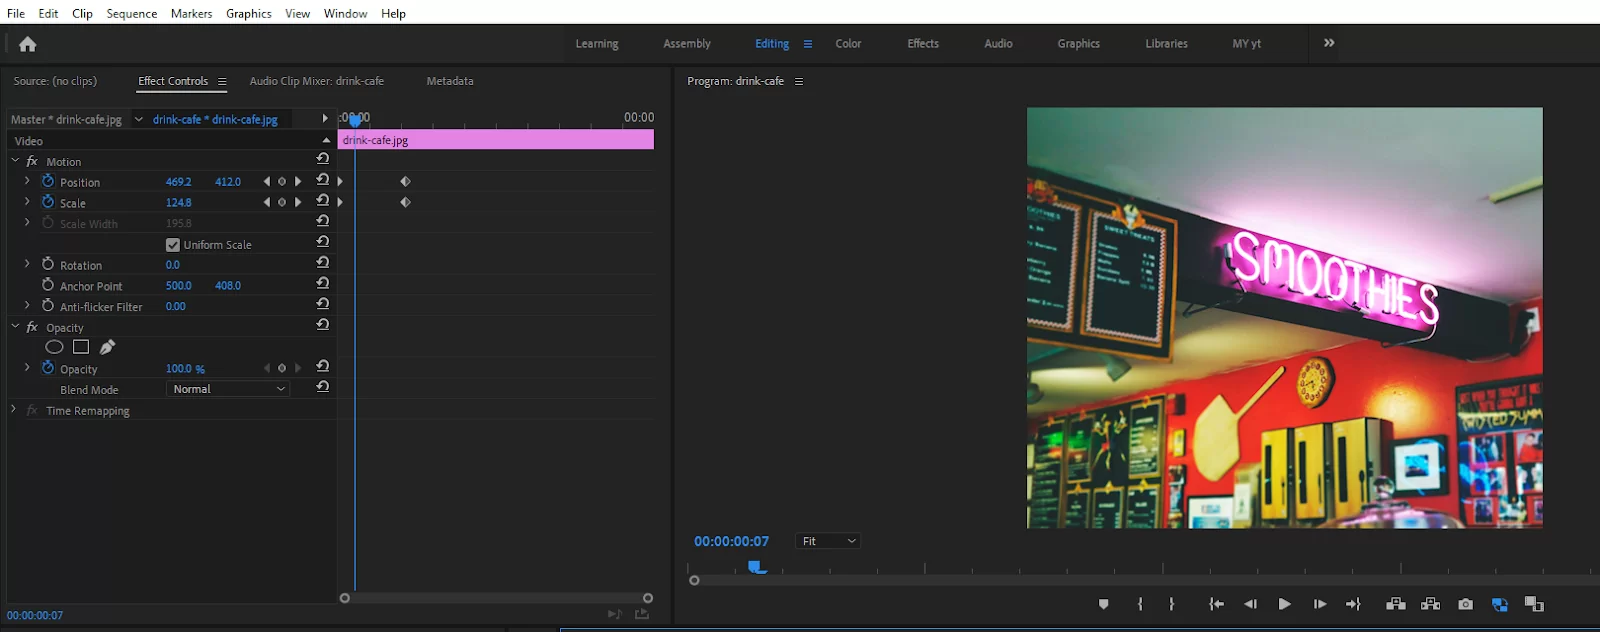
Move the play-head to the spot where you want the movement to end and adjust the Scale and Position properties so you’re zoomed in and framed up around your subject. When you change the scale and position value, New keyframes will be recorded as long as keyframing is on.
Step 4:
Create a smooth zoom
In this step, we are going to smooth the zoom effect. First, select the first both keyframes and right-click on them then go to temporal interpolation. Here you will find Ease in and Ease out.
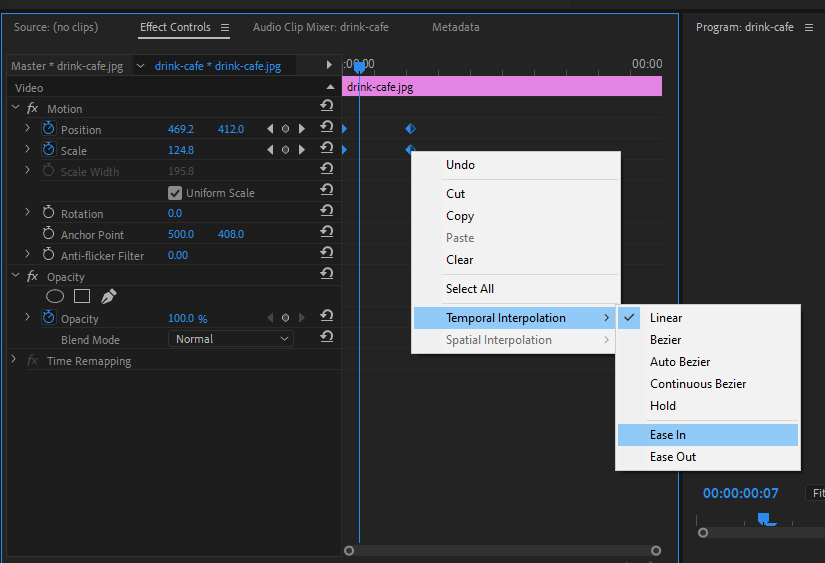
If you want to smooth out the ending of the zoom, you can always add the Ease in or Ease Out tool to give the ending of the clip a little bit more slide.
Step 5:
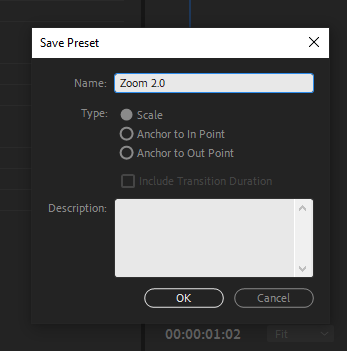
Saving zoom as a Preset
If you want to use this same zoom effect. You can save it as a preset to use quickly on any other clip.
In the “Effect Controls” Window, with motion selected, right-click on the panel and you will find the save preset. Click on save preset and your preset will be ready.
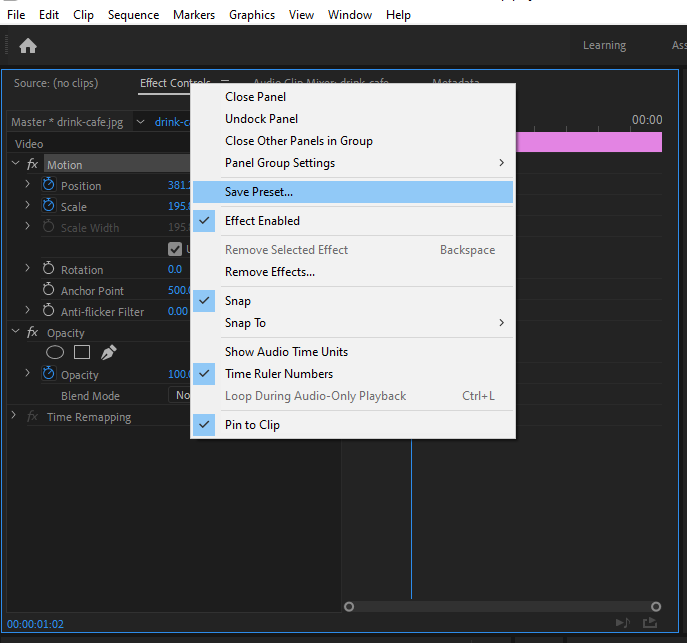
This will save the animation for the entire duration of the clip. You can also name the preset for example I named it “zoom 2.0”
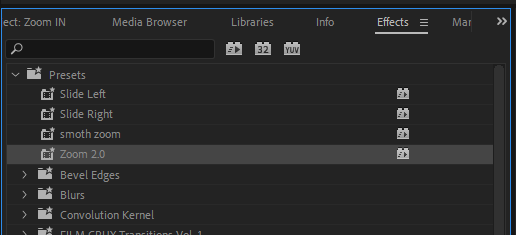
Now you can use this in any clip or image. Just go to the effects window and go to presets and you will find you’re save preset. Just drag this into your clip or image.
You can also check out our detailed article on how to unnest in Premiere Pro.
Cool Premiere Pro Zoom Effects You Should Try
In Adobe Premiere Pro, digital zooms may do more than just zoom in and out. Upgrade with transitional effects, or use a digital dolly zoom to produce a dramatic visual effect.
- Shutter Zoom Transition Effects
When using a Shutter Zoom effect, it appears as though the camera is capturing still pictures while enlarging the subject with each frame. In journalism or true crime content, it is frequently employed as a transition effect.
If you want the zoom effect, duplicate your clip as many times as necessary. Normally, three to four cuts are sufficient. By holding down the Option and dragging the clip straight up in the timeline, you can duplicate it.
To scale up each clip a little bit more than the previous one, use the Scale property in the Effect Controls panel. While working, you can conceal tracks by clicking the eyeball symbol.
Locate the Transform effect in the Effects panel and drag it to the first clip. Then uncheck use composition shutter angle and adjust the value to 180 in the Effect Controls tab.
When you animate, this will result in motion blur.
Toggle the animation and set your first keyframe using the Position property under the Transform effect. Adjust the Position property such that the clip is up and out of the frame by moving the playhead ahead 4 or four frames. Remove any extra video at the end of the clip.
The next thing you want to do is copy and paste to the next track. Drag the two keyframes into place immediately following the first animation after selecting them in the Effect Controls panel or the timeline, respectively.
Continue by playing the remaining tracks. Make your last revisions and preparations for the effect and replay it in real-time and make any necessary modifications.
When you include camera shutter sound effects, you practically equal the professionals.
- Smooth Zoom Transition Effects
A common transition effect for vlogs and other brief cuts is Smooth Zoom. It comprises two clips with a zoom movement applied to them that seems to go on forever.
To make smooth zoom transition effects. Start the timeline with two clips. Drag a New > Adjustment Layer from the context menu of your right-click in the Project panel onto your timeline. Then adjust the adjustment layer’s size so that it covers the two clips you are switching between.
The next thing is to copy the adjustment layer and place it on the track. Resize the bottom adjustment layer so that the top adjustment layer is at the bottom and the second video clip is at the top.
To the top adjustment layer, apply the Transform effect and keyframe a zoom that scales from 100 to 300. By unchecking the use composition shutter angle and setting it to 180, you may add motion blur.
Find the Replicate effect in the Effects panel, open it, and then add it to the bottom adjustment layer. Then, Set the effect to 3 in the Effect Controls panel. The most challenging phase comes next.
The center image must be reflected four times. Imagine it reflecting over the four lines of the grid. Next, locate the Mirror effect and add it four times.
We recommend that you see our step-by-step guide on video rendering using Premiere Pro.
Leave a Reply
You must be logged in to post a comment.