Unnesting in Premiere Pro is a simple process that can save you time and improve the organization of your video projects. By unnesting a clip, you can separate it from the other clips it was previously nested within, giving you more control over the individual elements of your project.
Understanding how to unnest in Premiere Pro can help streamline your workflow and produce more polished results. I’ll walk you through the steps for unnesting in Premiere Pro.
How to Unnest in Adobe Premiere Pro
You nested your clip and now you want to edit some of the elements into the nest sequence. Follow this method to unnest the sequence.
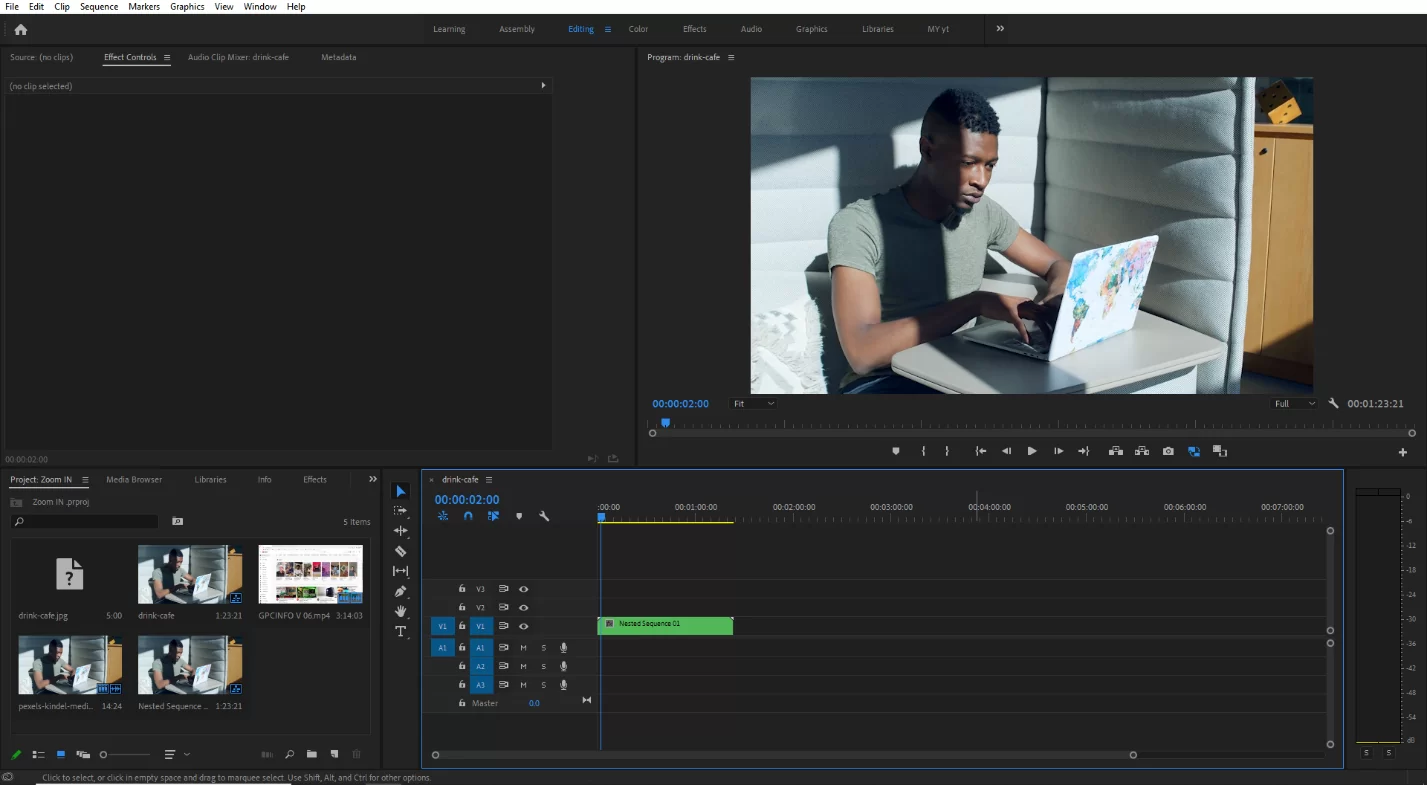
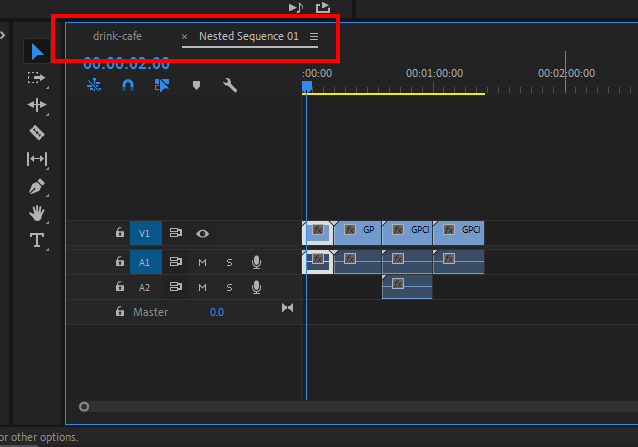
Double click on the nested sequence it will open its previous unnest sequence. And you will see on the timeline there was an open tab with the previous project sequence. Now you can edit the nested sequence.
If you nested the sequence recently you can simply use [Ctrl + z] to unnest your sequence. While learning how to unnest, it is also important to learn how to undo in Premiere Pro. This would come in handy if you make any mistakes.
Other solutions to try:
Method 1
To separate a nested clip in Premiere Pro, start by double-clicking the nested sequence in the project panel to open it in a separate timeline. Next, move the nested timeline out of the dock so that you can see it alongside the main timeline.
Then, select the clips you want to extract from the nested sequence and drag them back to the main timeline. If you have deleted any tracks after nesting, make sure to add them back before dragging the clips.
Once the clips are in place, you can delete any remaining nested tracks. Note that you may end up with duplicate audio clips, depending on what was nested.
Method 2
Another effective method for extracting a clip from a nested sequence is to use the match frame function. First, move the playhead to the position of the clip you want to extract. Then, select the clip and press match frame. This will take you to the source footage in the nested sequence.
Next, make sure the “overwrite sequences as nested clips” option is turned off, which can be found in the top left corner of the sequence window, just under the hour timecode. Then, simply overwrite the footage back onto the main timeline.
This should retain your in and out points. If you are using an older version of Premiere Pro, using the match frame function may not always preserve your edit points and so you will have to manually set them again before overwriting the footage.
Nesting More Than Two Clips in Premiere Pro
You should also have a sequence with several clips available if your projects are open. If not, kindly do so. Choose the clips that you want to nest. Right-click the selected clips and pick nest from the drop-down menu that appears.
You can name the nested sequence that is about to be generated using the dialogue box that appears. By your Premiere Pro preferences, clicking OK will generate the nested sequence in your timeline, which you will see in yellow.
You can also read this informative article on video stabilization using Premiere Pro.
Nesting in Premiere Pro: What is The Importance?
One of the best things about Nesting is that you can speed ramp the whole process.
To speed up the whole process, select the Nested Sequence, right-click, and then select Speed/Duration. Set the speed/duration to the desired ratio, such as 50%, and then select OK. Nesting’s key benefit is that you can avoid repeating the effect on every clip by having it apply simultaneously to all of the clips in the nested material.
Additionally, if you want to confine your project to a specific runtime, you don’t need to consult a mathematician to figure out when to stop recording each clip to meet your goal.
Because it doesn’t change the video’s original quality, this nested sequence is non-destructive. The nested sequence can also be edited as a single clip rather than having effects applied inside of it. This nested sequence will help you stay organized and keep your timeline neat, so if you’re anything like me, you’ll adore using it.
Unnesting a Nested Sequence in Premiere Pro
A creative project requires innovation. Because of how clips are nested, there may be a need to unnest while editing, but this capability is not immediately available.
If it’s urgent, you can use Ctrl Z, but doing so will remove all of the effects that have been applied to the clips inside the nested sequence. From your timeline, choose the nested sequence, and then double-click. This will display a nested sequence that only contains nested clips.
After selecting every clip in the nested area, drag it down into the main sequence. Alternatively, you can copy and paste it into the track above the nested area. Make sure your cursor is on the desired timecode before pasting them.
Nest Warping Stabilizer
One of the powerful video effects in Premiere Pro is the warp stabilizer. Applying it could be challenging because the settings required for the first clip cannot be the same settings for a somewhat similar clip. That is why careful analysis of each piece of material separately is necessary.
You need to nest the footage to use further effects, such as speed ramping and other things. Use the technique covered above to nest it. Additionally, for Warp Stabilizer to do its magic, clip dimensions are necessary. It won’t work if you have a 4K clip on a 1080 timeline.
You will also like our article on working with aspect ratios in Premiere Pro.
Leave a Reply
You must be logged in to post a comment.