Undoing an action in Adobe Premiere Pro can be a lifesaver, especially when you’re working on a large, complex video project. In case you’ve made a mistake or just want to go back to a previous version of your project, knowing how the undo feature works in Premiere Pro can come in very handy.
I’ll walk you through the process of undoing actions in Premiere Pro, as well as tips I’ve learned working with the undo feature in the program.
How to Undo in Premiere Pro
There are two mistakes that you can undo in premiere pro. First, is the workspace displacement and the second is the editing mistake. To undo the workspace go to Window > Workspace > Reset to Saved Layout. For the short key, you can use [Alt + Shift + 0].

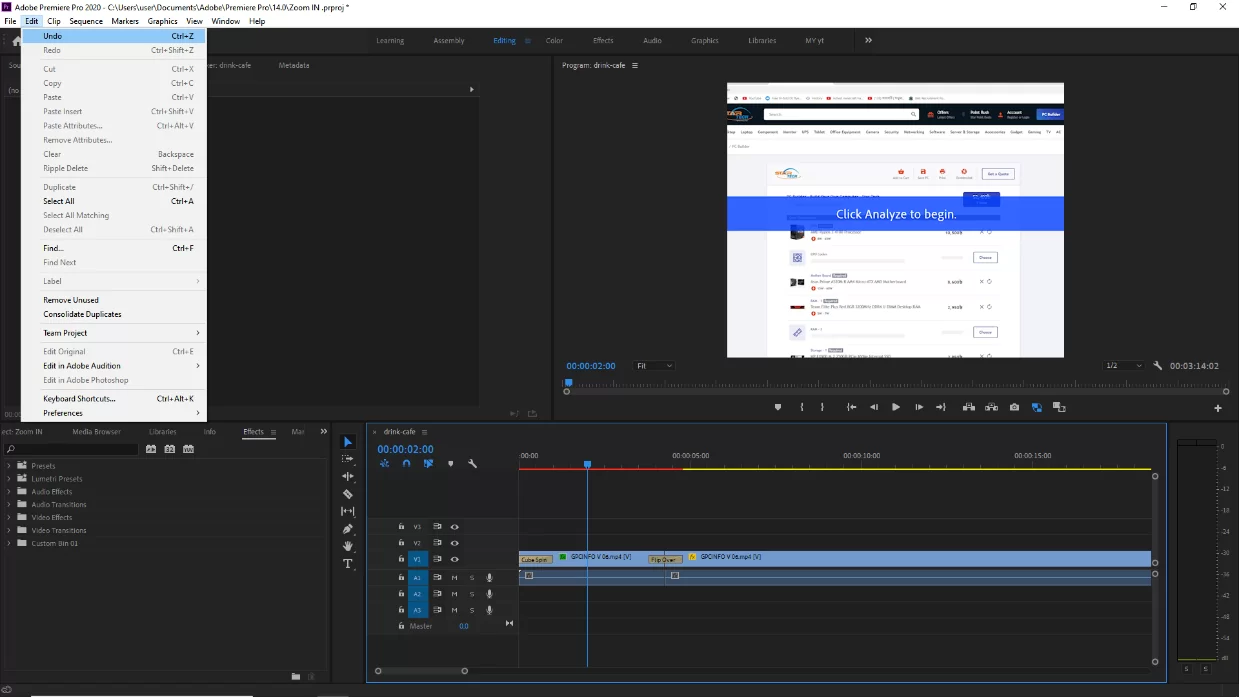
The most common and popular way to undo is to hit [Ctrl + Z] or [Cmd + Z]. Or you can use this manually if you made a mistake by going to Edit > Undo.
You can undo 32 recent changes made to the project in any Premiere Pro panel.
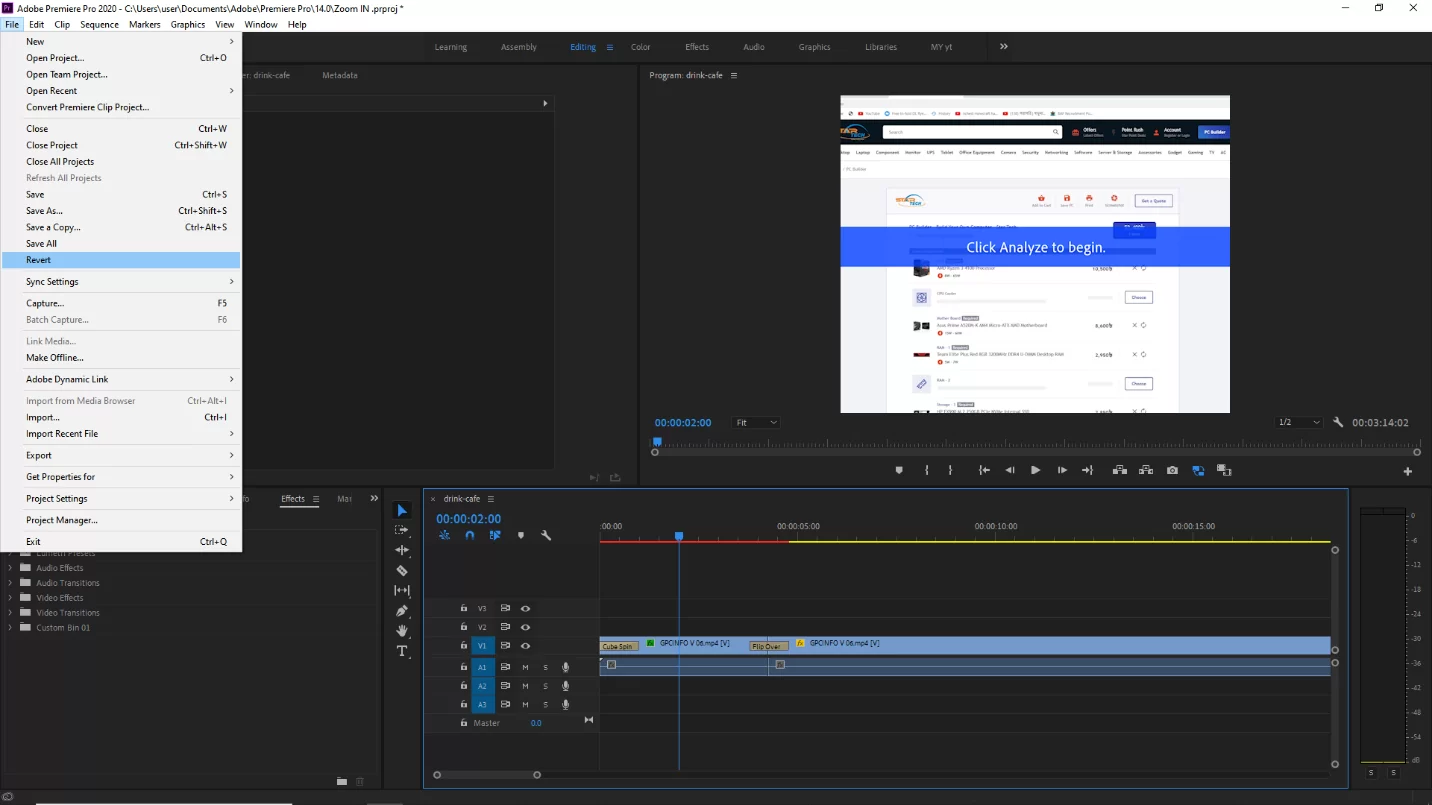
To undo all changes in your project since the last time you saved the project go to File > Revert.
To stop a task that Premiere Pro is processing press Esc. For example, if you see a progress bar and want to stop the process, Press Esc.
How To Undo Using The History Panel
Follow the steps below to undo using the history panel.
Step 1
Start by opening the history panel and go to windows>history. Next, click the history tab.
Step 2
You may see a list of all the modifications that have been made to your project in the History panel. Then, click on a step in the list to reverse it. When you click the step your project will return to the state it was in when the step was first generated.
Step 3
The rest of the list will turn gray when you click on a previous action, indicating that those activities have not yet happened and will be removed if you return to that step.
Click on the grayed-out version of a step in the history panel to undo it, and redo it. It can also be used to advance to any earlier modifications you’ve undone.
Premiere Pro History Panel: Things You Should know
Below are a few things you ought to know about the Premiere Pro history panel:
- When you choose a specific change in the history panel, all subsequent changes are removed and you are immediately sent to that action.
- The activities listed here will become dimmer if you choose a specific action. This informs you of the changes that are undone if you take that action.
- The list is ordered with the earliest action at the top and the most current at the bottom.
- Every time you close and reopen your project, the history panel is reset. So incase you used the wrong aspect ratio or mistakenly cut a clip you shouldn’t have, you can easily undo it using the history panel.
How to Redo in Premiere Pro
If you mistakenly undo an action, you can easily redo it. You can redo it by using the keyboard shortcut Command+Shift+Z if you’re using a Mac. If you are using windows, you can use the shortcut Ctrl+Shift+Z. Follow the steps below if you are not able to use the shortcut.
Step 1
Start by going to Edit > Redo to get the Redo option.
Step 2
Keep in mind that you can only undo the most recent action. In the History panel, you can also choose any step that is grayed out to undo multiple stages at once.
Factors to Consider When Undoing in Premiere Pro
When undoing using Premiere Pro, there are a few things that you need to keep in mind. Below are a few of them.
- Don’t Work Multiple Sections at The Same Time
It can be helpful to divide a project into smaller portions. This is important if your project is complex and has several different layers. When you divide your project into smaller portions, you can easily fix it without having an impact on the remainder of your project.
- Save and Replay Your Project as You Work
It is important to remember to save your work frequently. When you save frequently, you can always go back to an earlier version if you do make a modification that you don’t like.
Also, play back your edits frequently. You are more likely to discover any major errors early on before you’ve made many changes if you develop the practice of frequently playing back your adjustments.
You may also like to read our information packed guide on how to add keyframes in Premiere Pro.
Leave a Reply
You must be logged in to post a comment.