The Premiere Pro cut function is very helpful for removing unwanted or unnecessary footage from the video. It also helps to create a seamless transition between two clips by cutting out the part of the video that does not fit.
To create a more dynamic and engaging video by cutting between different shots or angles, you need to master the cut function and I’ll show you how to achieve it easily.
How to Cut in Premiere Pro
There are many ways to cut or trim a video in Premiere Pro. Here are the popular ways to cut a video clip on a timeline.
Let’s start with getting the footage you have recorded into the timeline.
Step 1:
Import your video into Premier Pro by hitting [Ctrl + I] for windows and [Cmd + I] for Mac. Or you can go with File > Import.
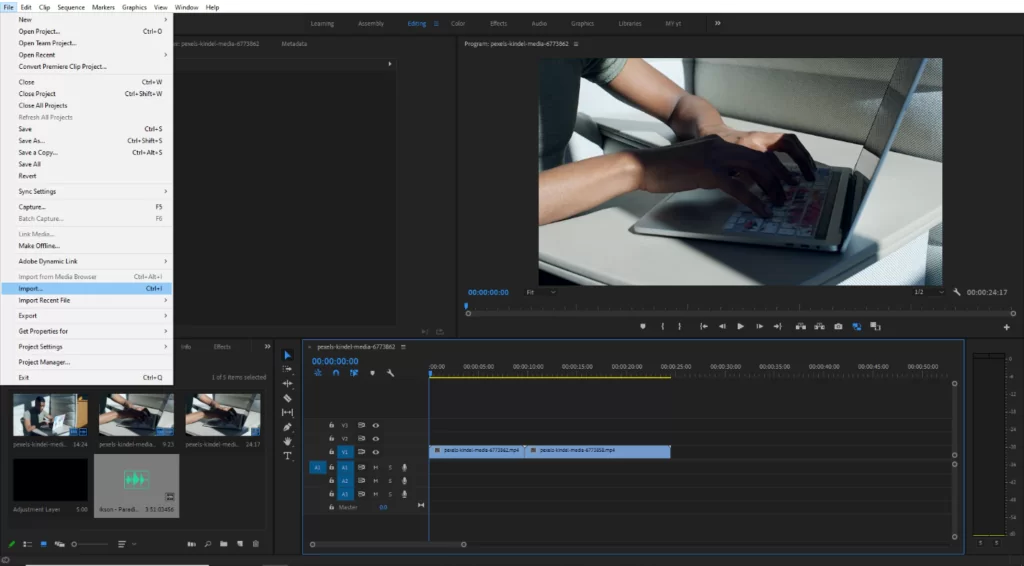
If you already have an existing video in your project panel, then drag the clip onto the timeline.
Step 2:
Cut with Razor Tool
First, select the Razor Tool and select your clip and just simply click where you want to cut. If you want to cut the middle of a clip, click both sides of the part you want to cut or remove.
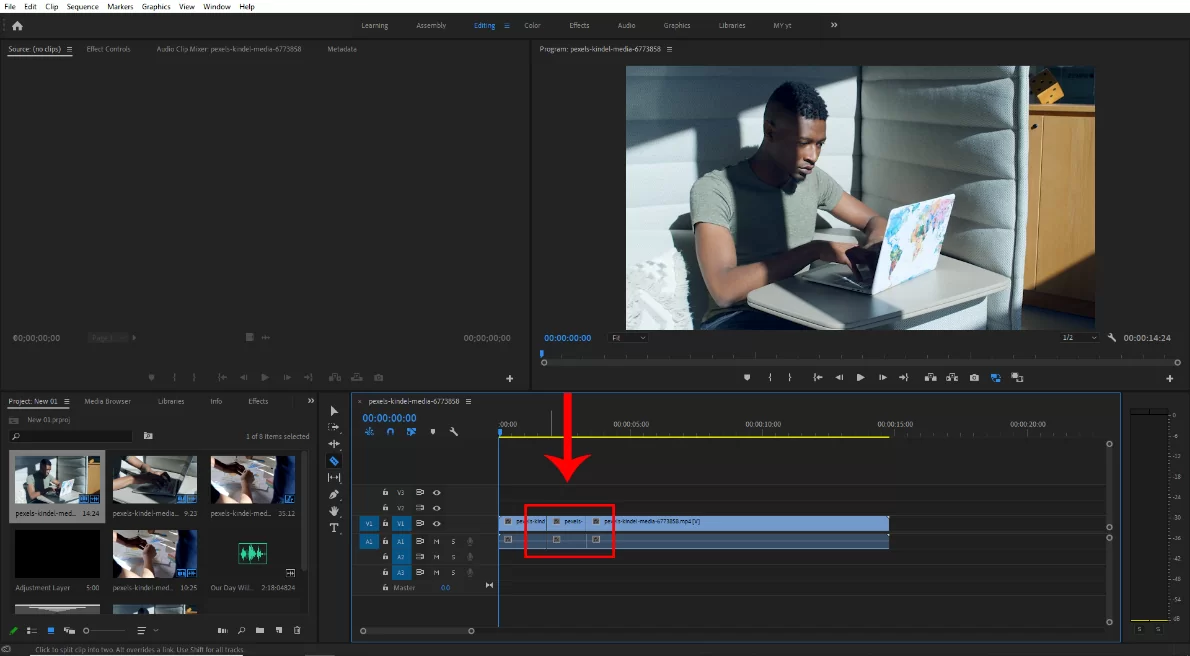
You can select the razor tool shortcut by hitting [ C ] on the keyboard.
Step 3:
Just click and Drag
You can cut or trim a clip with just a click and drag. First, go to the starting point of the clip and then select the clip, Next, just click and drag on the left side – drag it until the unnecessary footage is trimmed.
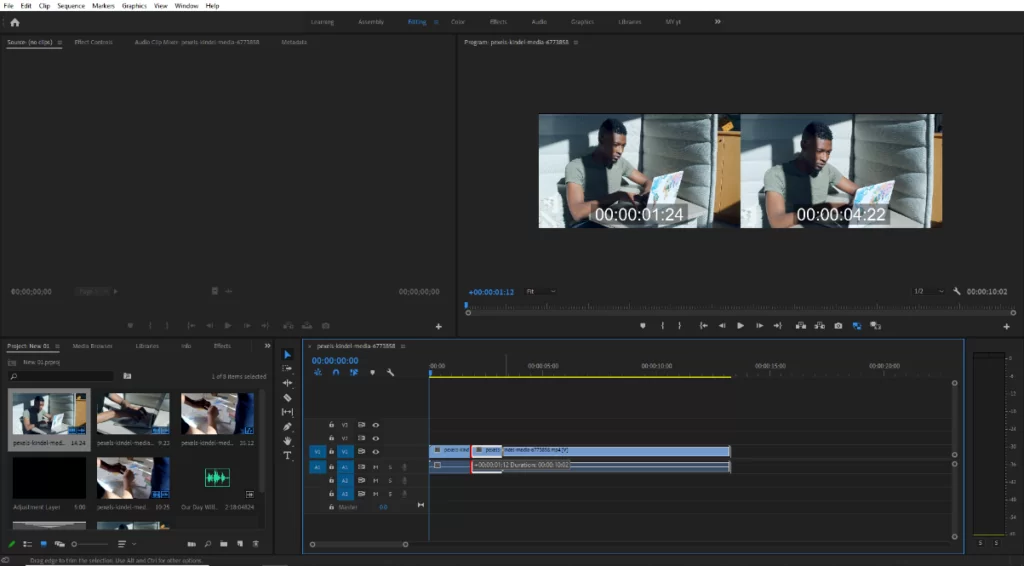
You can use this method on both sides and the middle of the clip if it is a split clip.
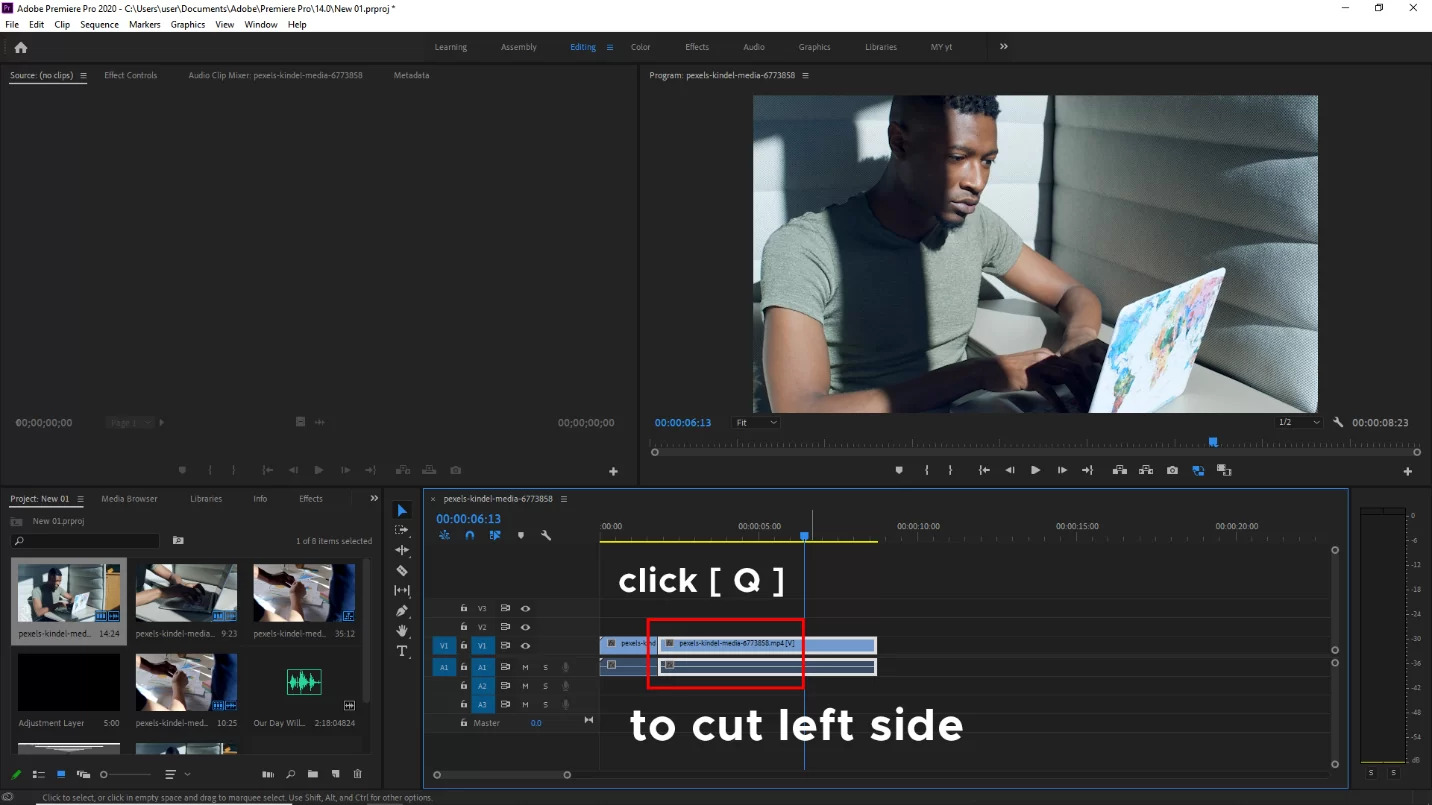
Step 4:
Using the short key to cut a clip
The easiest way to cut a clip is with two short keys [Q] and [W].
Before
After

Select your clip and move the playhead where you want to cut the clip. Then just hit [Q] all the left-side portions should be deleted.
Before

After

To cut the right side of the clip move the Play-hed that you want to cut then press [w] all the right-side portions should be deleted.
I’ll go over cutting tools so you understand which one you need to use to achieve various effects.
What is The Razor Tool in Premiere Pro?
The Razor tool is used to split a single clip into two. To use this tool, click on a clip in the timeline where you want to perform the cut after choosing the tool. This is done by pressing C on your keyboard.
After the Razor tool splits the clip, you can treat them as two distinct clips. Whenever you need to remove a segment of your film, the Razor tool is your best bet. When you’re finished cutting it out, hit V to switch back to the Arrow tool. Next, pick the clip, and then press Delete to get rid of it.
After you delete the clip, you should know that the clip will disappear, leaving a gap. Holding ALT when deleting the clip prevents a gap from appearing, and the chronology will be corrected as necessary.
What is The Slip Clip?
One of Adobe Premiere’s most underutilized features is the Slip Clip tool. When you have lengthened your clips to your desired length but are dissatisfied with the clip selection, you can use the Slip Clip tool.
You should choose the Slip Clip Tool instead of deleting the clip and re-dragging the video with slightly changed In and Out points. Press Y on your Keyboard to scroll through the entire clip.
Click and hold the clip in the timeline while dragging it to the left or right. When you are done, your new In and Out points, as well as still images from the clips, will be displayed in the Media Viewer.
What are L and J Cuts?
As long as what you are editing has audio, you will need to use J and L cuts. These quick cuts in the audio allow the sound to continue either before or after the video starts.
For example, if you are cutting a scene between two persons speaking, the J and L cuts come in handy. You can also switch to another shot while still hearing the previous clip’s audio by using a J or L cut.
To keep hearing the previous clip audio while switching to another shot, you will need to separate your audio and video. If you want to separate your audio and video, drag the end of the audio track until it is the right length after selecting it.
Trim Clip and Ripple Edit: What are They?
The Ripple Edit tool is used to lengthen a clip. Grab the end of the clip and drag it out if you want to trim the end. However, you can only do this if there is room for the clip to be stretched.
By first selecting the Ripple Edit tool (by pressing B on your keyboard), you can stretch the timeline by lengthening a clip that is in the center of the timeline. If you want to get back to your Arrow tool, press V. This is quite easy. If you have gotten this far in this guide, you now know how to cut and trim.
Also, check out this in-depth article on how to add Keyframes.
Leave a Reply
You must be logged in to post a comment.