Splitting a clip in Adobe Premiere Pro is not a daunting task, even for a newbie, and can be accomplished in a matter of seconds. Asides from trimming down your footage, splitting a clip has other benefits like creating separate clips for individual use.
In this guide, I’ll show you the methods and steps I use for splitting a clip in Premiere Pro, including both the keyboard shortcuts and the traditional method using the program’s tools.
How to Split a Clip in Premiere Pro
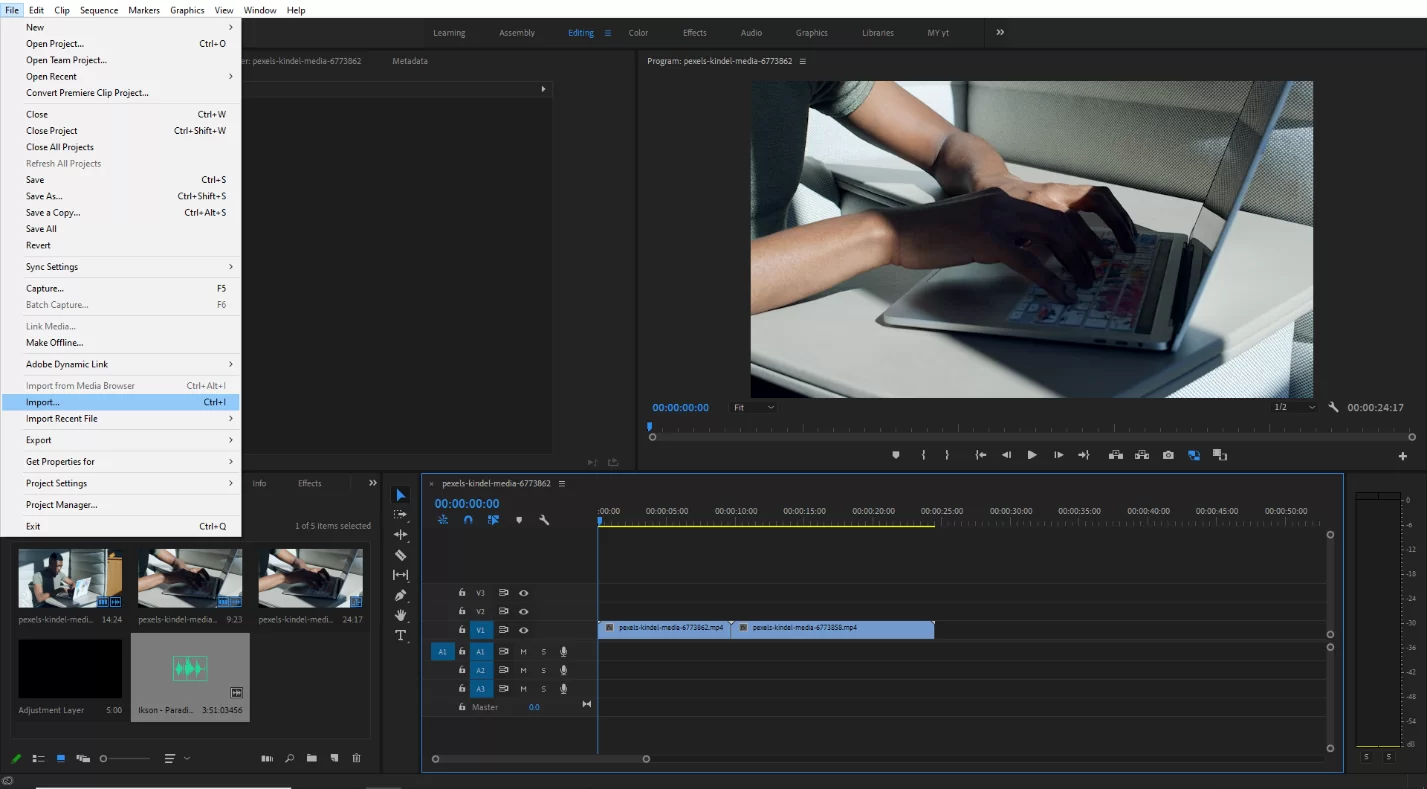
Import your video into Premier pro by hitting [Ctrl + I] for windows and [Cmd + I ] for Mac. Or you can go with File > Import.
If you already have an existing video in your project panel, then drag the clip onto the timeline.
Method 1:
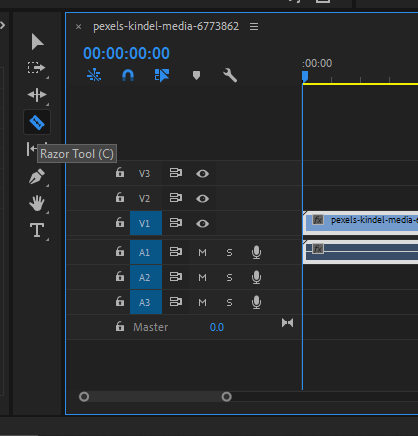
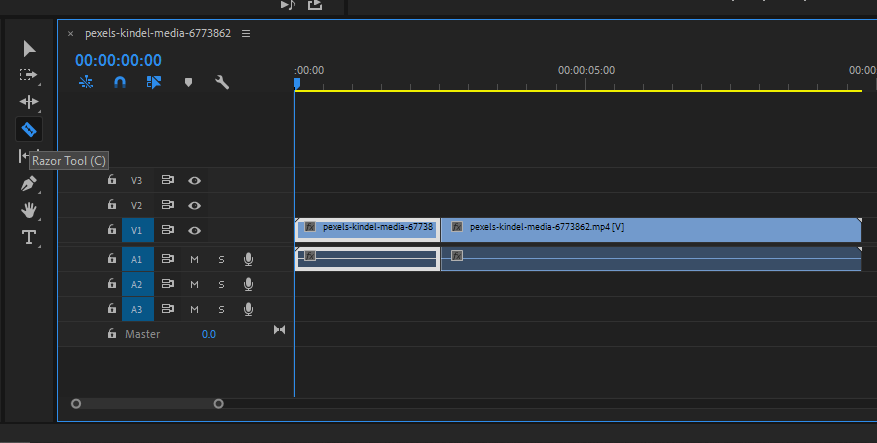
Now select the Razor tool from the tool panel beside the timeline. Click on the part of the video clip that you want to split.
You will see you have two clips from the same video file which can be worked on independently. Remember that splitting and cutting a clip aren’t the same thing. If you are not sure about their differences, check out our in-depth article on how to cut a clip in Premiere Pro to find out.
Method 2:
Alternatively, you could make use of the current time indicator.
Move the Current-Time Indicator to the part of the video clip that you’d like to split. Make sure the video layer that you are splitting is highlighted on the left side of the timeline. Hit [Cmd + K] for Mac and Windows [Ctrl + K] on the keyboard to split the clip.
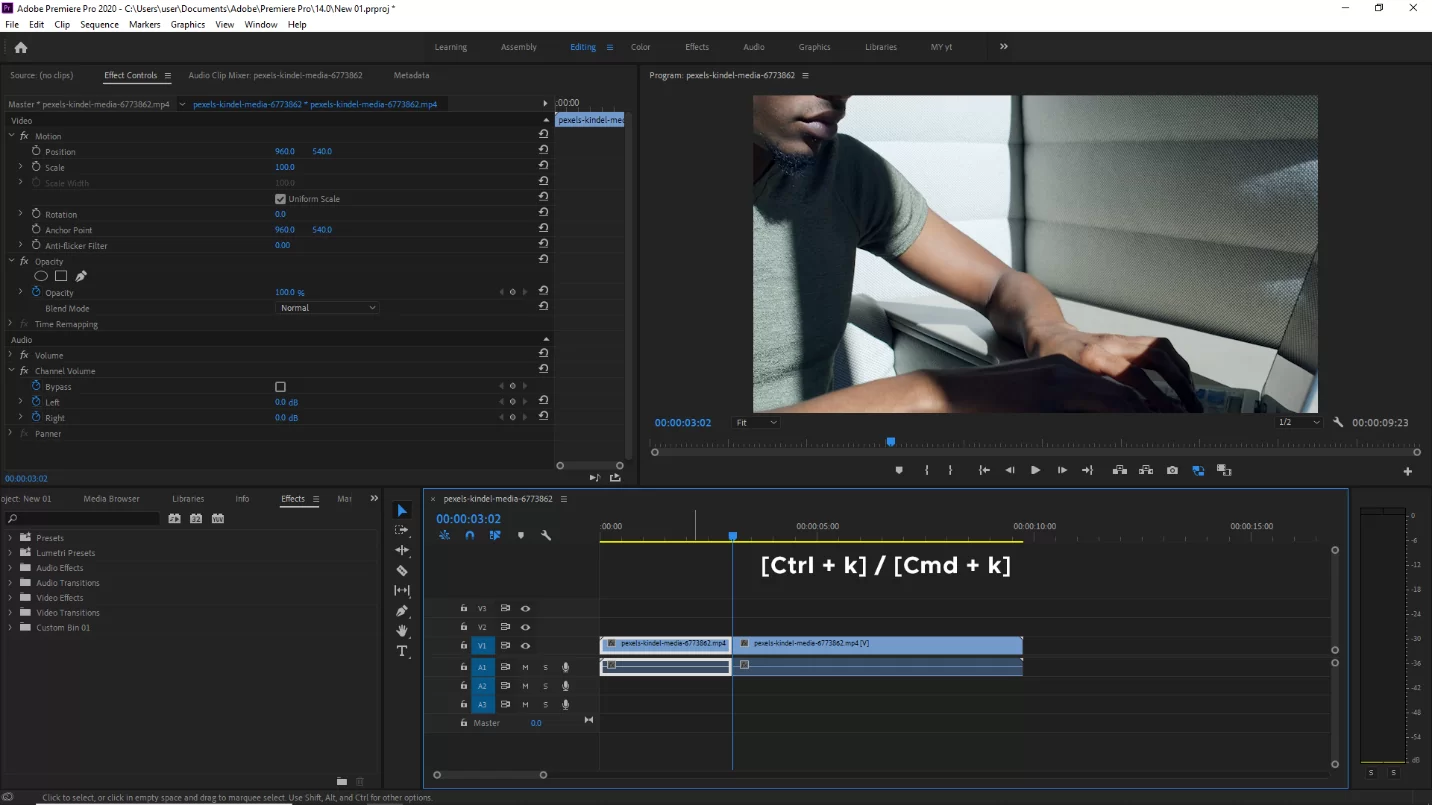
[Note: If the audio clip is also highlighted, it will also split. Otherwise, it will only split the video]
How To Split Layered Clips in Premiere Pro
If you wish to simultaneously split two or more layered clips, follow the steps below.
Step 1
Start by changing to the chronology an expert view.
Step 2
To import the video clips you want to separate, click Add media. Alternatively, choose the video clips from the Expert view timeline if they are already there.
Step 3
This step is optional. To view every frame in your video clips, either touch or click the Fit to Visible Timeline button. You may also hit = to enlarge the video snippets. The = also helps to slide the zoom button to the right.
Step 3
Next, drag a marquee to choose the clips on various tracks that may coincidentally overlap.
Step 4
To separate the frames, drag the current-time indicator to those frames.
Step 5
The frames you want to separate can be selected by dragging the current-time indication there. Also, by selecting the Split Clip button next to the time indication line, you can divide the clips into several segments.
We also recommend that you check our in-depth article on duplicating a clip in Premiere Pro.
How To Split Clip Using The Source Panel
Follow the steps below to split the clip using the source panel.
Step 1
When you check the Source panel You’ll see an arrow-shaped marker at the start of the time bar. This can be used to navigate the clip and indicate the In and Out points. The clip will begin where the In marker is put when it is inserted into the timeline. The opposite is true for the Out marker. Easy to understand right?
Step 2
Next, you may want to put your In and Out markers in a particular spot in the video clip. Wherever you want the In and Out indicators to appear, press the I or O key. I stand for inside, and O for outside.
Additionally, some icons resemble brackets in the Source panel’s toolbar that you can click to configure the keys.
elect Insert from the Source panel’s tools once your marks are in place. The clip will then be added to your timeline at the location of the timeline marker. You can insert a video with or without audio.
Important Tips You Should Know When Splitting a Video
When splitting a video you should add a bit of creativity and technical know-how. Below are a few things you should keep in mind when splitting a video.
- Create Your Videos Side by Side
You might want to group two video clips in the timeline while you edit your video. To group your videos, start by choosing a clip. Then, change the number position in the box by going to the Effect Controls page. The number varies between 960 and 1920. The screen will split, giving you access to two separate screens for the same film.
- Splitting Audio From Video
You should choose the video clip that has the audio you want to separate the audio from the video while keeping the original audio. Next, select Clip, Audio, Options, and Extract Audio. The retrieved audio file will be included in new audio files created by Premiere Pro.
- Delete Footages You Don’t Want
In Premiere Pro, you can remove any unnecessary video by using the Lasso tool. To choose the Lasso tool, click the Clips option. The part of the video you don’t want can be selected by using the Track Select Forward or Track Select Backward Tools. According to your selection, you will either choose the front or the back of the selected clip. Finally, choose Clip and press Delete to eliminate the chosen portion.
If you enjoyed reading this article, you will also like our article on how to add fonts to your clips in Premiere Pro.
Leave a Reply
You must be logged in to post a comment.