Using the Illustrator masking feature, you can hide or cover up a portion of an image. Unlike an eraser, the best part is that a mask layer allows for rapid, non-destructive drawing manipulation. Immediately made modifications can be undone or changed. The masking feature is also available in other manipulation software such as procreate.
Masking in illustrator is quite easy when you use the clipping mask. The shape of the clipping mask will cover other artwork, so only areas within the shape are visible. Read on to find out the steps in masking on illustrator.
What is a Clipping Mask?
A clipping mask hides everything behind it, leaving only the contents of the clipping path visible. A photo cannot be a clipping path; only a vector object can. But whatever you choose can be the item below it—a raster image, a vector illustration, etc.
The item you want to clip must always be on top of the clipping path, and you should also note that there can be only one clipping path. Clipped objects must be in the same group or layer.
4 Steps to Make a Clipping Mask
Masking an object or shape with the image is very easy and simple in illustrator. Here are 4 steps to make a clipping Mask in illustrator.
Step 1:
First, we need to open Adobe illustrator and create a blank project. Click Create New, or you can go to File > New for the short key win [Ctrl + N] or Mac [Cmd + N].

A New Document panel will open. Here you find the artboard setting. Click Create to create your new artboard.

If you have an existing file, go to File > open and then select your File. Short Key win [Ctrl + O] and Mac [Cmd + O]. To import your image, you can use drag and drop. Just drag your image from your file and drop it in illustrator.
Or you can go to File > open and select your image from the file. Short Key win [Ctrl + O] and Mac [Cmd + O], Then click Open.
Step 2:
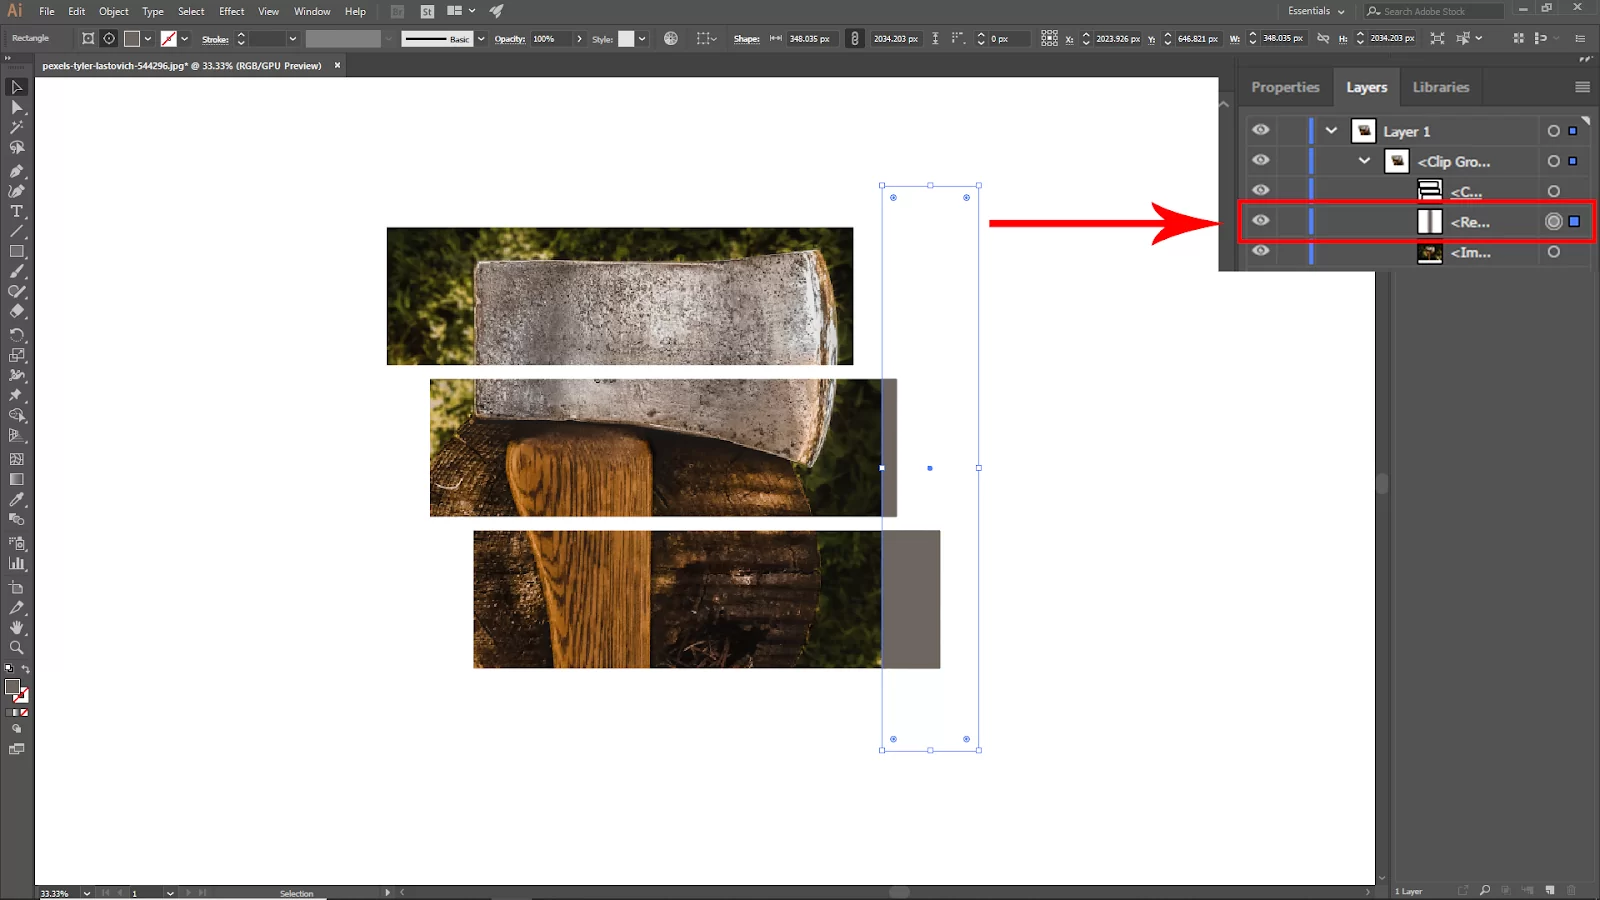
To make a clipping mask, you need to put your masking object in front of the shape or image that you want to mask with the object.

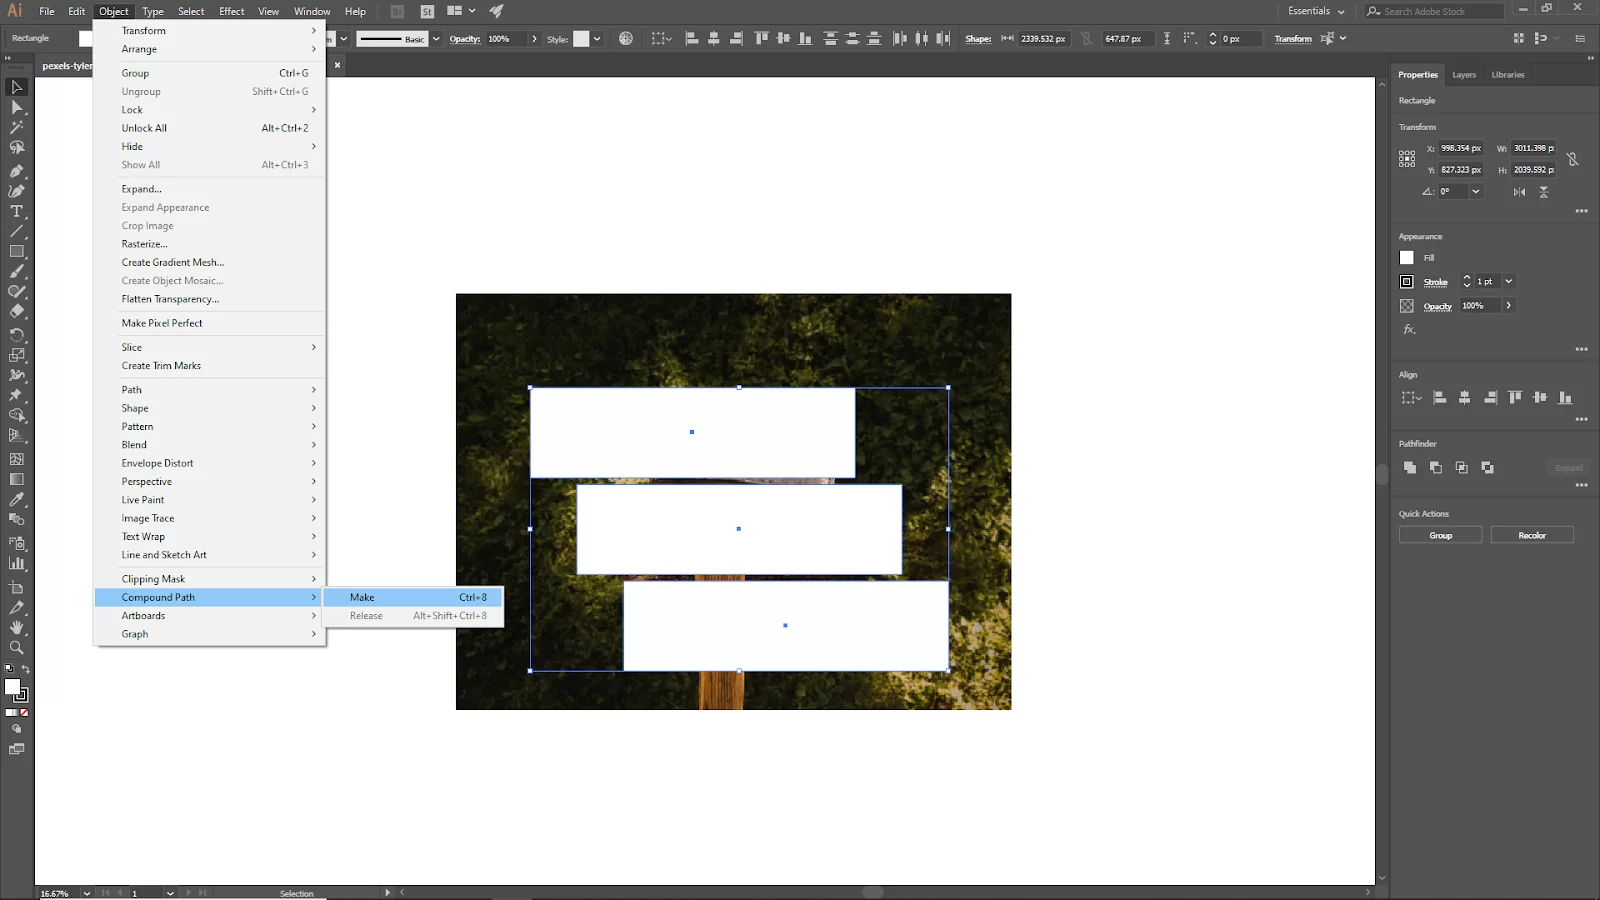
If there are multiple objects on top of the masking image, you need to compound them first and then do a clipping mask. If there is one object, you don’t need to compound it.

Step 3:
To compound the objects, select all and go to Object > Compound Path > Make, or you can hit wind [Ctrl + 8] or Mac [Cmd + 8].
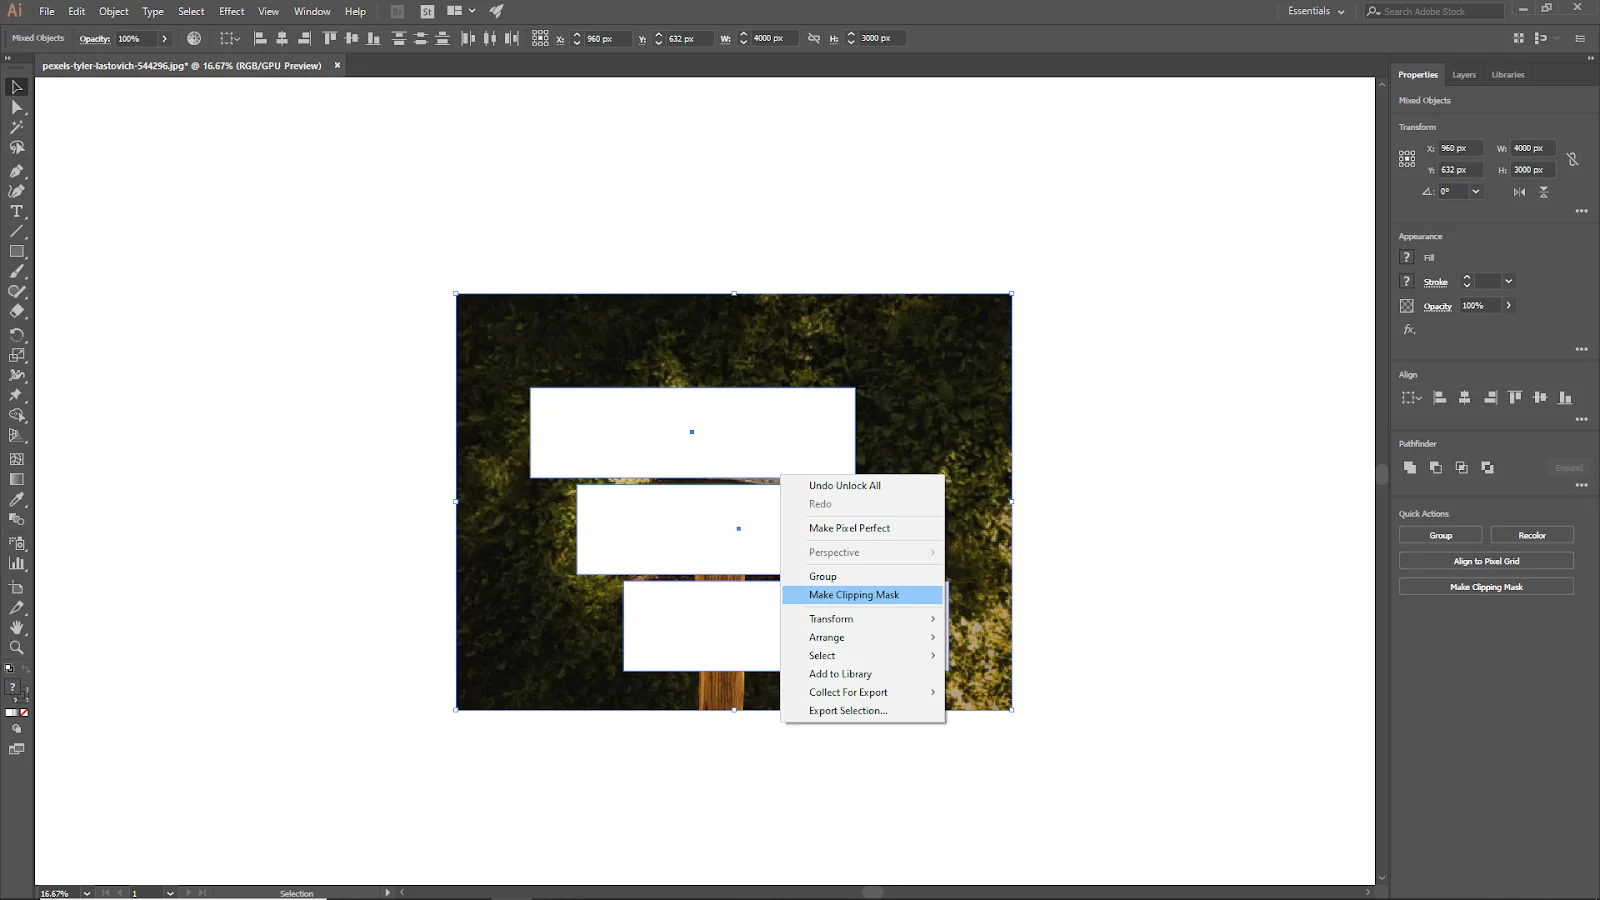
Now select both objects, right-click on and select Make Clipping Mask, or use the short key win [Ctrl + 7] in Mac [Cmd + 7].
Or you can go to Object > Clipping Mask > Make.

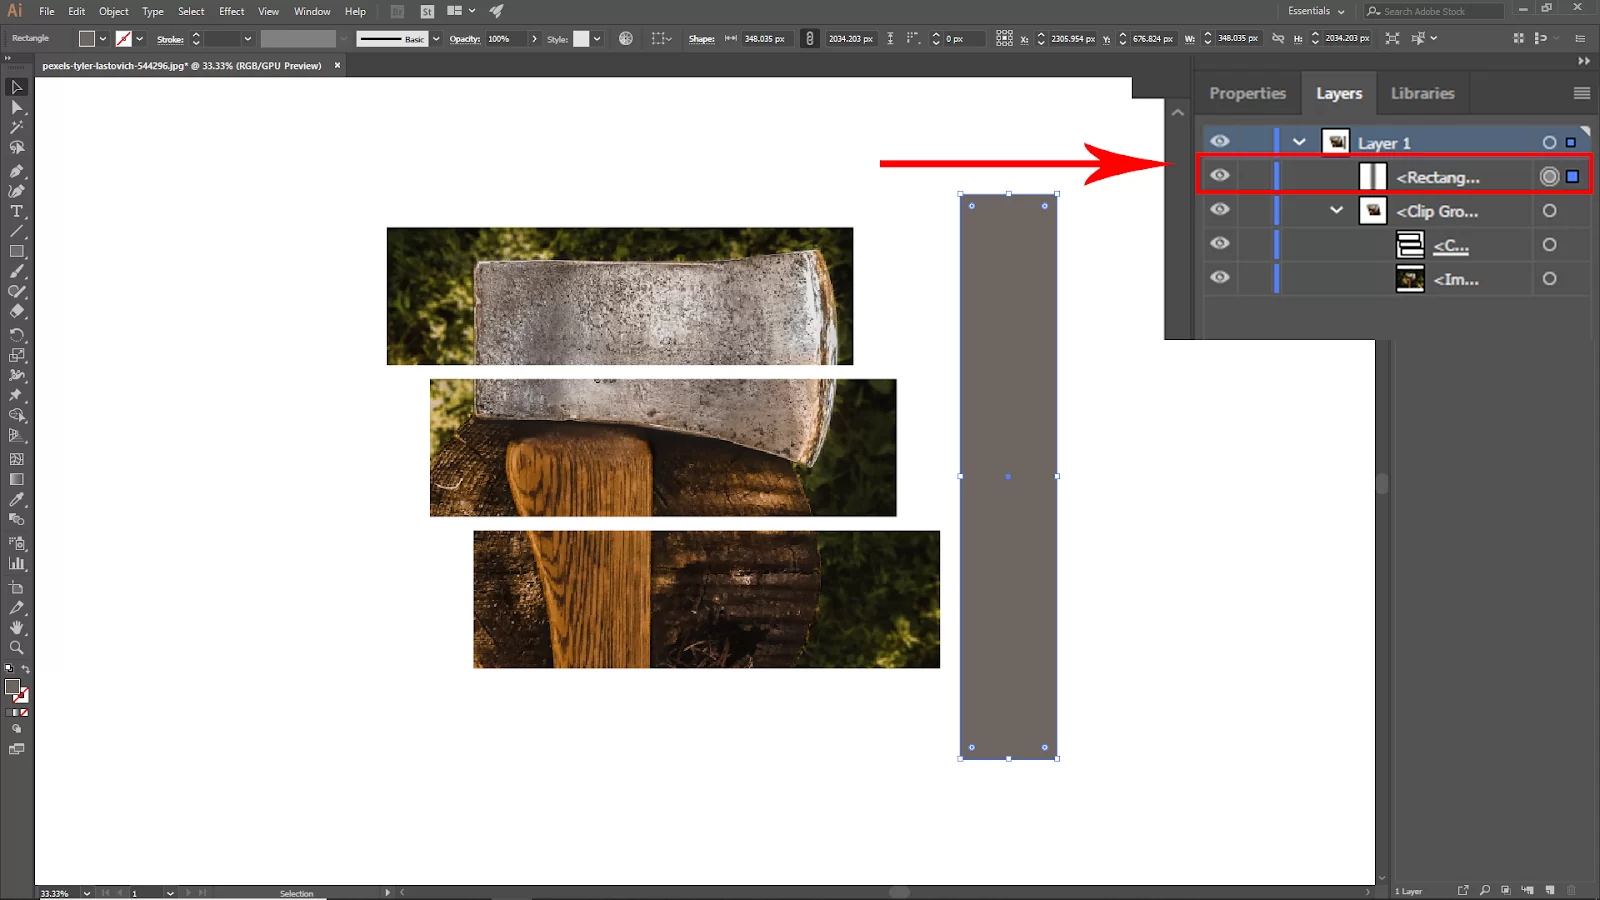
Step 4:
Now your clipping mask should be ready. To scale up the inside image that you have masked, go to layer and select the image layer. You should see the rectangle of the image. Now you can scale up your image.

If you want to add some more objects or shapes to the mask, use this function.
Create your shape and then put the layer of the shape inside the clipping mask layer. Your shape will go into the masking image.
We recommend that you see our article on how to merge layers in Illustrator.
Using Compound Clipping To Mask in Illustrator
Compound clipping masks numerous distinct shapes. Using the compound clipping mask, you can employ a more sophisticated shape rather than a plain rectangle.
When using the compound clipping, string together the pieces of art you wish to clip (Ctrl+G or +G).
Next, choose Object > Compound Path > All to create a compound path out of any shape you want to utilize as the clipping mask.
A compound path is comparable to a group, where numerous things or shapes act as one. A compound path is a single object made of multiple shapes that behave as one and share the same attributes, such as strokes, fills, etc. This differs from a group, which is a container full of objects.
To use compound clipping mask in Illustrator, Choose the compound clipping mask and the art: one art and one compound path. The compound path should be toggled on. When you’ve done this, you can then make the mask. To make the mask, use object>clipping mask> make (Ctrl +7).
Using Transparency Shape Masks To Mask in Illustrator
A transparency shape mask, which has different levels of transparency, enables you to creatively mask artwork using gradients and patterns.
Once more, use Ctrl+G or +G to group the artwork you want to clip. Use Ctrl+C or +C to copy the selected grouping art. Next, open up the transparency.
You can temporarily hide your artwork by selecting the Make Mask button. Everything is masked and concealed by default, and you will not be able to see your artwork when it is black.
In the transparency panel, choose the black Opacity Mask. You will enter mask editing mode after doing this. Keep in mind that the transparency mask is solely to be used to mask artwork. Use the keyboard shortcuts Ctrl+F or +F to paste.
Now start putting gradient boxes in black and white inside the opacity mask. Aim to use black and white; anything else will only partially mask.
Using Transparency Layer Mask To Mask in Illustrator
A single, sizable image serves as the transparency mask for a transparency layer. The degree of masking applied to your painting depends on the light and dark values in the layer.
Ctrl+G or +G can be used to group your artwork. Next, import a picture or texture into your illustrator.
Click Make mask after opening the transparency section. Examine the various mask behaviors by experimenting with the Clip and Invert Mask options. By default, black parts are hidden, and white areas are revealed.
To adjust the mask’s positioning, scale it up or down, and add additional masking components, choose the Opacity Mask option in the transparency panel.
If you enjoyed reading this piece, you will also like our article on how to duplicate a layer in Illustrator.
Leave a Reply
You must be logged in to post a comment.