Every designer at one point or another has to use arrows in their designs. I’ve found that arrows are one of the most common design elements. I’ve personally created a ton of them in Illustrator.
Arrows are commonly used in design to indicate movement, direction, or progression. They can be used to guide the viewer’s eye through a design, to show a sequence of steps, or to indicate a call to action. Arrows can also be used to create visual interest or balance in a design.
They can be used in creating logos, infographics, user interfaces, and advertising materials. Additionally, arrows can be used in architectural and interior design to create flow and guide the movement of people through a space.
I’ll show you multiple ways you can create arrows in Illustrator.
How to Make Arrows in Adobe Illustrator
Here are 3 main methods I use to make arrows in Illustrator:
Method 1:
This is the common technique to make arrows in illustrator. Create your line object then select it. Now go to the properties panel. Go to Window > Properties. Under properties, you will find stroke settings.
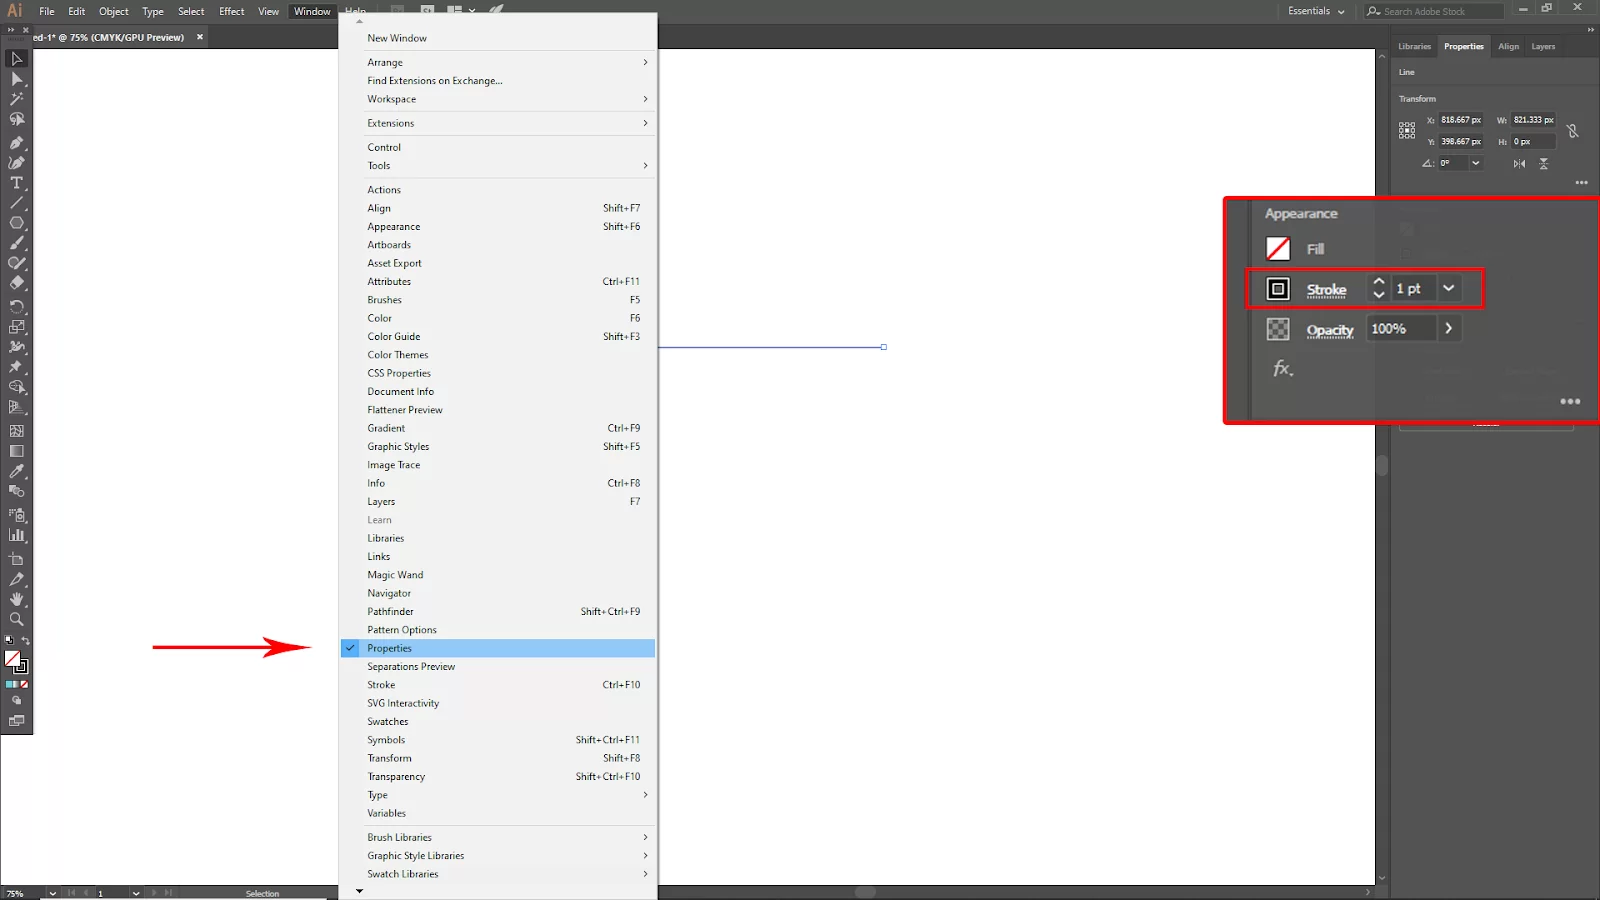
Increase the stroke value of the line object. Now click on Stroke you will find Arrowhead Option. Click the left-side arrowhead dropdown arrow and you find many arrowheads to choose from. Choose your desired one and then click.
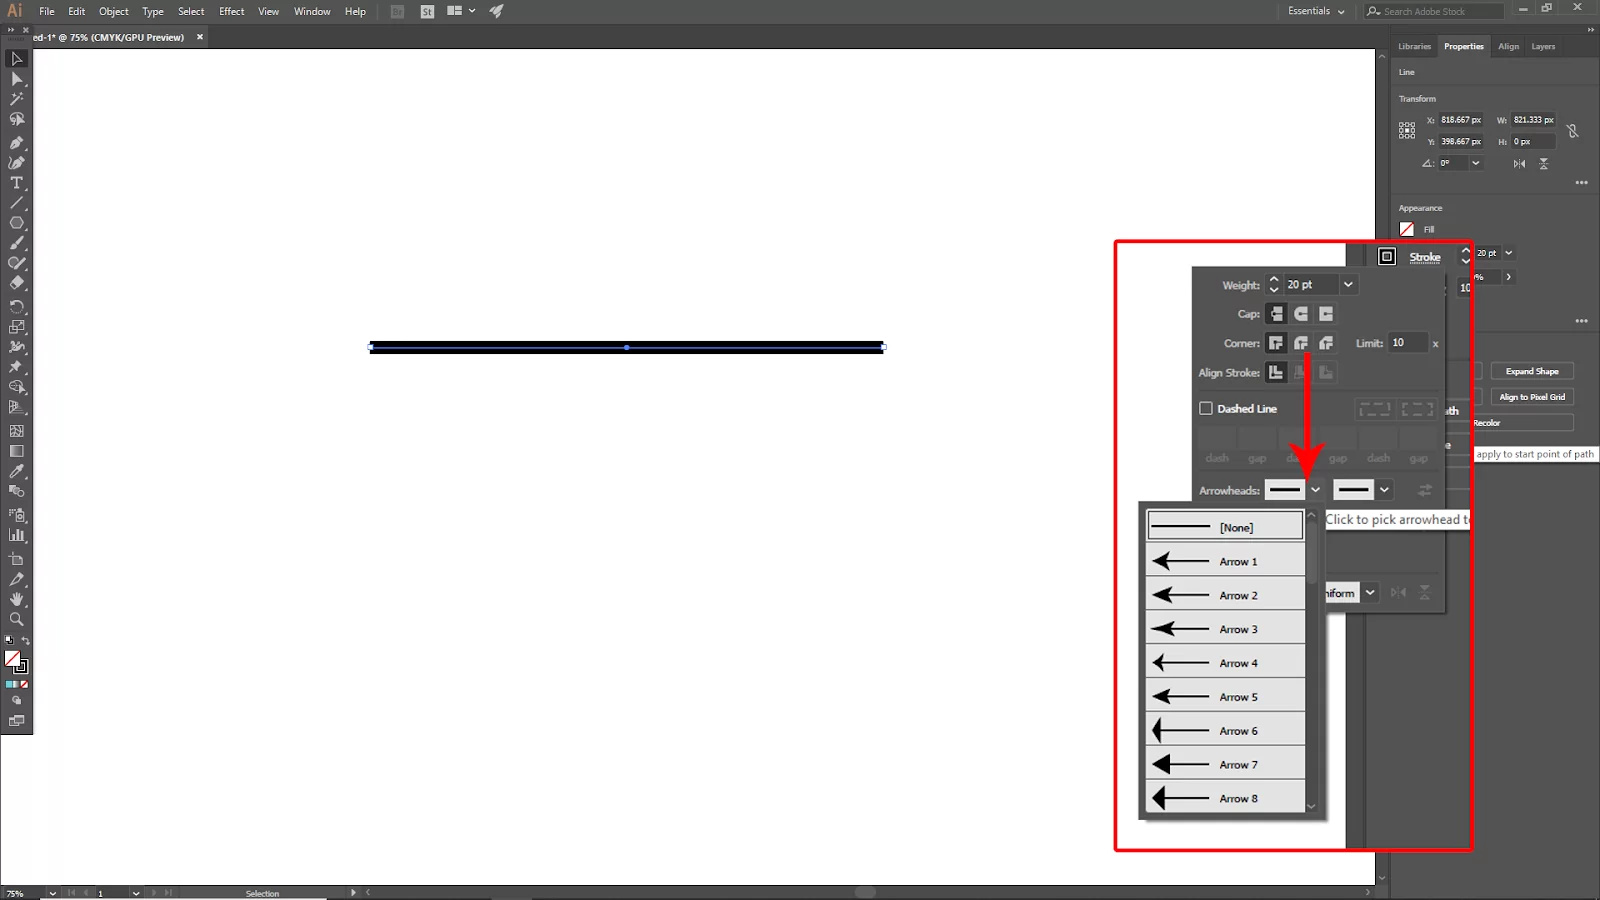
Your arrow is ready and you can change to the right side of the arrow. Click on the right-side arrowhead dropdown arrow. And now choose your right-side arrowhead.

Method 2:
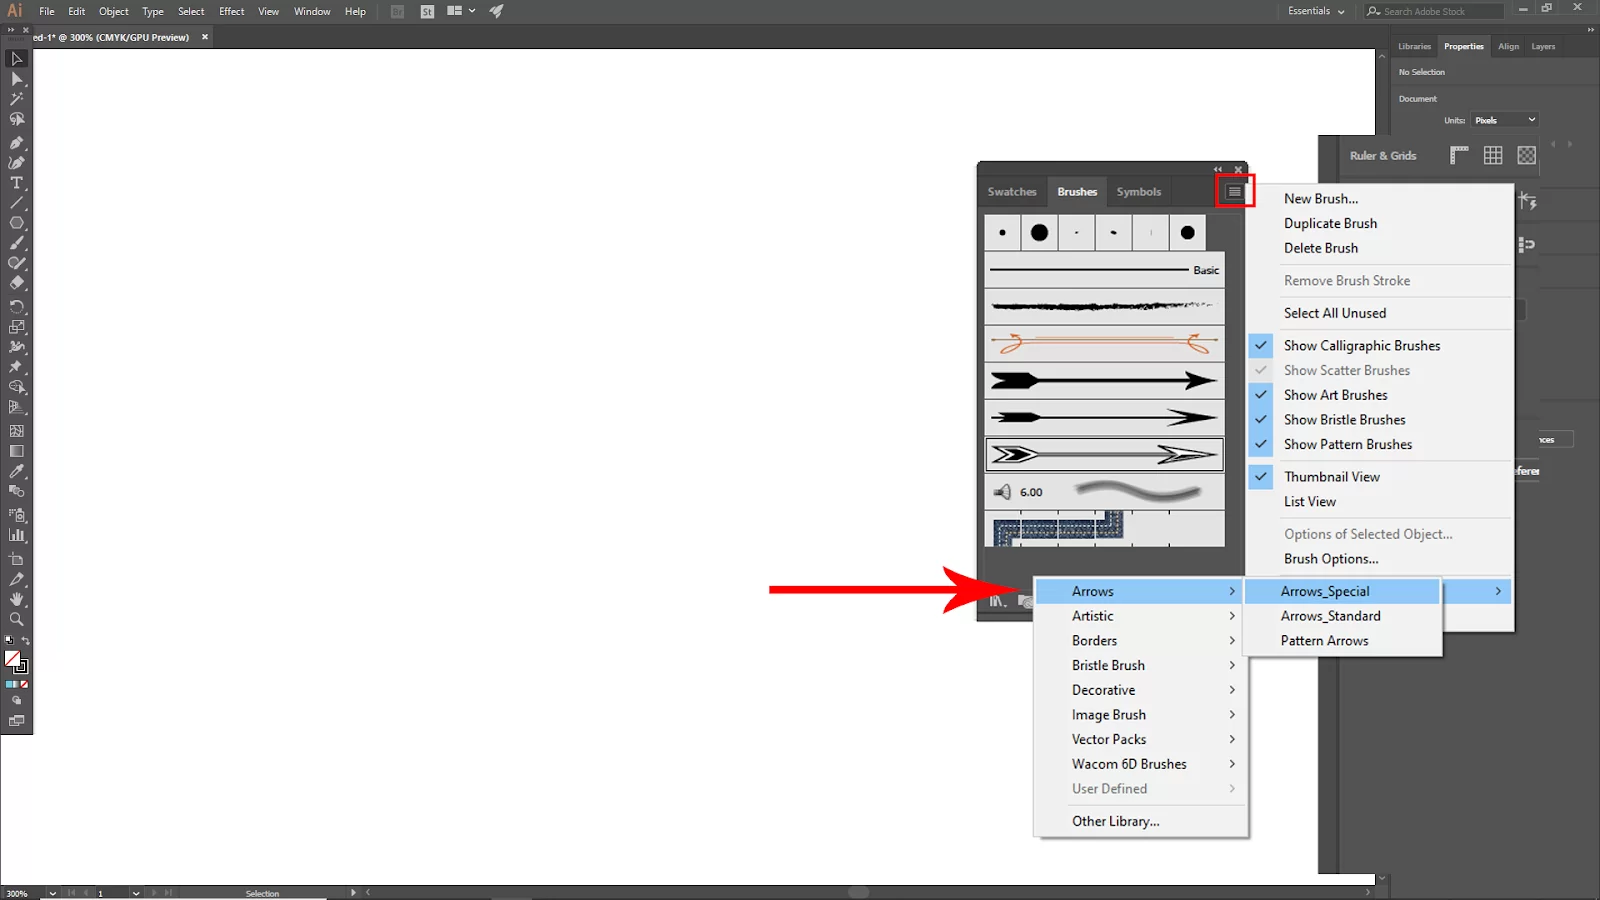
In this method, you can make arrows via brushes. Open the Brushes Panel and go to Window > Brushes. Or you can use the short key. Click F5 on the keyboard.

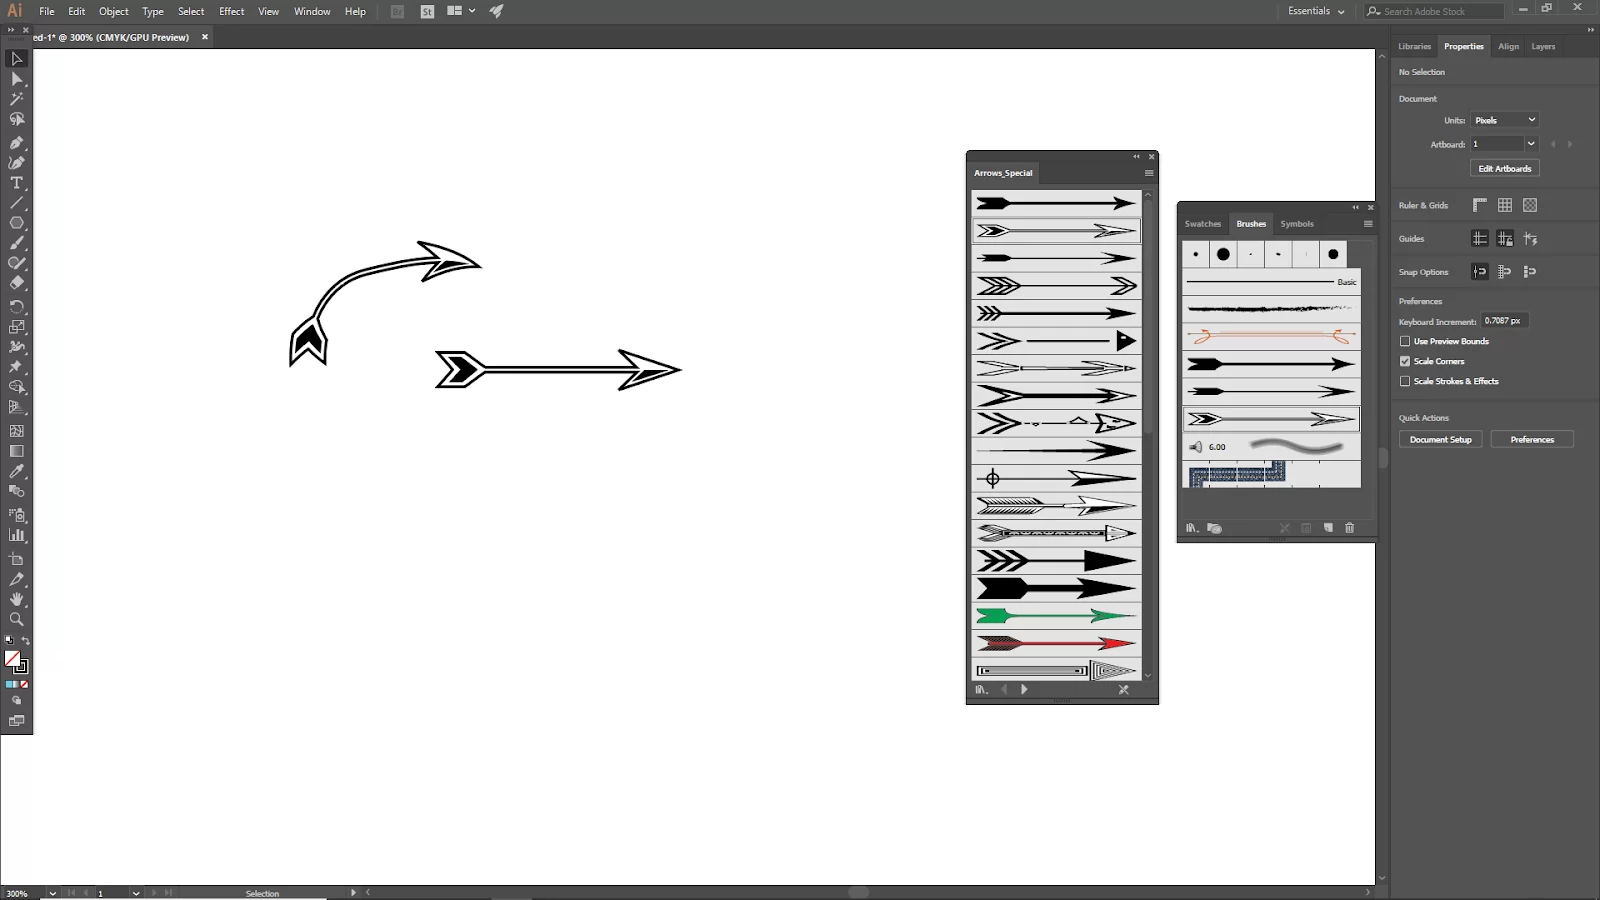
Now select your Line Object and Click on the three-line menu icon top corner of the Brushes Panel. Next, go to Open Brush Libary > Arrows > Arrows_Spacial.
Select the brush tool from the toolbar and select your arrow style from Arrows_Special. Now click and drag with hold shift to make the arrow.
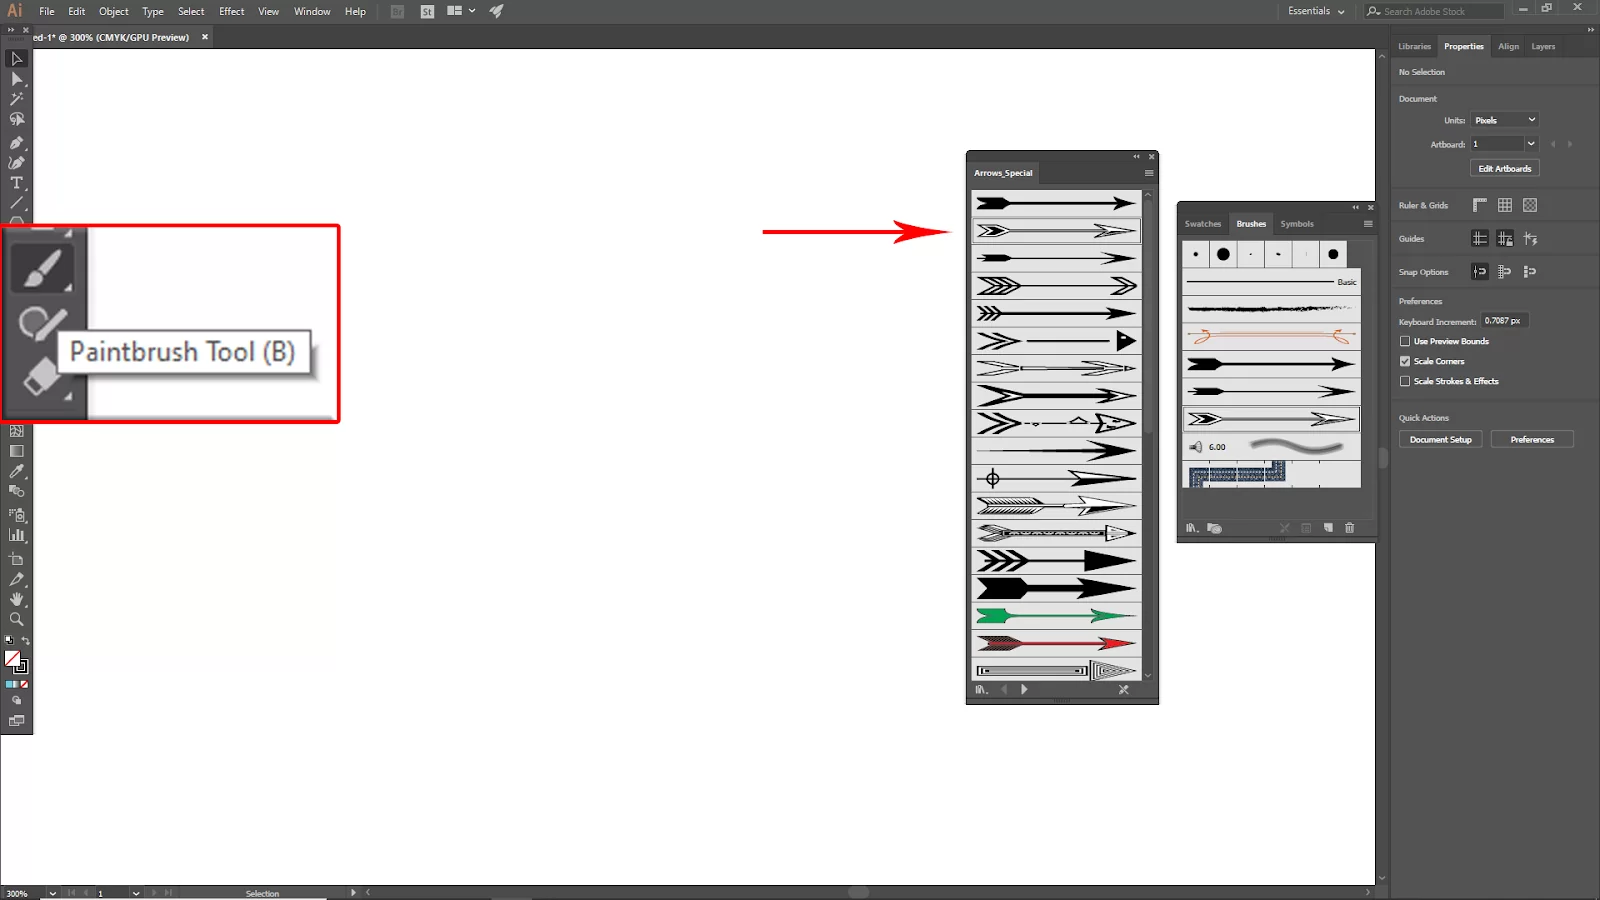
You can also make it round. As you use the brush tool, whatever you draw makes an arrow. Brushes are one of the most used tool in Illustrator. They also come in hand when you are drawing a circle.
Method 3:
This is the easiest way to make an arrow. In this method, we will be using symbols.
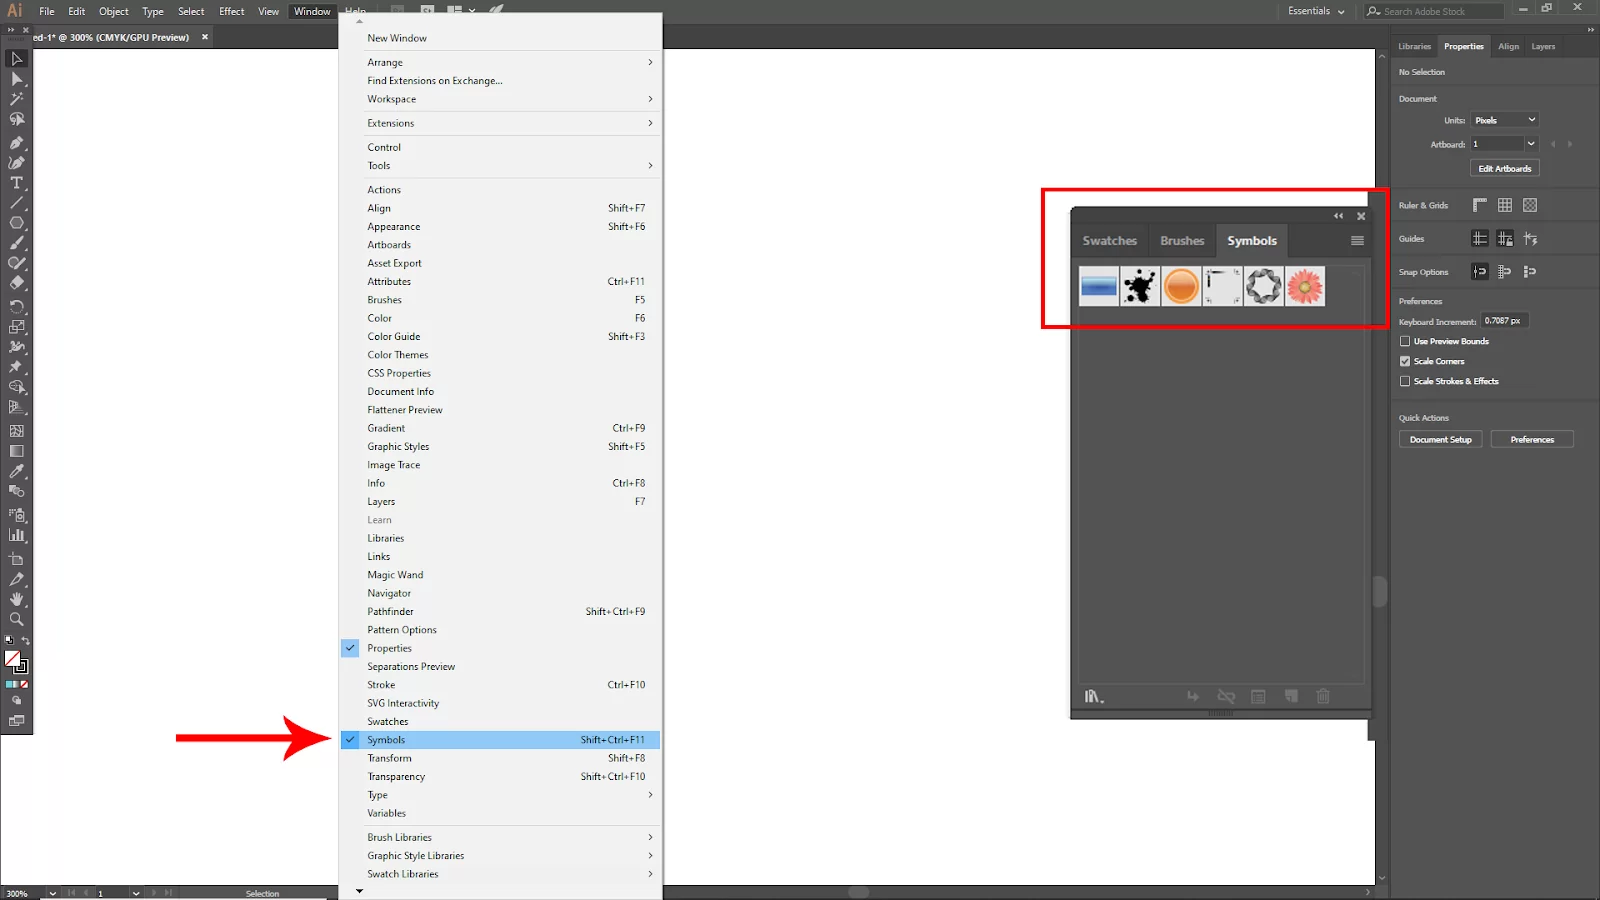
Go to Window > Symbols panel. Or you can use the short key for this [Shift + Ctrl + F11].
Now click on the top corner menu of the symbols panel. Go to Open Symbol Libary > Arrows.
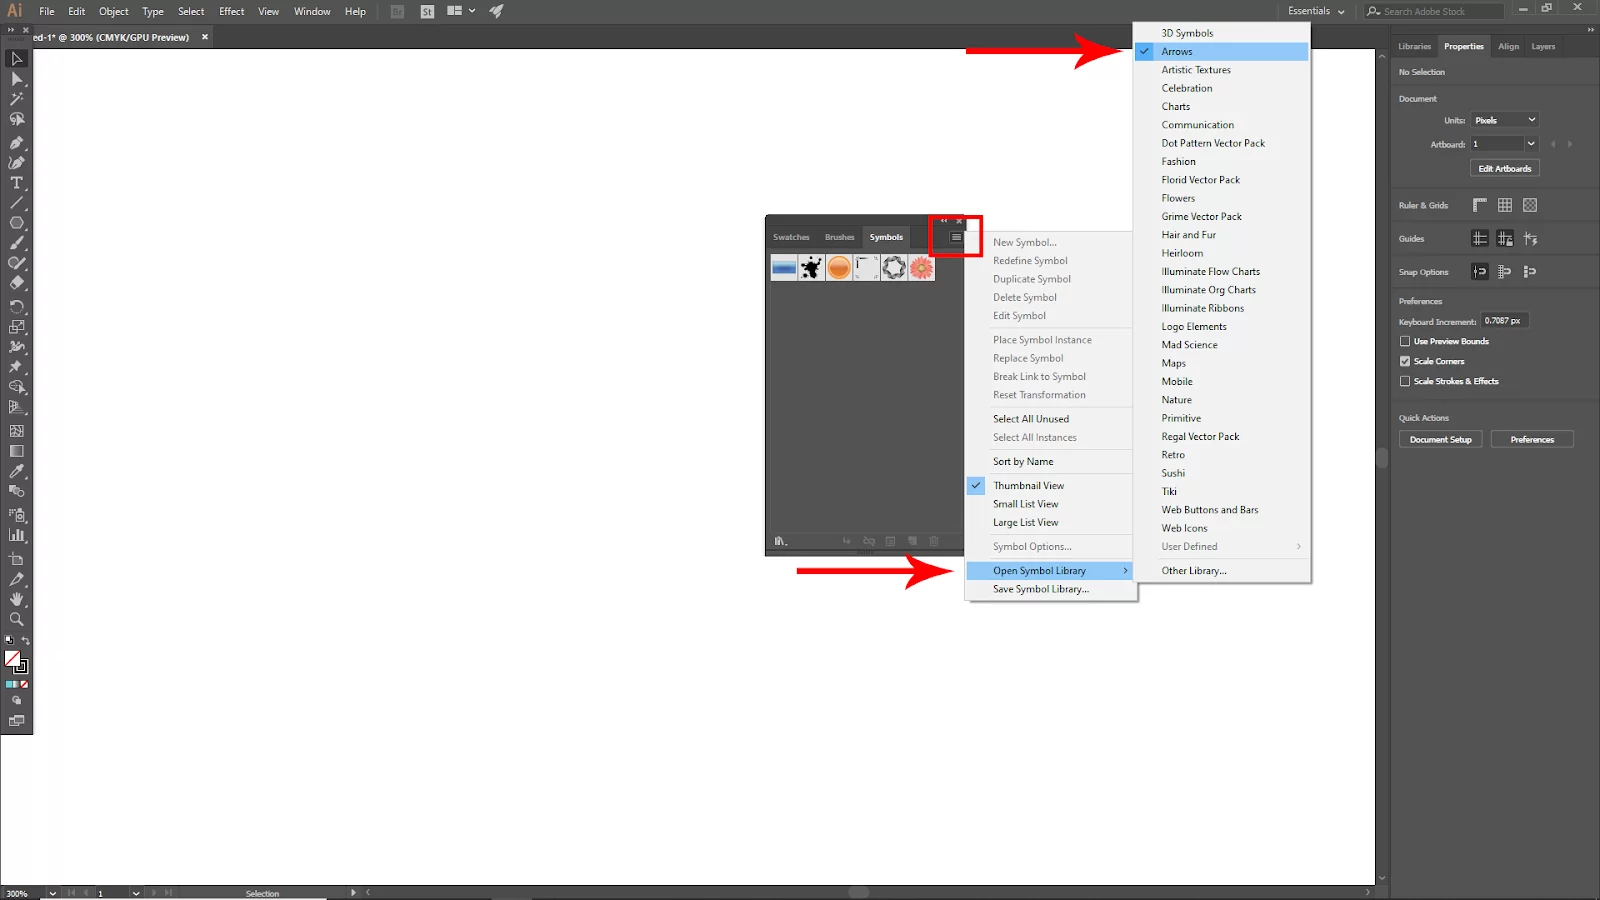
Now your Predesign arrow will open on the arrows panel. Drag any arrow symbol that you like on the canvas. And your arrow will be created.

Using The Pen Tool To Draw an Arrow
You can use the pen tool to make a curved arrow. Using a pen tool is first to draw a curve line, and then you can add arrowheads from the Stroke panel or draw your own with the pen tool. Follow the steps below.
Step 1
Select the pen tool, and click on the artboard to create the first anchor point. Click again, hold the mouse and drag to create the second anchor point, and you’ll see a curve.
Step 2
Use any technique or style to draw a triangle or an arrowhead. You can continue by using the pen tool.
Step 3
With the curve line and the arrowhead selected, choose Object > Path > Outline Stroke from the overhead menu. In this stage, the curve line (stroke) is converted into a path (shape). Re-select both, then select Unify in the Pathfinder panel.
Using The Shape Tools To Draw Arrow
Here is how to draw arrows using the shape tools. Using this technique, you’ll reunite a triangle and rectangle to create an arrow.
Step 1
Align both shapes’ centers, rotate the triangle 45 degrees, and put one on each side of the rectangle. Next, scale the shapes.
Step 2
When you have both shapes selected, click Unite in the Pathfinder panel.
You can also see our article on how to make a triangle in Illustrator.
Creating a Single-Lined Curved Arrow Using Illustrator
A curved arrow is used in many logos and T-shirts. Adobe illustrator can help you to create a curved arrow with a few simple clicks.
Step 1
Start by choosing the Arc Tool. The Arc Tool can be chosen by clicking on the Line Tool in the toolbox. Click and drag the mouse in your workspace until you get an arc.
Step 2
The second step is to click on the arc while using the Black Cursor tool from the toolbox. Resize and rotate the arc as necessary to achieve the level of the curve you need.
Step 3
The next step is selecting Filter from the menu bar at the top by clicking on the curved line to make it visible. Then, choose Add Arrowheads under Stylize. There will be arrowhead styles and direction options in a dialog box. The arrowhead you want will show up at the end of your curving line in your workspace when you click on it.
Creating a Four-sided Curved Arrow Using Illustrator
Follow the steps below to create a Four-sided curved arrow using illustrator.
Step 1
In the toolbox, select Rectangle Tool. You can resize a shape in the workspace by left-clicking and holding down the mouse button while dragging it. By clicking and dragging the mouse on one of the shape’s corner points, you can change the size. When the rectangle is the size you want, let go of the mouse.
Step 2
In the toolbox, select Rectangle Tool. To resize a shape in the workspace, left-click and hold down the mouse button while dragging it. By clicking and dragging the mouse on one of the shape’s corner points, you can change the size. When the rectangle is the size you want, let go of the mouse.
Step 3
For the third step, click on the triangle on your workspace while using the Black Cursor toolbox option. You must put the triangle on top of the rectangle, so you must click and drag the mouse while holding the button down.
The triangle may need to be rotated by positioning the cursor outside a corner until the Rotate Arrow appears. When the triangle is in place, click on it to highlight it, then while holding down the Shift Key on the keypad, click on the rectangle.
Step 4
Next, click the White Cursor icon in the toolbox, then click the grouping arrow in your workspace. You will have to Drag the corner to the desired location for the arrow’s end by double-clicking the outer bottom corner anchor point. You should apply this same procedure to the opposing bottom corner.
Step 5
In the toolbox, choose Pen Tool, then choose Create Anchors Pen. To add a new anchor point, click on the triangle’s side where you want the curve’s center. On the opposite side, repeat this procedure.
Step 6
For the final step, you should select the White Cursor option from the toolbox, then double-click the newly generated anchor point. The options for point conversion icons will be visible on the working menu bar, which is located beneath the main menu bar.
You need to change the new anchor point into a Bezier Curve Tool by clicking on the curve icon. You will see a dot that has handles pointing in both directions coming from the point. Proceed to bend the line into the desired curve using the handles, then repeat on the opposite side.
Leave a Reply
You must be logged in to post a comment.