A grid is a visual aid that can be used to align and arrange objects within a document. I find grids useful for aligning objects to specific gridlines, which helps to ensure that elements are positioned consistently and accurately in my designs.
I’ll show you how I use grids to create precise and consistent designs.
How To Make Grids in Illustrator
Here are 3 Steps to Make Grid in Illustrator:
Step 1:
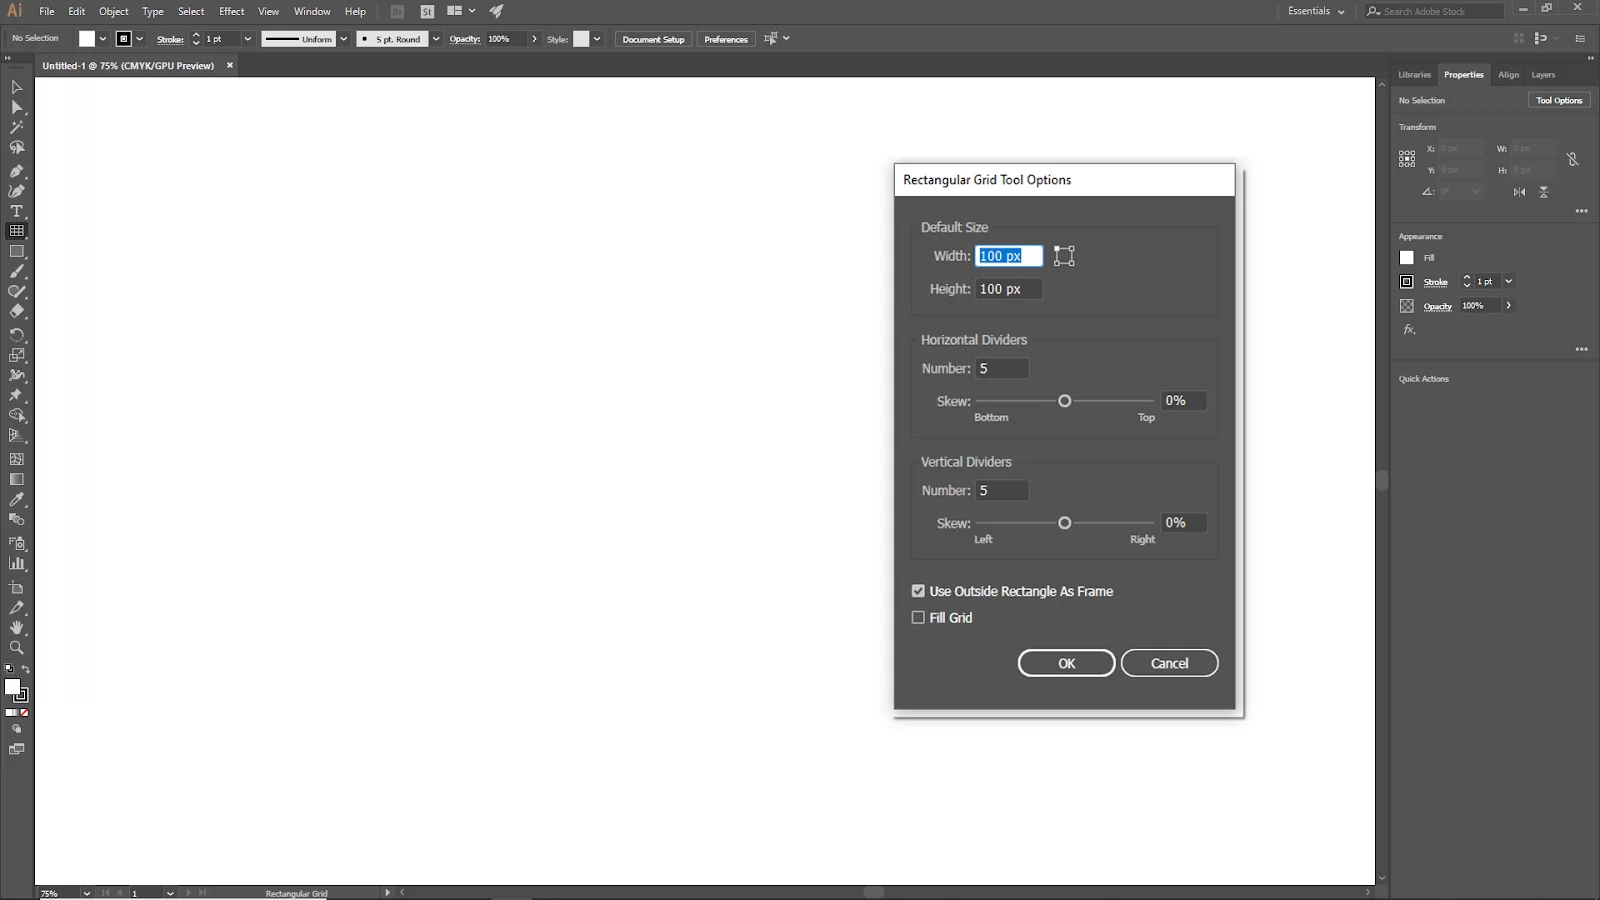
Go to the toolbar and then select the Line Segment Tool. Right-click on it, and you will find the Rectangle Grid Tool. Double-click the Rectangle Grid Tool now the Rectangle Grid tool options panel will open.

Now set the height and weight of the grid. And set your Horizontal dividers and vertical dividers. For this example, we will use 5×5. You can also Skew the dividers. Increase or decrease the Skew volume as your desire.
Step 2:
After setting, all the grid settings now, click ok to create your grid. You can also check the fill box or fill the grid color later. And your grid is ready to use.

You can also increase the stroke of the grid rectangle. Go to properties, and here you will find the stroke option. If you want to turn on the fill color, then you can also change it from the properties panel.

Step 3:
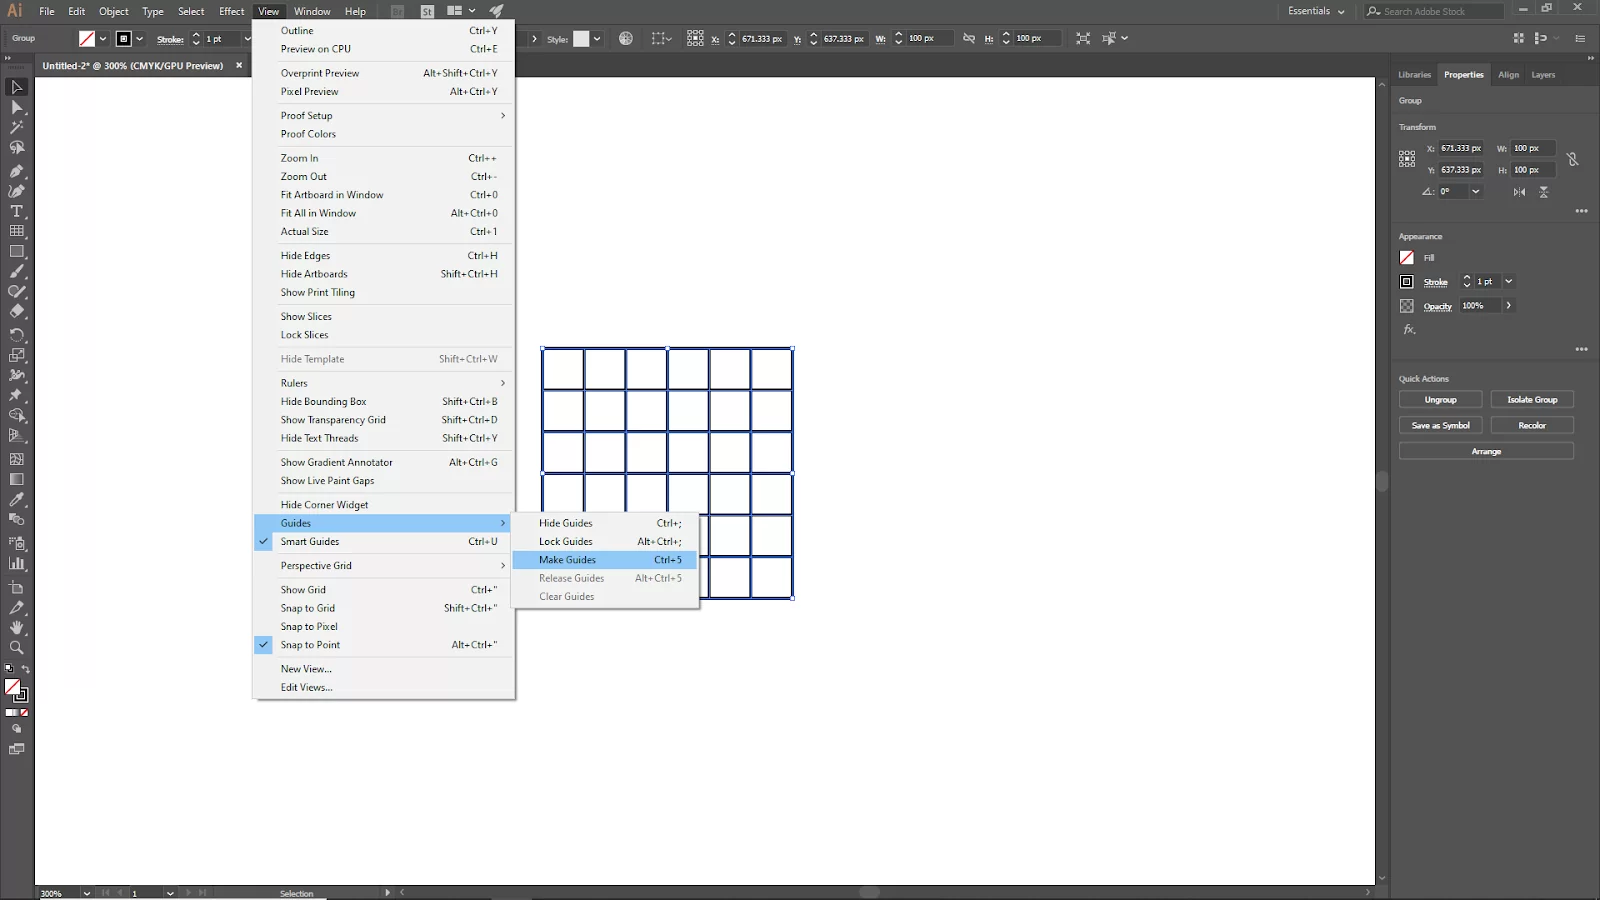
You can make your guide as a guide. To do this, select the grid and go to the View menu on the upper bar. Now go to Guide > Make Guide. Or you can use the short key for this win [Ctrl + 5] or Mac [Cmd + 5].
Your grid is all done and ready to use. You can follow this guide to create additional grids.

How to Create a Polar Grid in Illustrator
Here are the steps to create a Polar Grid in your illustrator software.
Step 1
To enter the Polar Grid Tool Options box, you may customize the settings for the grid you’re constructing and double-click the Polar Grid Tool. This is similar to what you’d do if selecting a rectangle tool.
You can also select the Polar Grid Tool and click on your artboard. After selecting your tool, set the width and height of your grid. You can decide where to start drawing your grid by choosing one of those four reference points.
Step 2
You may wish to add concentric circles to the primary ones. To add more concentric circles in addition to the primary one, use the Number input box found in the Concentric Dividers section.
Set the number of straight lines you want to add between the grid’s center and the edge using the Number input box in the Radial Dividers section.
Step 3
If you want to decide if your concentric circles should be heavier on the inside or outside of the grid, use the Skew slider found in the Concentric Dividers section.
Use the Skew slider found in the Radial Dividers section to control whether your straight lines are weighted in the grid counterclockwise or clockwise. Remember that the Concentric Dividers section and Radial Dividers section are different.
Step 4
The Check Compound Path creation Ellipses combine the overlapping circles into a single composite path. You should proceed to fill your radial grid with the active color. To do this, check the Fill Grid Option. Ellipses are also used when drawing a circle using illustrator.
How to Create an Isometric Grid in Illustrator
Follow the steps below to create an isometric grid using illustrator.
Step 1
The first step is to make a rectangular grid. Do you remember the steps for creating a rectangular grid? Follow them to create an isometric grid. Follow the directions for creating a rectangular grid above to create an isometric grid. Please ensure that your grid has a lot of rows and columns.
Step 2
The next step is to activate the Align panel. Go to Window in the menu at the top of your screen, then select Align. Alternatively, you can use the shortcut Shift+F7 on your keyboard to open the panel.
Step 3
For the third step, you need to align your grid. To align your grid to the center of your artboard, select it and then click one of the icons in the Align Objects area of the Align panel.
Step 4
Look for the Selection tool and select it. In case you don’t know where the tool is, the toolbar at the left of your screen is where you’d see the Selection tool. Alternatively, you can quickly pick the tool using the V keyboard shortcut.
Step 5
Now, you need to rotate the grid. Your grid’s border and the dividers that go through it must be highlighted while it is selected. Additionally, your grid should have anchor points that are both visible on and in the middle of the corners.
Use the Selection tool to hover your cursor near any discernible anchor point beyond the grid’s perimeter. While clicking, rotate your grid 45 degrees, so it changes from a square to a diamond shape. You can do this by holding down the Shift key.
Step 6
Proceed to activate the Scale window. To scale your grid, right-click on it, select Transform, and then click Scale. The Scale window because of your actions.
Step 7
Next, you need to scale up your grid. To scale up your grid, Choose Non-Uniform in the Scale window and scale your grid by 100% horizontally and 60% vertically. When you are done with the scaling, click the OK button at the window’s bottom.
Step 8
Perform a right-click on your grid, and the Scale window will be reopened. This time, choose Uniform and input the value of the scaling factor, which will increase your grid’s size to fill the full artboard.
It is important to Keep the Preview option selected while inputting the value of the scaling factor; when you are done, press the OK button at the window’s bottom.
If you enjoyed reading this article, you can also see our step-by-step guide on how to make arrows in illustrator .
Leave a Reply
You must be logged in to post a comment.