DaVinci Resolve is a widely-used and intuitive video editing software that is gaining traction as video content becomes more prevalent on the internet. Its free version is packed with features, including the ability to add effects that enhance the production value of a video, such as text overlays.
In this article, we will walk you through how to add text to your video using DaVinci Resolve in a simple, step-by-step process. Additionally, we will share some helpful tips and an alternative software option for those interested in trying something different.
Adding Text in Davinci Resolve
Adding text to your video in DaVinci Resolve is a simple process. There are various types of text you can add, including standard text, Text+, and Scroll text. In this guide, we will focus on adding standard text. Here is how to do it:
STEP 1 – Import your Video to the Editor
The first step in adding text to your video is to import your footage into DaVinci Resolve. If your video is already in the timeline, you can skip to step 3. To import your video, press Ctrl+I or go to File in the menu bar and select Import File, then Import Media. You can also drag and drop a folder containing multiple videos into the media pool, and the editor will automatically load them.

STEP 2 – Create a New Timeline
Now that your video is in the editor, the next step is to create a new timeline for editing. To do this, click on the selected video(s) and choose “Create New Timeline Using Selected Clips”. Alternatively, you can drag and drop the selected videos onto the timeline.

STEP 3 – Select Text Effect from the Effects Library
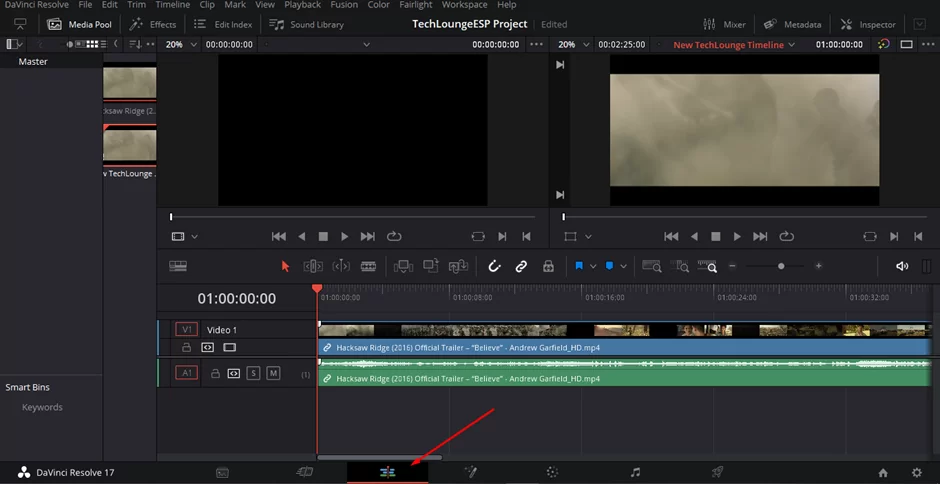
In order to add text to your video, you will need to enable the video for editing. To do this, go to the control panel at the bottom of the editor’s interface and click the Edit tab.
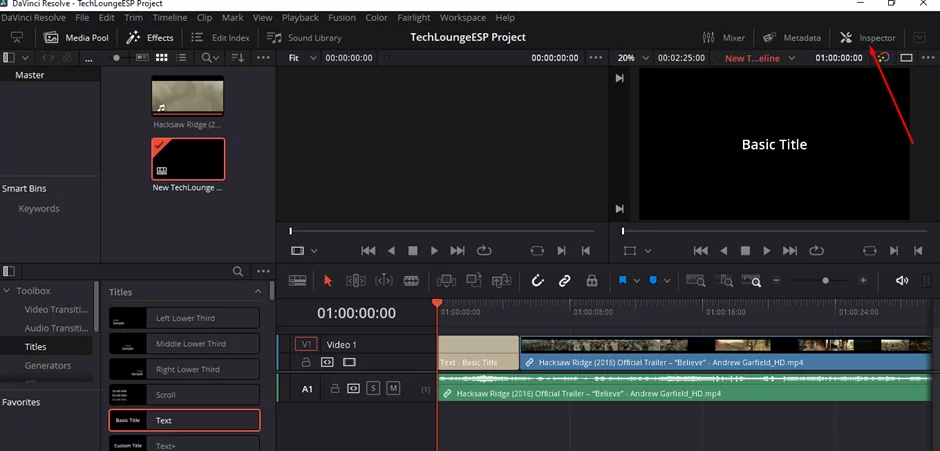
Under the main menu bar, you will see the Effects Library. Clicking on it will reveal a list of effects and tools you can apply to the video.

Select Titles to open a pop-up window with a list of preset options. Under the Titles category, drag and drop the Text effect onto the timeline on top of the video layer.

STEP 4 – Modify the Text Properties
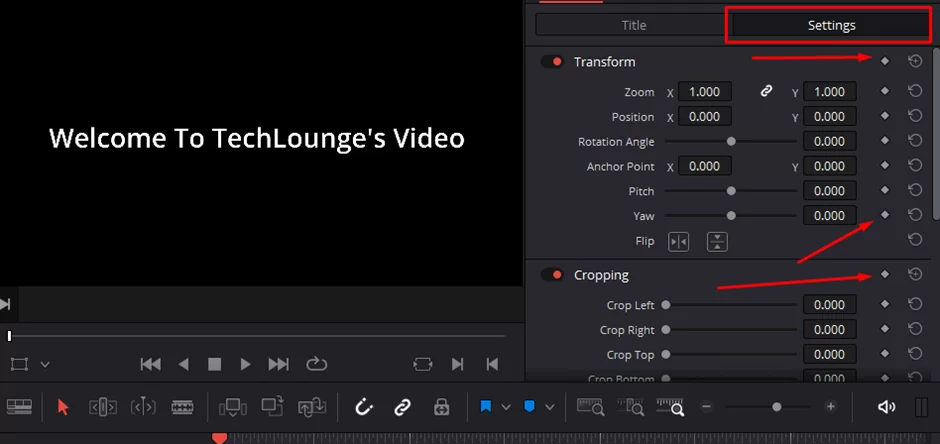
After adding the text effect, you can customize its properties to suit your needs. This includes basic edits such as changing font size, type, color, and background. You can also set the position, line spacing, and more. To do this, select the title you want to edit and click ‘Inspector’ at the top far right of the screen. To undo any changes, press Ctrl+Z or Command+Z. You can also use the ‘arrow circle’ on the right side to undo everything on a setting.
If standard text is all you need in your video, you can move on to other edits or export the video.

However, if you want to add some style and create something unique, you can use keyframes in DaVinci Resolve to create animated effects.
Also read: How to export projects in Davinci resolve
STEP 5 – Add Animated Effects by Creating Keyframes
Keyframes are anchors for effects applied to an element in the video. In this case, it is the text effect. In DaVinci Resolve, you set keyframes by pressing the diamond shape on the right of each setting. Checking the diamond button saves the value of your text in the timeline at the current timestamp and applies the change to the rest of the video.
For example, if you want the text to move from right to left over a 5-second period, you would go to the Position setting and set the starting position by changing the values of X and Y. Then go to the time you want the text to begin moving and hit the keyframe.
Next, move forward 5 seconds in the video and set the position of the text to where you want it to end. This will create a moving effect on your text, visible during playback. You can repeat this process for different settings in the Inspector window to add some style to your text.
Also read: How to crop a video in Davinci resolve
STEP 6 – Save the Edited Text for Future Projects (Optional)
Creating the perfect edits that match your vision can take a significant amount of effort. Instead of redoing it all over again, you can save it for later use in DaVinci Resolve. This not only streamlines your workflow, but it also helps maintain a consistent look for your brand across different content.

To save your edit, go to View in the menu bar and click Show Power Bins. Then open ‘Media Pool’ and locate Master under Power Bins. Next, drag the text layer you want to save into Master. With that, it is saved and accessible for future projects. Just go to Master under Power Bins to access the saved edit and drag it onto the timeline when you need it.
That’s it. You now know how to add text in DaVinci Resolve.
You can also check out our in-depth guide on how to freeze frame on Davinci resolve
Tips to Keep in Mind When Using DaVinci Resolve Text Effects
DaVinci Resolve offers a wide range of effects and creative possibilities when it comes to adding text to your videos. However, it’s important to keep in mind a few tips when creating video content for an audience.
Balance
It’s important to find a balance when it comes to text size. Text that is too small to read or too big that it overshadows the content is not effective. A useful trick is to use keyframes in DaVinci Resolve to stylishly add and remove text from the screen. Additionally, consider how your audience will watch the video. If a majority watch on a large screen, larger fonts might be more appropriate.
Choose Fonts That Match Your Brand
There are many font options available in DaVinci Resolve, but it’s important to choose one that best matches your brand. Big, graphic texts work well for videos in creative fields like design and fashion, while sleek, professional fonts are better for service-oriented industries like law and real estate. Additionally, if you’re adding multiple texts to a single video, make sure the font styling is consistent.
Consider The Read Time
It might be cool to have a text crawl like the one in Star Wars, but it’s important to make sure it makes sense for the content. Stick to short blocks of text that are easy to read in a few seconds. Additionally, don’t leave text on the screen for an unnecessarily long time.
Have Spatial Awareness
Consider how you frame your video to ensure that there is enough space for text. This is something to keep in mind during filming and editing so that neither element overshadows the other. DaVinci Resolve has a “Safe Area” feature that can help you identify acceptable areas to place your text. Additionally, it’s important to understand the meaning behind the position of your text. For example, placing text in the lower center might be confusing for viewers as it is typically reserved for subtitles or captions.
Final Words
Adding text to your videos using DaVinci Resolve is a straightforward process. The software offers a wide range of features and effects to enhance the production value of your video, including the ability to add text overlays. By following the six simple steps outlined in this guide, you can easily add text to your video and give it that professional touch.
The tips provided in this guide will help you to consider important factors such as spatial awareness, font selection, readability, and balance when adding text to your videos. With DaVinci Resolve, the possibilities are endless, and you can create unique and engaging videos that will captivate your audience.
If yyou enjoyed reading this article, you will also like our in-depth guide on how to undo on Davinci resolve