Cropping is an important part of video editing, as it allows you to focus on specific parts of the footage and remove any unwanted elements. DaVinci Resolve is a feature-rich video editing software that makes it easy to crop your videos with precision. In this article, we will guide you through the process of cropping videos in DaVinci Resolve and provide tips to help you get the best results.
Cropping a Video in Davinci Resolve
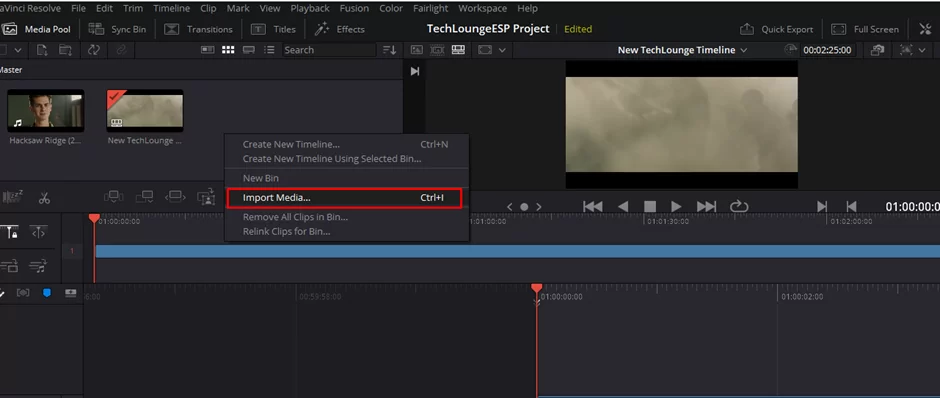
Step 1: Importing the Video
The first step in cropping a video in DaVinci Resolve 17 is to import the video into the software. This can be done by going to the “Media” tab and selecting “Import.” Choose the video file you want to crop and click “Open.”
Step 2: Adding the Clip to the Timeline
Once you have imported your video, you need to add it to the timeline in the “Cut” tab. This can be done by dragging the video clip from the Media Pool to the timeline or by right-clicking on the clip in the Media Pool and selecting “Add to Timeline.”

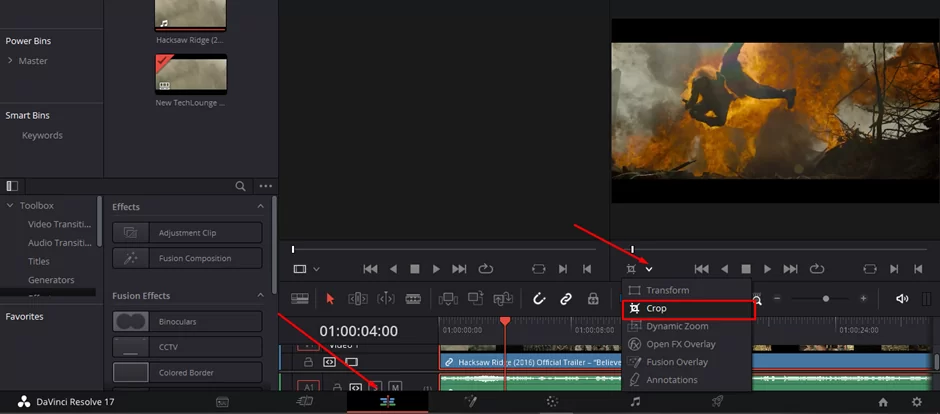
Step 3: Enabling Crop Mode
To crop the video, you need to enable the Crop mode. To do this, click on the “Edit” tab, you’ll see an arrow pointing downwards, close to a crop sign. Click on it to enable crop mode.
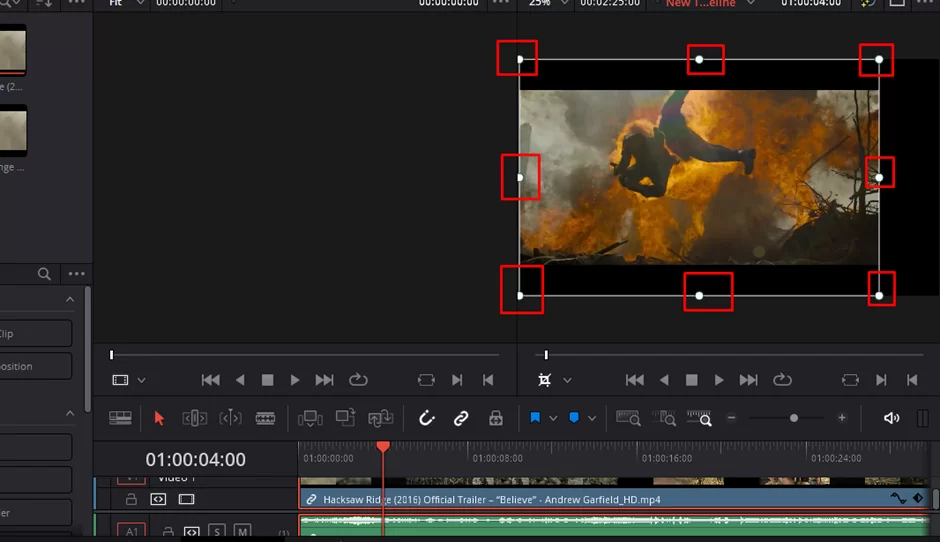
Step 4: Adjusting the Crop Settings
With Crop mode enabled, you can now adjust the crop settings. This can be done by dragging the corners of the crop box or by using the numerical input fields. You can also change the aspect ratio by selecting a preset from the “Aspect” drop-down menu.
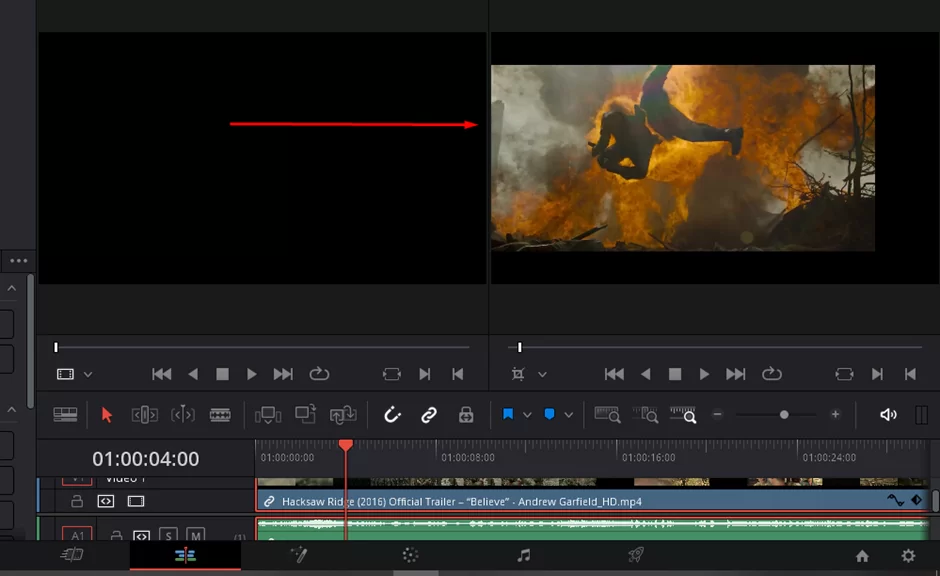
Step 5: Previewing the Changes
Before finalizing your crop, it’s a good idea to preview the changes to make sure they look the way you want. To do this, click on the “Play” button in the timeline and watch your clip in the Preview window.
Step 6: Finalizing the Crop
Once you are satisfied with the crop, you can finalize it by clicking the crop symbol again. The cropped clip will now replace the original clip in the timeline.

Step 7: Exporting the Cropped Video
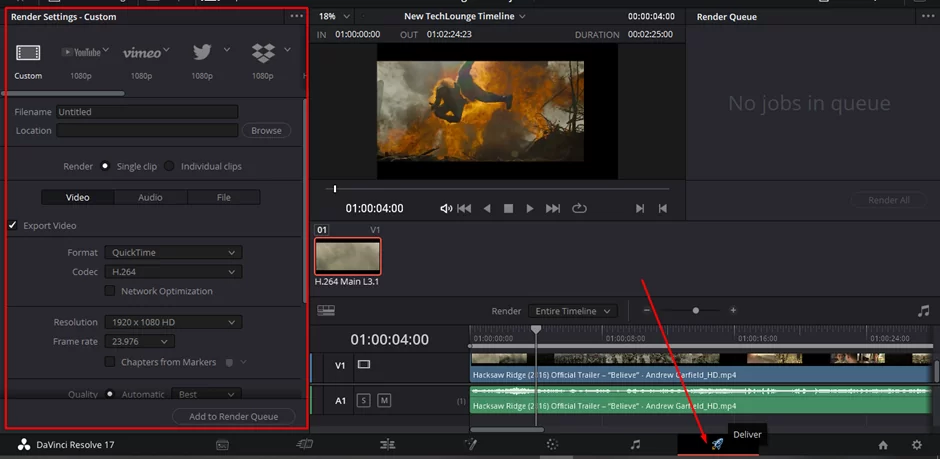
Finally, to save your cropped video, go to the “Deliver” tab and select the output format, destination, and other settings. Then click the “Deliver” button to start the export process.
Check out our in-depth article on how to add music to clips in Davinci resolve
Why Cropping Is Essential For Some Clips
Cropping is essential for some clips because it allows you to focus on specific parts of the footage and remove any unwanted elements. This helps to improve the overall look and feel of the video, as well as to draw the viewer’s attention to the most important parts of the footage.
By cropping the video, you can eliminate any distracting elements, such as empty space or background clutter, and ensure that the focus remains on the subject of the video.
Additionally, cropping can be used to adjust the aspect ratio of the video, which can be important for achieving a specific look or feel for your project. Whether you are creating a video for personal or professional use, cropping is an essential tool that can help you create high-quality, engaging content.
Also read: How to use Chroma key in Davinci resolve
Tips for Effective Cropping
Here are a few tips to help you get the best results when cropping your videos in DaVinci Resolve:
- Crop carefully: Make sure to crop carefully, as cropping too much can result in a loss of important details.
- Use the right aspect ratio: Make sure to use the right aspect ratio for your project, as different aspect ratios can impact the final look of your video.
- Keep the subject in focus: Make sure to keep the subject in focus when cropping, as this will help to draw the viewer’s attention to the most important parts of the video.
Davinci Resolve Crop Not Working? Try These
If you’re encountering issues with cropping in DaVinci Resolve, there are several possible solutions:
- Check for updates: Ensure that you are using the latest version of DaVinci Resolve, as updates may include bug fixes or performance improvements that could resolve your issue.
- Restart the software: Sometimes, a simple restart of the software can resolve any technical issues that you may be encountering.
- Check your project settings: Ensure that your project settings match the format of your source footage, as this can impact the cropping function.
- Try a different clip: Try applying the crop effect to a different clip to see if the issue persists. If it does, it may be related to the clip itself and not the software.
- Delete the cache files: DaVinci Resolve generates cache files to improve performance. If these files become corrupt, it can lead to issues with the cropping function. To resolve this, you can delete the cache files by going to “Preferences” > “Cache” and clicking on “Delete All”.
- Reinstall DaVinci Resolve: If none of the above steps resolve the issue, try reinstalling the software to see if this resolves the problem.
If you continue to encounter issues with cropping in DaVinci Resolve, consider reaching out to the software’s support team for further assistance.
Conclusion
Cropping your videos in DaVinci Resolve is a simple and straightforward process that allows you to focus on specific parts of your footage and remove any unwanted elements. By following these steps and tips, you can get the best results when cropping your videos and create high-quality videos that are sure to impress.
If tyou liked reading this piece, you will also like our in-depth article on how to export your projects in Davinci resolve