One of the keying techniques used often in filmmaking, creating visual effects, broadcasting, and gaming is the chroma key. The major difficulty encountered during the shooting phase is color leakage. With these ideas in mind, we can begin creating green-screen videos from scratch.
In this article, we will talk about how to chroma key in DaVinci Resolve. However, before proceeding, it is vital to know what keying, spill, and chroma key mean.
Keying is the technique of removing specific areas of the image based on their color or brightness. With this choice, one may do color grading, such as changing simply the color of the sky without impacting the surroundings, or removing it to make it translucent (green screen in VFX).
- Chroma keys are needed to segregate the pieces based on color.
- Luma keys are required to control the brightness level.
A spill happens when the subject’s color is mirrored in the background’s color. For instance, if the light is excessively intense, the green screen may reflect the character’s perspiring face. Since the subject has a green hue, keying out the green will likewise cause a portion of the subject’s picture to disappear. Software for composition typically has a spill suppression option. Additionally, if the keying degrades the image, a hold-out matte can be added to fix it.
To enable the subject to be composited with a different backdrop, chroma key is a technique that isolates a certain color from the background and renders it translucent. As an alternative, the performers can dress in green clothing that is afterward removed to make them invisible. Chroma keying is also known as color keying or as color-separation overly, which is what the broadcasting business has traditionally termed (mainly by BBC).
Green and blue screens are frequently utilized because they differ from the tone of human skin and are homogeneous and different from the topic.
Also read: How to export projects in Davinci resolve
The Process of Chroma Keying in DaVinci Resolve
The most fundamental chroma key tool is properly termed the Chroma Key tool. Let’s investigate some of the features that come with the Chroma Key tool.
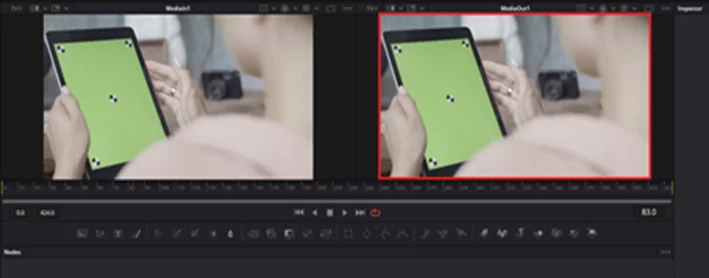
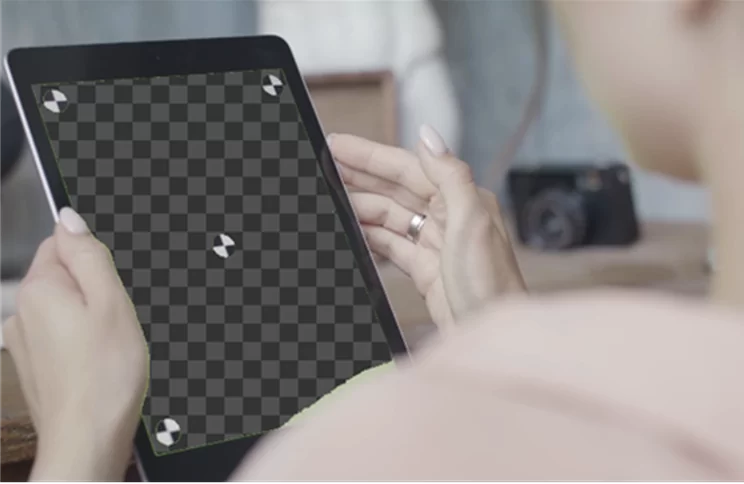
We have a video of a female holding a tablet in front of a green screen here. The green-screen backdrop will be eliminated using the Chroma Key tool after the cat has been isolated.
You may also like our in-depth guide on how to cut clips in Davinci resolve
Using the Chroma Key Tool
By right-clicking on the nodes and selecting Create Tool > Matte > then Chroma Keyer, let’s add a Chroma Key tool.

As well as connecting the Chroma Keyer tool to Media Out, make sure your Media In is linked to the yellow input on the device.

Selecting a key type is the next step once you’ve linked them.
Check out our detailed guide on how to add music to your clip in Davinci resolve
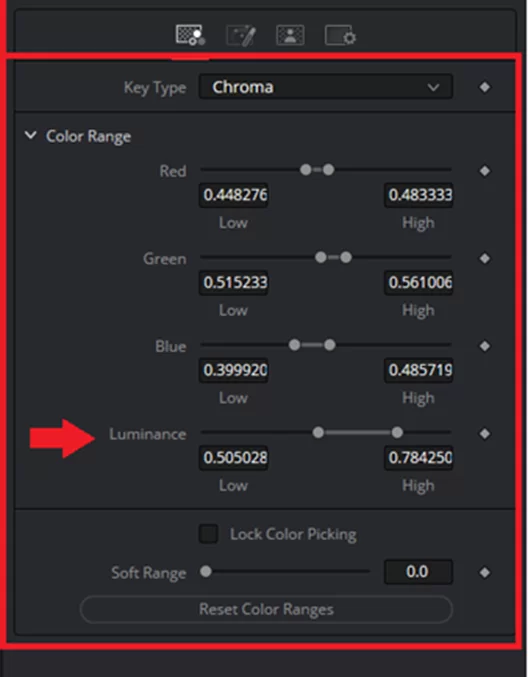
Selecting the key type
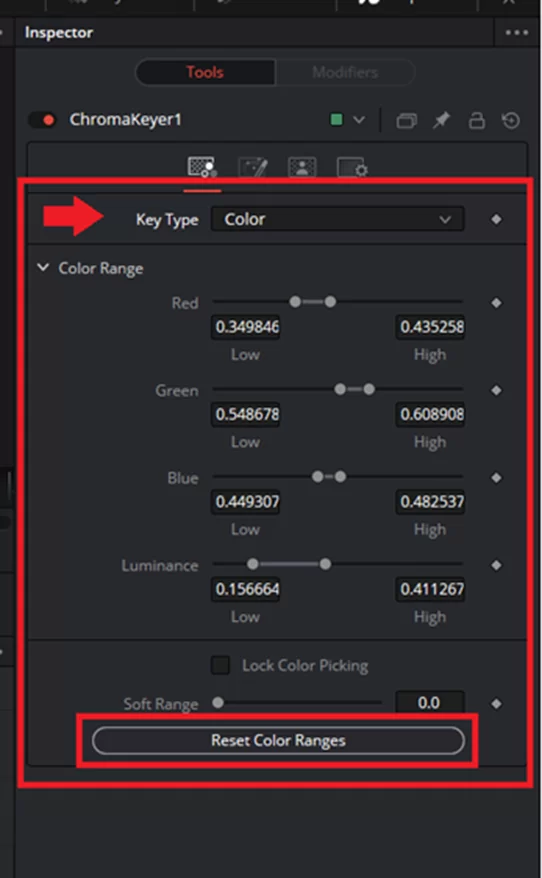
When selecting a key type, there are 2 alternatives available. To distinguish the key, one method uses chroma, which examines values in RGB (Red, Green, Blue) mode, while the other uses color, which examines values in HSV (Hue, Saturation, and Brightness) mode. In a minute, you’ll notice that each method will provide a somewhat different outcome.
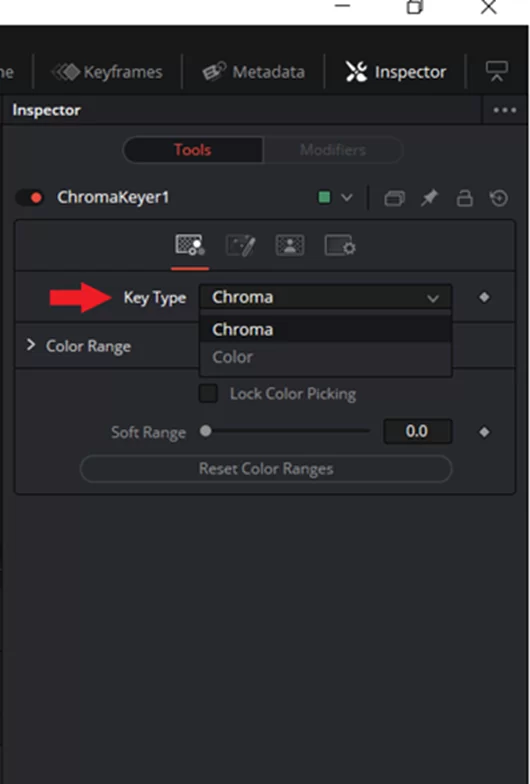
Chroma Key Type
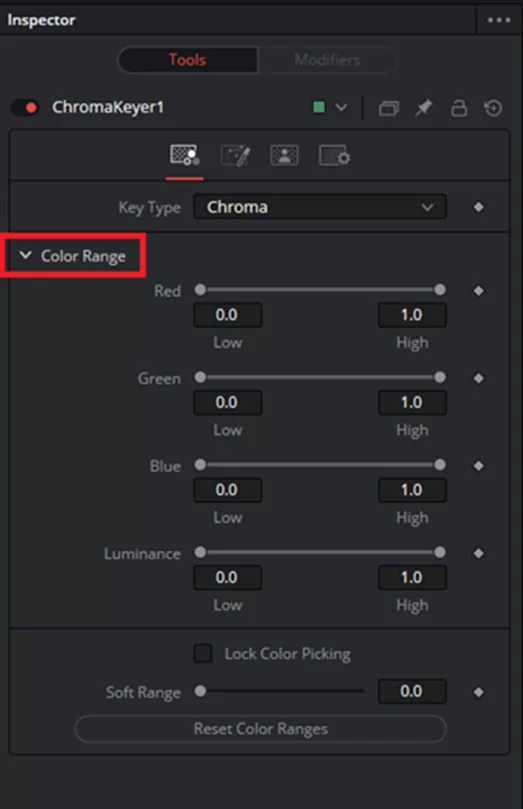
Let’s choose the key color now that we’re utilizing the Chroma Key type.
Remember that the color you select will be the one you want to be transparent. Specifically, the green backdrop.
Contrary to other keyers, Color range does not provide an eyedropper tool for choosing your key color. The red, green, and blue channels as well as luminance or brightness are represented by the sliders.
However, if the Chroma key tool is used, you may click, drag, and mark your key over the color you want to change, and the sliders will be changed right away.

Additionally, you’ll see that the slider bars have been modified and the green screen has become targeted and translucent.
The fact that the bars are initially rather narrow indicates that the desired range of values for removal and conversion to transparency is a relatively small one. The choices may be expanded, and the bars can be updated. If you just click and drag more mark keys, you’ll see that the sliders are stretched to cover a wider range of values.
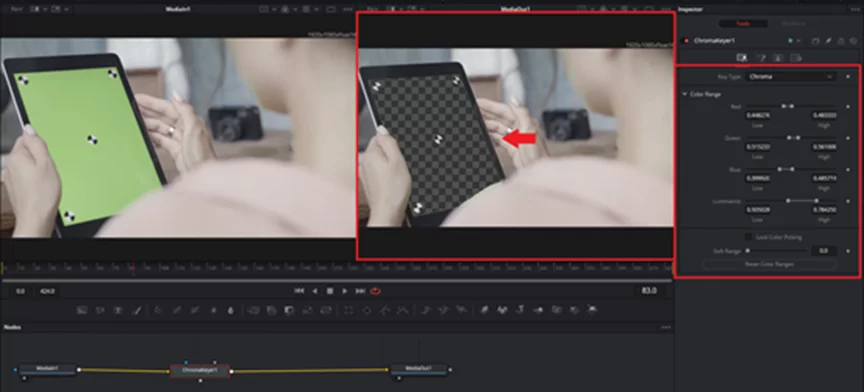
Because more of the dark greens are being targeted, in particular, the bar size in brightness rises. You may keep selecting as many times as necessary to get rid of as much of the important color as you like.
This is what occurs when you choose the Chroma key type, now. Now let’s explore the Color key type.
you will also enjoy our step-by-step guide on adding transitions in Davinci resolve
Color Key Type
If you change the mode, you must re-sample and reset the sliders.
Like you did with the Chroma key, click, drag, and mark your key over your viewer.
As you can see, the Color key type functions similarly. The Color Key is more likely to choose foreground colors that blend in with the backdrop since it operates in the HSV color space.


Therefore, it would generally be preferable to use the Chroma Key type.
Ultra Keyer
Similar to a chroma keyer, an ultra keyer is made to function with either a green or blue screen. The key color you select is irrelevant to the chroma keyer, though.
By right-clicking on our node and selecting Add Tool > Matte > Ultra Keyer, we can access the Ultra Keyer tool in a manner similar to how we access the Chroma Keyer tool.

Choosing a key color
The next step is to choose a key color after you’ve inserted the Ultra Keyer node.
There are several methods for choosing a key color:
- You’ve got the eyedropper.

- The color field

- The RGB sliders
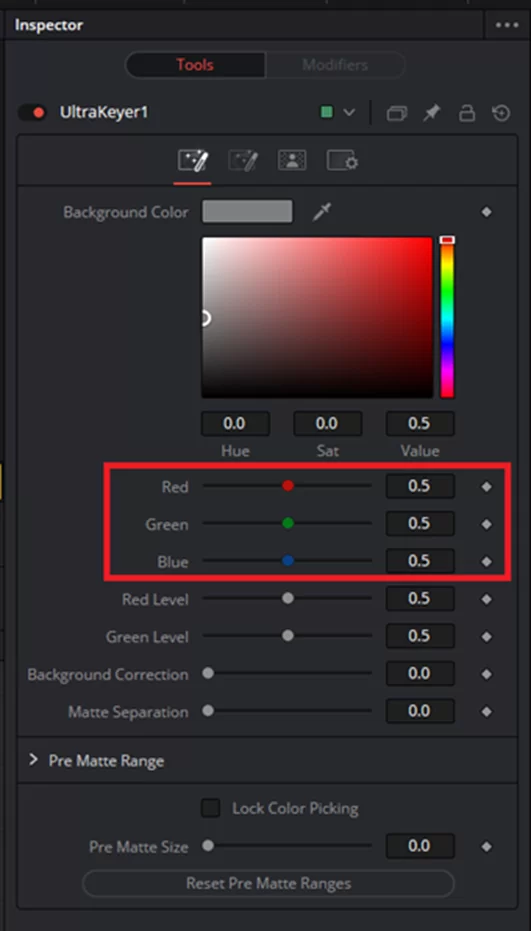
- The color swatch (Background color)
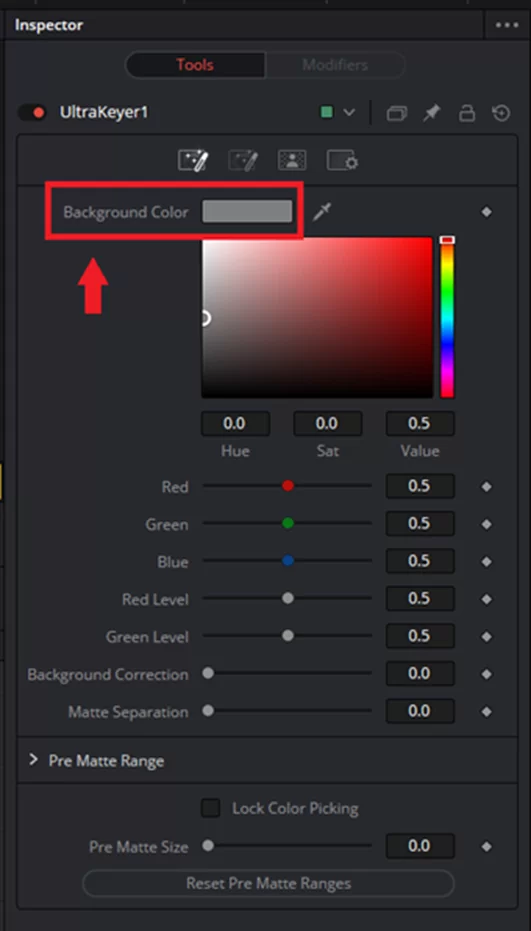
The color swatch, which gives you access to the whole color picker, is the easiest way to choose a key.
The green screen is quickly erased whenever you select a screen color.


We now have a transparent key that we can apply our masks with literally simply one click.
To determine whether the key is clean, we must examine the alpha channel. We’ll need to tidy them up if there’s any noise (the grey hue indicates this).

Conclusion
Overall, the output from the Chroma Keyer and Ultra Keyer is the same. Their respective approaches set the two apart.
The two Chroma Key tools mentioned above are the most popular and efficient options, especially for beginners. After learning how DaVinci Resolve’s chroma key function works, it won’t be long until you’ve mastered compositing and can create a screen replacement effect like this!
If your liked this article, you will also like our piece on how to use green screen in DaVinci Resolve.