Welcome to the world of professional video editing. Doesn’t matter if you are new to video editing or an experienced user looking for a more advanced tool, this blog post will provide a comprehensive overview of how to use Davinci Resolve.
Davinci Resolve is one of the most popular non-linear editing software packages available on the market today and offers a range of features that make it an excellent choice for filmmakers and video editors alike.
DaVinci Resolve Tutorial
We’ll explore all aspects of using Davinci Resolve from its basics such as creating projects, importing media, setting up edit points, and adding transitions right through to more advanced features like color correction and compositing tools. So, let’s get started – we hope you find this guide useful in mastering your skills with Davinci Resolve!
Understanding the Interface
The first step to mastering DaVinci Resolve is understanding the interface. The interface is divided into several sections, each with its own set of tools and functions. The Media Pool, for example, is where you import and organize your footage. The Timeline is where you edit your video and audio. The color page is where you color-correct and grade your footage.
The Media Pool

The Timeline

The Color Page
Importing Footage
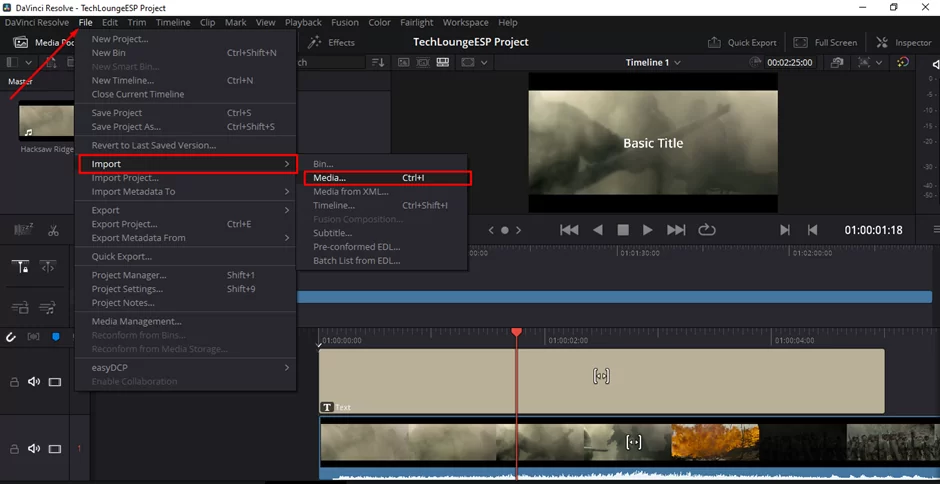
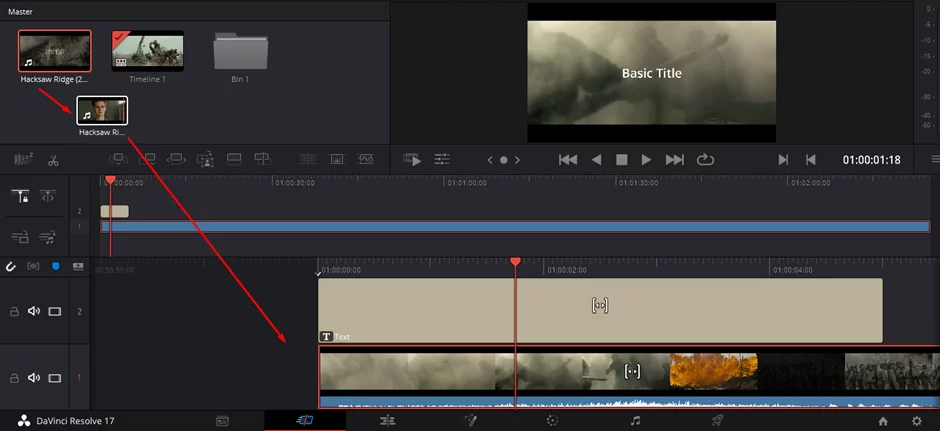
Once you understand the interface, the next step is to import your footage. To do this, navigate to the Media Pool and click the “Import” button. From there, you can select the footage you want to import and choose the appropriate settings.
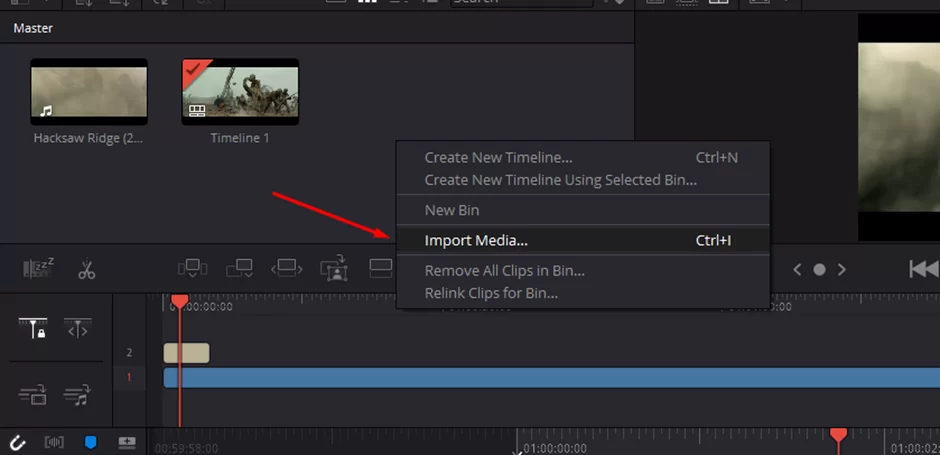
You can also right-click on the media pool section to import your media file
Also read: How to export projects in Davinci resolve
Organizing Footage
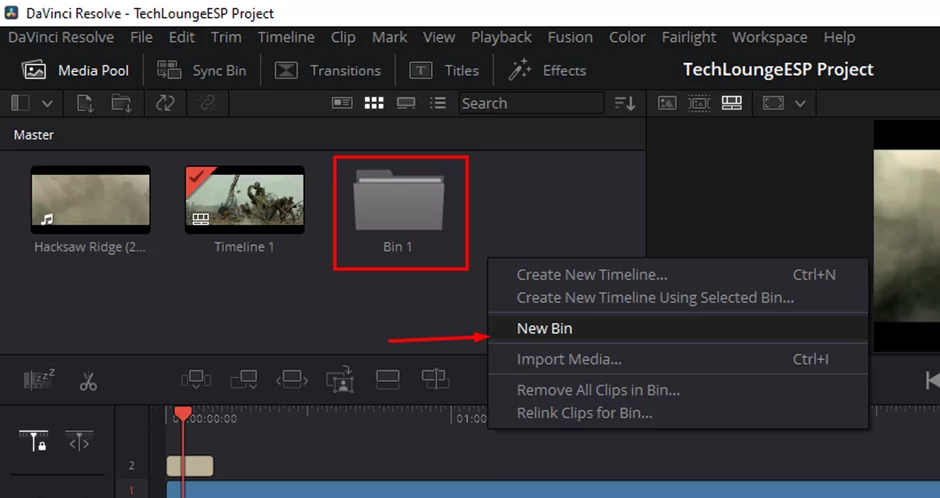
With your footage imported, the next step is to organize it. In the Media Pool, you can create bins to group your footage by project, scene, or any other criteria. This makes it easy to find the footage you need when you’re ready to start editing.
To create a bin, simply right-click in the Media Pool and select “New Bin.” Give your bin a name, and then you can start dragging footage into it. You can also create sub-bins within a bin to further organize your footage. For example, you can create a bin called “Project A” and within that bin, create sub-bins for each scene or location.
Overall, organizing your footage in DaVinci Resolve is a crucial step in the editing process. It saves time and makes the editing process more efficient. You can easily access the footage you need and can focus on the creative process instead of spending time trying to locate footage.
You can also check out this information packed article on how to reverse a clip in Davinci resolve
Editing In The Timeline
In the Timeline section of DaVinci Resolve, you can begin editing your footage to create your desired video. The Timeline is where you will be assembling your footage, adding transitions, effects, and audio to enhance your video. The Timeline is also where you can make precise cuts, trims, and adjustments to your footage.
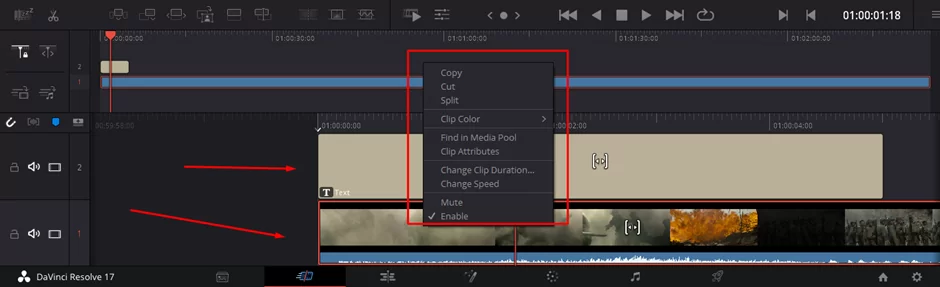
To add footage to the Timeline, simply drag and drop it from the Media Pool or from the source viewer into the Timeline. Once the footage is in the Timeline, you can move it around to create your desired video. You can also use the trim tools to make precise cuts and adjustments to your footage.
DaVinci Resolve also offers a wide range of transitions, effects, and audio tools to enhance your video. Transitions can be added between clips to create a seamless flow, while effects can be added to individual clips to change the look and feel of the footage. You can also add audio tracks and music to your video, and use the audio tools to adjust the volume, panning, and more.
With a wide range of editing tools, you can make precise cuts, add transitions and effects, and enhance your video with audio. The Timeline gives you a lot of creative freedom to produce a video that stands out.
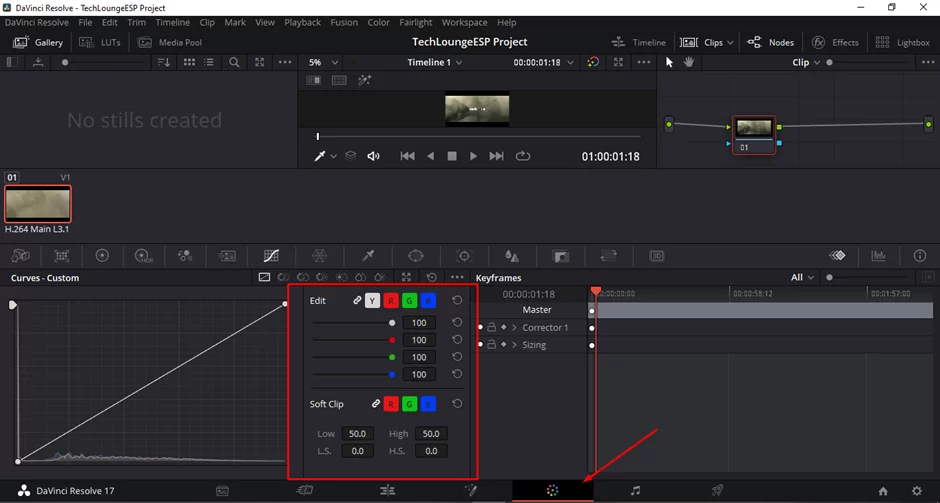
Color Correction and Grading
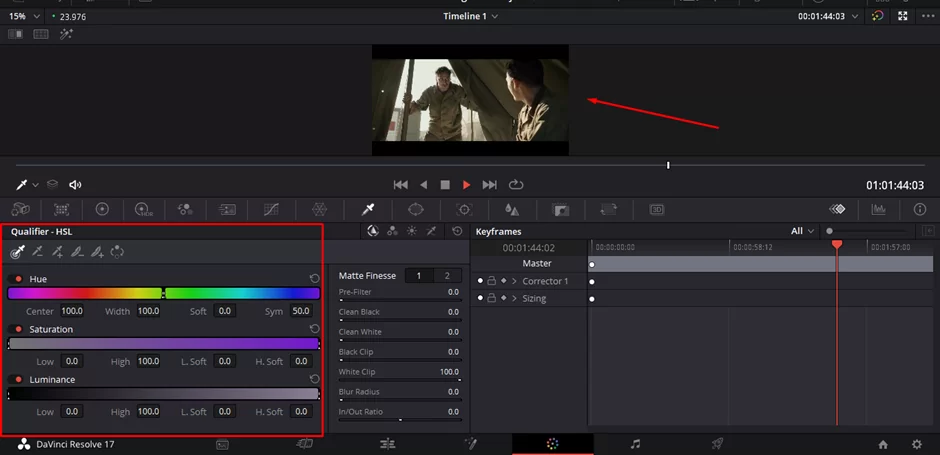
Once your editing is complete, it’s time to move on to color correction and grading. On the Color page, you can adjust the exposure, contrast, and color of your footage to make it look its best. You can also use the built-in color correction tools to match the look of different shots and create a cohesive visual style.
Exporting and Delivering
When your video is complete, it’s time to export and deliver it using DaVinci Resolve. Exporting is the process of creating a final version of your video that is ready to be shared or distributed.
DaVinci Resolve offers a wide range of export options, allowing you to choose the format and settings that best suit your needs. Some common formats include ProRes, H.264, and more. You can also export to specific resolutions such as 4K, 1080p, and 720p and also choose the bitrate, frame rate, and audio settings.
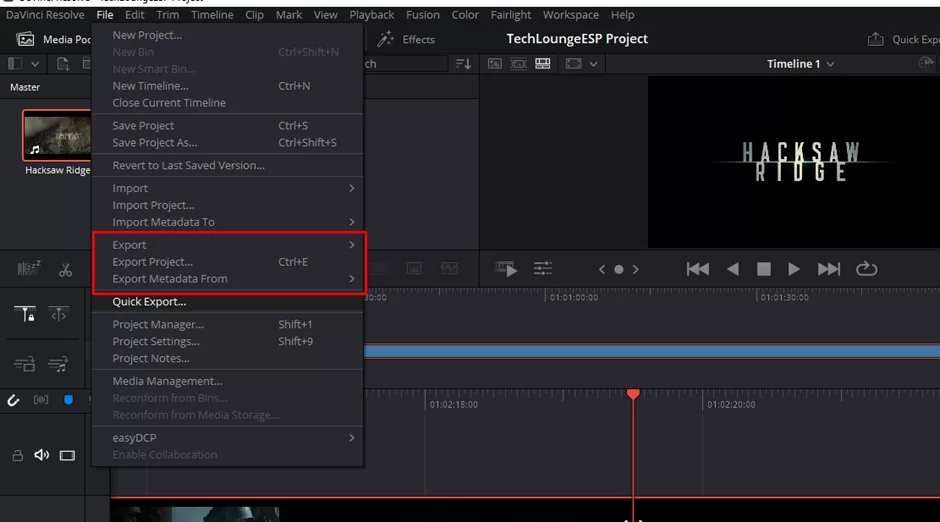
DaVinci Resolve allows direct delivery to well-known sites like YouTube, Vimeo, and other social media platforms in addition to exporting to numerous formats. By doing this, there is no need for additional software or manual video uploading.
Exporting and delivering your video using DaVinci Resolve is a simple and straightforward process. With a wide range of export options and direct delivery to popular platforms, you can easily share your video with the world.
Before exporting, it is crucial to confirm that all parameters and the finished video are correct and that you are happy with the results.
Conclusion
Overall, DaVinci Resolve is an incredibly powerful editing tool that can bring your projects to life in stunning 4K resolution. It offers a wide range of features and functions for both beginners and professionals alike, allowing you to create the type of content you desire without breaking the bank.
While mastering DaVinci Resolve may require some patience and practice, it’s well worth the effort as it opens up whole new creative possibilities that weren’t available before. Now all you need to do is open up DaVinci Resolve, experiment with its multitude of options, and start creating!
If you liked reading this piece, you will enjoy our in-depth guide on how to add text in Davinci resolve