iMovie allows users to edit and enhance their videos with a wide range of tools and effects. However, as with any editing software, mistakes can happen. Whether you accidentally deleted a clip, moved a piece of footage in the wrong place, or split a clip you didn’t want, you’ll learn how to quickly and easily undo your actions and get back to where you were before.
This guide will walk you through the process of undoing actions in iMovie, so you can edit your videos with confidence.
How to Undo in iMovie
Step 1: Select Edit from your iMovie window options.

Step 2: Select Undo from the Edit options to undo your last action.
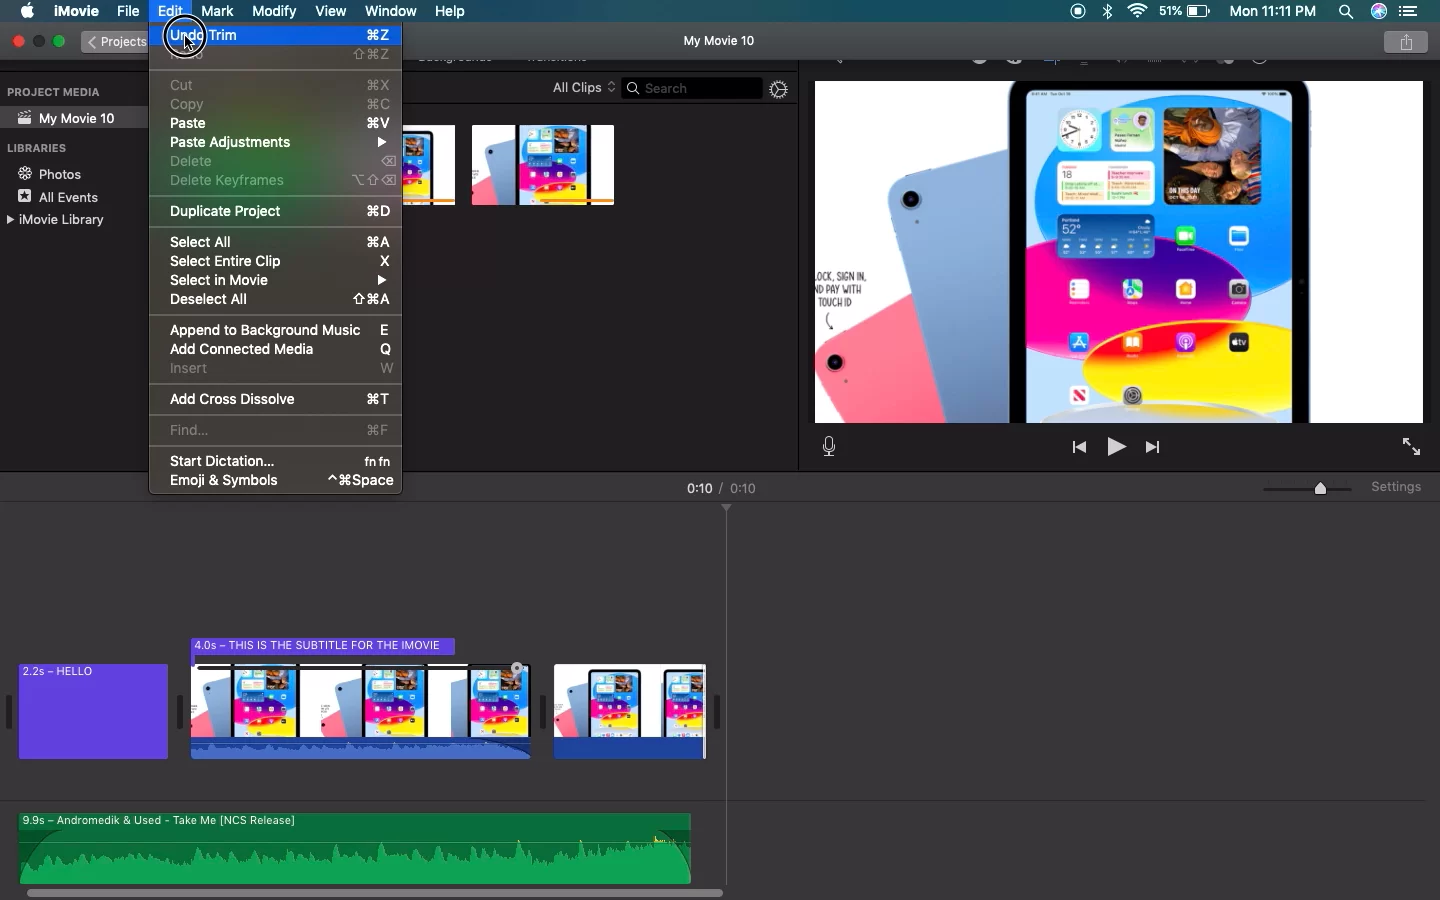
Tip: You can use Command + Z to quickly & successively undo your last actions.
Undoing and Redoing on iMovie Using iPhone
Have you ever been editing a video and you suddenly trimmed video even though you didn’t want to? Now you’re wondering if you need to start afresh. No, you don’t have to, thanks to iMovie undo option. Any activities you carried out up to the previous time you updated your project in iMovie can be undone or redone. If you wish to reverse or redo recent operations in iMovie on the iPhone, follow these simple steps:
Step 1
Simply hit the Undo button, which will appear in the form of a U-turn arrow. This will help you reverse whatever action you took. You can see the button right next to your timeline, and it is extremely noticeable.
Step 2
To reverse recent changes, you can also shake the device and then select Undo Project Edit.
If you wish to re-do a task, follow the steps below.
Step 1
After tapping on the Undo Project Edit button, keep holding it. Tap Redo Project Edit after that.
Step 2
After shaking your device, you may also press Redo Press Edit, which functions precisely like Undo.
Step 3
You can also utilize the Undo and Redo keyboard shortcuts from Mac if your device has access to one.
Reverting Clip To Original Using iMovie
Apart from Undoing or Redoing a last edit, iMovie allows you to revert a clip to its original state. Keep in mind that iMovie doesn’t alter a clip when you cut or crop videos. It merely moves its internal pointers to the section of the clip you want to utilize in its place.
Recovering Deleted Clips in iMovie
Beyond Undoing, there are times when you may delete a clip and need to restore it. Thankfully, there are ways to restore clips in iMovie. Below are a few of them.
- Checking Trash Bin
The Trash folder on your Mac is a unique container for temporarily storing deleted files and making them accessible for easy recovery from your computer. To retrieve an iMovie file from the Trash, simply click on the trash can icon to open the trash.
Look for the iMovie file you wish to recover by scrolling through the folder. To return an item to its original location, right-click on it and choose Put Back.
- Checking iMovie Library
You may have a lost iMovie project on your hands for various reasons. If you are looking for a lost project, it may be missing from the iMovie library file. Check to see if your lost project can be retrieved from the library by opening the iMovie Library(It is by default located in your Home directory’s Movies folder).
Then, Show Package Contents by choosing the iMovie Library file with a right-click of the mouse. Find the desired iMovie project using a search. Double-click the file to restore the project if you find it.
- Search Mac
iMovie files can get lost easily, especially when you are not accustomed to the program. Libraries are where projects are saved, and you may end up with several libraries distributed across various external storage devices. Your missing projects might be found if you thoroughly examine your Mac and any external storage devices.
The ‘imovielibrary’ extension is used to save iMovie libraries, which are saved as iMovie Library.imovielibrary. Start by launching the Finder and In the search field in the top-right corner, enter the following search term: KIND:iMovie library. When you enter the search term, all of the iMovie libraries on the target device will be returned by this search.
- Using a Time Machine Backup
You might be able to recover a lost iMovie project if you use Time Machine to back up your Mac. One thing to keep in mind is that you need to restore an iMovie library, not specific projects, because of how the system is stored up. To restore a prior version of an iMovie library, connect your Mac to the storage device that holds the Time Machine Backup.
Next, launch a finder window in the iMovie library folder. By selecting the Time Machine icon from the menu bar, Time Machine will be opened.
Using the arrows and timeline of the software, go through the backups and snapshots to discover an iMovie library that might include your project. When you discover your project, click the Restore button after selecting the file to be restored. They move the iMovie library back to its original spot. You will also be given the option to keep both the original library and any replacements.
Finally, open iMovie, go to the newly restored library and check to see if the missing iMovie project has been found. When you finally restore your iMovie project, you can go ahead to carry out some edits on it such as moving texts and adding subtitles.