iMovie, the video editing software for Mac and iOS devices, offers a variety of tools for adjusting the speed of a video. iMovie makes it easy to make a clip play faster or slower. In this guide, we’ll show you how to speed up a video on iMovie in just a few easy steps. With a little bit of practice, you’ll be able to create professional-looking videos in no time.
How to Speed Up a Video on iMovie
Step 1: To speed up a particular clip from your video, just click on it in the timeline.
Tip: You can use Command + A to select your entire timeline.

Step 2: Locate & click the speedometer icon in the upper-right area of the screen, just above the video area.
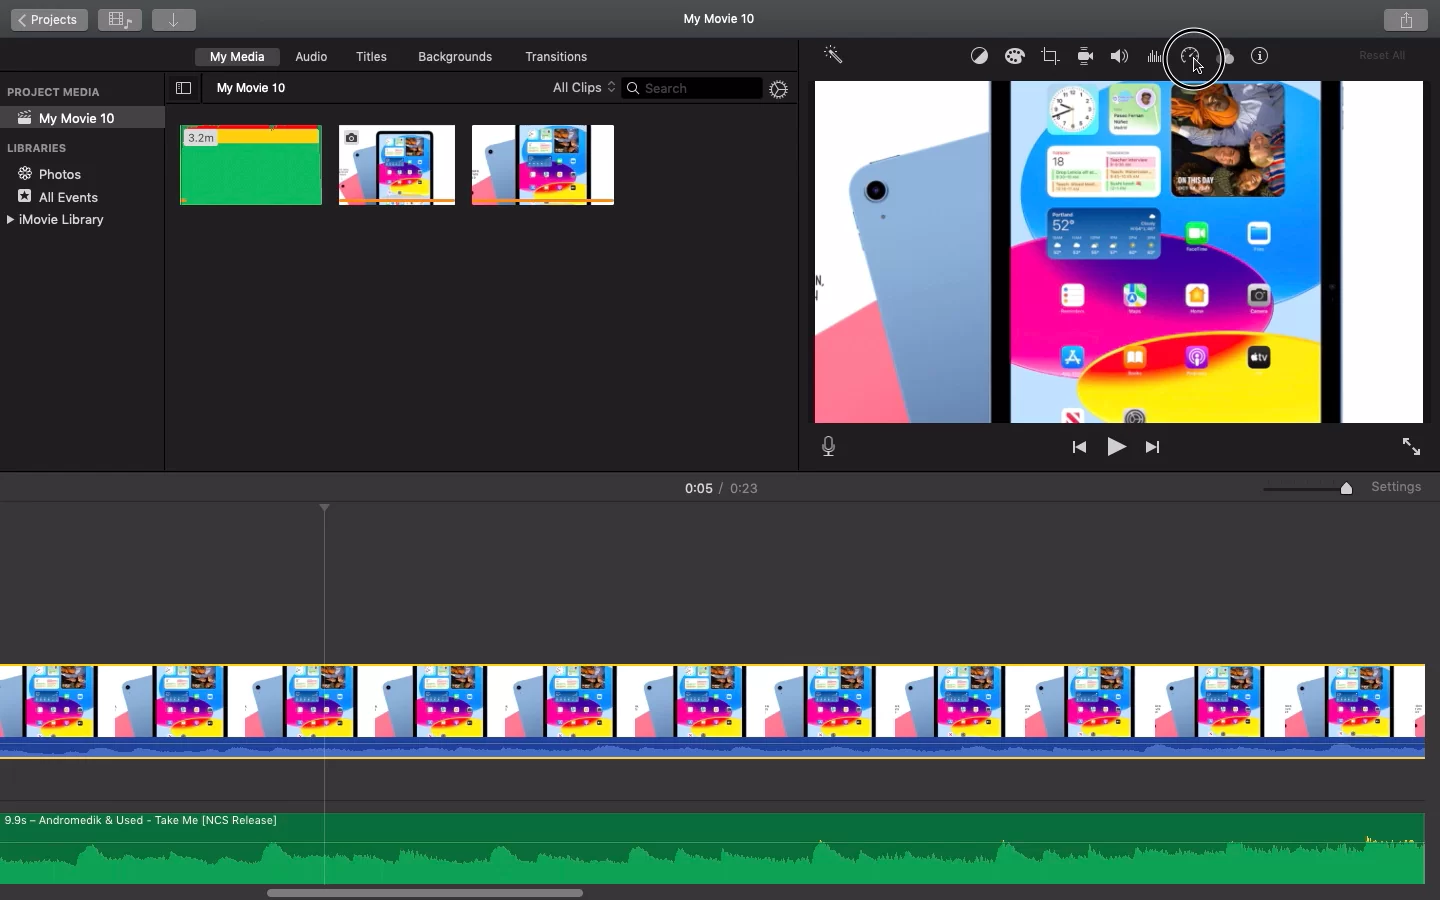
Step 3: Now you will be able to see the Speed settings for your clip, by default there are 4 options, Normal, Slow, Fast & Freeze Fast. You can choose any of these based on your requirement.
Tip: You can use the Custom option to specify the exact speed you would like, a value less than 100% would enable slow-motion and vice-versa.

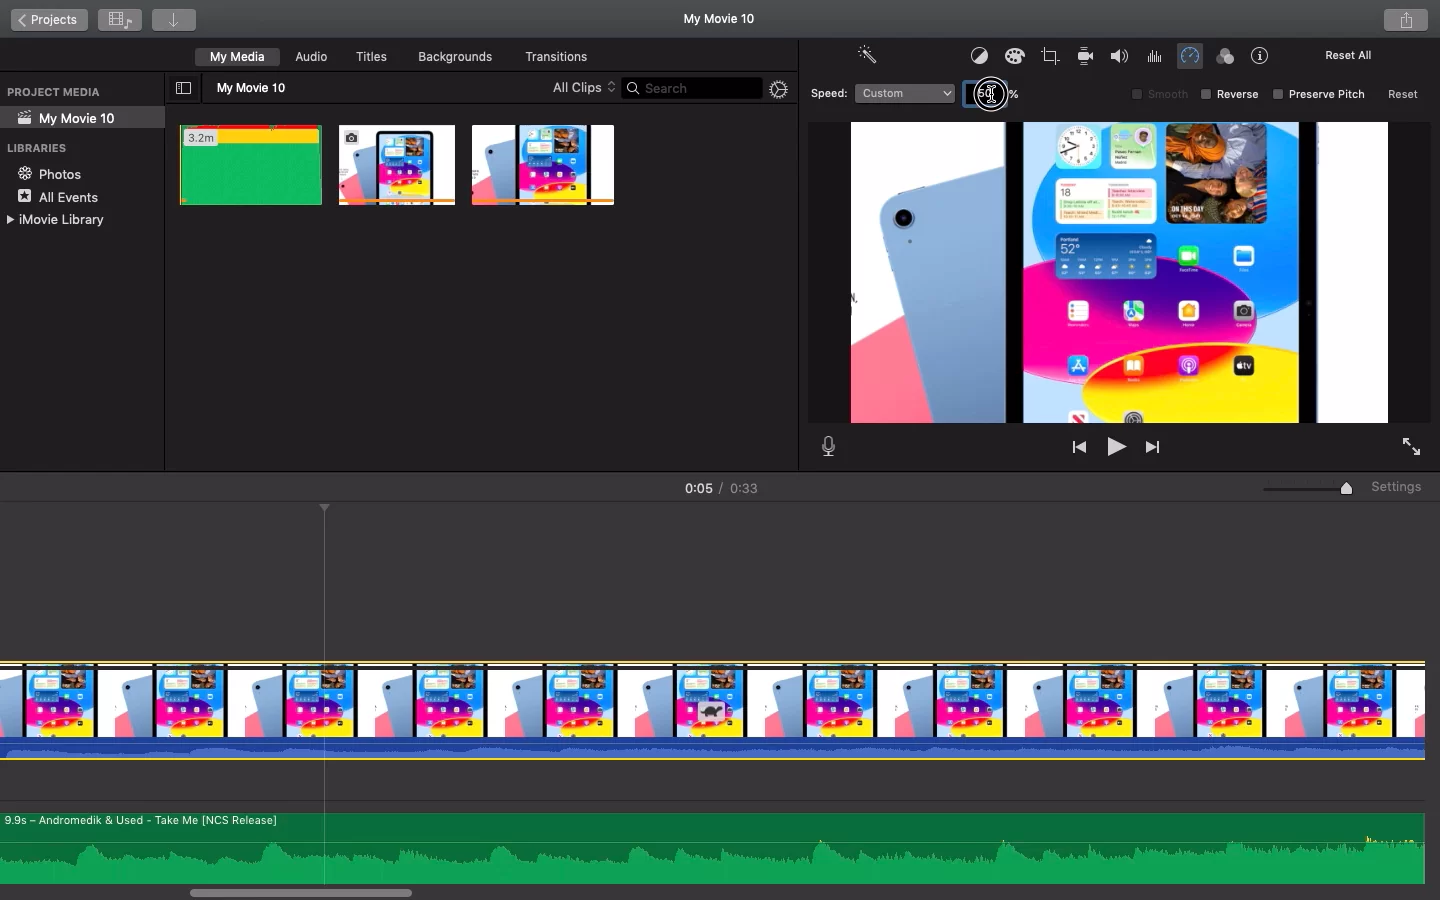
Step 4: You can also choose to reverse your video clip from this toolbar by enabling the check-box.
Tip: If you feel the voice isn’t very clear post speeding-up or slowing-down your clip, you can then use the preserve pitch option.

Adjusting Video Speed in iMovie Using iPhone
iMovie is a great video editing software which can help you do things such as cropping a video and even fading music. By breaking a clip into ranges, each with its speed, you can fine-tune speed alterations for a single clip. You may specify several ranges so that a clip speeds up, slows down, and then speeds up again. Additionally, you can stop time in your movie by freezing a single frame. Follow the steps below to adjust your video speed using the iPhone.
Step 1
Start by opening a movie project with the iMovie software on your iPhone.
Step 2
The next step is to display the inspector at the bottom of the screen and tap a video clip in the timeline. Then tap the Speed button.
Step 3
At the bottom of the clip, a yellow bar with range handles emerges. You can choose one of the following actions to generate ranges inside a clip: Pick a yellow range handle and move it or create another range and tap Add in the inspector.
Step 4
The next step is to drag the slider to the right to speed things up or to the left to slow things down in the inspector.
Step 5
The relative speed is shown beneath the clip as you drag. For example, 2x indicates twice the regular pace, 1/2x indicates half the normal speed, and so on.
Step 6
If you wish to make more ranges, tap a section of the clip outside the one that is now chosen, or use the inspector’s Add button to draw a range border where the playhead is.
Step 7
Drag the yellow range handles to change the range, and then use the slider to change the range’s speed. At the bottom of the clip, a vertical white line denotes each range you create.
Adding a Freeze Frame to Your Videos Using iMovie
Follow the steps below to add a freeze frame to your videos using iMovie.
Step 1
Start by opening a movie project with the iMovie software on your iPhone.
Step 2
The next step is to find the frame you want to freeze, touch and hold a clip in the timeline while swiping left or right. To access the inspector at the bottom of the screen, tap the video clip in the timeline.
Step 3
By pressing the Speed button at the bottom of the clip, a yellow bar with range handles emerges.
Step 4
Then Tap Freeze on the inspector’s menu. The frame at the playhead position will become frozen when you tap freeze and both ends of the frame will still be connected to the source clip. To change the freeze frame’s length, move the yellow range handles.
Step 5
The bottom of a video clip in the timeline displays a freeze frame with yellow range handles, starting at the playhead position. Tap anywhere within the clip’s freeze-frame range, then select Freeze in the inspector to get rid of the freeze frame. Tap anywhere outside then Inspector to dismiss it when you are done.
If you liked reading this article, you will definitely love this article on splitting a clip using iMovie.
Leave a Reply
You must be logged in to post a comment.