Saving a file on InDesign isn’t quite as simple as using Ctrl + S. Saving an InDesign file is an essential task when working on any document. It not only allows you to access your work later, but it also enables you to share your document with others.
InDesign provides a variety of options for saving your files, including the ability to save a copy, save a version, or export your document to a different format. In this tutorial, we will show you step-by-step how to save an InDesign file, so you can keep your work safe and accessible.
How to Save an InDesign File
To save your document on a specific location, simply click file > save as
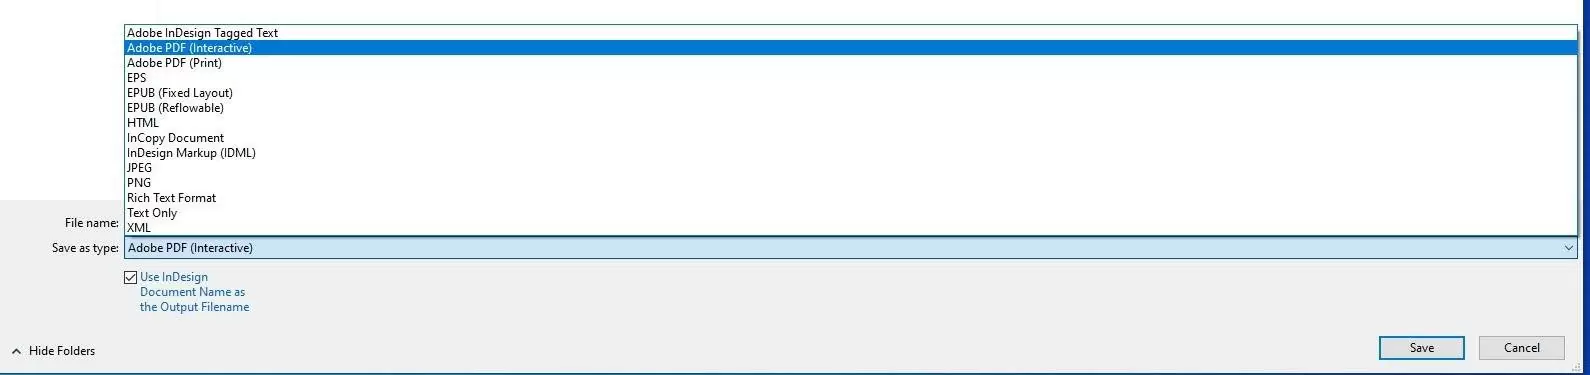
You have the option of saving your file type as an InDesign Doc, IDML as PDF, HTML, EPUB etc.
You’ll also need to name your file. It’s important to use a name that is easy to remember.

Step 2
After saving the file, click file > export.
We also recommend that you check our in-depth guide on how to turn off hyphenation in InDesign.
How to Save InDesign Files as Print-Ready PDFs
You must first open the File menu when you want to start saving your InDesign file as a ready-to-print PDF. When you open the File menu, the next thing is to click Export. When you click Export, InDesign will first open an Export dialog window which will allow you to name your file and choose the export format.
When the format dropdown menu comes up, choose Adobe PDF, name your file and click Save.
Now let me show you some quick tips that will help you.
InDesign will open the Adobe PDF export dialog window. In the dialog window, you can edit all your PDF settings and display options. Don’t be overwhelmed by all the clutter in the dialog window. It gets easier, I promise.
Adobe includes some helpful PDF Presets that are meant to ease you through configuring a PDF file.
There are two very popular InDesign PDF export presets, and they are High-Quality Print and Press Quality. The two are generally quite similar. However, the Press Quality preset produces the highest-quality result and includes color conversion options.
However, before exporting your file, make sure to verify them through professional printers. This is because professional printers have their specifications. Use the High-Quality print preset when creating PDF files that will be printed on laser or inkjet home or office printers.
The General section contains some of the most basic options for setup and display. You can specify whether you want your PDF to show layout spreads or individual pages. The layout spreads or individual pages can be set by choosing page ranges.
Remember that you are creating a PDF document, so it is advisable to leave the other settings on the page at their default. The next thing to do is switch to the Marks and Bleeds section. You may want to crop marks or other printer marks to your document if you print at home. When you are done, click export!
Also, check out our detailed guide on how use overset in InDesign.
How to Save InDesign Files as Interactive PDFs For Screens
To begin the process of saving an interactive PDF that can show all sorts of interactive forms, open the file menu and click Export. When you are in the Export dialog, choose Adobe PDF(interactive) from the Format dropdown menu. When you are done, click the Save button after naming your file.
After naming your file, InDesign will open the Export to interactive dialogue. This dialogue allows you to customize all the displays and image quality settings for your PDF.
Most of the options in the dialogue box are easy to understand. But you should think carefully before using the Viewing Options. This is because how your PDF will be viewed when it first opens will impact your viewers. However, the ideal settings will depend on your design.
Set the Resolution to 300 PPI, which is the highest resolution that InDesign will support, then change the compression setting to JPEG 2000 (Lossless). While InDesign won’t upscale any of your photographs, it will try to maintain the best image quality.
Did you like reading this piece? Then, you will also like our in-depth guide on How To Add Fonts To InDesign.
Leave a Reply
You must be logged in to post a comment.