Resizing images in InDesign is a powerful feature that can help you create polished and professional layouts. It allows you to adjust the size of an image to fit seamlessly into your design. One of the main benefits of resizing images in InDesign is the ability to maintain image quality.
When you resize an image in InDesign, the program automatically adjusts the resolution to ensure that the final output looks sharp and clear. This is especially useful when working with high-resolution images that need to be scaled down to fit into a design.
Another benefit of resizing images in InDesign is the ability to create flexible and responsive designs. With InDesign, you can easily adjust the size of an image to fit different page sizes, orientations or devices. This allows you to create designs that look great on any screen or in any format.
In this guide, we will discuss how to resize images in InDesign and show you how to do it.
How to Resize Images in InDesign
Step 1
The Adobe InDesign toolbar has the basic scaling tool. Select the frame you want to scale in this case and click the scale tool. You can then drag the corners to make them bigger or smaller. The Frame tool in Adobe InDesign also lets you change the starting point of scaling by clicking once before dragging.

In this way, you can resize images easily
Step 2
Create a document and place the image in the frame.
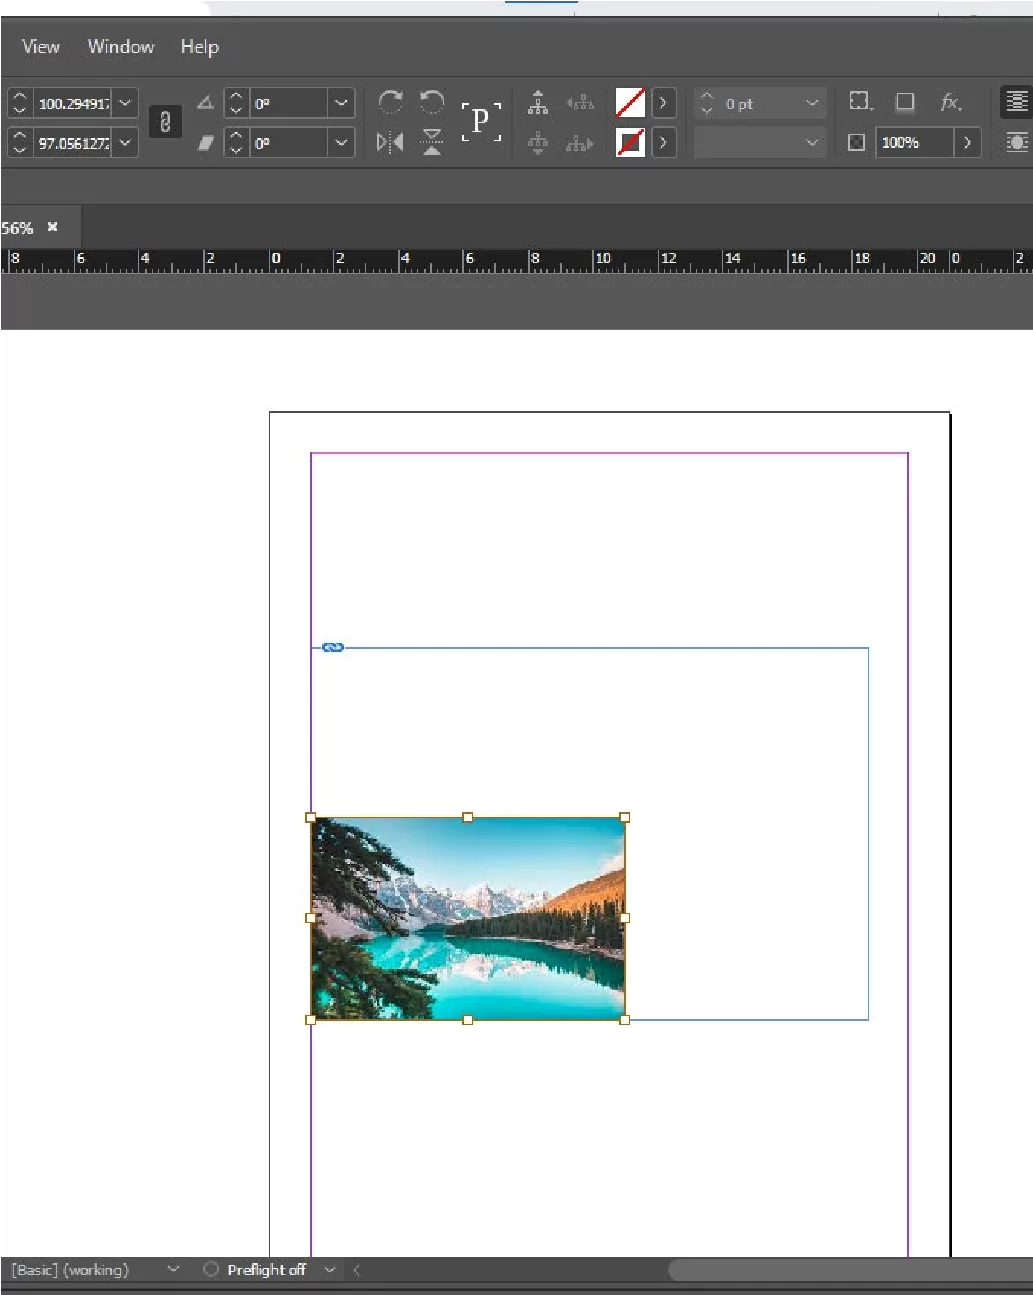
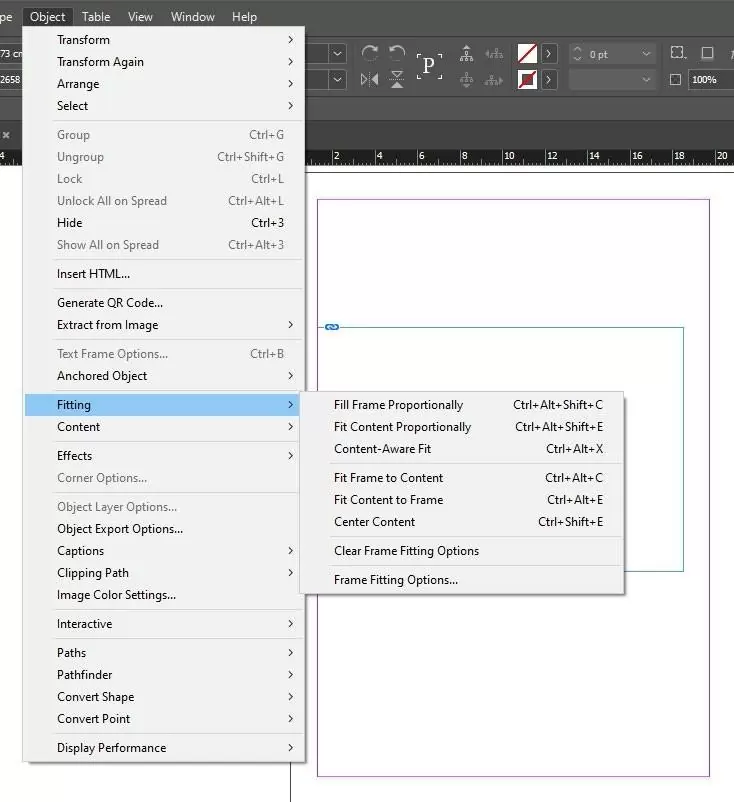
Step 2: Click on object>fitting and fit the image according to your need.
After applying to fit, the image will be set.
Also, see our information packed guide on how to change page size in InDesign.
Other Ways to Resize Images in InDesign
Apart from the method mentioned above, there are other ways to resize an image in InDesign, which I will mention in the next few paragraphs. Let us begin with the first method.
Method 1
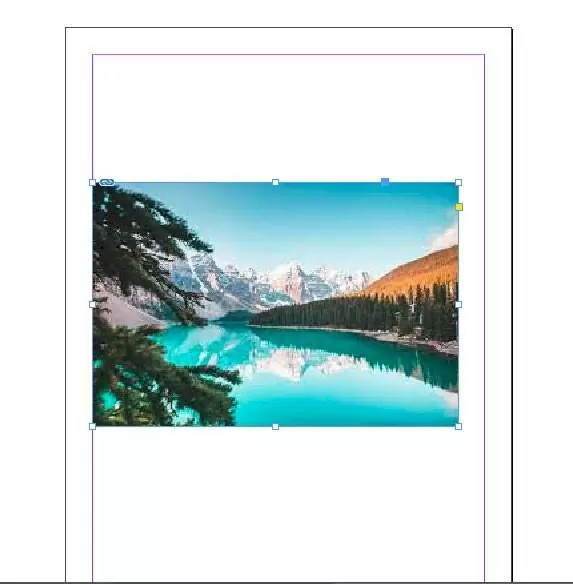
The first method is resizing the image by hand. The fastest way to resize your image is by using the image object’s bounding box. Keep in mind that the bounding box is different from the image frame. This means that you will need to activate the image object instead before you start resizing.
To use this method, start by switching to the Selection tool using the be Tools panel. Alternatively, you can use the shortcut V. Next, click once on your image to click the Content Grabber. Now click the Content Grabber to display the image object’s brown bounding box.
For the next step, click and drag any of the bounding box corners. This will resize your image. To resize the image proportionally, hold down the Shift key while resizing to lock the image to the current aspect.
You can also resize the image frame and object simultaneously if you want. You can do this by holding the Ctrl key as you resize. You can also combine the two modifiers. Hold Ctrl + Shift at the same time while dragging to resize the image frame and image object proportionally at the same time.
This method is easy, making it an excellent option for your layout’s intuitive composition stage. You may immediately experiment with various size and layout options without interrupting your flow to switch tools or perform any calculations.
We also recommend that you see our step-by-step instructions on how to link text boxes in InDesign.
Method 2
The second method is about resizing an image precisely with transform.
There are times when you’ll need to be more precise with your image resizing. Using the Scale transform command is the best option if this is the case. You can apply the Scale transform either to the object or frame. You can also apply it to the frame and object at the same time. This is dependent on which elements are actively selected.
If you are looking to resize the image and frame simultaneously, then click the image using the Selection tool.
On the other hand, If you want to resize just the image, start by selecting your image using the Selection tool. Next, click the gray content grabber to activate the image object.
Now you need to locate the control panel that runs across the top of the main document window. The control panel will provide several transform options if the selection tool becomes active. The transform options include the ability to resize the image using the width and height fields.
Make sure the small chain link icon is turned on. This is important if you want your image to be resized proportionally. The chain link icon connects the height and width using their current aspect ratio.
The final step is to enter the new dimensions for your image. You can specify the required size for your image in any measurement unit you like (including percentages), and InDesign will take care of the unit conversions for you because it has a lot of unit flexibility.
If you are not going to use the Control panel, you can also resize your image using the menus. Open the object menu, choose the Transform submenu and click Scale when your desired image element is selected. When you do this, InDesign will open the Scale dialog window, allowing you to enter the new dimensions for your image.
One of the advantages of using the Scale command from the object menu is that it allows you to create a scaled copy by clicking the Copy button. This would save you the time involved in scaling the original image.
If you enjoyed reading this guide, then we also recommend that you check out our detailed article on How To Save InDesign As PDF.
Leave a Reply
You must be logged in to post a comment.