The link text box feature in InDesign helps you to keep your text organized and make sure it displays correctly. This can be particularly useful when dealing with long documents that span multiple pages.
Linking also allows you to create a single chain of connected text boxes, making it easy to move content around or format it while still maintaining the integrity of the document. By linking your text boxes, you can even add new sections without having to adjust pagination.
Getting Started with Linking Text Boxes in InDesign
Step 1

Create a document of 1 page, then select the type tool and make the text frame fill with text. Then if the text is over, you can see this red point in the text frame.
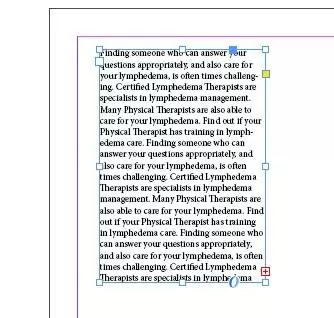
Click on this red point and make another frame for text to finish all the text and change the colors in 3rd frame to show that these text frames are linked. Change the color text, and if you remove some text, you can see that the text of the 3rd frame is moved toward the 2nd frame.
We also recommend that you see our information packed guide on resizing images in InDesign.

What is a Text Frame?
Before we talk about other ways to use a text frame, I think it is important for you to understand what they are. A text frame is one of the basic building blocks of InDesign projects. The term text frame and text box can be used interchangeably. When you add text to your document, it resides in a text frame container. You can resize these text frames and change things such as the number of columns in the frame. You can also change the spacings of the margins between the text frame and also change the spacings of the text inside the frame.
If you want to create a text frame, you need to use the Type Tool. For easy identification, the type tool looks like a T. Click and drag the Type Tool across the page to create a text frame. Next, use the Selection tool to resize the text frame that you created. You can select and drag the square handles on the frame’s corner.
Before you continue, pause and think about the layout of your document. The text needs to flow from one frame to another in a different document section or another page. When two frames are connected, it is known as linking text frames.
Every text frame has an in port and an out port. Those ports are used to link text frames. When you choose a text box, you will see a square at the corners of the frame. If you want to resize the frame, you can drag the handles, and the frame will be resized. Also, you will see slightly larger squares near the text frame’s top left and bottom right corners. The square at the bottom right is the out port, while the one at the top left is the in port.
You can also check see our guide on saving InDesign as PDF
How To Add a New Text Frame To a Thread
Follow the steps below to add a new text frame to a thread.
Step 1
Using the selection tool, choose the out port of the text frame. A text icon will load.
Step 2
Next, click or drag the text icon in an empty area. This will create a new text frame that contains the offset text.
How to Add an Existing Frame to a Thread
Follow the steps below to add an existing frame to a thread.
Step 1
Using the selection tool, select the text frame.
Step 2
Now select the in port or out port, and a text icon will load.
Step 3
Now hover the loaded text icon over the frame that you want to link to. You will now see the loaded text icon change to the thread icon.
Now click inside the frame you want to link to, threading it to the first frame.
If you enjoyed reading this article, you will also enjoy reading How To Make A Triangle In InDesign.
Leave a Reply
You must be logged in to post a comment.