Gimp has several tools that allow you to outline an image depending on your desired effect. You can add a border to your image, add a 3D outline, or add edge detection to your image. There is almost no limitation to what you can do to your image after you outline them using Gimp tools.
If you wish to outline your image on Gimp, there are simple steps you can take. One of the steps involves making sure you use a transparent background when you begin your image outline editing. Also, for people who are still new to using Gimp, outlining an image isn’t the same as outlining a text. They are two different things entirely. We have written an easy guide on how to outline text in Gimp.
Now that I’ve cleared that up, let me start by helping you understand the select-by-color tool.
What is the Select By Color Tool?
The Select by Color tool allows you to choose portions of an image based on how closely their colors match. It operates similarly to the Magic Wand’s Fuzzy Select feature.
The Magic Wand chooses contiguous areas, with all pieces connected to the beginning point by paths with no significant gaps. In contrast, the Select by Color tool selects any pixels that have a sufficient degree of color similarity to the pixel you click on, regardless of where they are located.
Steps to Outlining Images in Gimp
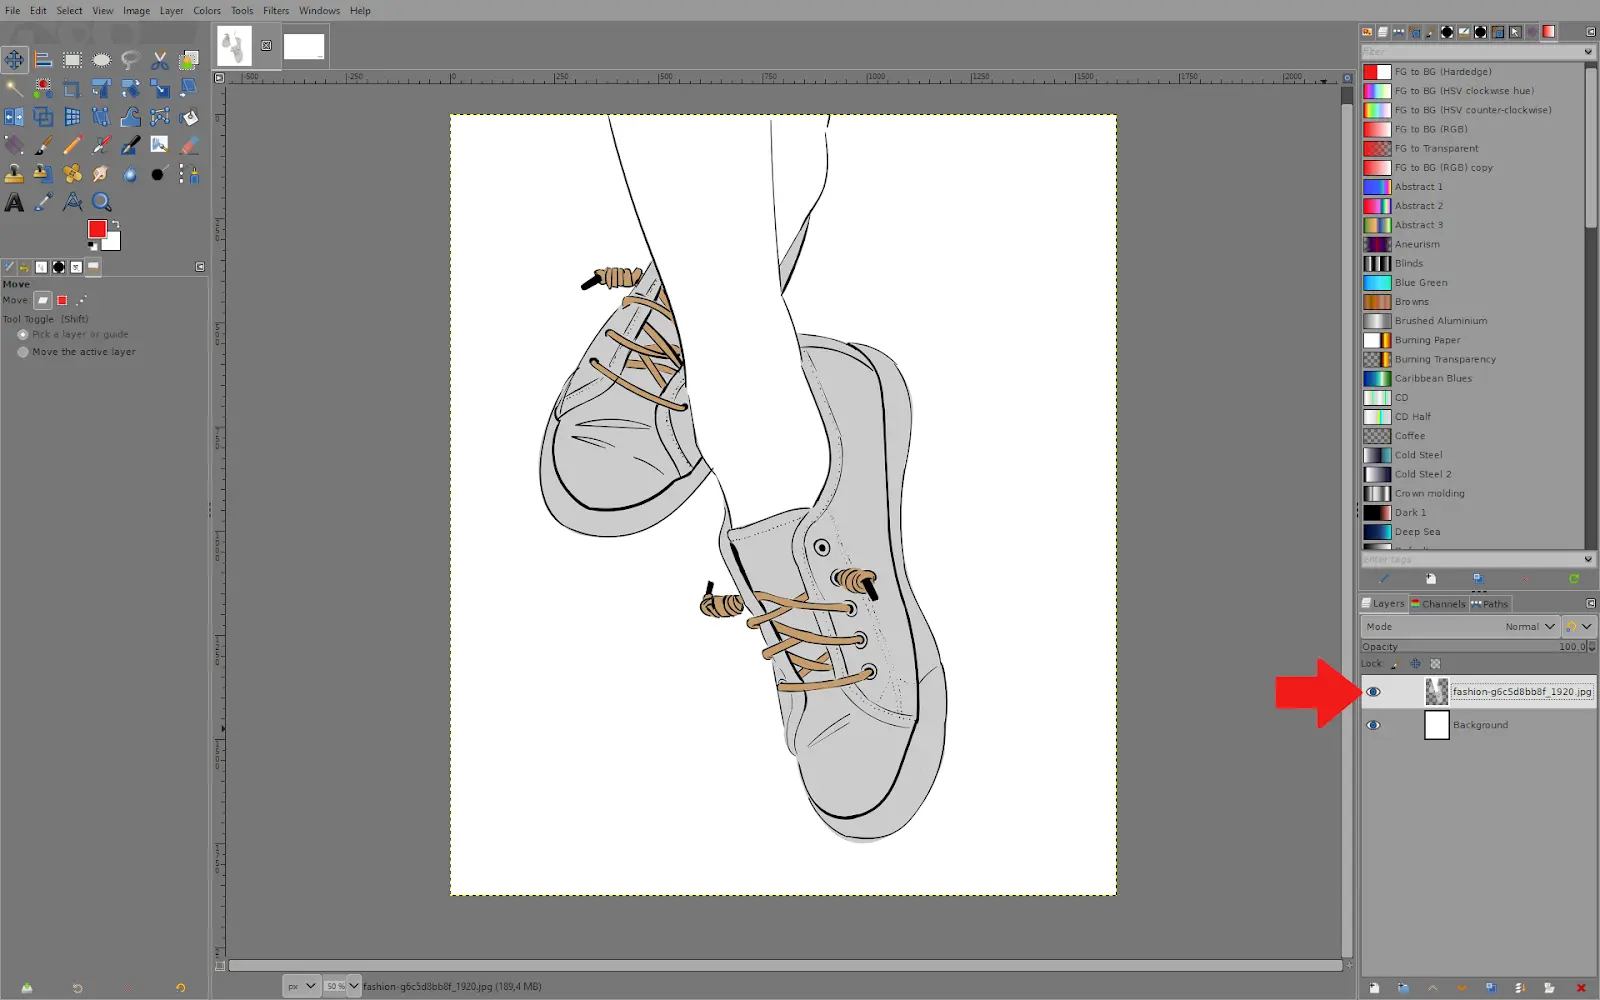
1. Open your image in GIMP. Make sure it has a transparent background; this project has a white layer as a background under the image layer.
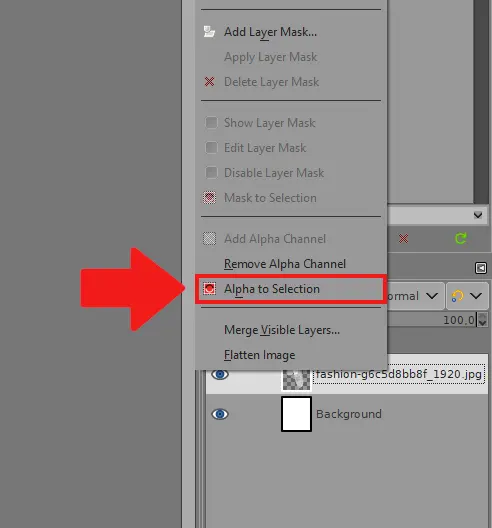
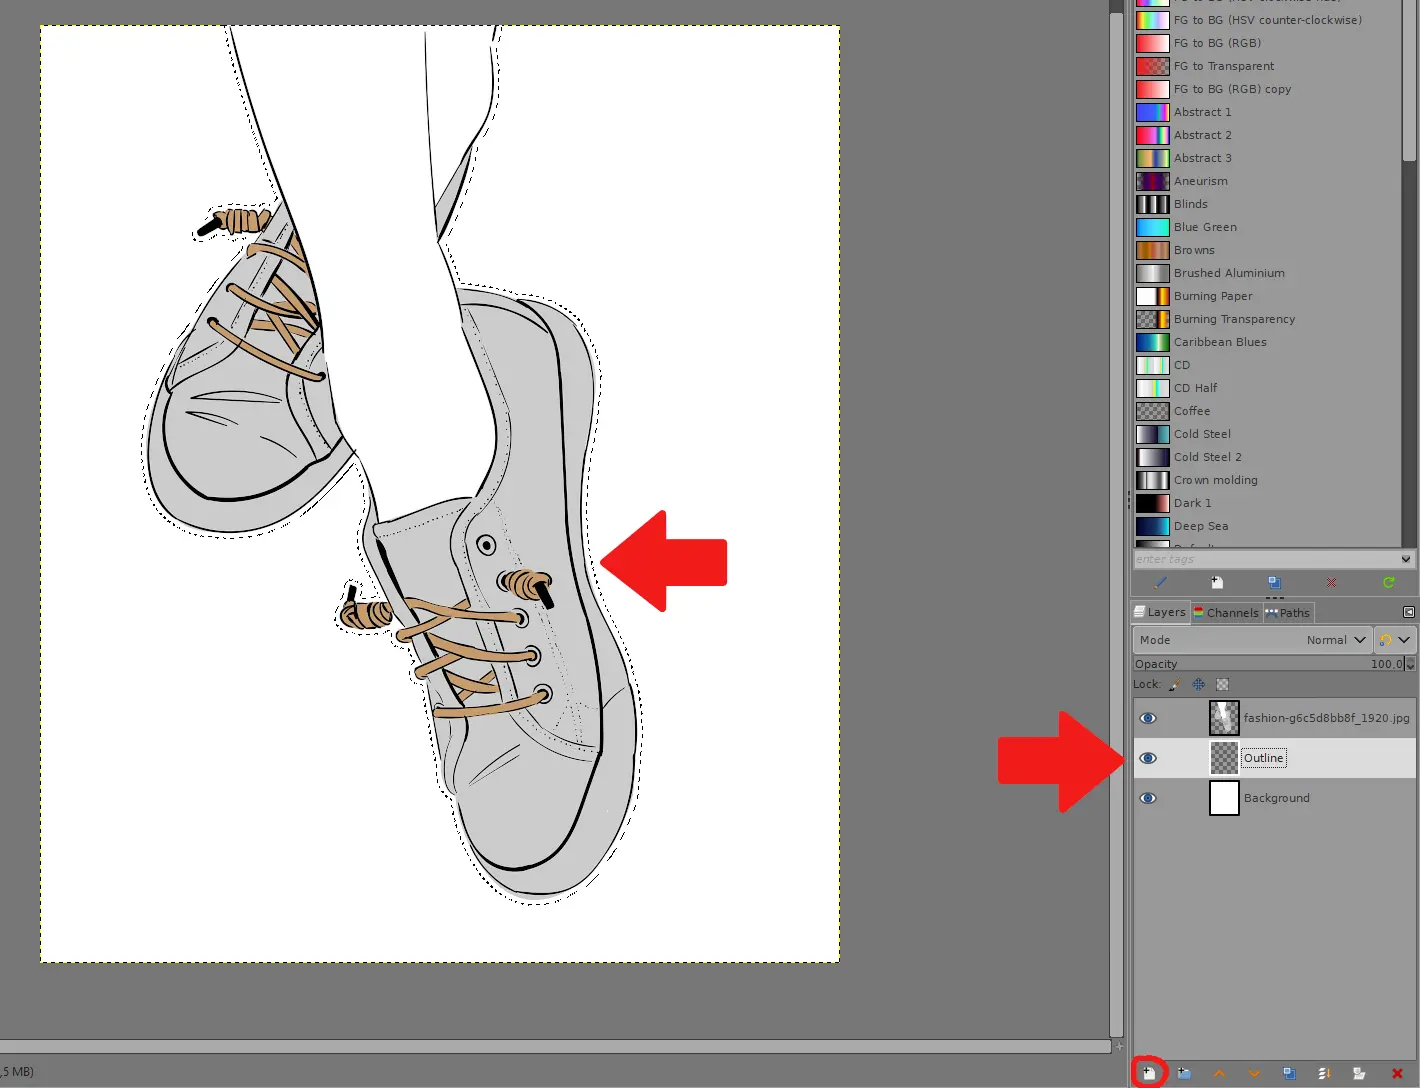
2. Right-click on your image layer and select ”Alpha to Selection”. This creates a selection around the image.
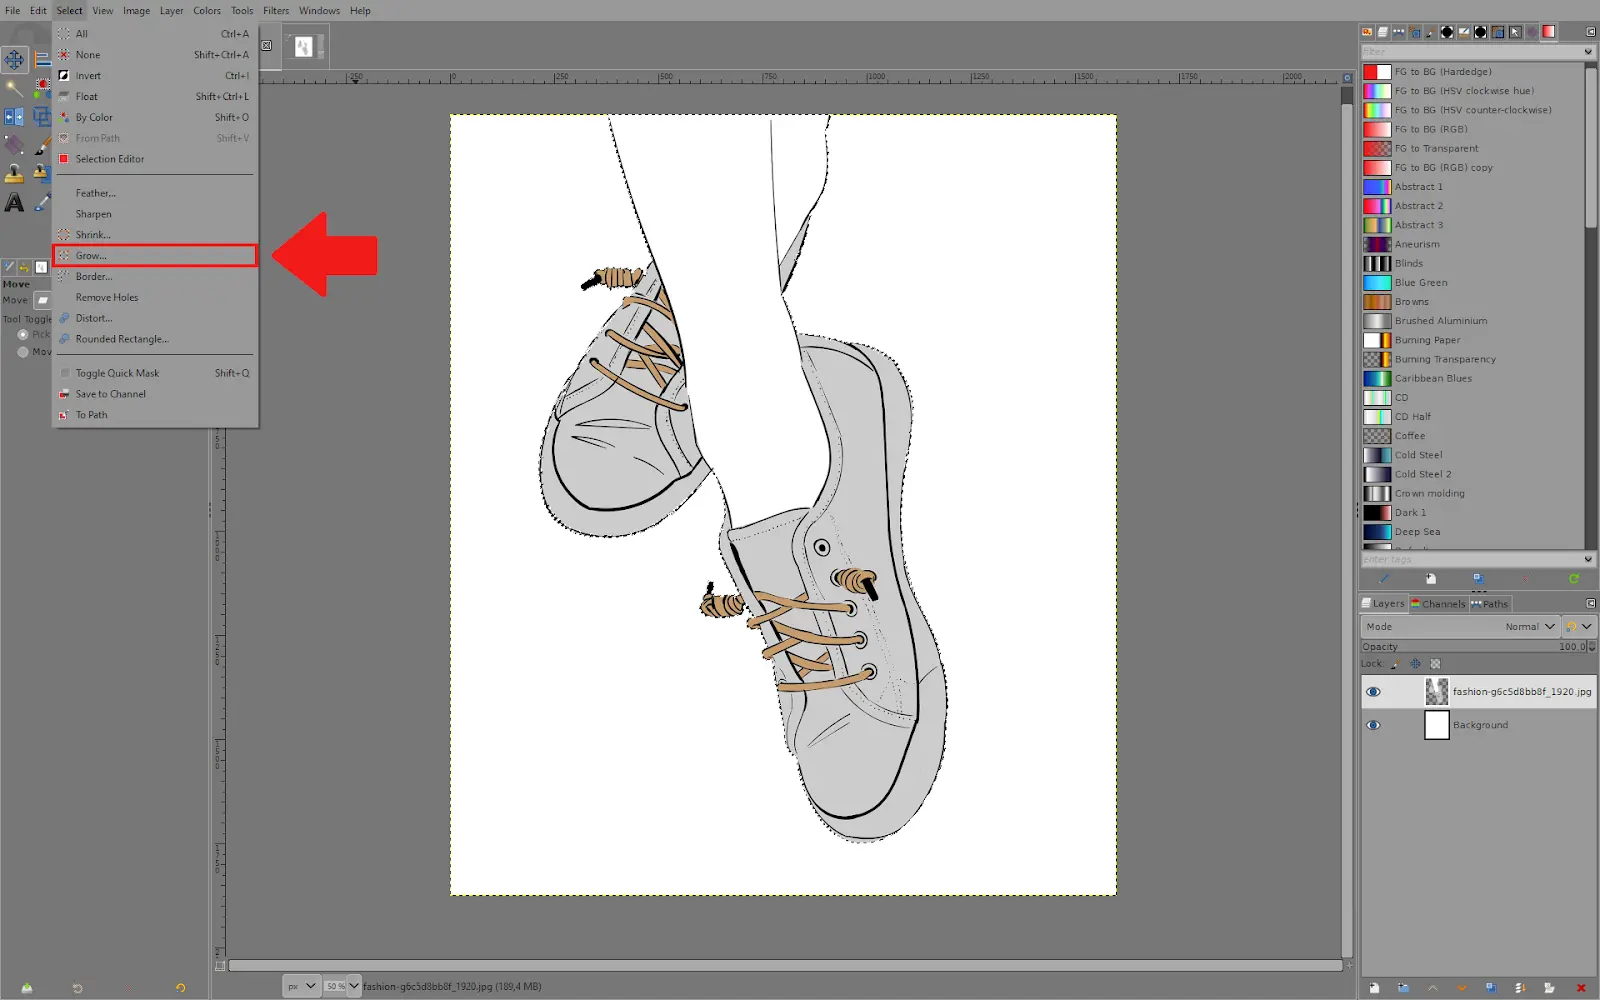
3. Go to Select – Grow.
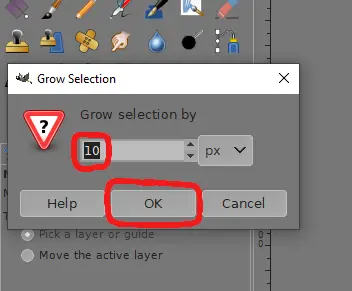
4. In this menu, select how many pixels you want to grow your selection. You won’t need a large number. You can also change from pixels to other measurements, like centimeters.
5. Click the icon at the bottom to create a new layer for the outline color, then move it between the background layer and the image layer. This way, the image will be on top of it.
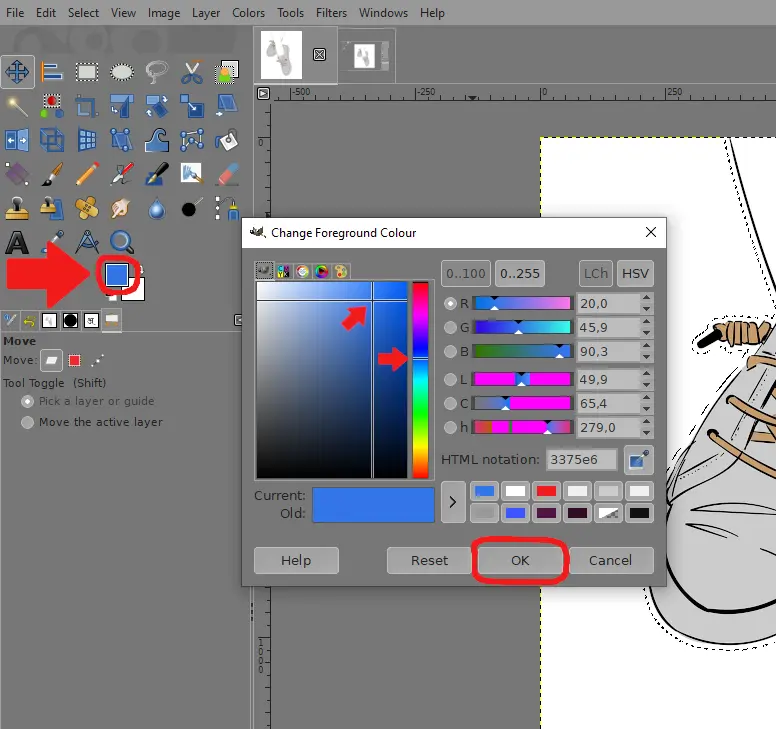
6. Now click on the foreground color icon to open the color selector, and move the controllers in the color board and spectrum to choose your outline color. Make sure to select a color that stands out from the image’s colors.
7. Go to Edit – Fill with FG Color.
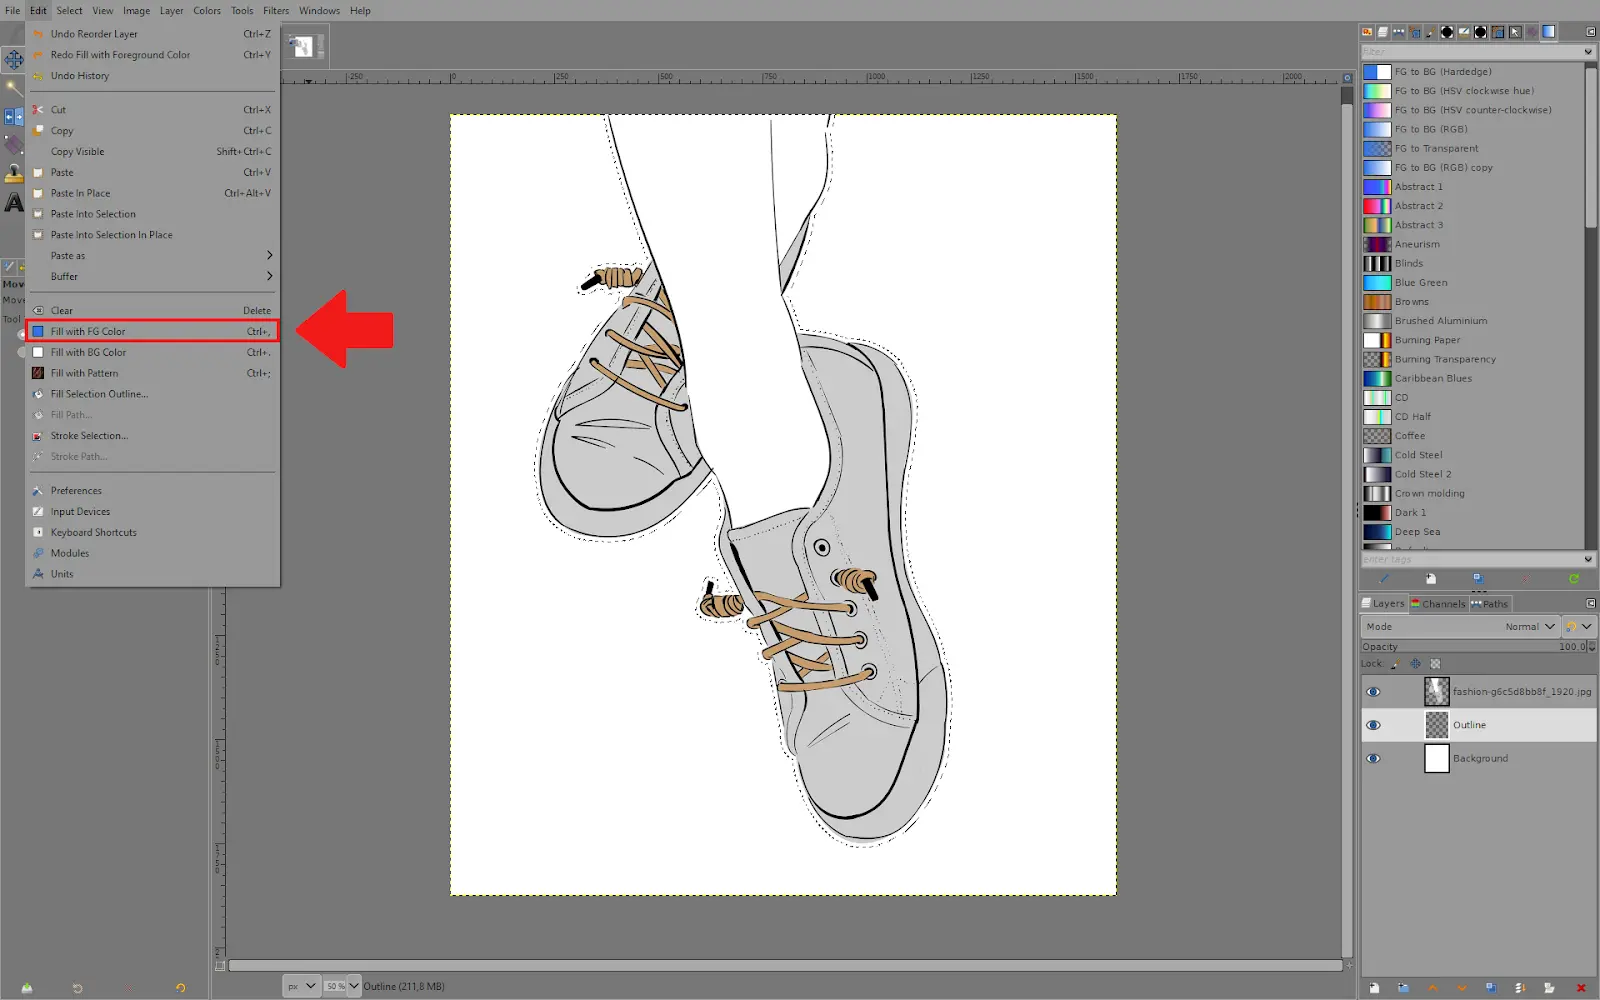
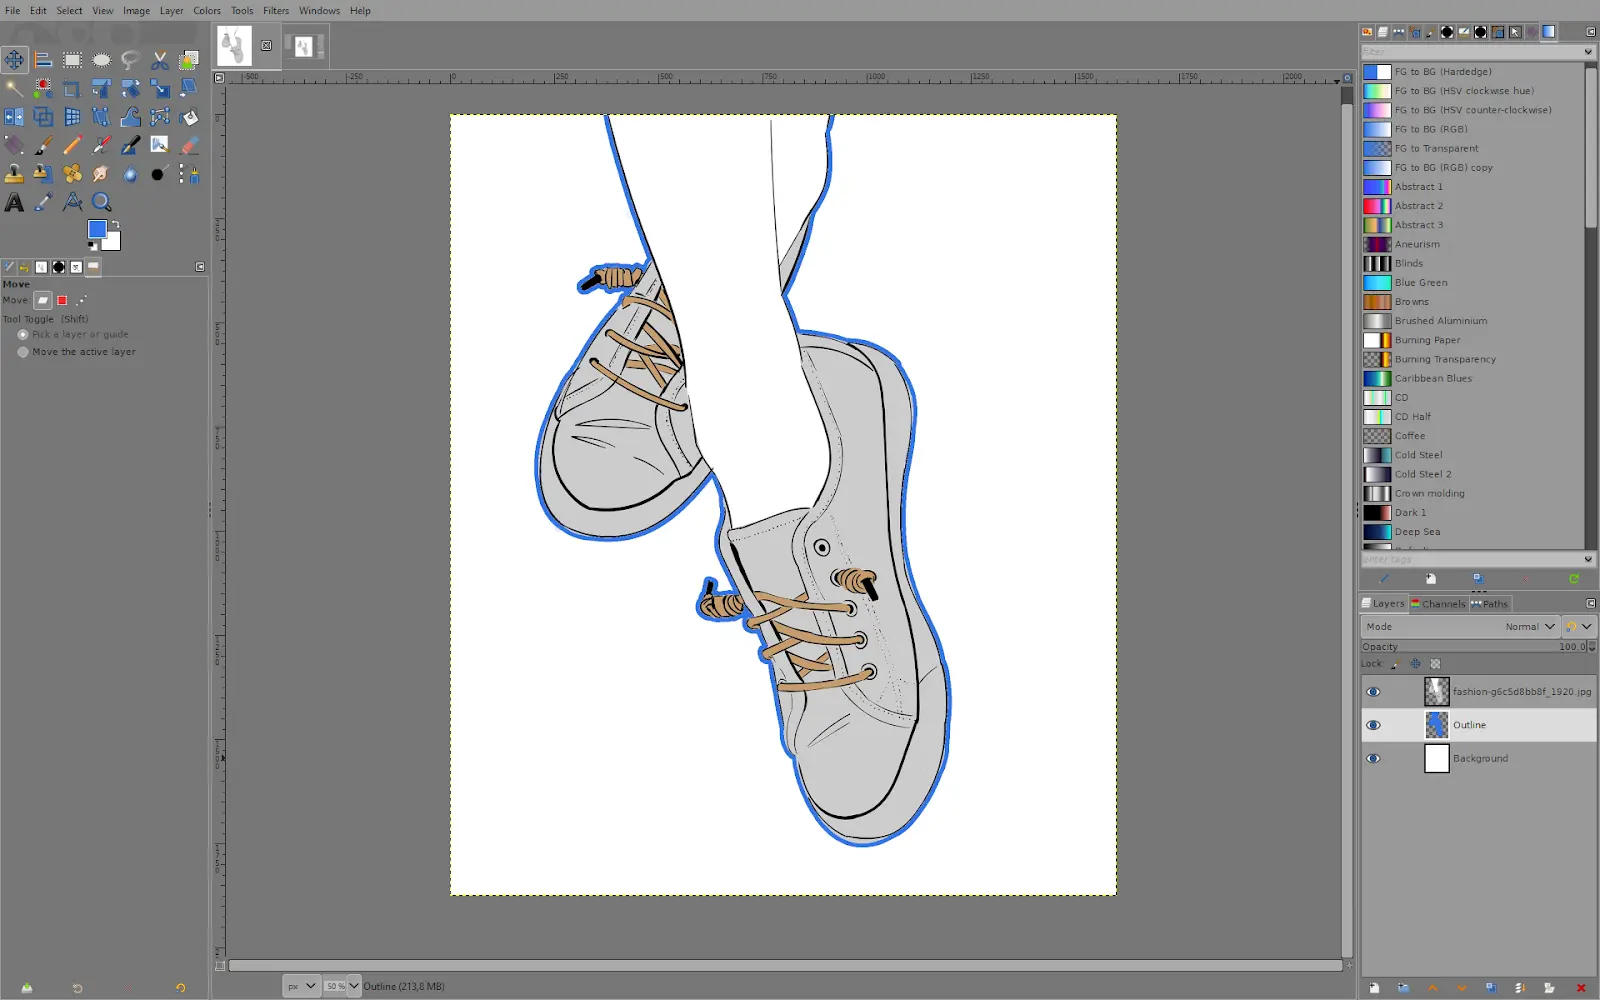
8. Now, you have outlined your image.
How to Outline Objects With Edge Detect on Gimp
Here is how you can outline your images and objects with edge detection on Gimp.
Step 1
First, click “Filters” after opening your image file. Next, from the drop-down menu, select “Edge-Detector.” Numerous selection options in GIMP can highlight different elements in your image to give it a neon effect.
Step 2
You choose “Sobel” for this step. What is the work of Sobel? Sobel looks for vertical and horizontal borders when looking for edges between colors in images. You may adjust the amount of darkness in the image and the thickness of the outlining borders on the Amount slide. The radio buttons determine the image limits. It is advised that “Smear” should be left as the default. Click “OK” when you are done.
Step 3
Check the results, and you will see the results of the outline on your image. It is also advisable for you to go back and fiddle with different settings and edge detection filters.
We recommend that you also read our article on how resize image on Gimp.
Leave a Reply
You must be logged in to post a comment.