Making GIFs can be fun and exciting. GIFs have become an incredibly popular way to express yourself in the digital space, but not everyone knows how to make one. Have you ever wanted to create a GIF for your blog or social media? Well, now’s your chance! Using GIMP (GNU Image Manipulation Program), you can easily turn any image into a moving masterpiece that’s sure to catch people’s attention.
In this post, we’ll walk you through how to use GIMP to make GIFs – and by the end, you’ll be ready to show off your creative skills!
How to Make GIFs in GIMP
Making a Gif on platforms such as Gimp is straightforward. With the help of animation tools readily available on Gimp, you can be well on your way to making your Gifs.
Let’s get started!
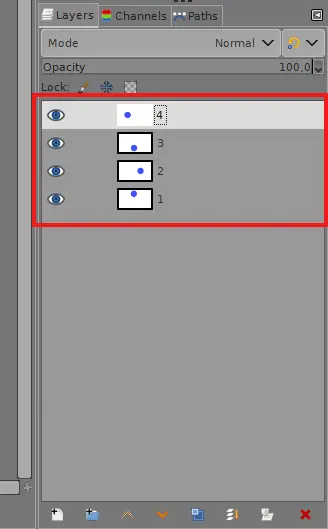
1. Start a project and create every individual image as a layer.
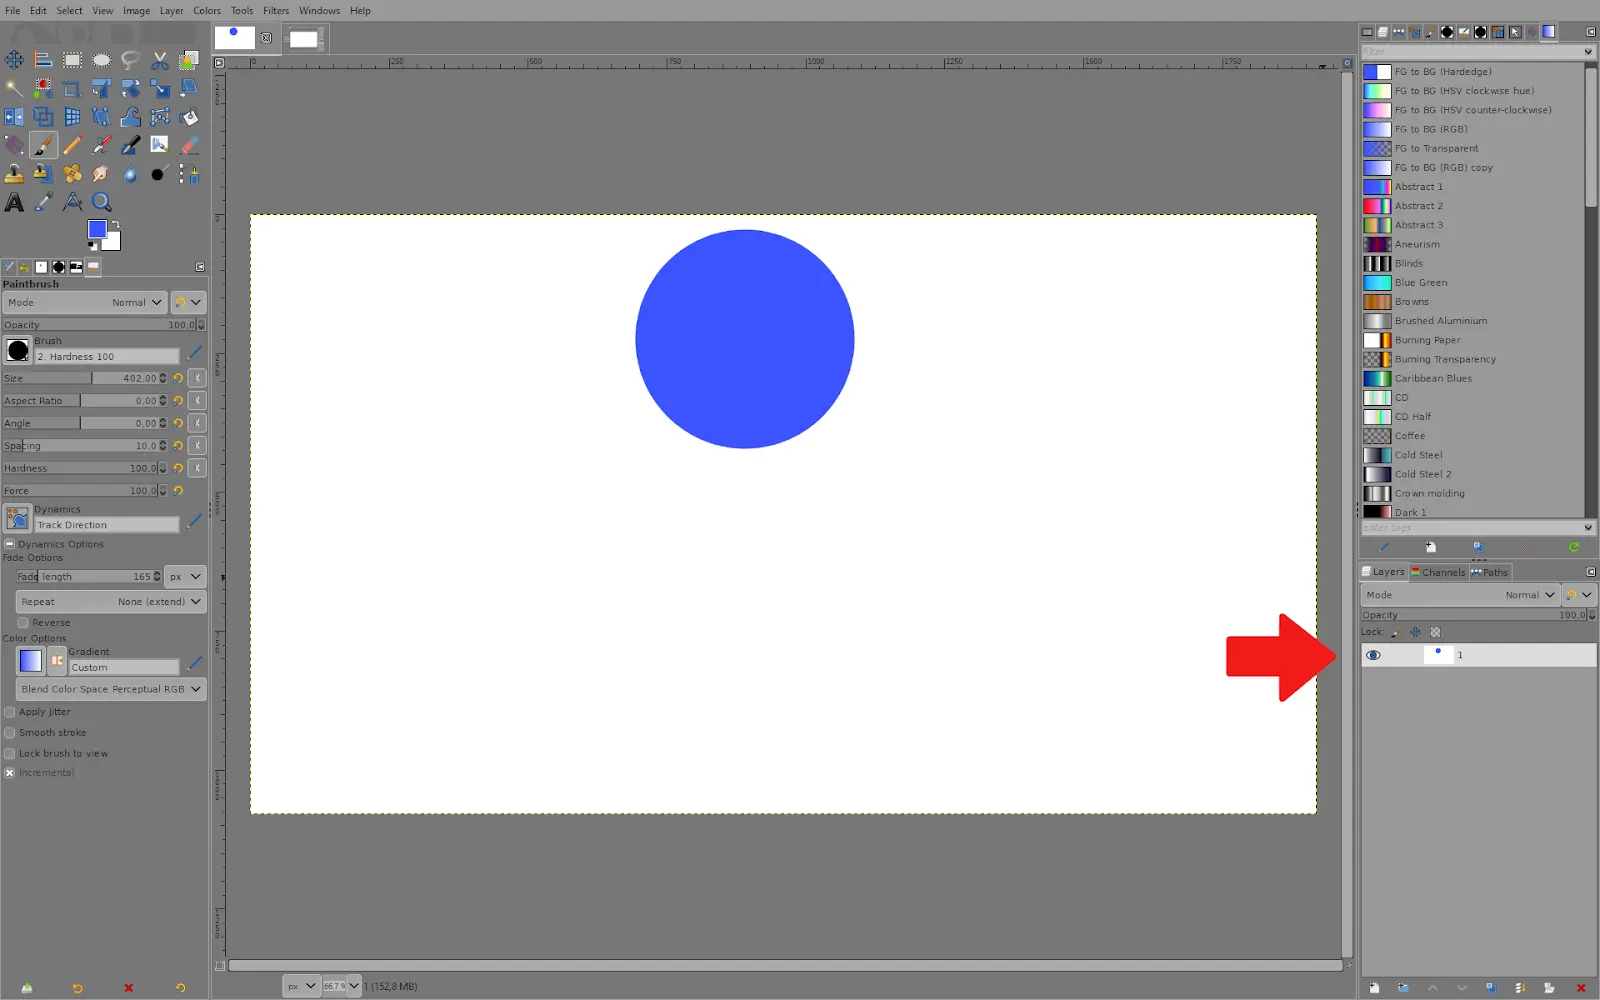
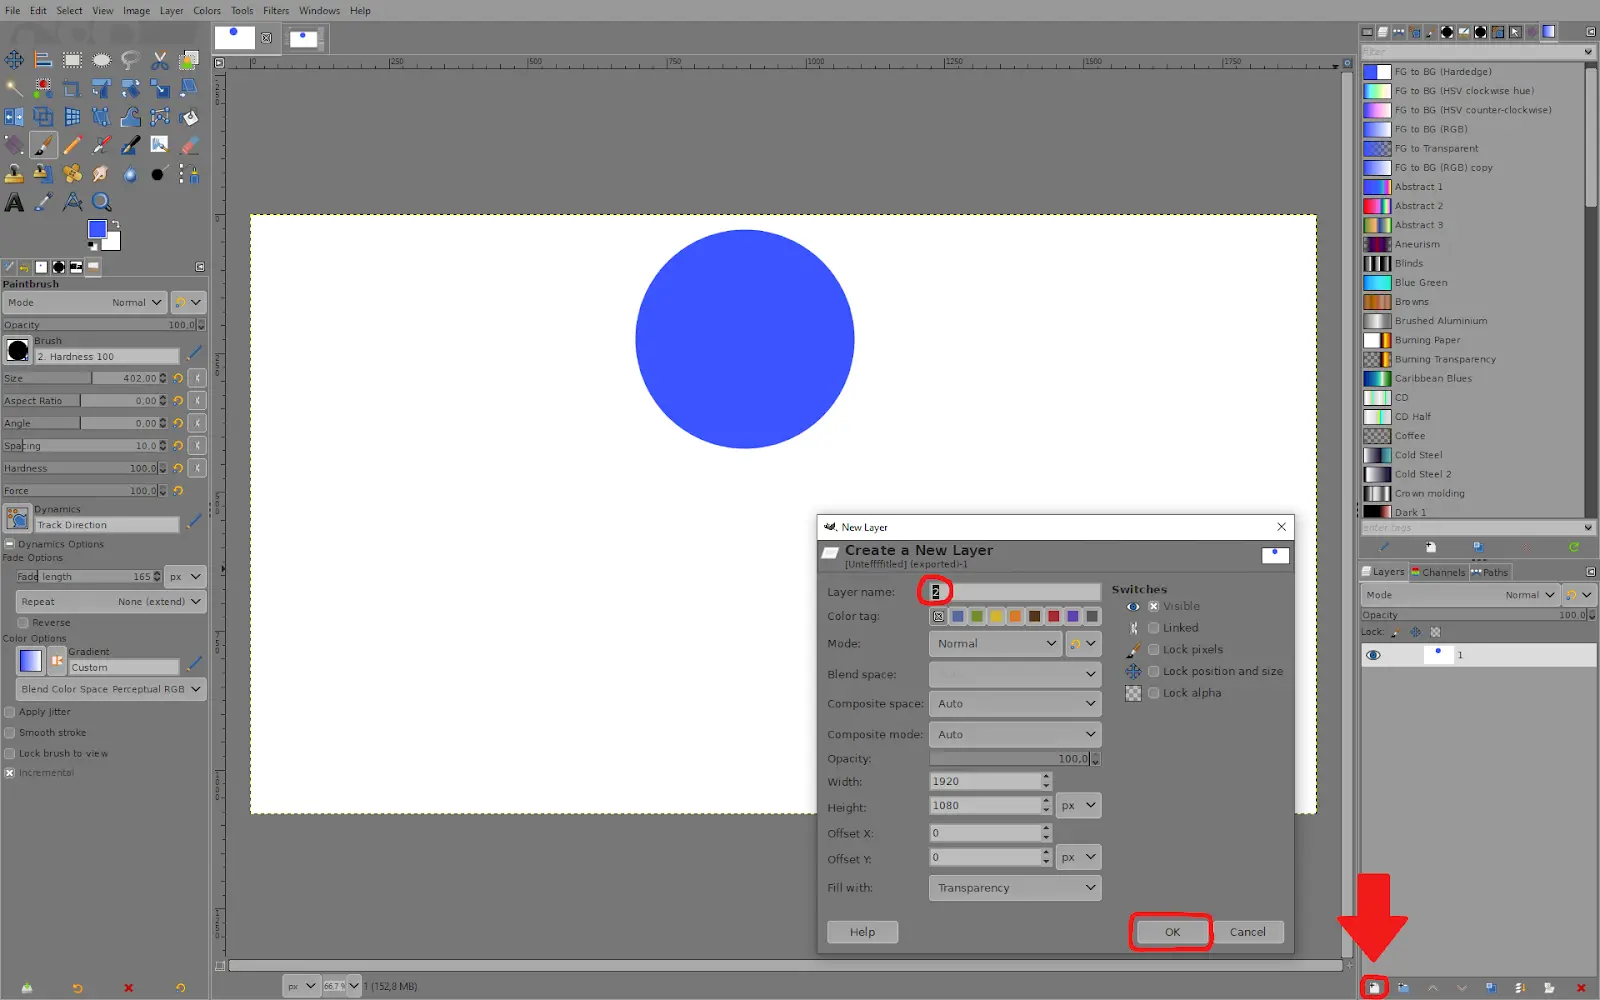
2. Create a new layer by clicking the icon at the bottom, and name it. Numbering them makes it easier to know which is which.
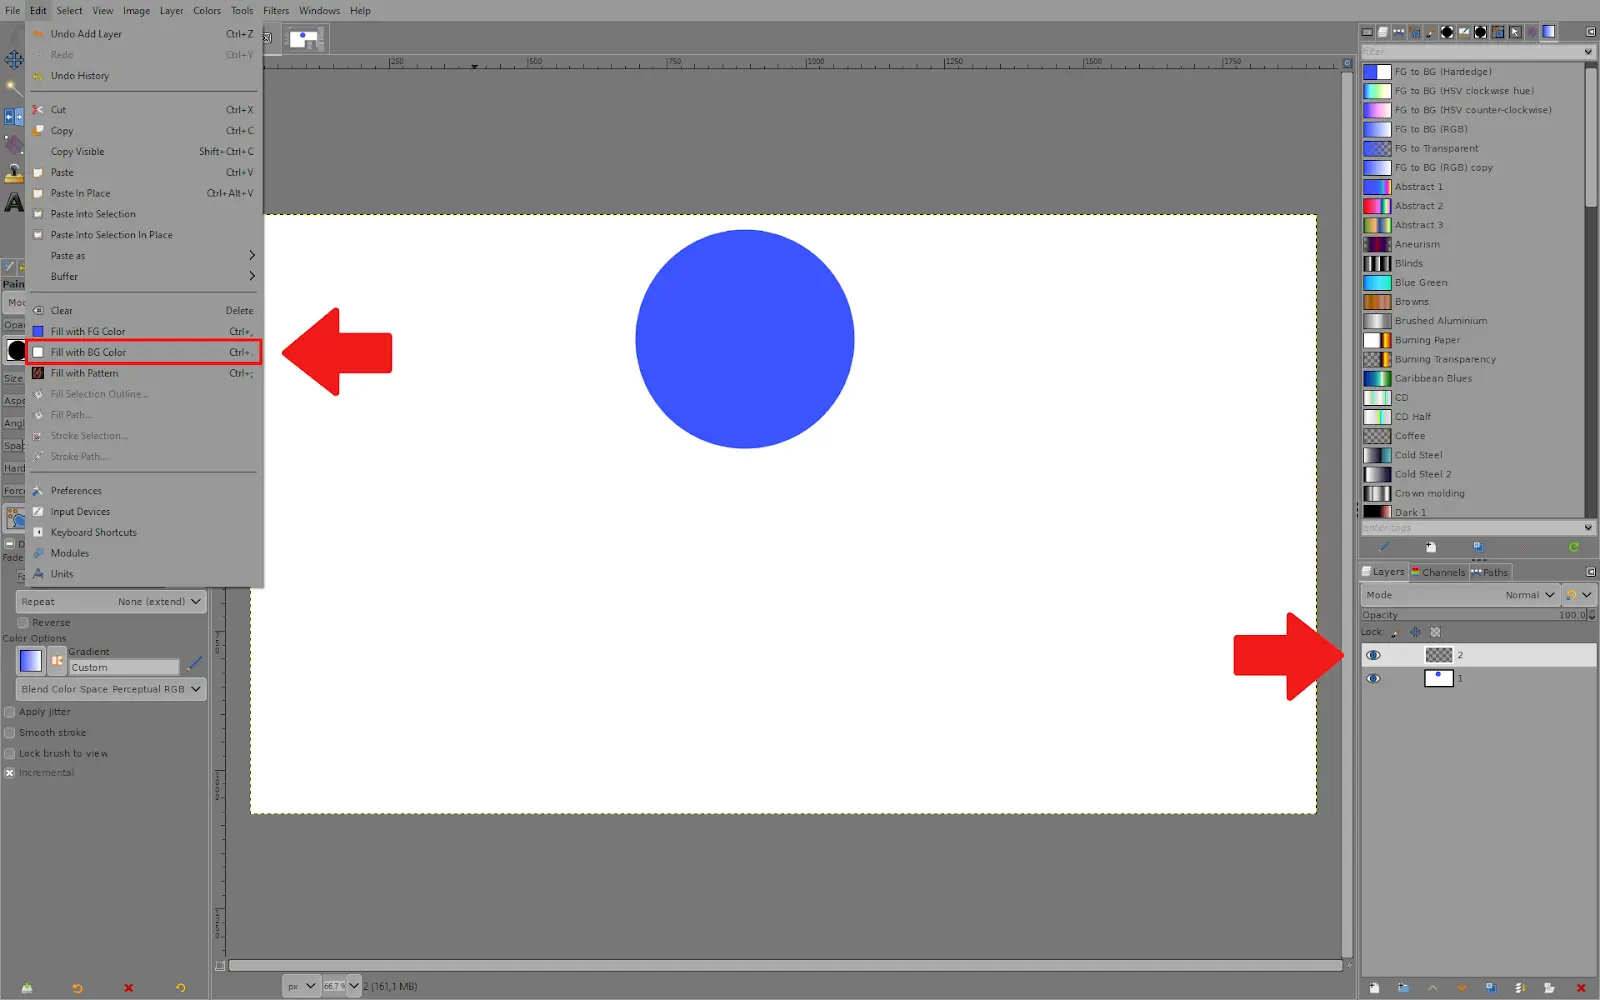
3. Remember to create a background for each layer by, for example, filling it with a color.
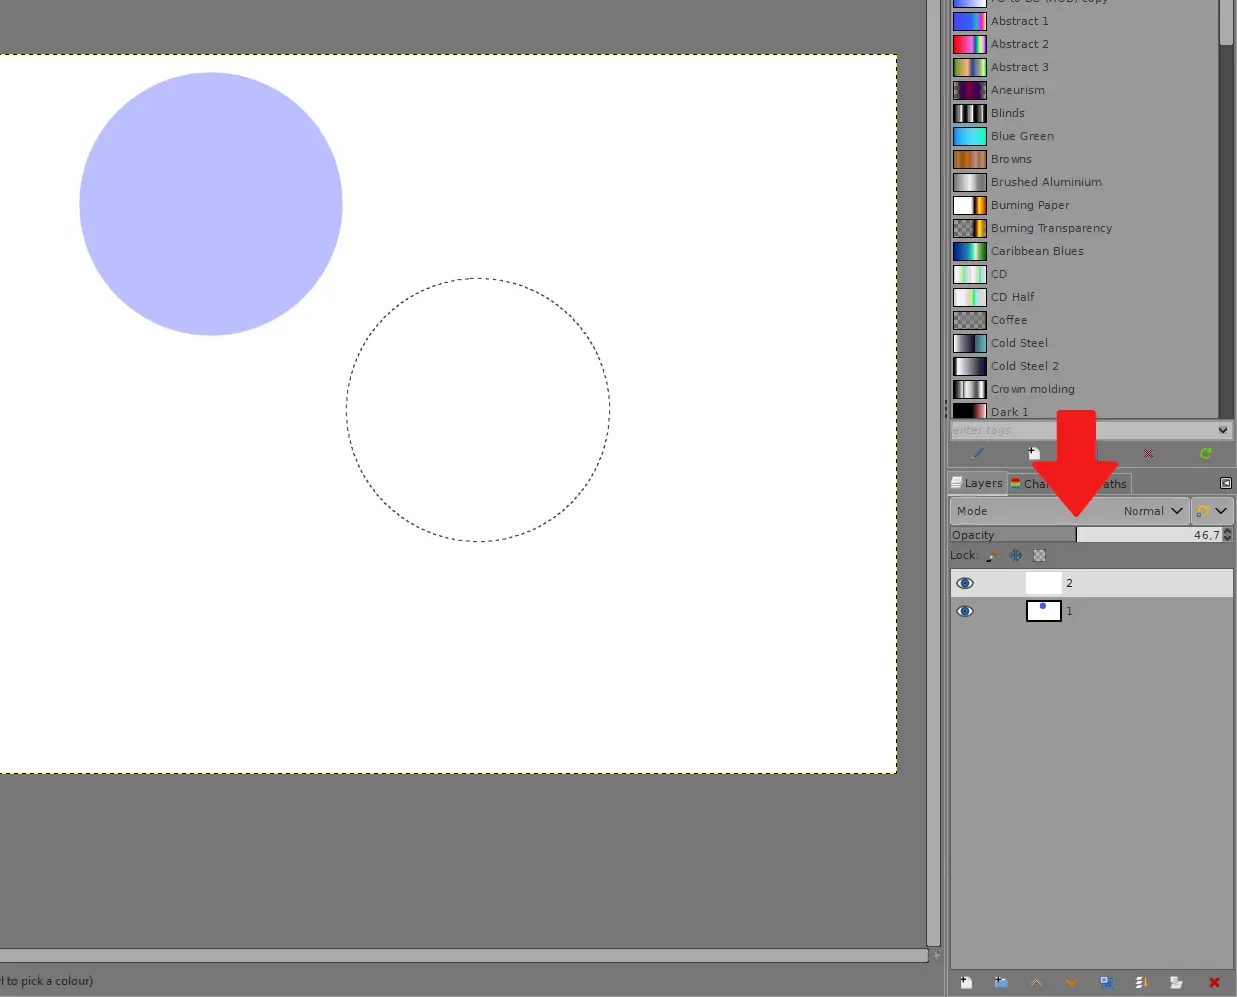
4. You can bring the opacity of any layer down while you are drawing; this makes it possible to see the layer underneath so you know where to draw again. Remember to bring the opacity back up when you are done.
5. When you are done creating the layers, make sure that they are in the right order.
6. Go to File – Export As. Remember that using Export As is the only way you can save your image as JPG or PNG in Gimp.
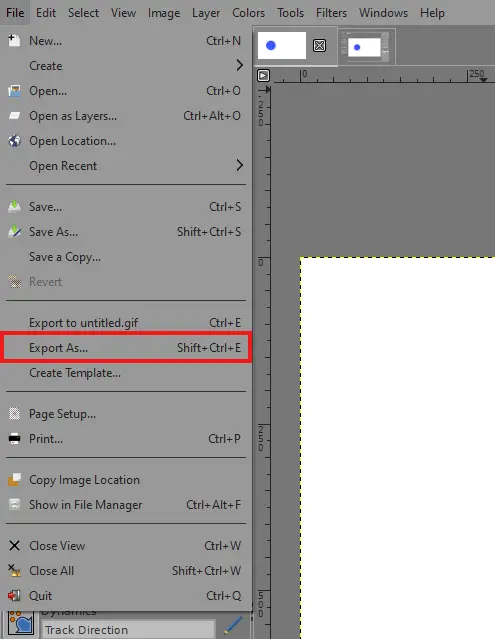
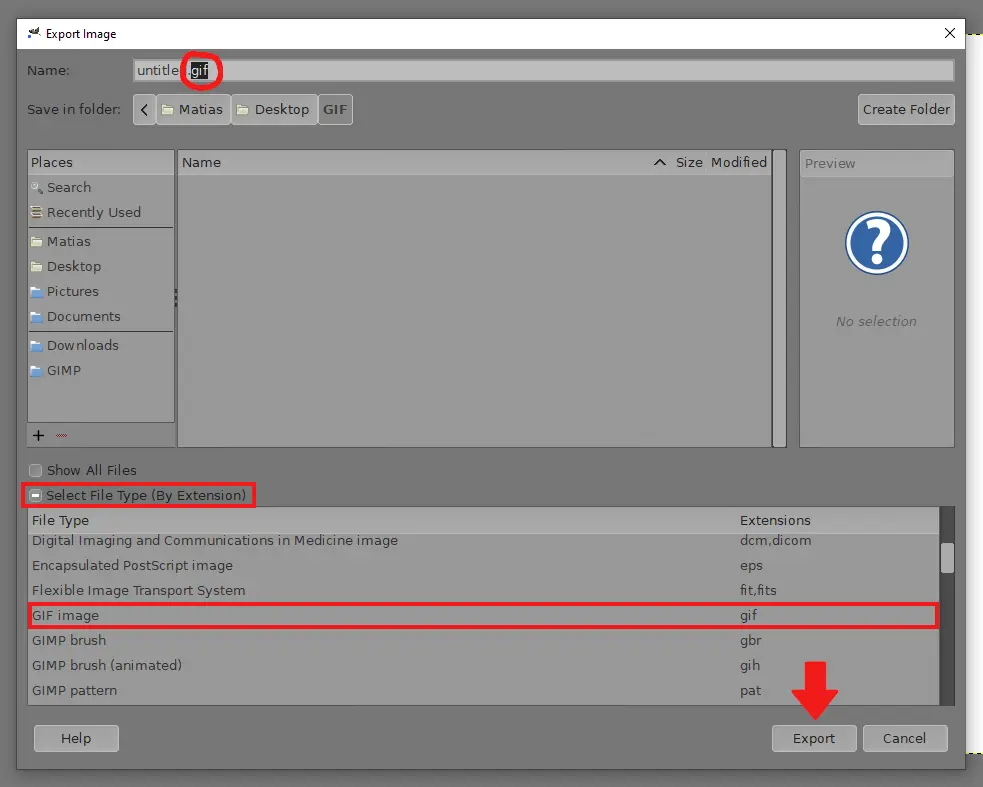
7. From this menu, choose your destination folder and save it as a GIF file. You can type .gif in the name section at the top, or find it from the ”Select File Type” menu below. Then click Export.
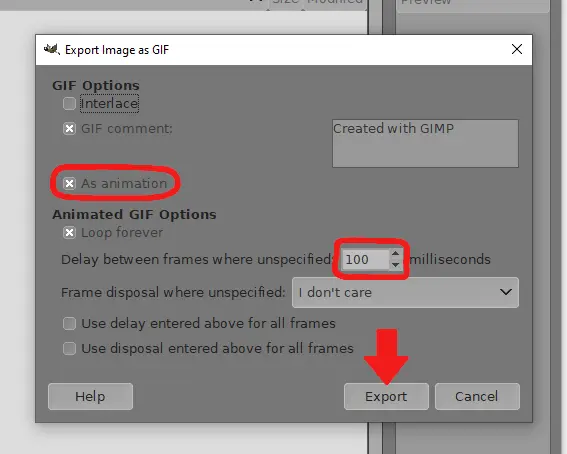
8. From this menu, make sure to click on the ”As animation” box to activate it. You can also adjust the delay time between frames if you want to. Then click Export.
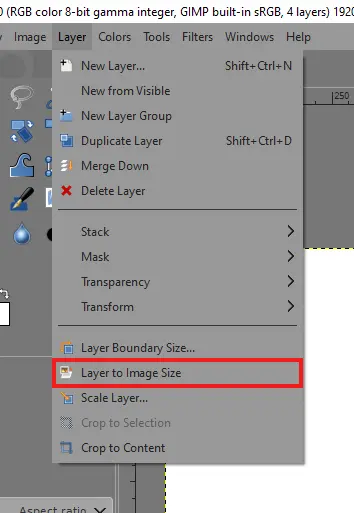
9. If you get an error while exporting your gif, it might say that some layers are larger than the image size. You can set the layer size to the image size by going to ”Layer –>> Layer to Image Size.”
How to Save Image as GIF on Gimp
Follow the steps below to save your images as GIFs on Gimp.
Step 1
Start by selecting the file and going to export as.
Step 2
Next, enter your desired file name in the name field.
Step 3
Choose Select file type, scroll down and select GIF image under file type.
Step 4
Select Export.
Step 5
Next, select interlace under the GIF option. When you execute this step, it will produce a Gif that progressively loads.
Step 6
Select Export. If you have a JPG file, you can convert your Gimp JPG images into GIFs.
How to Create Transparent GIFs Using Gimp
Here is how to create a transparent GIF using your Gimp platform.
Step 1
Start by opening your Gimp. Then, right-click the image and go to layers. When you are in layers, click on add alpha channel. Although nothing immediately noticeable occurs, this step inserts a transparent layer beneath your image so that the image will reveal the transparent layer and whatever is beneath it on the screen when colors are removed.
Step 2
Proceed to right-click on the image again and go to select and then go to By color. This would open an all-black window. Do not change any of the settings.
Step 3
Next, click the mouse cursor on the color in the image you are trying to make transparent. The color will show up with an outline.
We recommend you check out our article on how to outline an image using Gimp.
Step 4
Once more, right-click the image and select EDIT, then scroll down to CLEAR. The outline color will be removed from the image, and the “transparent GIMP checker box.” Gimp uses this to show that the region is now transparent.
If you want the transparency to function on the web, choose SAVE AS from the menu when you right-click the image.
Leave a Reply
You must be logged in to post a comment.