In Gimp, the standard file format is XCF. However, the XCF format is only used when editing images on Gimp. However, when the image is worked on, it has to be converted into a standard format that can be used elsewhere. This is where the knowledge of exporting your images as JPG becomes important.
Saving your file in JPG format on Gimp or any other raster editing software isn’t rocket science, and you can save your file and export it in JPG format with a few steps. So, can you save you JPG in Gimp? Read on to see the best steps to take in saving your file as JPG on Gimp.
How to Save As JPG In GIMP
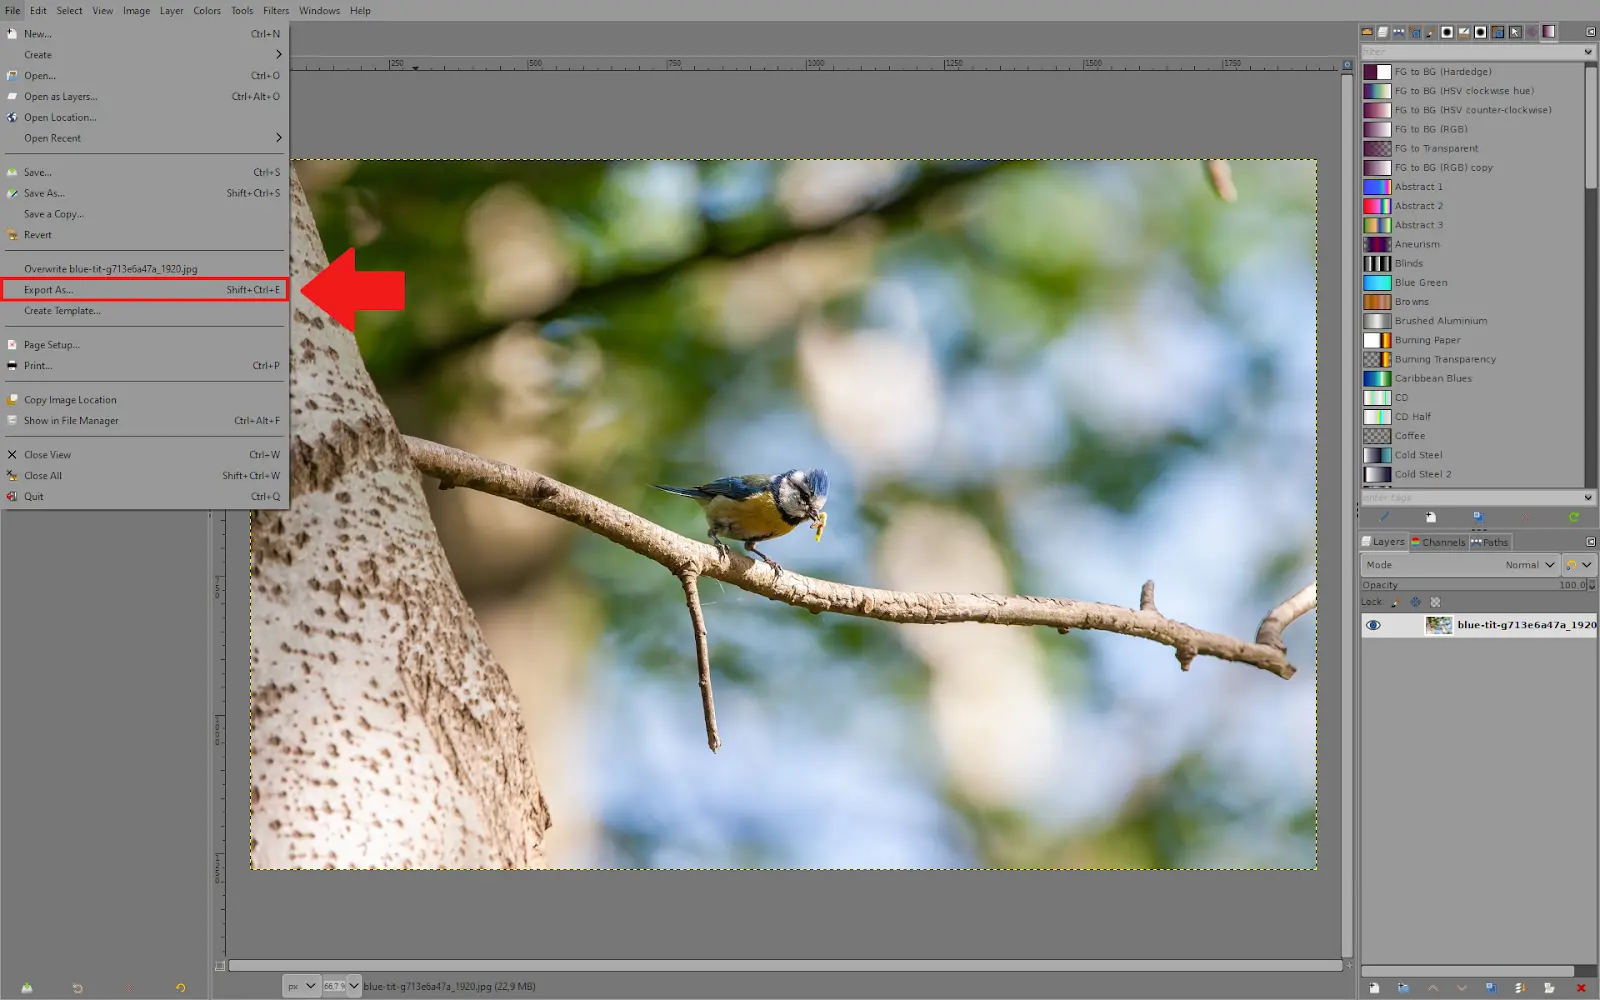
1. To save your image as a JPG file, go to File – Export As
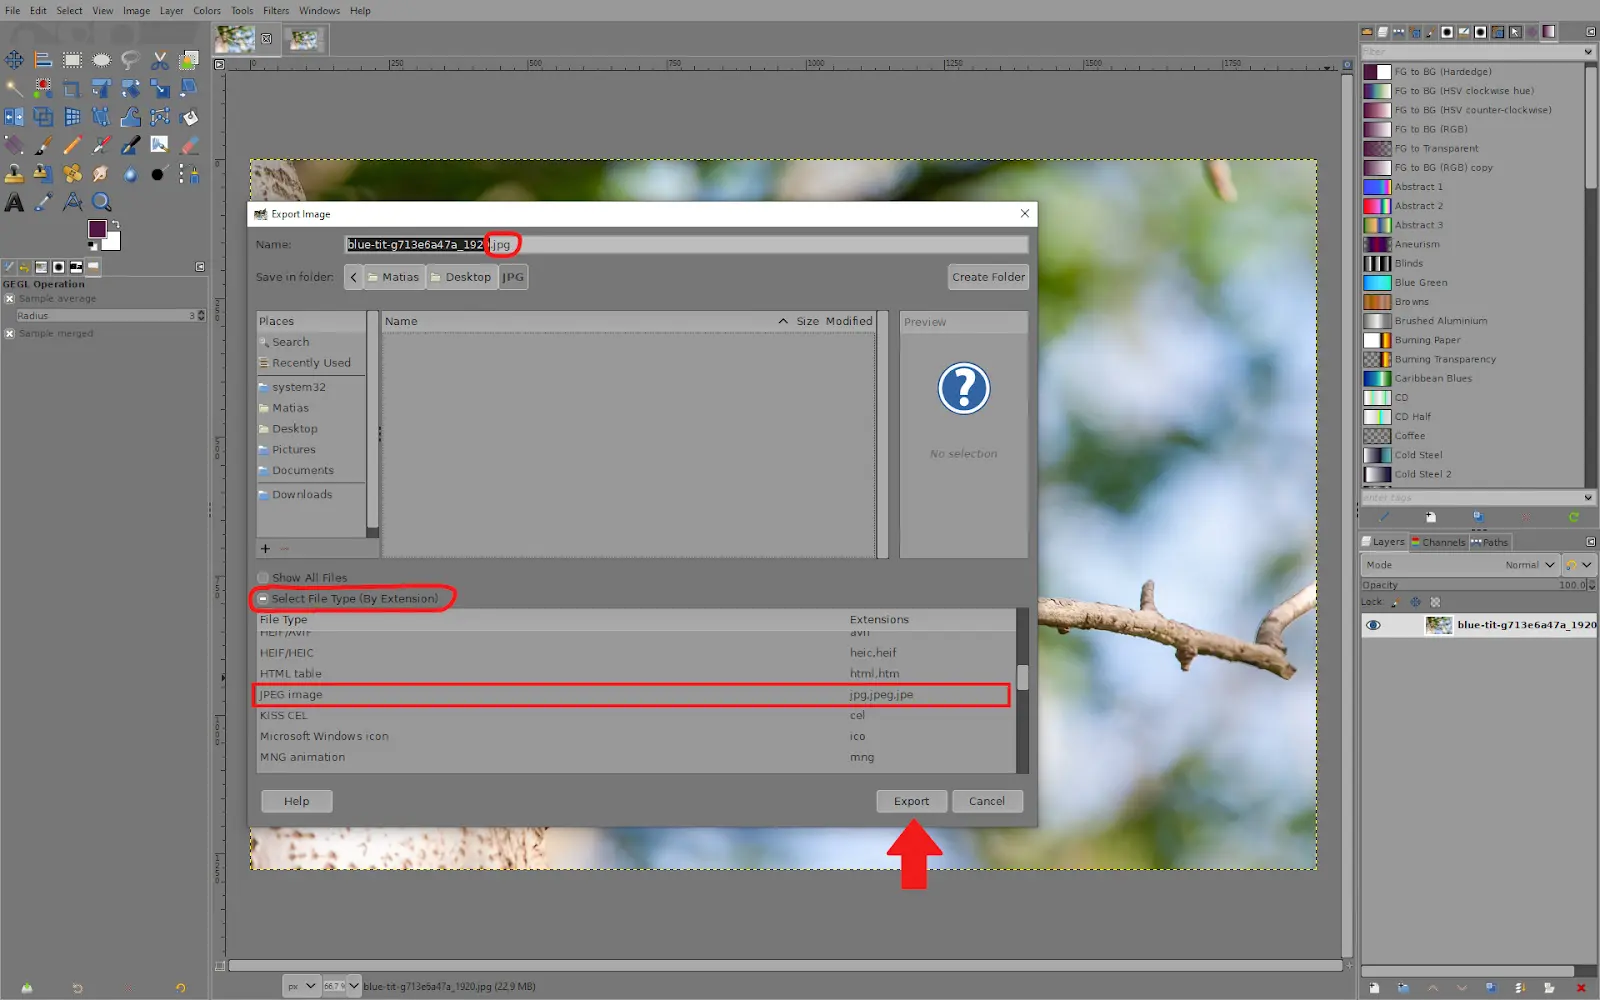
2. Once you choose your image’s location in the folders, you can write ”.jpg” in the name section or click on ”Select File Type” and scroll down until you find the JPG option. After that, click ”Export.”
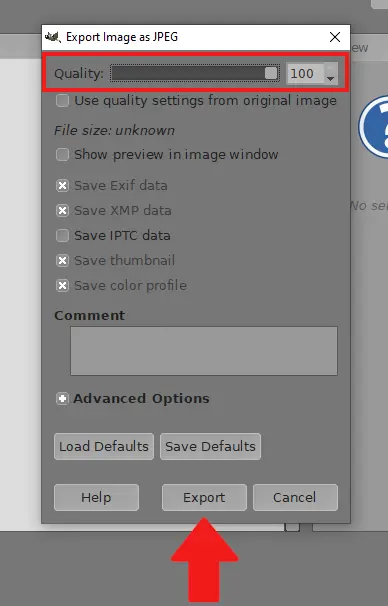
3. From the last menu you can adjust the image quality. Then click on ”Export”. You can also choose optional JPEG options. You can change the Quality slider’s default setting of 90 to enhance or decrease compression. Using the default settings usually works just fine.
How to Insert an Image in Gimp
If you save an image as a JPEG on Gimp, you need first to understand how an image is inserted on Gimp.
Step 1
Start by opening your base image in Gimp.
Step 2
Next, open the file menu and select open as layers.
Step 3
Browse the image you want to insert, then click the open button. When you do this, Gimp will proceed to create a new pixel layer containing your selected image. Remember that you may need to adjust the scale slightly for the image to fit properly.
You can insert your image directly into Gimp using the normal copy and Paste, which comes in handy when quickly inserting images from the web into Gimp. Follow the steps below to insert images from your browser.
Step 1
Right-click the image you want to copy and choose Copy image; remember that the exact phrase may differ slightly depending on the browser you’re using, then open GIMP. Press Ctrl + V or select Paste from the Edit menu while your base image is open.
How to convert HEIC images to JPEG or another format
If you want to convert your HEIC images to JPEG, it can be done using the Gimp editor. Follow the simple steps below.
Step 1
Open your Gimp editor and press Ctrl + O. If you are using a Mac computer, use command + O. These commands will execute the open function, selecting the HEIC file.
Step 2
Go to your Import image from a color profile window and click Keep.
Step 3
The file should be open by now. Press Ctrl + shift + E, or if you are using Mac, press Command + shift + E., These commands will execute the Import As function.
Step 4
Choose the HEIC text from the Export Image window’s file name drop-down menu and type a different JPEG or PNG extension. Based on the extension you typed, GIMP automatically detects your desired saving format.
Gimp Not Saving in JPG or PNG – Solutions
Most regular computer users are accustomed to saving their work using the shortcut Ctrl+S. When using Ctrl+S to save in a prior version of GIMP, you could save in JPEG, PNG, and other formats.
However, the Ctrl+S popular method of saving your work has been altered by GIMP 2.8. Now, the only option you see when pressing Ctrl+S to save your work is to save your image as an XCF, bzip, or gzip archive file.
You can fix this by following the steps below to save your work in JPG using the normal command you’ve always known.
We also recommend that you check our in-depth article on how to resize images in Gimp.
Step 1
Open your Gimp and go to Edit>Keyboard shortcut.
Step 2
The next step is to search for Overwrite.
Step 3
Click on Disabled, and it will change to New accelerator.
Step 4
Now assign the shortcut using your Ctrl+S.
Leave a Reply
You must be logged in to post a comment.