
Are you an artist who uses Procreate? If so, you may want to know how to change the opacity of a layer. By doing this, you can create different effects in your artwork. In this article, we will show you how to change the opacity of a layer in Procreate. Read on to find out more!
What is Opacity?
If you’re not familiar with the term, opacity is simply the measure of how see-through something is. In other words, it’s a way to control the visibility of an object. When it comes to digital art, layers are often used to create different effects. And one layer may be more visible than another depending on its opacity setting.
Why Change The Opacity Of A Layer?
You might want to adjust the opacity of a layer in Procreate for several reasons. Maybe you want to make subtle changes to your artwork, or maybe you want two images to blend together seamlessly. Whatever your reasons, knowing how to change opacities can help add depth and dimensionality to your work as well!
For more tips, read How To Trace On Procreate.
Changing The Opacity
Before diving into the steps of changing the opacity of a layer, it is important to note that the major reason you’ll need to change opacity is to blend that layer with other layers for smoother incorporation with texts, other images, or designs.
To change the opacity of a layer in Procreate, there are 2 ways you can do this. Let’s go over both methods.
Method 1: Using the Magic Wand Tool
To do this, start by loading your art, image, or any graphic you would want to work on. Next, click on the magic wand tool.
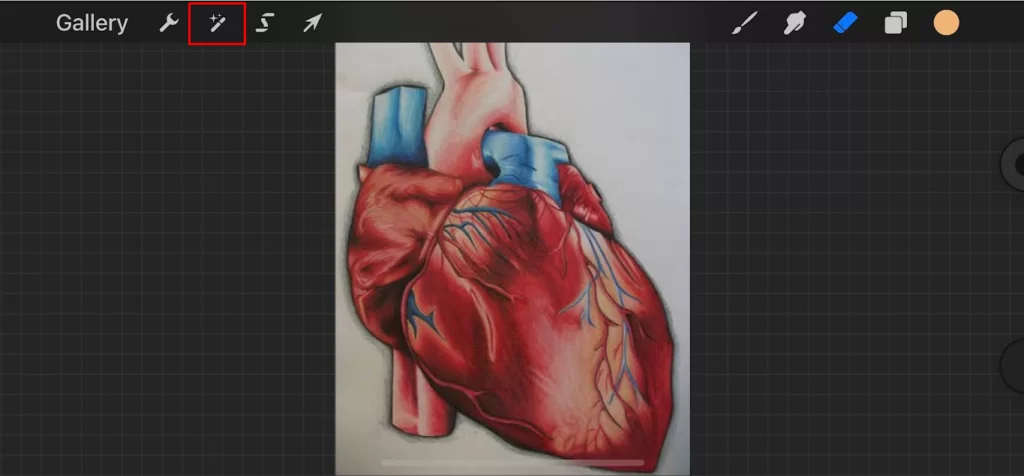
The magic wand tool will display some adjustment options, where you can adjust the color, blur, or even do a little retouching using your brushes. The option we’re going for is the “Effects” option.
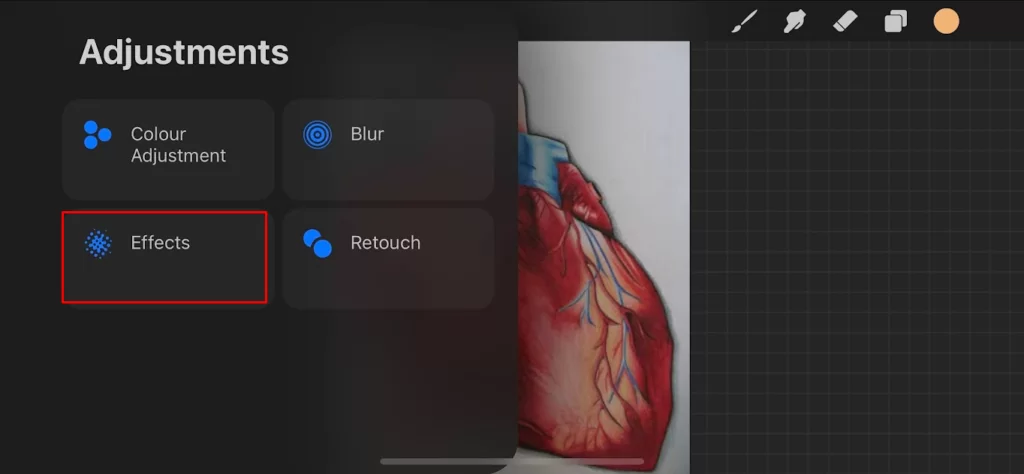
The “Effects” option comes with a whole lot of other options. As you can see from the image below, “Opacity” is the first. In tutorials, we will discuss the usage of some of the other tools, but for now, we’re sticking with changing the opacity of a layer.

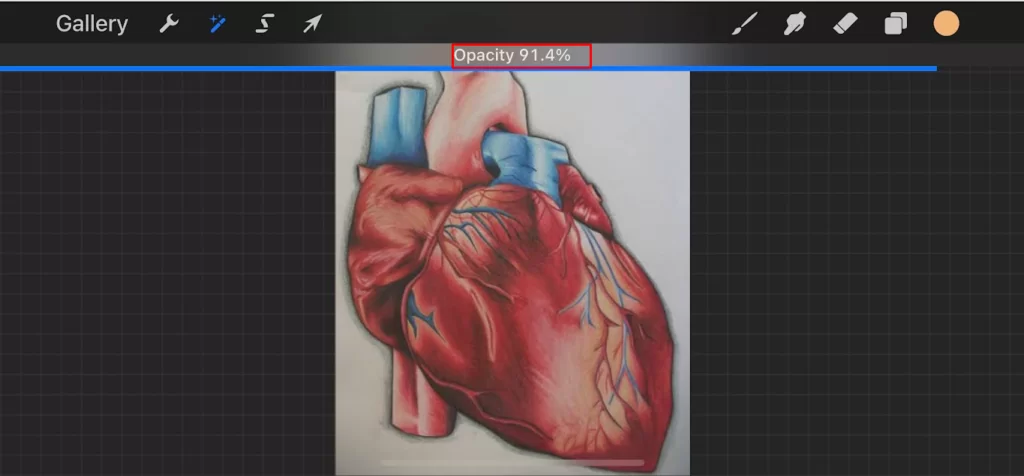
Tapping the opacity option introduces a slider on the top part of the screen. As with other effects applied on Procreate, sliding left is usually a reduction, and swiping right is the addition of that particular effect.

The image below shows a reduction of the opacity. You can see the image gradually fading away.

The image below shows that the opacity is been increased, and the image becomes sharper.
Doing this will already give you ideas on where opacity comes into play when creating your designs. If you aren’t sure where to use it, wait until you see the next method.
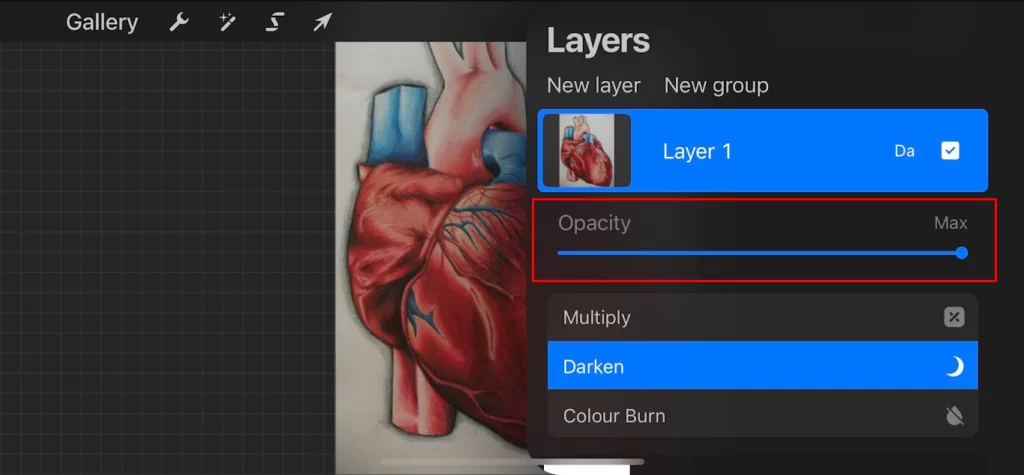
Method 2: Using The Layer Properties Directly
In this method, you are to access the list of layers within the artwork, then use the opacity slider introduced below that particular layer.
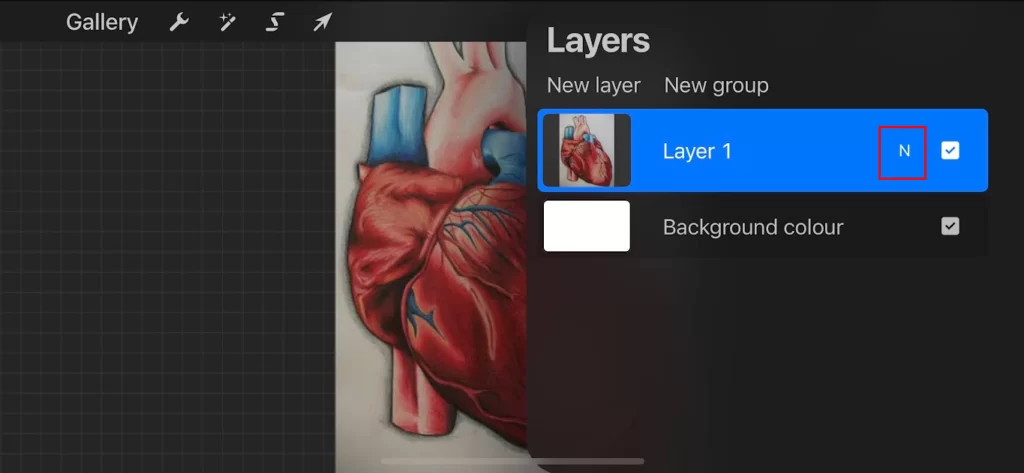
Start by tapping on the layer option in the top right corner of the screen.

Doing this will display all the layers within the design. In this case study, we have just a single layer, and that’s the image we’ve uploaded. To view more properties, tap on the “N” symbol on the right. Note that tapping on any other location on the layer won’t bring up the opacity option.
As you can see below, the opacity slider is right below the layer we’re working on. All that’s left is dragging it to the left or right.
Dragging it to the left reduces the opacity. You can see the current percentage shown on top of the opacity slider and the real-time effect of the change you’re making.
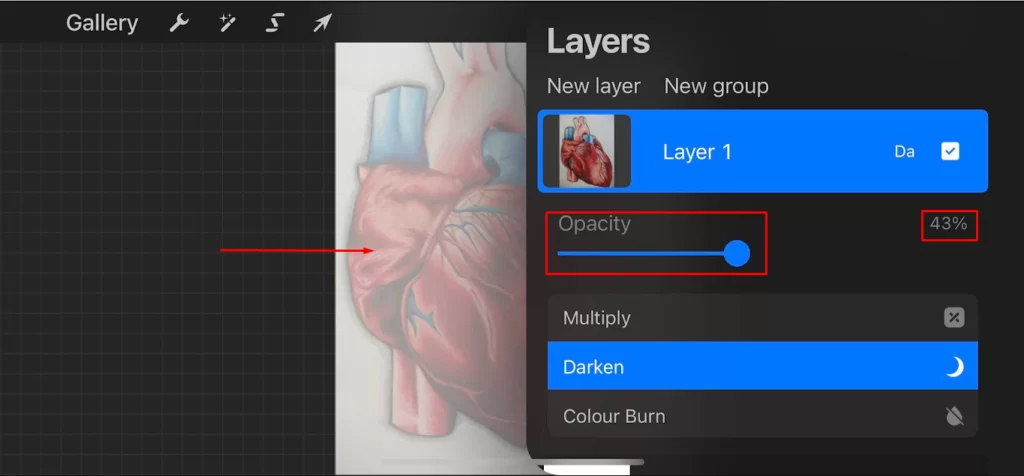
Dragging the slider to the right increases the opacity and sharpens the image. By default, the image’s opacity will be at 100%. So, in most cases, you’ll be dragging the opacity slider to the left.

The second method is more extensive than the two methods described above because you are presented with more options to manipulate the layer. Also, when working with more layers, the second method is much more flexible, as all you have to do is tap on the particular layer you want to work on from the list of layers and apply the opacity you desire.
Final Thoughts
Hopefully, this guide was useful if you regularly use Procreate or are thinking about trying the app out. Adjusting the opacity of a layer is a key skill to learn as it opens up many creative possibilities – from fading one element into another, erasing part of an image without affecting other areas, and more.
Now that you know how to change the opacity of layers on Procreate read our guides on How To Use Procreate and How To Make Stickers on Procreate.
Leave a Reply
You must be logged in to post a comment.