
Are you new to digital art and not sure how to get started? Or maybe you’ve been dabbling in design for a while but want to know more about some of the technical aspects, like fill settings. If so, this guide is for you! Here we’ll cover the basics of filling in procreate, from layer options to setting up your brushstrokes. You’ll be ready to start easily creating beautiful artwork by the end!
Filling Shapes
Filling a shape with your desired color on Procreate sounds very demanding and tedious without being told or shown how to do it. That’s definitely not the case. Let’s go over two methods to fill shapes within your artwork in seconds without breaking a sweat.
SEE Also: How to Flip a Layer in Photoshop
Method 1:
This method involves dragging the color at the top right corner of the screen to the desired part of the artwork you want to fill. However, there are 2 downsides to this method; first, you have access to just the color displayed at the top right corner. To change to another color, you must tap on it and select a new color from the color palette.
The second downside is while dragging the color to the part of the artwork you wish to color-fill, the tendency of long-pressing the chosen color is high. This is a problem because long-pressing the color from the menu switches to the previous color used and vice versa. This can be frustrating, especially when you have to do it repeatedly.

Method 2:
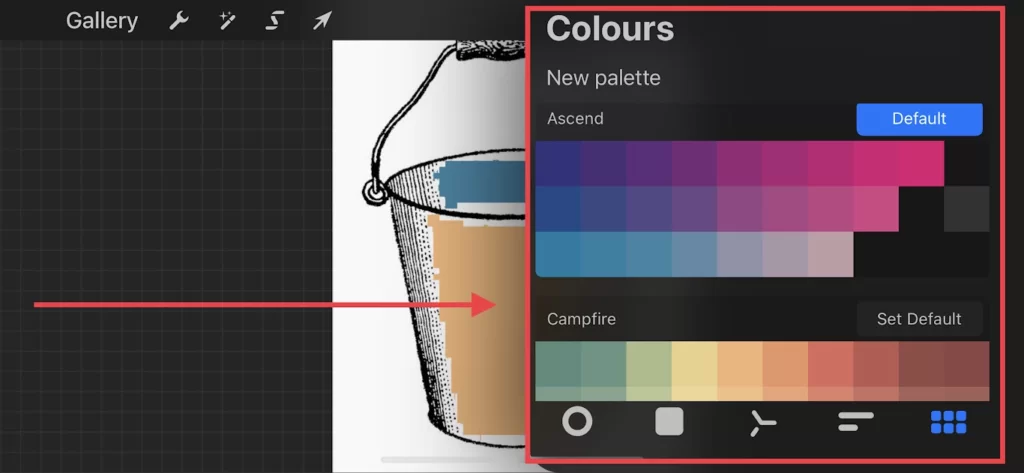
The second method is faster, more convenient, and can be easily recommended for artwork having so many shapes that should contain different colors. The method entails opening the color palette menu, then directly dragging the specific colors to the parts you want to fill. You can do this in seconds and have a perfectly-looking multi-colored design.
There are situations where the shape color filler option won’t perfectly do the job. More manual input is required to fill in the colors perfectly in such cases. We are talking about using the “Color Drop Threshold Gauge.” Once you drop your preferred color on the shape you want to fill and notice some unfilled spaces, you must drag your finger to the right or left to increase or decrease the threshold, respectively.
Note that this has to be done immediately after dropping the color, which means your finger shouldn’t leave the e-screen until you achieve your goal. The same applies if you are using an Apple pencil.
SEE: How to Resize an Image in GIMP
Why You Should Use Color Filling
If you’re like most people, then you probably use the bucket fill tool in Procreate without giving it much thought. However, there are a few reasons why you should start using color filling instead. For one thing, it’s faster and more efficient. Secondly, it allows for more precision when filling in areas of your drawing.
Why Using Procreate’s Fill Could Color the Entire and How To Fix It
Procreate’s color filling differs slightly from other design programs like Photoshop or Placeit. This is due to the absence of the customary bucket filler, which many of us are used to.
Procreate uses its internal algorithm to decide where and how the color should be applied when you use the tool to color-fill objects. While this is useful for filling separated and defined sections, it can be annoying when the color spreads beyond the localized area or takes over the entire page.
Even though there are a few distinct potential causes, the problem is typically simple to resolve. Let’s go over some reasons and how to solve them.
1. You Haven’t Set Your Reference Layer
Having a predetermined reference layer is another frequent cause. When a reference layer is specified, ColorDrop will work with the contents of that layer. Therefore, if you don’t have Reference switched on and your image is on a different layer than the one you are coloring, you will flood the coloring layer.
2. There Is Line To Close The Shape Or Selection
Selections are particular areas of your image that have been cut off from the surrounding text. As a result, any adjustments performed while a selection is active, like a color filling, will only apply to that selection.
Imagine that you have drawn a circle freehand and want to color it. The application might have trouble defining the borders if the circle doesn’t have a totally closed line, leading to the coloring taking up the entire page.
Simply check the lines of the object you are trying to fill to ensure no gaps or breaks to remedy this.
3. The ColorDrop Threshold Gauge Needs To Be Decreased
This issue typically has to do with the ColorDrop Threshold % if your color fills the page when that is not what you intended.
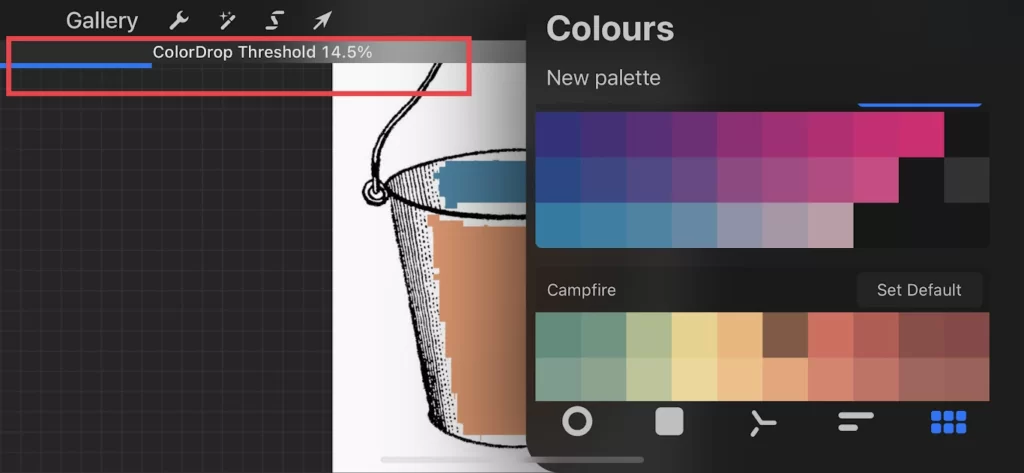
The ColorDrop Threshold controls how much of your ColorDrop fill leaks into and over the edges of your artwork. If the percentage is set too high, the color will diffuse over the entire text rather than remaining in its proper place. But at lower thresholds, the color will only appear in a limited area.
Just lower the threshold’s % value to solve the issue. When you drag a color onto the board, a tin bar at the top can be moved to do this. Before lifting your finger after dragging the color into position, set the threshold to your preferred value.
Until you modify it, ColorDrop will remember the selected threshold setting. So, if you’ve ever set it to 100%, it will stay that way until you change it to anything lower.
3 Tips For Filling Colors in Procreate
When filling colors in on Procreate, there are a few things to remember! Here are three tips:
SEE: How to Make Sticker on Procreate
- Make sure the fill layer is set to “Multiply.” This will help the color stand out and not get lost within your other layers.
- Use a large brush size when first filling in an area. You can always go back and add detail with a smaller brush, but it’s much harder to fix if you start too small!
- Once your base color is filled in, consider adding some shading or highlights with different colors for extra dimensionality.
Rounding Up
In conclusion, filling in your artwork within the bounds of shapes created by either the pen tool or another layer can be challenging. By following the steps above, you can create beautiful works of art constrained to your chosen area. Experiment with different brushes and colors
Leave a Reply
You must be logged in to post a comment.