Modern Photoshop techniques are prevalent, and whether you’re interested in photography or Photoshop, you should be aware of how crucial it is to flip a layer. Although many individuals are familiar with the fundamentals of Photoshop, they might not be as knowledgeable about the program’s more complex features and settings. And one of them is the Photoshop technique for flipping a layer.
Even though there are several ways to flip a layer in Photoshop and merge it with the source images, we’ll still explain how to flip a layer in Photoshop in this article.
Flipping A Layer in Photoshop – Steps
Inverting a picture Canvas works well for flipping a picture, but when we simply want to flip a portion of the image, issues occur. Consider the scenario where we simply want s brand logo to be shown. In that, we’ll just flip the layer that contains the logo picture.
There are different ways to flip a layer in Photoshop; we are going to discuss some of the easiest ways for flipping a layer.
First Approach: Image Rotation
It’s quite simple to edit a photo with just one layer. Learn how to flip a whole picture in less than a minute by using the following steps:
Step 1: Start by opening the photo
Start Photoshop, then select the “Open” option from the File tab at the top of the page. Press Ctrl+O or Cmd+O to use the keyboard shortcuts for Photoshop. Locate the picture you want to work with on your computer.
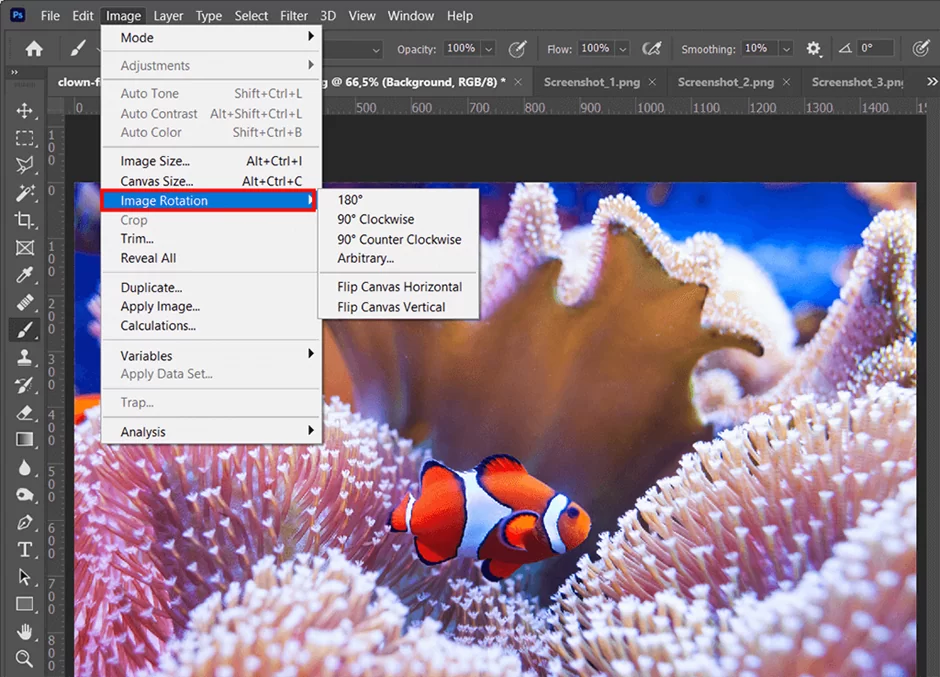
Step 2: The transformation phase
Navigate to Image Rotation by selecting the Image option from the top menu. At the bottom of the dropdown menu that appears, there are 2 items. You may alter something horizontally or vertically.
And that’s it! If done right, that process takes literally less than a minute to do.
Second Approach: Using the Free Transform Tool
Occasionally, you merely need to change a logo, a specific item in a picture, or a watermark. In this instance, only the layer containing that piece has to be altered, not the entire image.
The second approach is as simple, but you must first understand how to unlock a layer in Photoshop. Let’s go over the steps to do so.
Step 1: Selecting your layer
The first step is deciding which layer you want. Select it by clicking on it.
Step 2: Unlocking your layer
To allow changes to this layer, you must select the appropriate panel and double-click on the lock symbol, just as when mirroring a picture in Photoshop. The layer will then be unlocked.
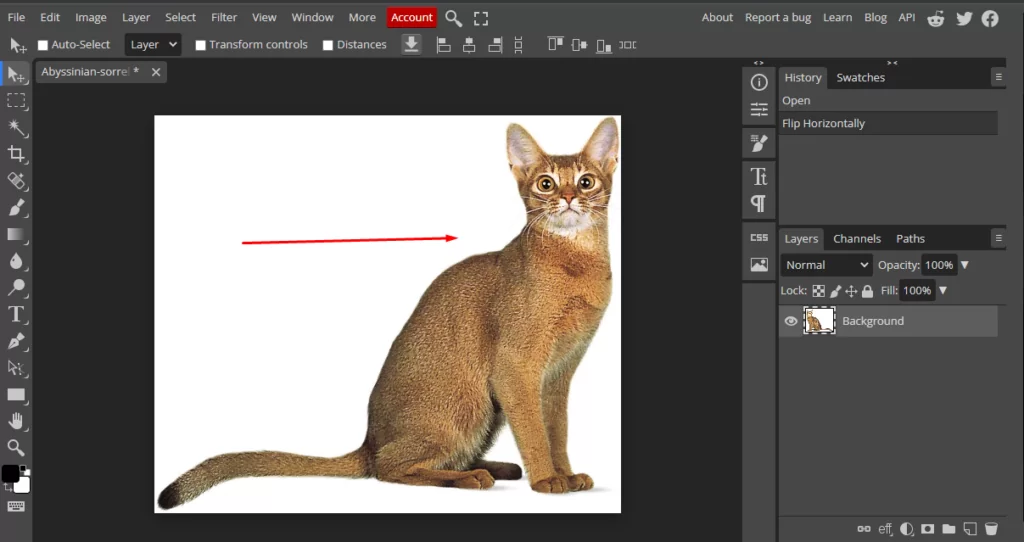
Here’s the final output
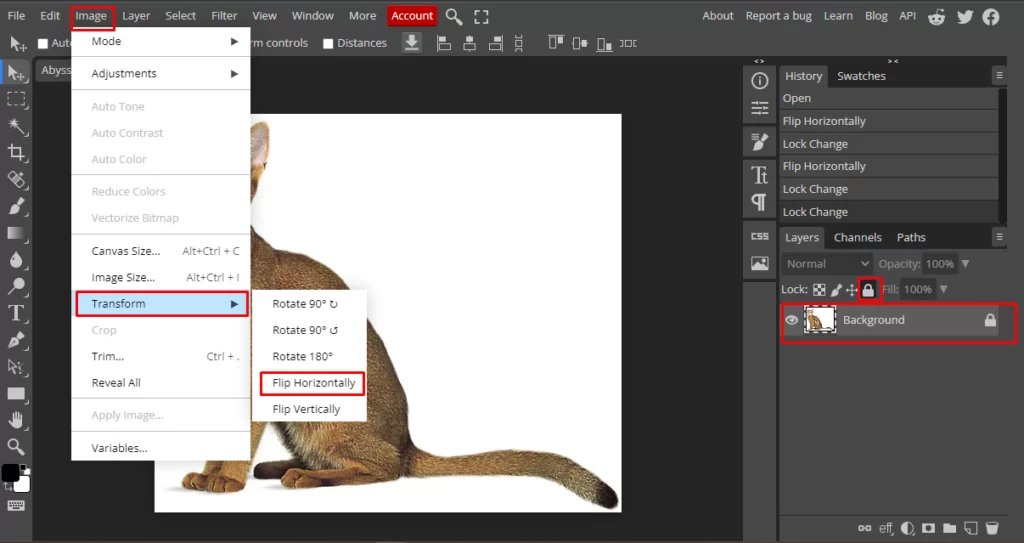
Step 3: Employing the transform tool
The Edit tab provides access to the easiest method of flipping the picture. Locate the Transform option by scrolling down the dropdown menu. There are several options for altering your image in the dropdown menu that comes up, including distortion, perspective change, rotation, scaling, skewing, etc.
We’ll just be concentrating on the horizontal flip and vertical flip in this guide.
Based on the direction you need to go, pick one of these. Note that this technique will operate on all layers and not only on raster images.
And that’s it for this method. You are now aware of how to flip a layer in Photoshop. More advanced approaches can be used as you continue to edit your images.
Third Approach: Using the Free Transform Tool
Using the Free Transform Tool is an additional useful technique. It provides you with more power over the entire procedure.
Step 1: Make the free transform tool active.
Navigate to the Edit tab at the window’s top menu. You may also hit Ctrl+T/Cmd+T to access the shortcut. This will turn on the tool right away.

Step 2: Modify the width value.
The width value of this tool must then be modified. You may manually do this by dragging the borders in that direction, or you can enter a value of -100 in the width box up top.

Before entering the value, ensure that the link between the width and height has been disabled because if you leave it active, it’ll maintain the aspect ratio, which will flip the image both vertically and horizontally.

And you’re done! It is that simple. Now you may continue your editing process.
Fourth Approach: Flipping Several Layers
Keep in mind that the aforementioned techniques will only flip the one layer that you choose in the initial stage. Follow the instructions below to flip multiple layers.
Step 1: Start by selecting the layer
When selecting the layers you wish to change, press and hold the Ctrl/Cmd key on your computer.
Step 2: The transformation phase
Edit > Transform provides access to the Flip option. Photoshop flips whichever layer you have selected as the active layer while working. That way, you can flip multiple layers while still working on the same canvas.

And you’re done. Now, you have the option of combining layers in Photoshop or continuing to modify your picture.
Last Words
Your knowledge of Photoshop may now include flipping images, which you can employ for your projects. Although you can always flip a picture using a standard photo viewer, Photoshop will provide superior results when working on designs with more intricate details.
Read More at :
Leave a Reply
You must be logged in to post a comment.