Gimp is a great software that can manipulate an image to almost any degree. With Gimp software, you can retouch your images and create realistic collages. Gimp has amazing tools, such as a brush that helps with digital drawing. The newer version of Gimp (Gimp 2.10) has an impressive Mypaint library for realistic paint effects.
You should note that Gimp isn’t designed for drawing, even though you can use it for drawing purposes.
How to Start Drawing on GIMP
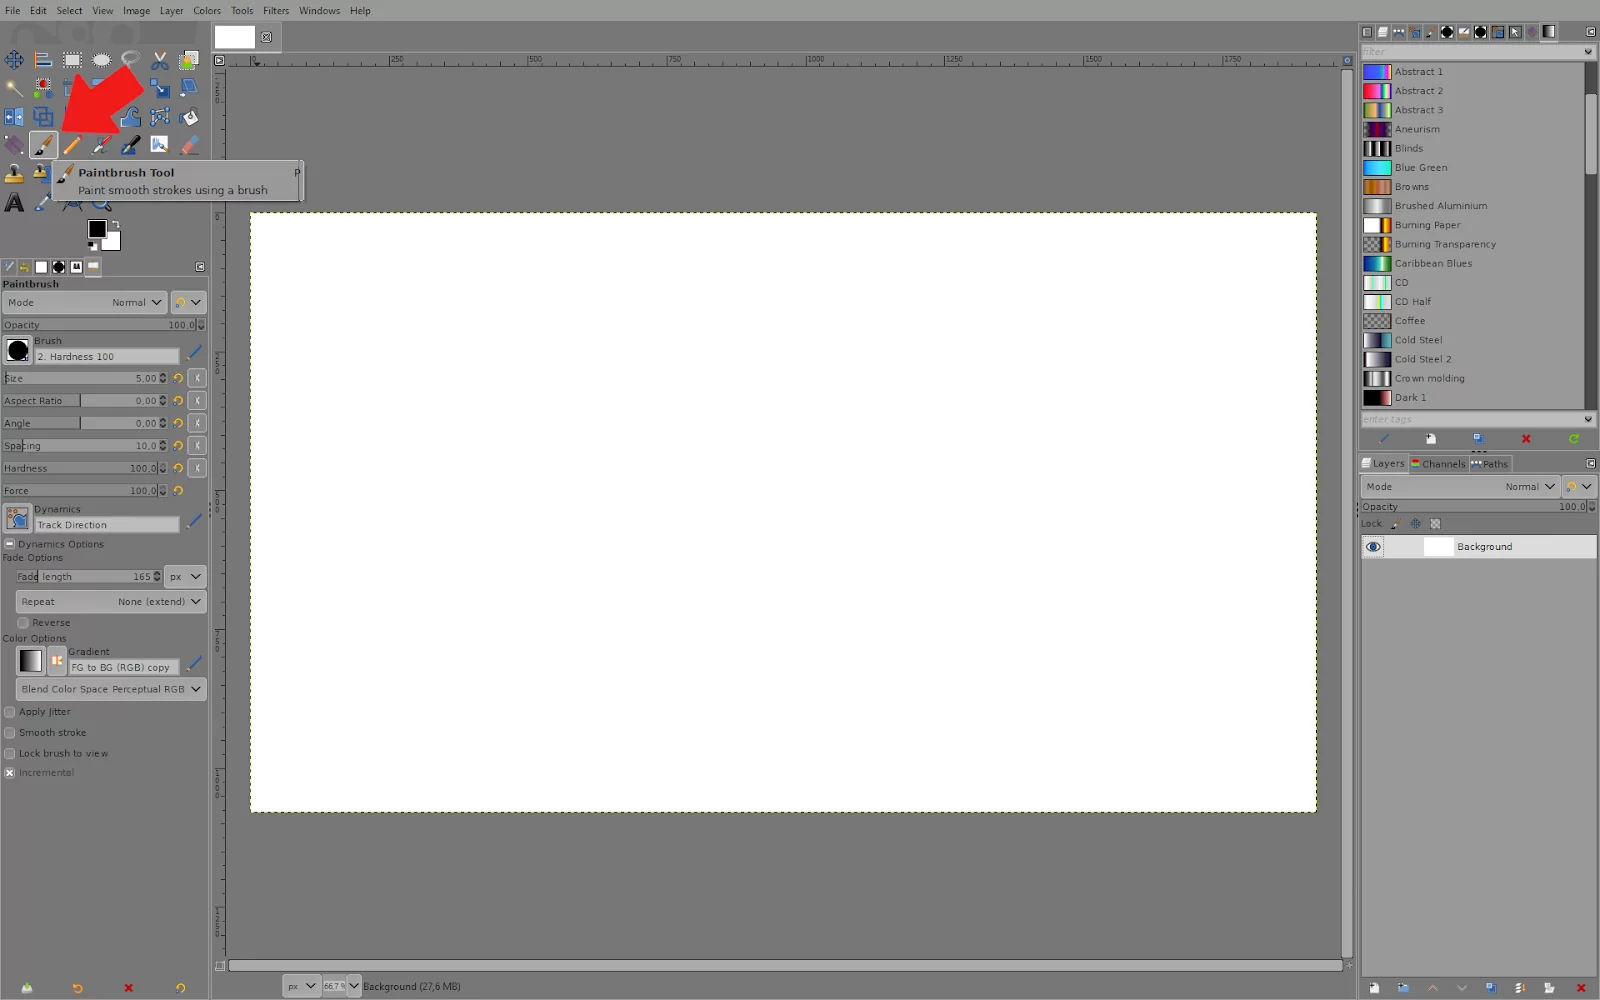
1. Select the ”Paintbrush Tool”.
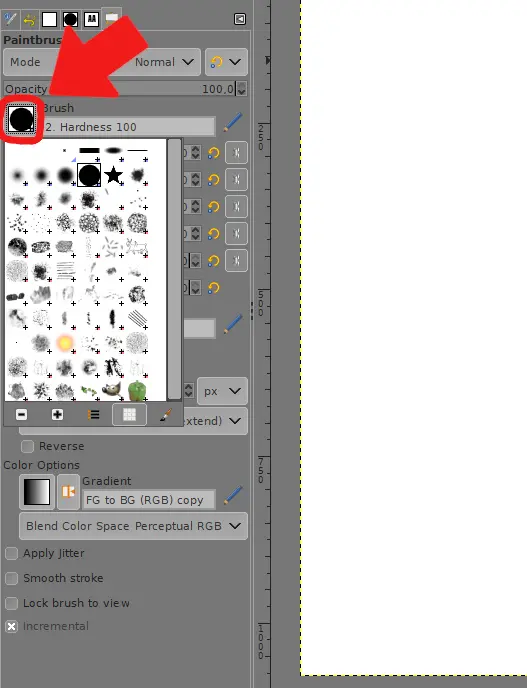
2. To choose from different types of brushes, click on the Brush icon to open up the menu. The brush tool also comes in handy when you are drawing lines on Gimp.
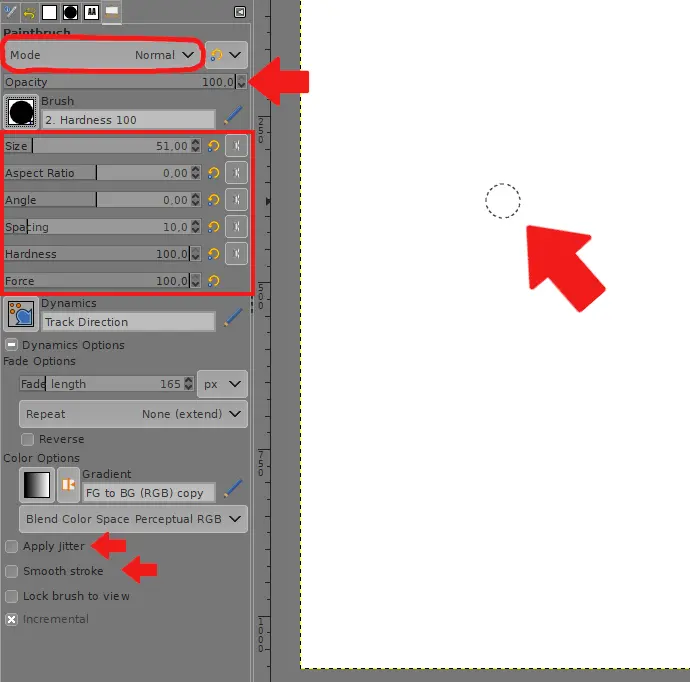
3. Choose your settings, drag your mouse over your image, and click and hold to draw.
Note these:
Mode: How the brush blends on top of the layer you are drawing on
Opacity: The transparency of the brush
Size: Size of brush
Aspect Ratio: Width/height ratio of brush
Angle: The angle between the brush width direction, which is normally horizontal, and the horizontal direction, counter-clockwise. When this value increases, the brush width turns counter-clockwise (0° to 180°).
Spacing: Spacing between individual brush prints
Hardness: Feathering of the brush border
Force: Pressing force of the brush
Apply jitter: Brush prints are scattered along the line
Smooth stroke: When you increase this, sudden mouse movements will not affect the drawn line
Using the Paintbrush Tool to Draw
Below are steps to use your paintbrush to draw:
Step 1
Start by choosing the paintbrush tool from the toolbox. Choose the “Circle 03” brush from the brush panel. This would help you to create a thin line. The purpose of the number beside the brush is to indicate the diameter in pixels.
Step 2
Short strokes of the brush are dragged across the canvas. Choose a larger or smaller circle brush depending on how wide it is.
Step 3
Use the mouse to create the lines for your artwork in quick, even strokes. Instead of copying the original piece of art, try using the background image as a model for your new design.
If you need to undo a brushstroke, press “Ctrl-Z.” Repeatedly pressing “Ctrl-Z” will allow you to erase more strokes. The paintbrush can also be used when drawing circles and lines in Gimp.
How to Draw in Gimp Using Path Tools
Below is a step-by-step guide on how to draw in Gimp using path tools.
Step 1
From the toolbox, choose the Paths Tool (The path tool is also used to draw lines in Gimp). Wherever you want the start of a new line to appear, click the tool. An anchor point is produced when you click the tool on your desired point.
A second anchor point and a line connecting the two points emerge when you click on the second point of the line. Create more anchor points and keep forming the line.
Step 2
To reposition an anchor point, drag it. The connecting lines will adapt as you drag the anchor. To bend the line, click and drag it between two anchor points.
To end the path, hit “Enter.” If you do not wish to close the path, do not click “Enter.”
Step 3
Choose “Stroke Path” from the “Edit” menu to draw a line from your chosen route. A panel titled “Choose Stroke Style” will appear after you choose the “stroke path.”
Next, type the line’s width in the text area after choosing “Stroke Line.” You can also choose “Stroke With A Paint Tool” and “Paintbrush” as alternatives. The “Stroke” button should be clicked to apply the stroke to the path’s line.
Step 4
Draw a new path by selecting “New Layer” from the “Layer” menu. All the paths on a layer will be changed to the new stroke when you apply a stroke to a path on any layer.
Drawing in Gimp Using Shapes
Below is how you can draw in Gimp using shapes.
Step 1
From the “Layer” option, add a new layer to your drawing. You can draw a circle in Gimp or even rectangles, by clicking the “Rectangle Select Tool” or the “Ellipse Select Tool.” To build the shape, drag the tool across the canvas.
Step 2
Click “Stroke Selection” from the “Edit” menu. It would help if you remembered that the “Stroke Line” field must contain a value. Since this value is expressed in pixels, you can choose a number identical to the one you chose for your brush. Alternatively, you can choose the “Stroke With a Paint Tool” option to give the design the values from your current paintbrush strokes.
Step 3
To rotate a shape, click the “Rotate Tool” and choose the desired object. The rotate panel will open up when you click the “Rotate Tool.” Rotate the shape by dragging the “Angle” slider, then select “Rotate.” By doing so, a duplicate of the shape is made on a new “Transformation” Layer.
Did you enjoy reading this article? check out our in-depth article on how to make background transparent in Gimp.
Leave a Reply
You must be logged in to post a comment.