Gimp is a powerful raster software tool to edit images and carry out other related tasks. Gimp has many features and tools that allow you to draw a circle. Gimp is often compared to Adobe photoshop.
Drawing a circle is an essential task for any editor. In Gimp, the ellipse selection is the tool that will help you to draw a circle. So, what steps are involved in drawing a perfect circle in Gimp? Read on to find out.
How to Draw a Circle in GIMP
Before drawing a circle, you need to understand the GIMP Ellipse Selection Tool.
What is an Ellipse Selection Tool?
With high-quality anti-aliasing, the Ellipse Selection tool selects elliptical and circular sections from an image.
Additionally, this tool can render a circle or an ellipse on a picture. Make an elliptical selection, then use the Bucket Fill tool to fill it in to make a filled ellipse.
The quickest and most adaptable method to produce an elliptical outline is first to make an elliptical selection and then stroke it. However, this method’s anti-aliasing quality is quite poor. The Ellipse selection tool is undoubtedly a powerful tool in Gimp but you can also check out our detailed article on how to use another powerful tool, known as the cloning tool.
1. Click on ”Ellipse Select Tool.”
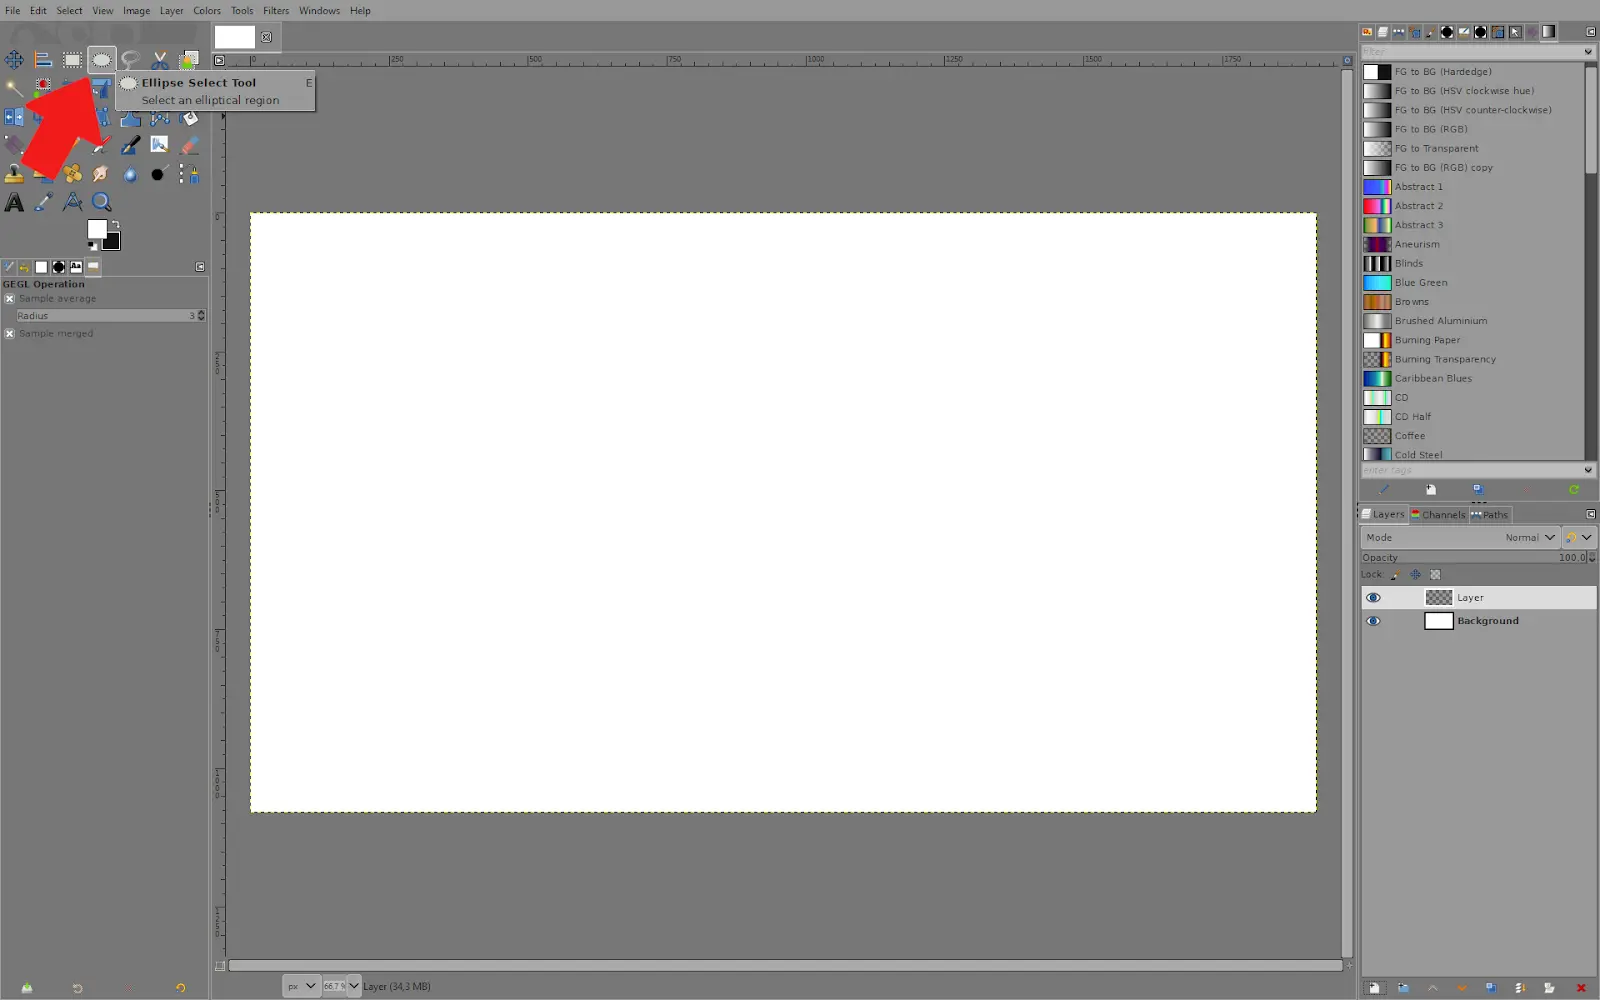
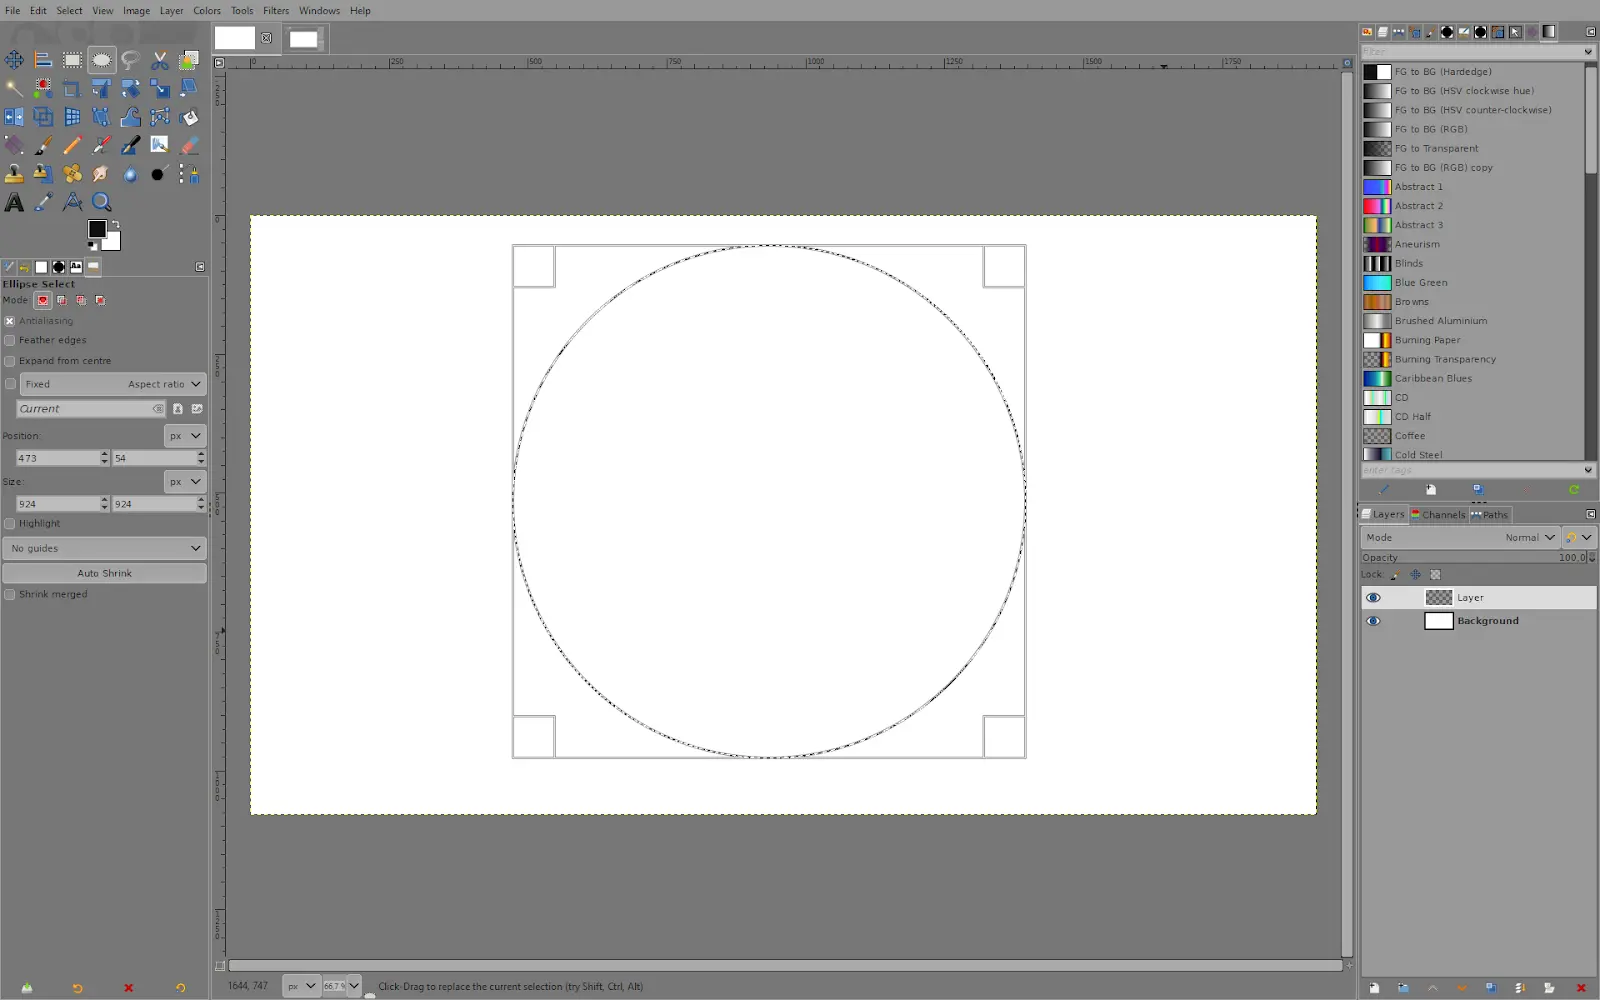
2. Move your mouse over your image, then click and drag to start creating the circle. If you hold Shift down, it will make a perfect circle, and holding Ctrl will center the circle around your starting point. You can hold Shift and Ctrl down for an easy and precise circle.
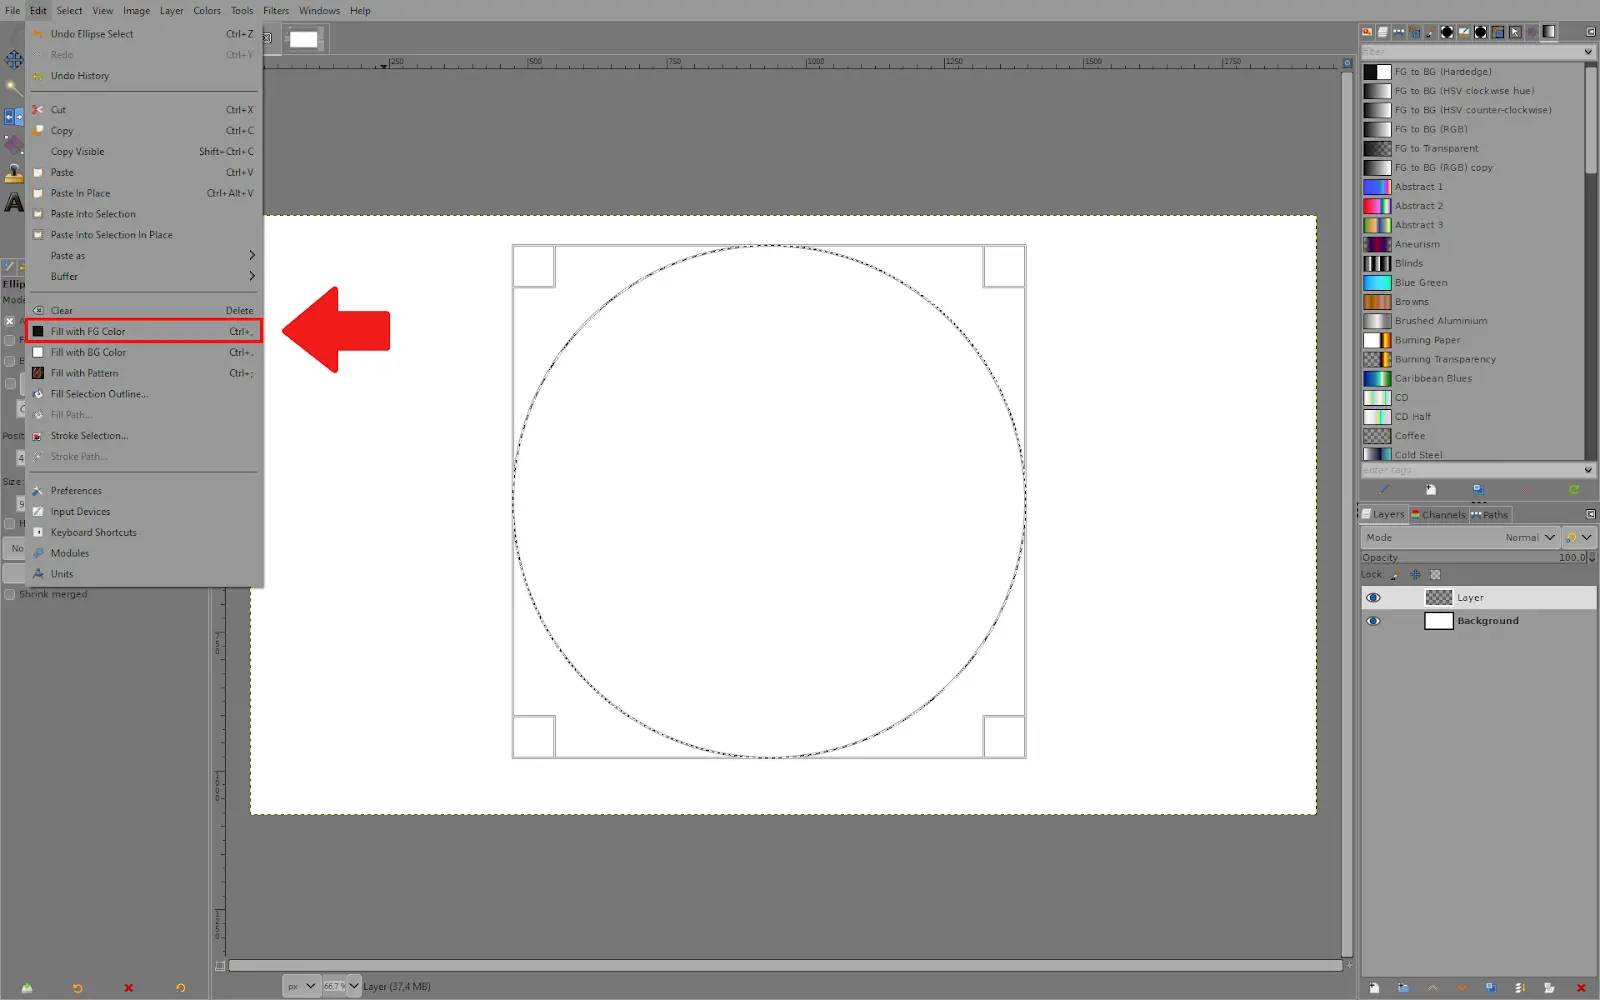
3. Go to Edit – Fill with FG color.
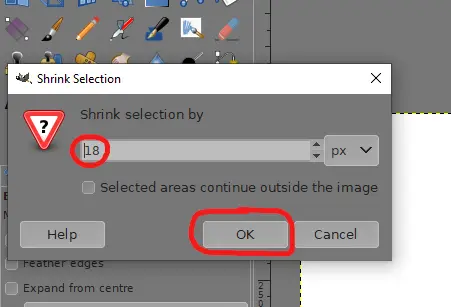
4. Then go to Select – Shrink.

5. This menu lets you select how much you want to shrink the selection. Higher values will give you a thicker circle.
6. Now, only the inner part of the circle is selected.
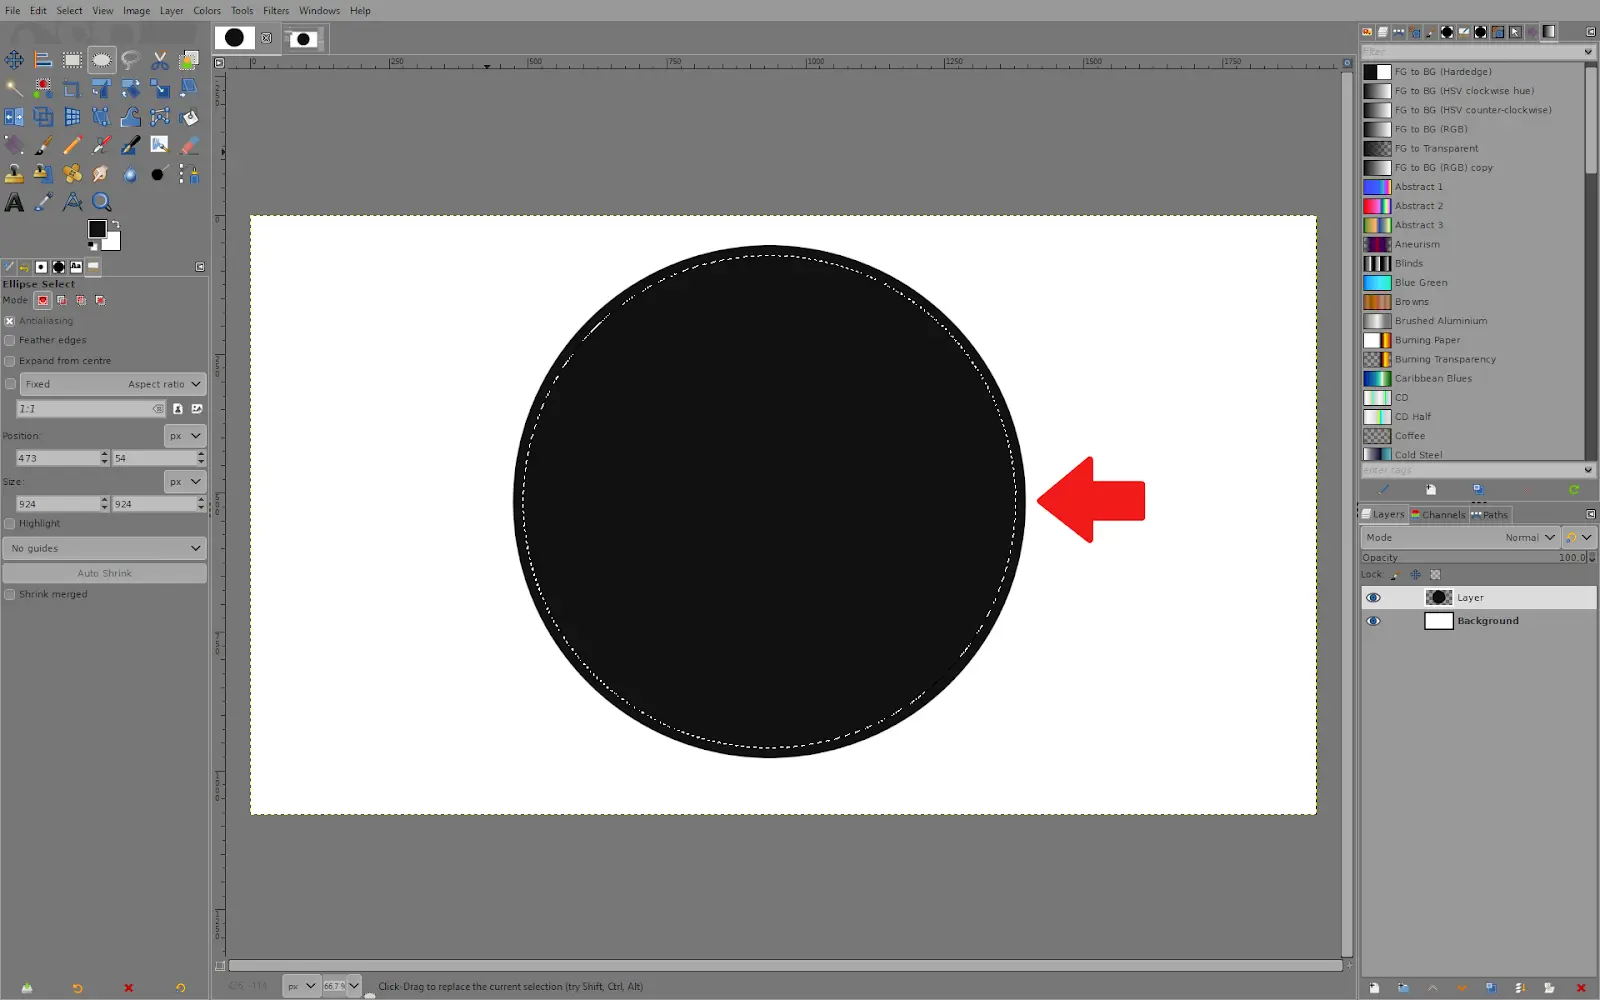
7. Press ”Delete” on your keyboard to remove the selection; now you have a circle.
Creating a Bordered Circle on Gimp
Follow the steps below to create a bordered circle on Gimp.
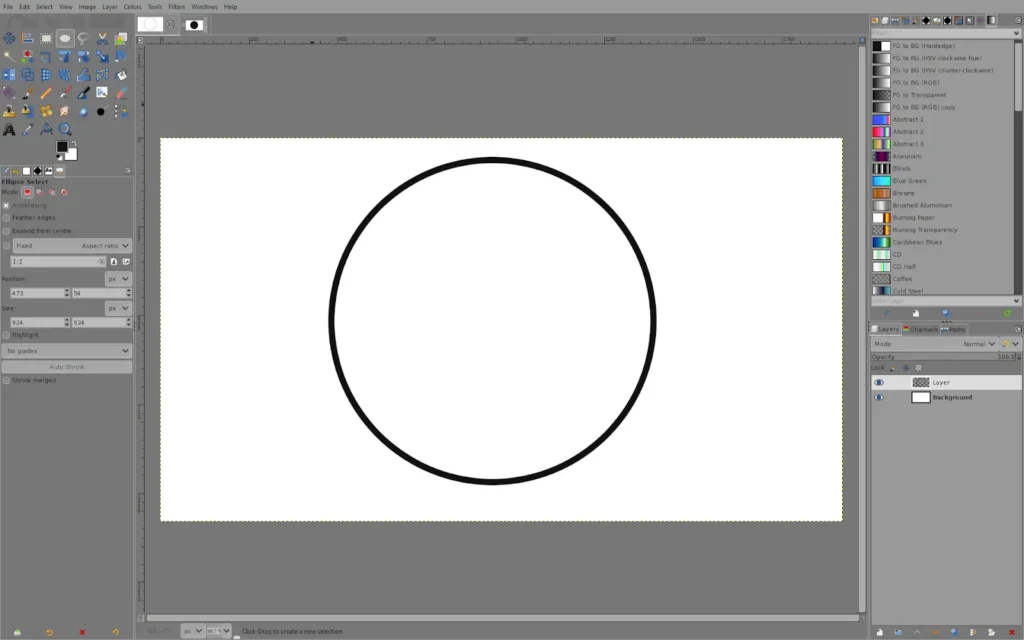
Step 1
Start by clicking the Ellipse select tool in the toolbox. The toolbox can be found in the upper left of the toolbox window.
Step 2
Next, click and drag on the canvas to start creating an ellipse. The ellipse tool can be used to create ovals and circles.
Step 3
You need to hold the shift while dragging to make a good circle. If holding the shift key isn’t working well, release it and start again. Ensure that you only hold the shift key once you start dragging. If you desire to make the circle a specific size, use the size fields in the Tool options.
Step 4
Choose “Border” from the Select menu by clicking it in the GIMP menu bar. You can now choose the option you just made from a new menu, effectively allowing you to build an image outline.
Step 5
Enter the border size for the circle that you want to utilize. Enter “1” to create just one pixel-wide border. Greater numbers will increase the selection by that many pixels on either side. For instance, if you enter “2,” the border will be four pixels wide. If you would rather work with alternative units, you can change the unit of measurement.
Step 6
Choose a color for the foreground that will serve as the circle’s border. Use the color picker to select the border color for the circle by clicking the foreground color in the toolbox.
Step 7
“Fill with FG color” can be found by selecting the Edit menu. The color you chose will then be used to fill the circle’s border. If you’ve followed the required instructions, your circle’s center is now transparent, and its border is colored.
Step 8
If you’d like, add a different color to the middle. If you wish to fill the circle with a different color, you can use the Bucket Fill Tool. After choosing the color, you wish to use as the foreground, use the Bucket Fill Tool and click inside the circle. Remember that you can always remove the white background behind your circle and add an image that you want.
Leave a Reply
You must be logged in to post a comment.