In Illustrator, there are a few different ways to create a dotted line. One of the most straightforward methods is to use the “Brush” tool to create a dotted line brush. This allows you to apply a set of dots along a path, giving you the look of a dotted line.
Another way to make a dotted line is to use the “Stroke” feature, allowing you to control the spacing and size of the dots along the line. I’ll show you how to create dotted lines very quickly.
How to Make Dotted Lines in Illustrator
Making dotted lines in illustrator is very simple and easy. Here are two steps to make dotted lines in Illustrator:
Step 1:
Select the line tool to make a straight line. Hold the shift to make it straight. Now go to the window > Stroke.

Your stroke panel will open, and you will find all the settings to make a dotted line here.

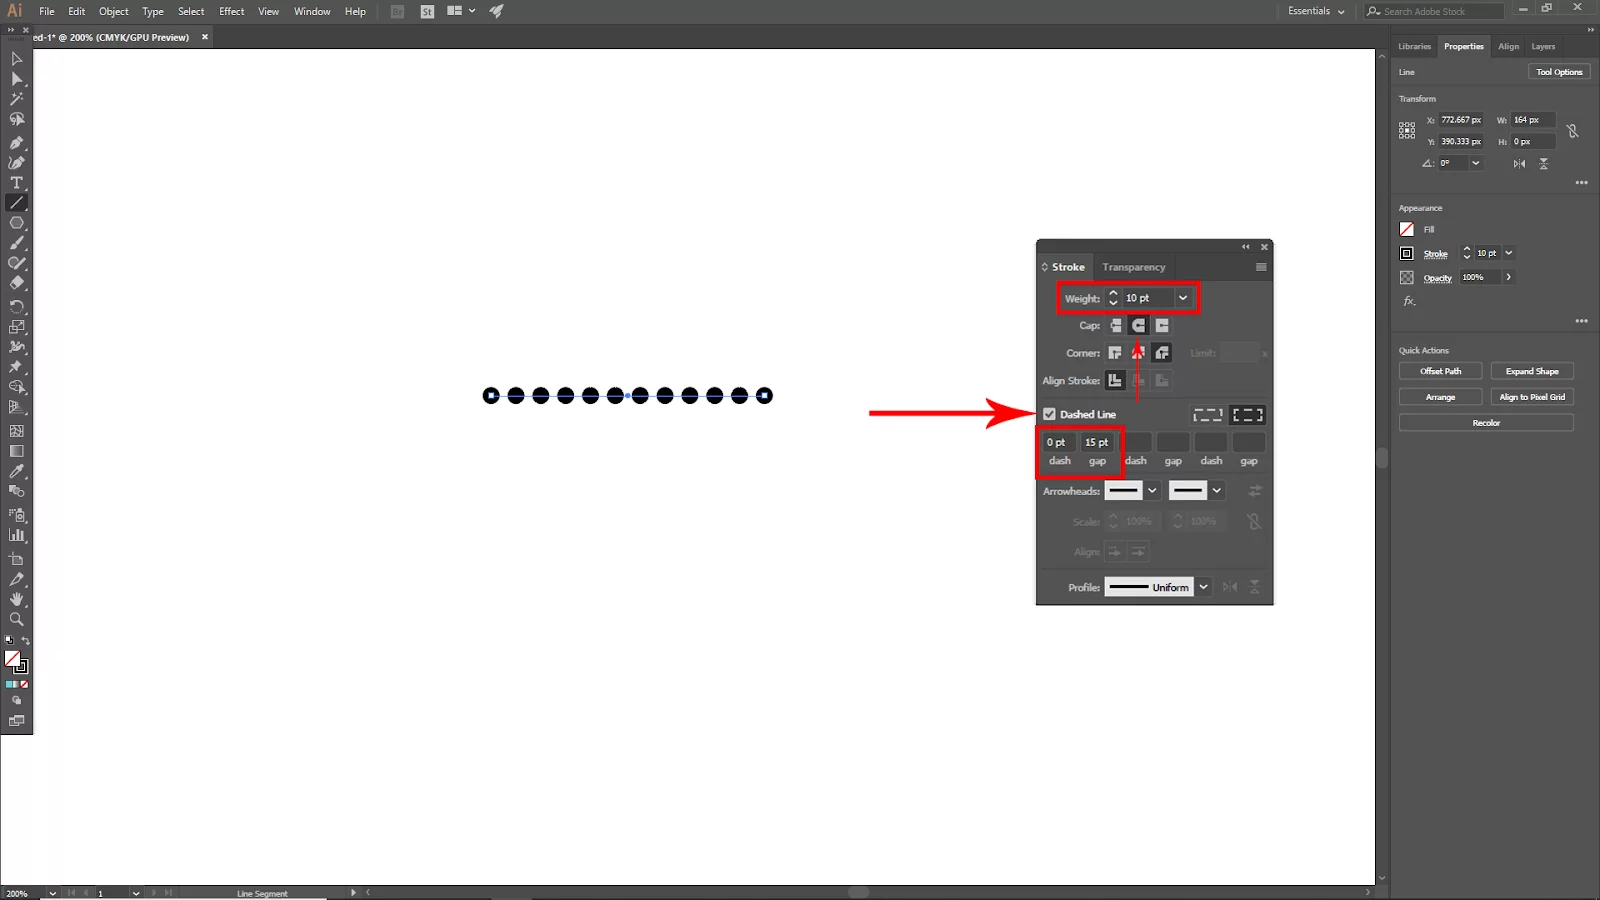
Step 2:
Now increase the weight value, and click on the round symbol of the Cap Option. Click on the Dash Line check box. And your dotted line is ready. If there is a mess with the lines, increase the gap under the dashed line, or you can also increase or decrease the dash as your desired dotted line.
You can also use this for your shapes. But it will work only on stroke shapes.

Creating a Dotted Line Using Brushes
You can also create a dotted line by generating a new brush or adjust it by changing the stroke settings.
Step 1
Start by choosing the Ellipse Tool, then draw a tiny circle.
Step 2
Go to the Brushes panel, and drag the circle. The Brushes Panel can be accessed via the overhead menu Window > Brushes if it isn’t already open.
Step 3
The New Brush dialog window will appear when you drag the circle to the Brushes panel, and the Scatter Brush option will be selected by default. Select OK.
Step 4
You can modify the Scatter Brush Options after clicking OK. Change the brush’s name while leaving the other options alone for the time being.
Step 5
Next, draw a line by selecting the Line Segment Tool.
Step 6
Return to the Brushes panel and choose the newly created dotted line brush.
Step 7
The Scatter Brush Options box will reopen when you double-click the brush in the Brushes panel. To acquire the outcome that will work best for you, check the Preview box and modify the Size and Spacing.
Creating Dotted Line By Changing Stroke Style
Follow the steps below to create a dotted line by changing the stroke style.
Step 1
Start by drawing a line with the Line Segment Tool.
Step 2
Next, Click Stroke from the Appearance panel.
Step 3
Then, reconfigure the parameters. You now have a few alternatives for modifying the line. Change the corner to a round join and the cap to a round cap.
Step 4
Change all dash values to 0 points and check the Dashed Line box. The gap value defines how far apart the dots are; the larger the value, the farther apart they are. You can make the dots bigger by selecting the line and increasing the stroke weight.
Using The Blend Tool To Create a Dotted Line
Follow the steps below to create a dotted line using the blend tool.
Step 1
Start by using the line tool to draw a line. Now use the ellipse tool to draw a circle. Holding shift will help you draw a perfect circle.
Step 2
Next, duplicate the circle. To begin, use the Selection tool. Next, click the circle while holding the Alt key, then drag. The circle will be duplicated as a result.
Step 3
After choosing both circles, go to Object > Blend > Make. The same result can also be obtained by selecting both circles. Use the blend tool, and then click on one circle before moving on to the next to blend them.
Step 4
Next, choose the blend and the line using your selection tool. Go to Object > Blend > Replace Spine to navigate. Then, Go to Object-> Blend-> Blend Options.
Step 5
Now, enter the number of dots you want between the first two you made to get the spacing you want. For instance, if you enter 2, there will only be two circles between the first two you made.
Step 6
To alter the gap values and set the distance between the dots, choose Specified Distance from the drop-down menu. This will cause a larger or smaller gap size between the dots. Again, using this technique, you can create your dotted line from any shape you desire.
You can also check out our in-depth article on finding pantones in Illustrator.
Leave a Reply
You must be logged in to post a comment.