Once upon a time, there was a designer who found themselves staring at a cluttered and disorganized artboard in Illustrator. They desperately wanted to change the color of their artboard to better match their design but didn’t know how to do it. That designer was me a few years ago when I first started learning to use the Illustrator software.
When working on a design project in Illustrator, it’s important to have a clean and organized workspace. One way to achieve this is by changing the color of your artboard to better match your design or to make it easier on the eyes. This task might seem daunting but with the right steps, it is actually quite simple. To get started, read our what are artboards article to get acquainted with artboards and their uses.
How to Change Artboard Color In Illustrator
Here are the steps I follow to change Artboard Color:
Step 1:
You have created your artboard and by default, it is a white color, and you want to change this to your desired color. To change this, go to the Artboard selection tool and select it.
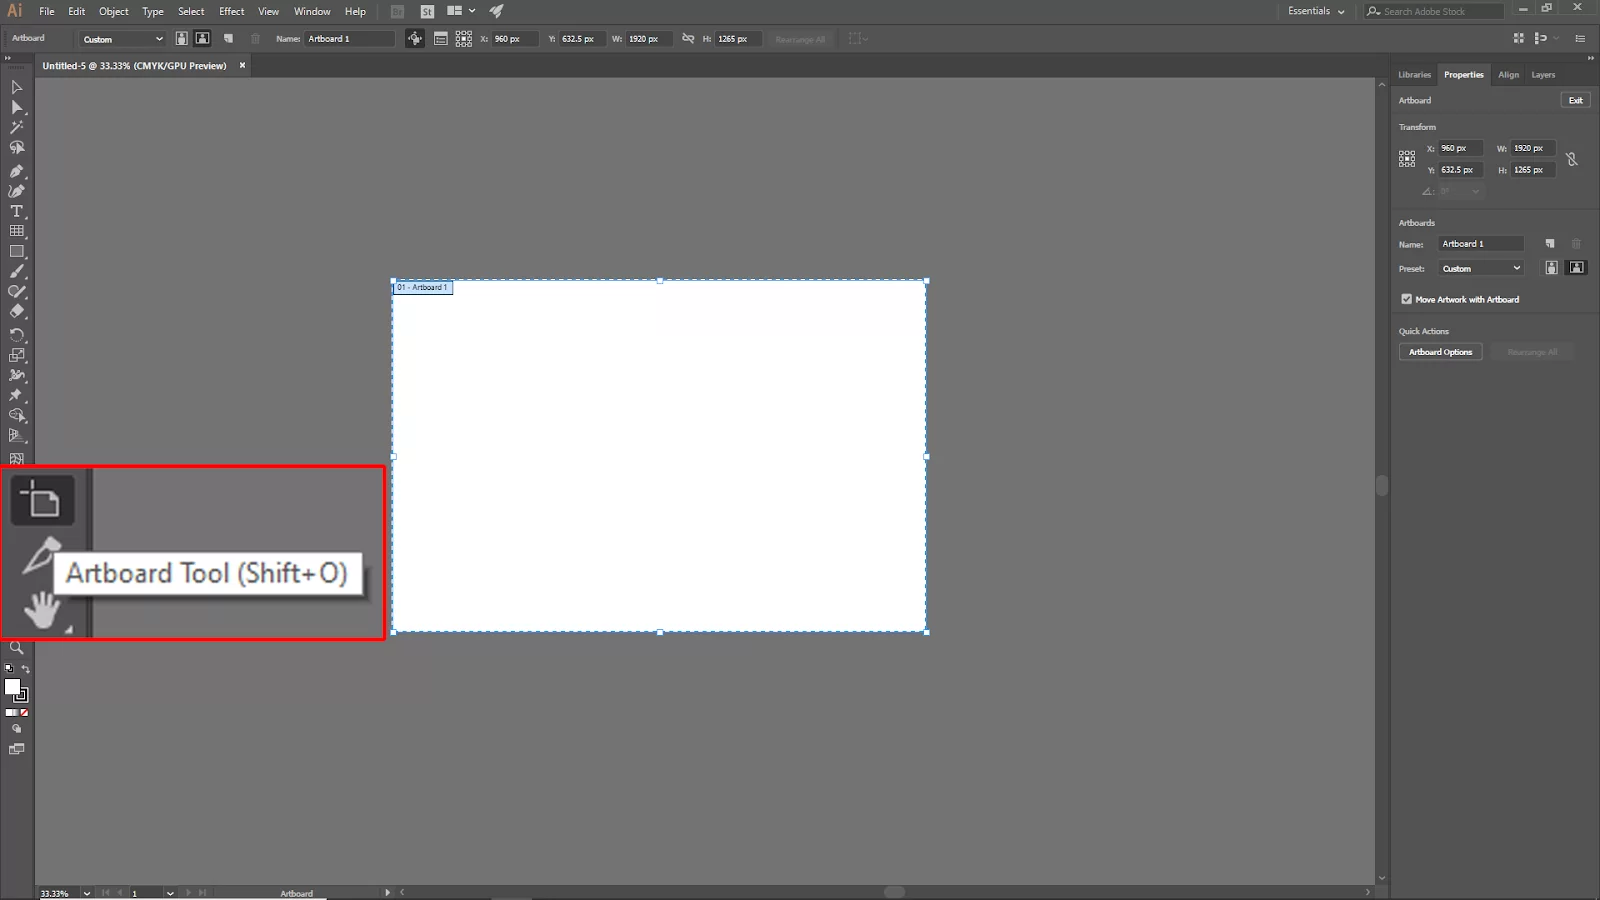
Now go to FIle > Document Setup. Or you can use the short key for this win [Alt + Ctrl +P] or Mac [Option + Cmd + P].

Step 2:
Your Document Setup Panel will open. Now check box the Simulate Color Paper. Click on the right-side top color pallet and your artboard color panel will open.
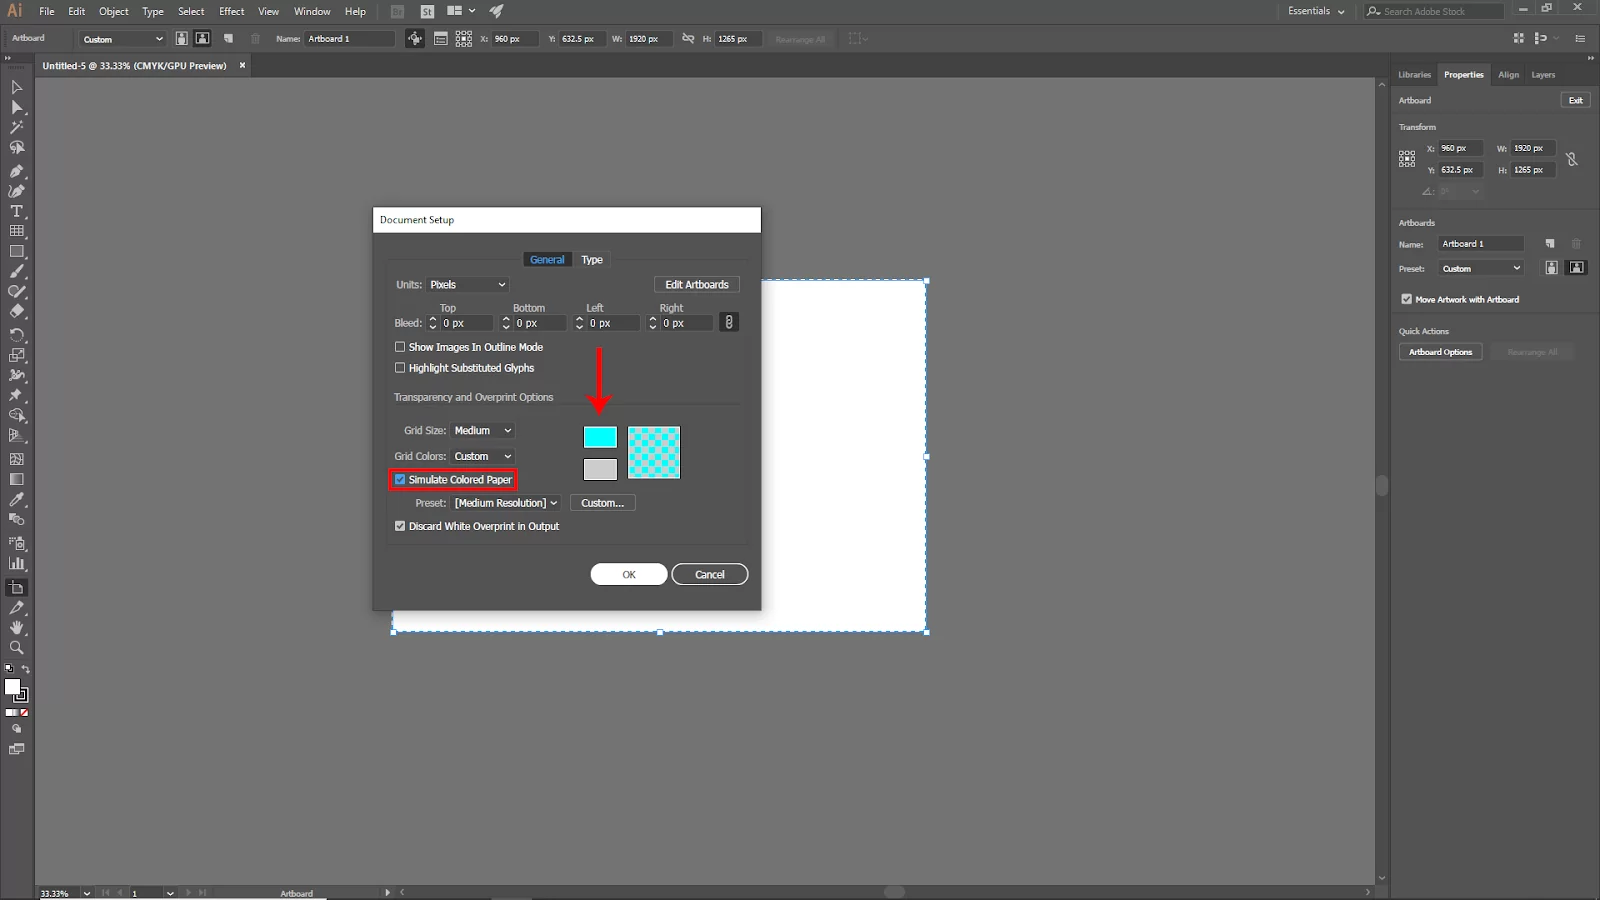
Select your desired color and then click ok.

Your artboard color should be changed. You can use this method to change multiple artboards.

How to Remove The Background Color of an Artboard
You can remove the background color using two main methods, which will be explained below.
First Method
Follow these procedures to get rid of the color if you choose to make it using the Simulate Colored Paper option.
Step 1
Choose File > Document Setup from the top menu and Uncheck Simulate Colored Paper in the Document Setup window. Your document will convert back to its usual white hue.
Step 2
Alternatively, you can manually return the color you chose to white. But the quickest way is to uncheck the Simulate Colored Paper option.
Second Method
Use the second method to eliminate the background color if you modify it with the Rectangle Tool (M).
Step 1
If you locked your base layer, go to the Layers Panel and unlock it. Verify that this layer doesn’t contain any other components you don’t want to eliminate.
Step 2
Click Delete after selecting the Layer. This would remove the rectangle that generated the background color from your project. If there are any items on the base layer that you want to maintain, either create a new layer and move them there or use the Fill option to alter the rectangle’s color to white while leaving the layer in place.
Changing Artboard Color By Changing Transparency Grid Color
The white background you see when you are creating a document is transparent. You can turn the transparency grid on to see it.
Step 1
By pressing Shift + Command + D, choose View > Show Transparency Grid from the overhead menu.
Step 2
Next, choose File > Document Setup from the overhead menu. You can choose the grid colors and see transparency and overprint options.
Step 3
Select a fill color by clicking on the color box. After selecting a color, click the button to exit the window to view the grid’s new color.
Step 4
Click OK after selecting Simulate Colored Paper. Apart from changing artboard colors, Illustrator can be used to do a lot of other manipulations such as filling colors in shapes and artwork.
Leave a Reply
You must be logged in to post a comment.