Illustrator Artboards is one of the features that make Illustrator worth it. Apart from organizing and separating different design elements within a single file, which can help to keep your work organized and make it easier to navigate.
Artboards can also be used to create multiple versions or variations of a design within a single document. This can be pretty useful for creating different versions of a logo, for example, or for creating different sizes of an image for different platforms.
Let’s learn more about the Artboard feature in Illustrator.
Illustrator Artboards: What are They?
Artboards in Illustrator are a feature that allows you to create multiple layouts within a single document.
Why are Artboards Important?
One of the best things about Illustrator artboards is their adaptability. Artboards in illustrator are adaptable and simple to alter so that you can change them to best suit your design. Artboards are crucial for keeping your design intact. You also can only export your work with an Artboard.
Artboards can be used to organize and separate different design elements, create multiple versions or variations of a design, export multiple versions of a design in a single operation, create designs with different sizes and aspect ratios and work on different pages of a multi-page document.
Artboards are not only very vital, but they are also good for organizing your job. You can easily reorder artboards, change their sizes, give them names, copy and paste artboards to create various designs, etc. Artboards can also be used to create a heart in Illustrator.
How to Add an Artboard in Illustrator
Basically, artboards are blank canvases in Illustrator. Where you will create the design that you intended to make. It helps you to work with a specific area of your design. Here are some steps to create an artboard.

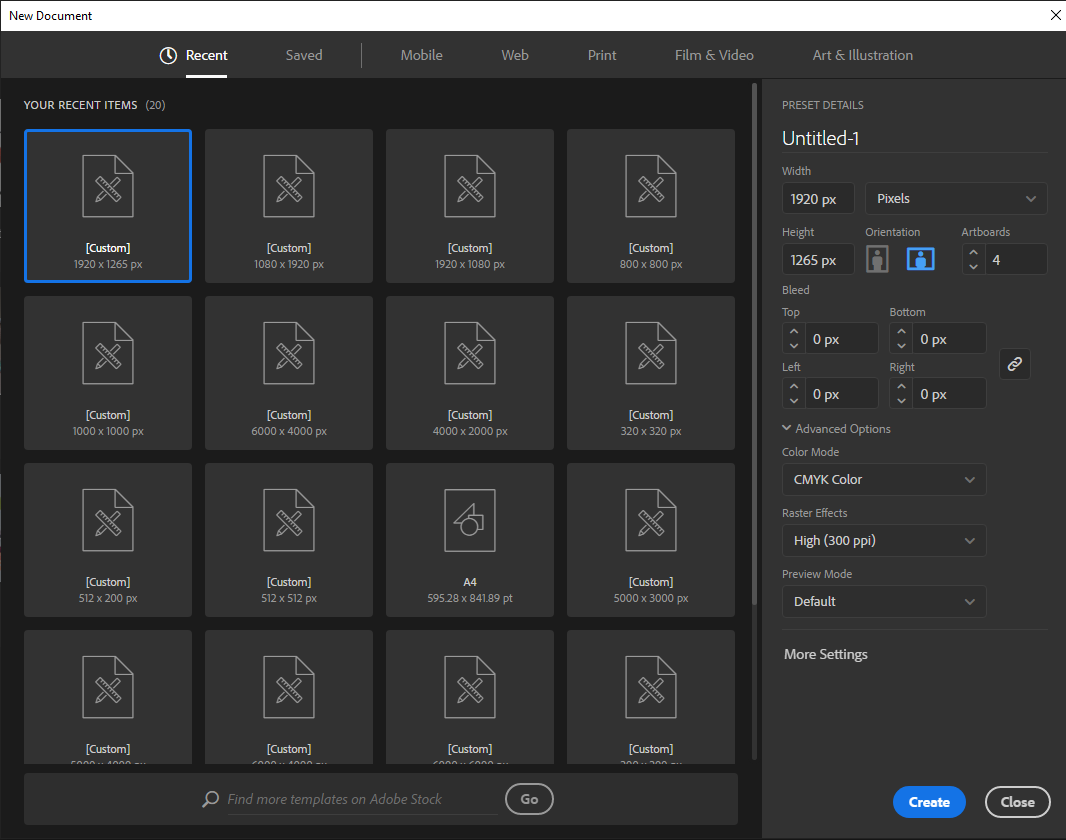
First, we need to open Adobe illustrator. And create a blank project, click Create New or you can go to File > New for the short key win [Ctrl + N] or Mac [Cmd + N].

The artboard settings panel will open. You can adjust the width and height. For this, I will use full 1920×1080 px. You can choose the artboard number and how many artboards you want to create in one project. For this example, I used 4.

You can also adjust the spacing between the artboards. Go to more settings and you will find the spacing option and column option. For this artboard, we will use an 80 px spacing.
If your project will go to printing you can use the bleed option to create a bleed line out of the artboard. That will help you with printing designs. For printing projects, always choose color mode CMYK.
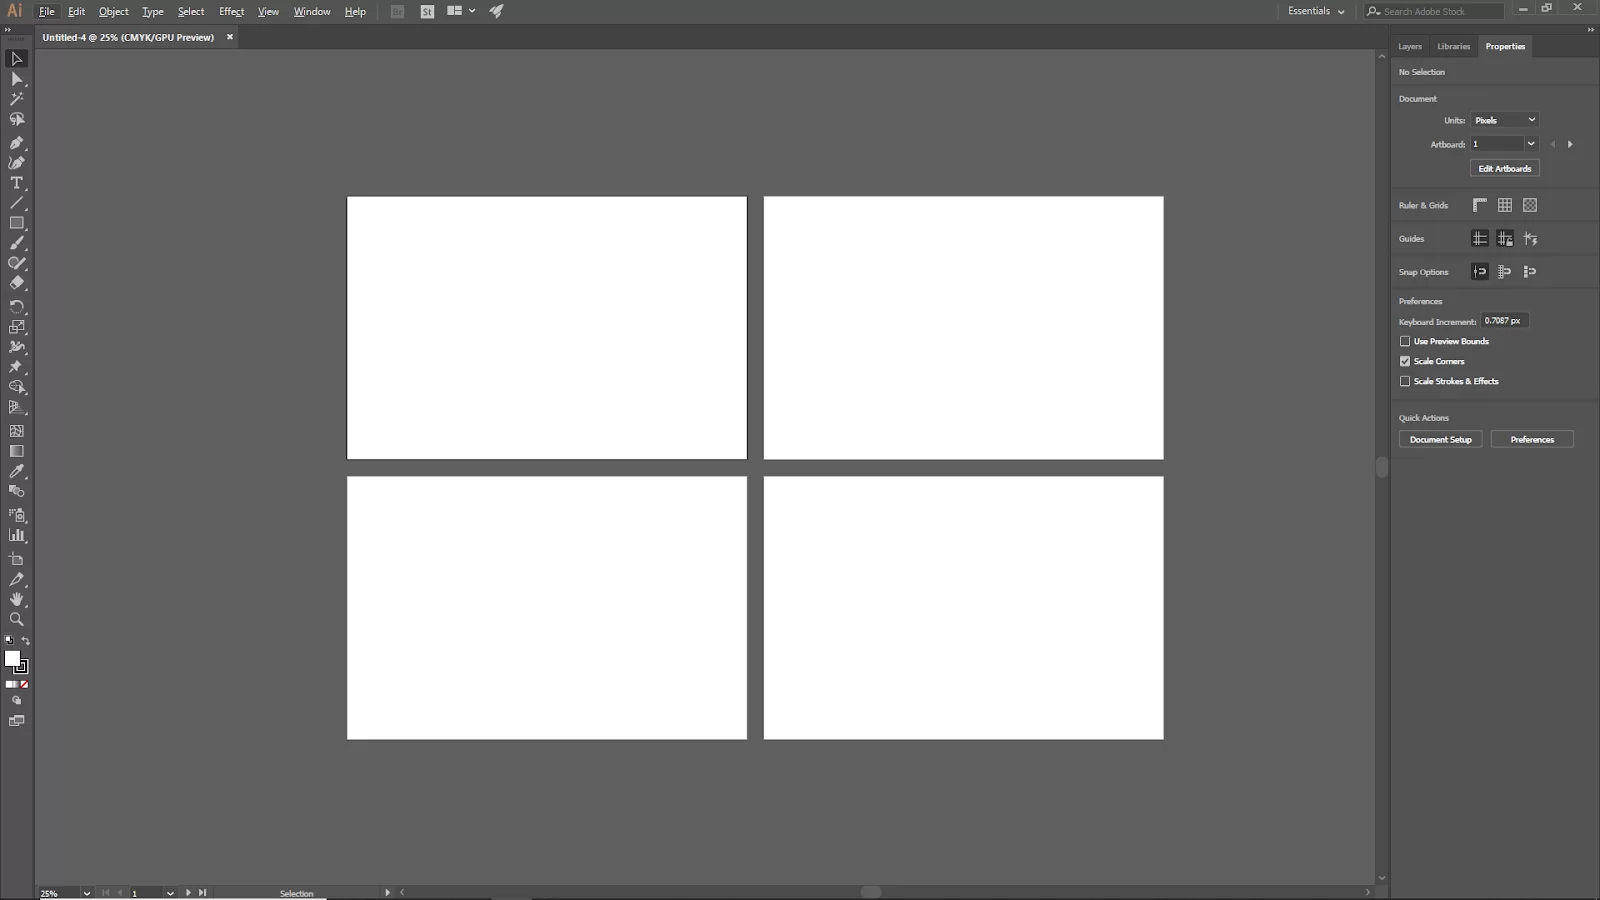
And now click on create. Now you can see 4 artboards are created.

How to Resize Artboards
Unlike some other design software, illustrator allows you to resize and move the artboard quickly. In some other design software, you must change the canvas size from the document settings before resizing your artboard.
If you wish to resize your artboard, navigate to the toolbar. From the toolbar, choose the Artboard Tool. The artboard border will have dashed lines, indicating that you can change it.
Next, click on the artboard and transfer it to the correct location if you wish to move it. Click on one of the corners and drag to modify the size to match your design. In the Properties panel, you may manually enter the size or alter other artboard parameters.
How To Save Artboards
No, artboards are not going extinct, so I’m not talking about saving them from extinction ( forgive my attempt at making you laugh). I’m talking about saving your artboard in formats such as jpeg, PNG, eps, etc. You can save only a particular artboard, a range of artboards, or all. Here’s how it works. After checking Use Artboards and changing the option from All to Range at the bottom, click Save As. Then select the artboards you want to save and click Save.
How to Delete Everything Outside an Artboard
As stated earlier, you can select Use Artboards when exporting your file; when you do so, everything beyond the artboard will not be displayed when saved.
An additional method is to create a clipping mask on the artboard. Choose and organize every item on your artboard to create a clipping mask to complete the task. Start by creating a rectangle the size of your artboard, then create a clipping mask.
How to Save Illustrator Artboard as a Separate PNG
Saving your illustrator artboard as a separate PNG is very simple. It would help if you started by choosing filefile> Export > Export As from the overhead menu to export your file as a PNG. Next, input the artboard number you want to export as a png, check the box next to Use Artboards, change All to Range, and then click Export at the bottom of the Export window.
Leave a Reply
You must be logged in to post a comment.