Welcome to our tutorial on how to zoom in on Final Cut Pro. Are you ready to take your video editing skills to the next level? Zooming in on a specific area or object in your video can add a professional touch and draw the viewer’s attention to a particular point. In this tutorial, we’ll show you how to easily and smoothly zoom in on your footage using Final Cut Pro.
2 Ways to Zoom in and Out on Final Cut Pro
Let’s get started!
Method 1:
I will show you how to zoom in using the Crop tool, which is under the transform tool, in this method.

Position the playhead on the timeline wherever you want to zoom in on your video. Now click the drop-down arrow of the Transform tool and click on Crop.

Next, click on Kan Burns. You will see on your preview panel two rectangles on your video: the first one is green and the second one is red. The green one is the zoom-out area and the red one is the zoom-in.

Adjust the green rectangle to fit the video and adjust the red rectangle where you want to zoom in on your video. The zoom size depends on the red rectangle size. Now your zoom-in effect is ready. If you want to make this reverse zoom out just click the reverse arrow on the left upper corner. And your zoom-in effect will turn zoom out.
Method 2:

First, position the playhead on the timeline where you want to zoom in on your video. Now select the clip from the timeline.

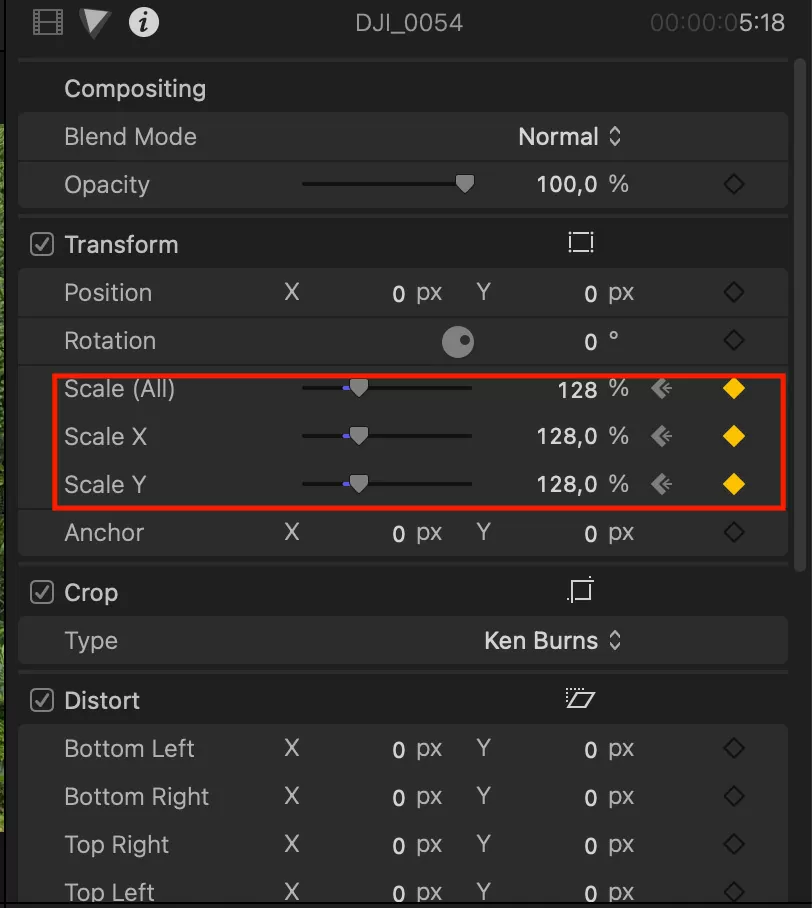
You will see the all-transform effect will show on the right side of the workspace area. Here we will create a keyframe in the scale parameter. Click on the keyframe icon it will create a keyframe of the video’s current scale.

Next, move the playhead forward, change the scale value, and increase it for zoom-in effect. It will automatically create a keyframe in your video timeline.
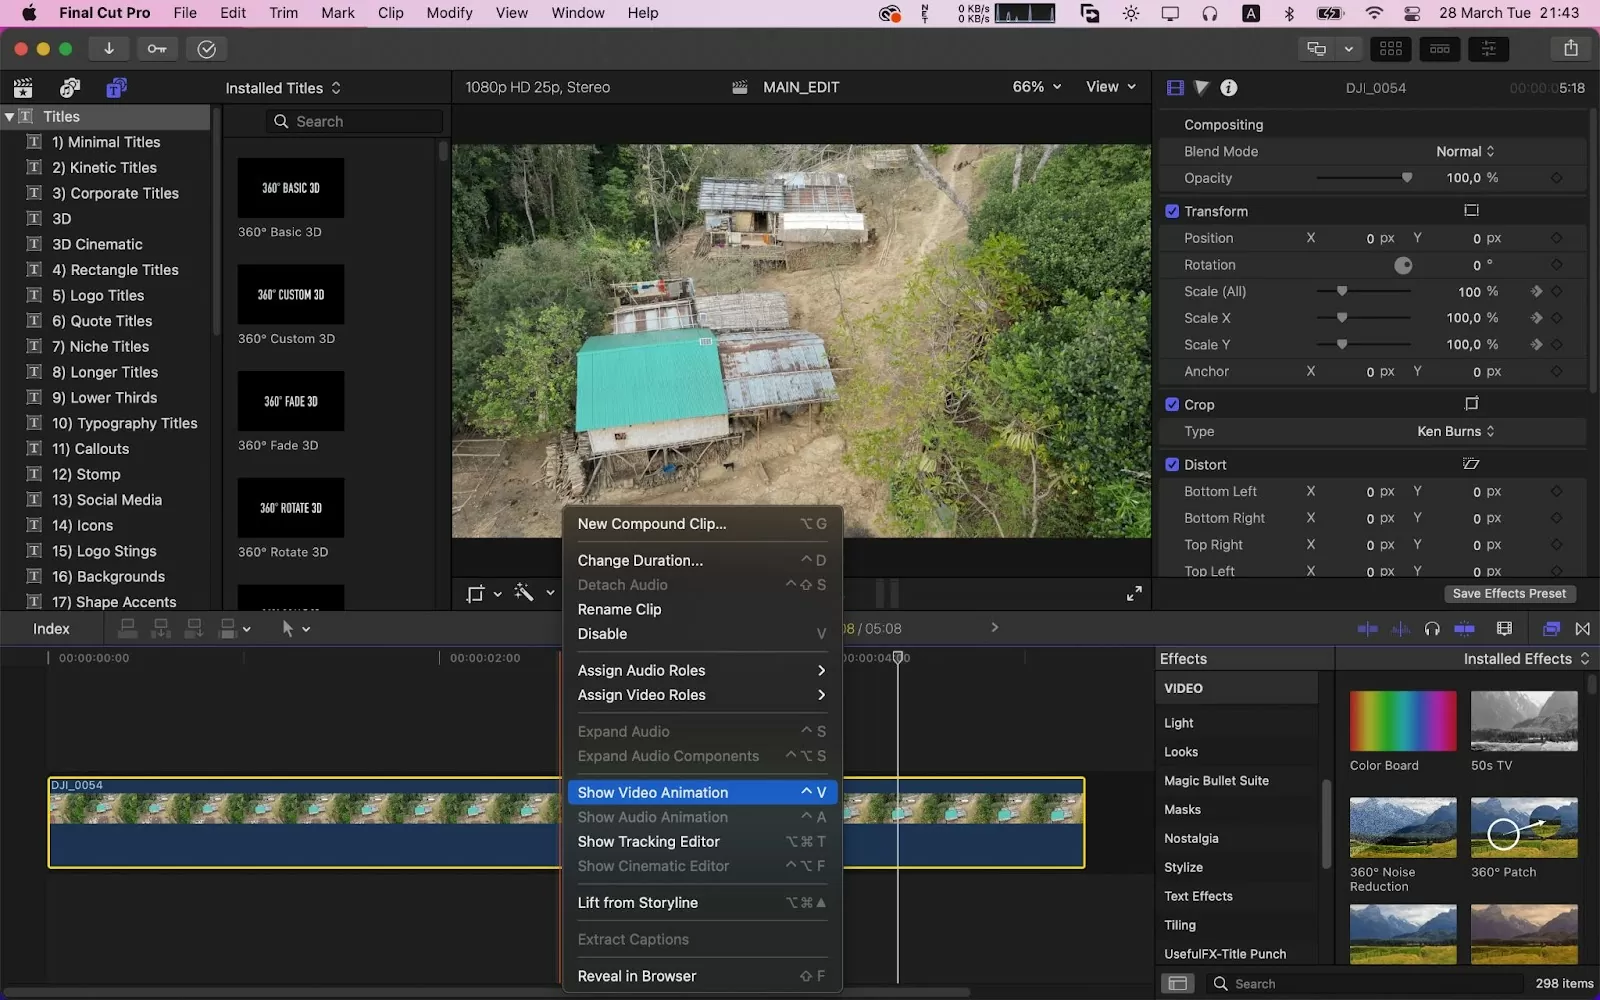
To increase the zoom-in speed right click on the clip in the timeline and click on Show video animation or you can use the short key press [ Cmd + V ].
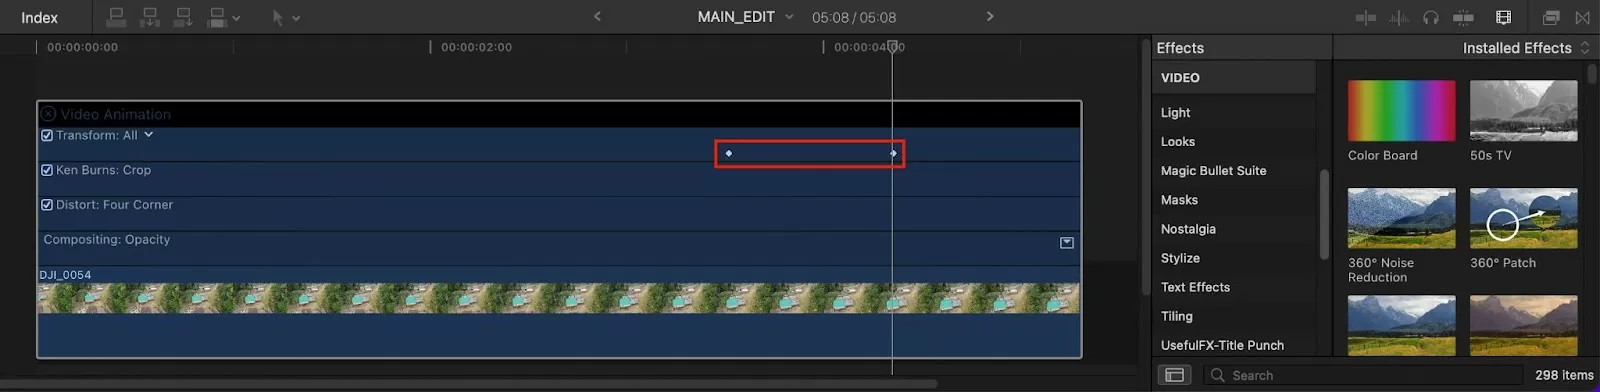
Now you will see the keyframes on the timeline. To increase the zoom-in speed bring the second keyframe closer to the first keyframe. The speed depends on the distance between two keyframes.
Exciting Things You Can Do With The Zoom Effect
The zoom effect can be used to do many exciting things on Final Cut Pro. Below are a few of them.
- Zoom Transition
You can utilize the scale and position tools to make obvious motion transitions, such as swiping one picture off as another enters the frame. If you are handling a project that moves quickly, such as a music video or advertising campaign, these transition effects work well. You may use many of the fantastic zoom transitions from Motion Array in your video productions.
- Zoom Titles
Having your titles move together with your image creates a great look for opening titles and advertising videos. Both text and video elements can be keyframed. But, it might be challenging to precisely match the movement.
Choosing New Compound Clip from the context menu after selecting your clip and text layer is a great tip when doing zoom titles. Apply your motion to the compound clip, which will impact the title and video.
You ccan also read our article on fading audio using Final Cut Pro.
Deleting and Copying Keyframes
Keyframing might be challenging because you must remember that a new keyframe is created every time you move or scale a clip. This can result in some erratic movement in your video.
Launch the Video Animation editor to delete Keyframes, then navigate your timeline to identify any keyframes that aren’t supposed to be there. Delete Keyframe by right-clicking on the keyframe. You can completely reset your clip by selecting the Reset symbol next to the appropriate parameter in the Effects control panel.
When working with several animations, it is time-saving to duplicate the keyframes to other clips. Simply choose the clip from which you want to duplicate the animation, then hit Command + C. Press Command + Shift + V after choosing the clip to paste the keyframes into and after choosing the settings to paste.

We also recommend that you see our step-by-step guide on how to rotate your video in Final Cut Pro.
Zooming Vs. Cropping: What is The Difference?
To keep more details in the image, zooming is primarily used. However, cropping merely enlarges a certain area of the video or image by removing or blurring distracting elements. We can conclude that when you zoom, you do not eliminate any of the image’s other pixels; rather, you increase the size of a certain area of the image or video.
You can choose the landscape area you want to capture properly and present to the viewer by zooming in on the image. However, you aren’t given this choice when you crop an image. Of course, you could crop it arbitrarily, but it would dilute the image’s authenticity.
When you zoom in on an image, you get clarity and a point-and-shoot focus, but when you crop an image, you lose definition and get ripped pixels, and no one loves a warped photo.
Changing your lens’s length to create the desired composition is also known as zooming. Zooming occurs while you are shooting a picture outside. Contrarily, cropping is the process of altering a photograph after it has been shot by choosing a smaller portion of the original image to create the final image. When you zoom, you use your lens or your feet; when you crop, you use a computer.
Did you like reading this article? You will also like our in-depth guide on how to save a video on Final Cut Pro