Saving a video in Final Cut Pro is a crucial step in the video editing process, but it can sometimes be challenging for users. One common issue is not properly organizing and naming your project files, which can make it difficult to locate and save your work.
I’ll walk you through the steps to ensure your video is safely saved and ready to be shared. Just follow along and you’ll have it saved in no time.
How to Save a Video on Final Cut Pro
Here are 2 ways to Save a Video in Final Cut
Method 1:
There are actually no specific ways to save a Final Cut Pro project. When you do a little bit changes to your project, it will automatically save on your file location. You can view the save file wherever you put your file location when you created your project.
Backing up your file is another way to save your project. Click your project panel, and on the right-side corner, click on Modify. A panel will appear here. You can see the backup option, which will automatically save your project as a backup file.
Method 2:
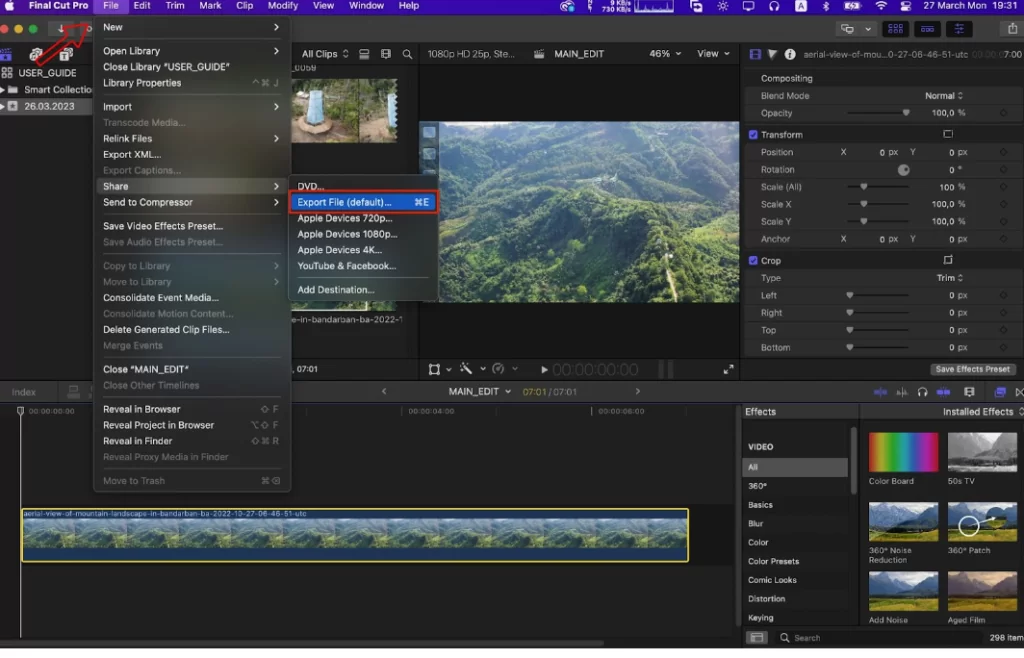
Save your video by exporting it.
Go to File > Share > Master File (default) from the upper menu bar. There are many settings to export the video, but this is the easiest way, and this method is used for most of the video.
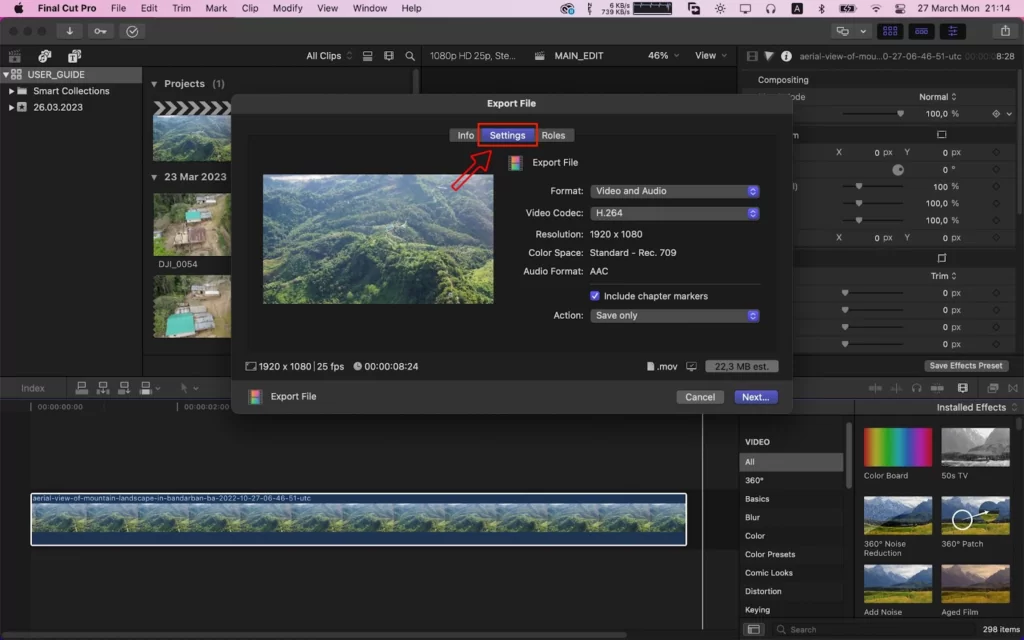
After clicking on Master File (default), the master File panel will open. Here you find all the exporting settings of your video. Now click on settings.
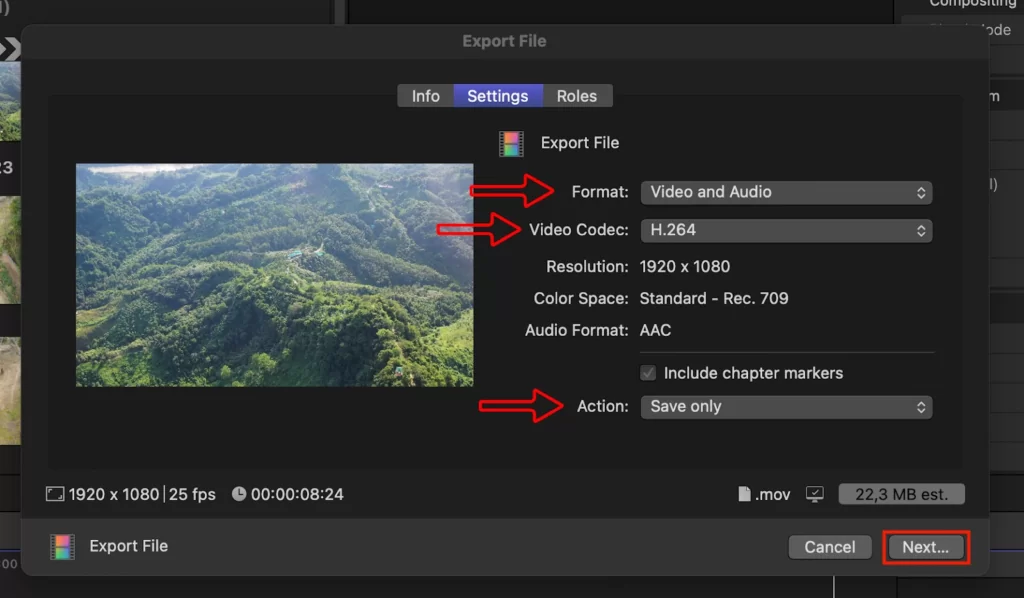
After Clicking settings, the video exporting setting will appear. Now select The Format > Video and Audio. Select the video Codec H.264, this is the most common video codec, and all the platforms use this codec. And this codec file size is so small. You can choose your desired video codec. There are many video codecs in Final cut pro. Then Click Next, and your video will be exported.
Library Backup in Final Cut Pro
Organizing and securing your work depends on you backing up your library. With each new project started and every change made, your library will automatically back itself up.
Before anything else, you should make sure you have enough capacity to store a backup of your library. This is very important. For higher library sizes and to prevent slowing down the performance of your system, external hard drives are advised. Follow the steps below to backup your Final Cut Pro library.
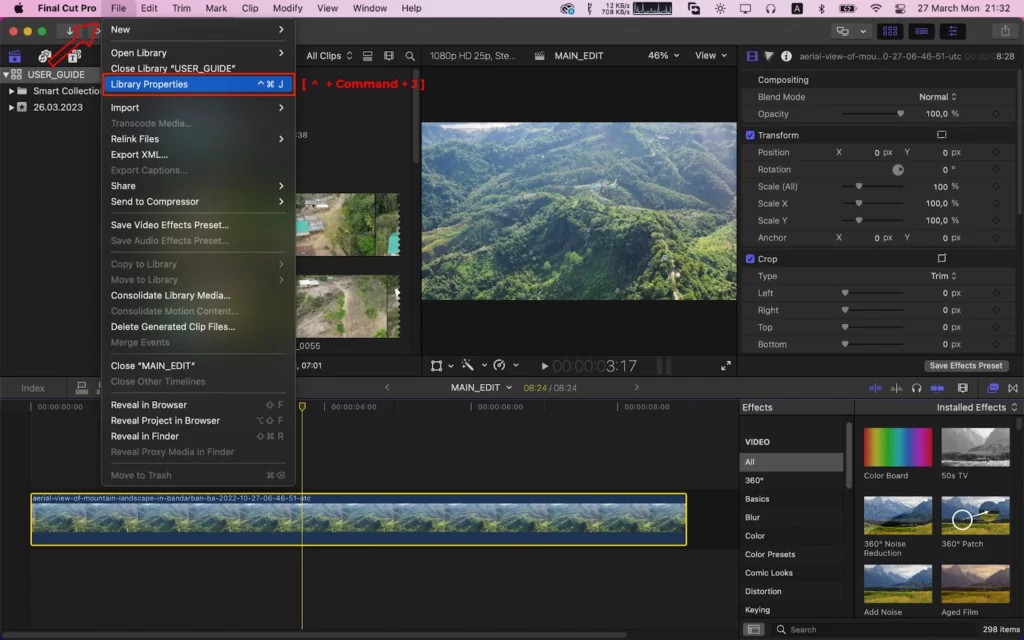
Step 1
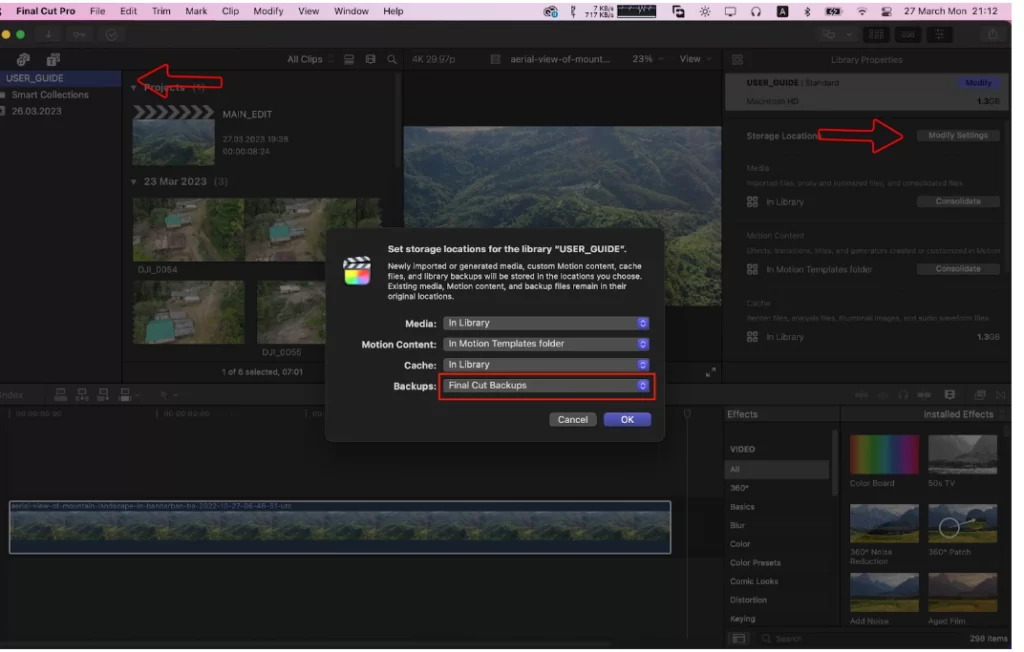
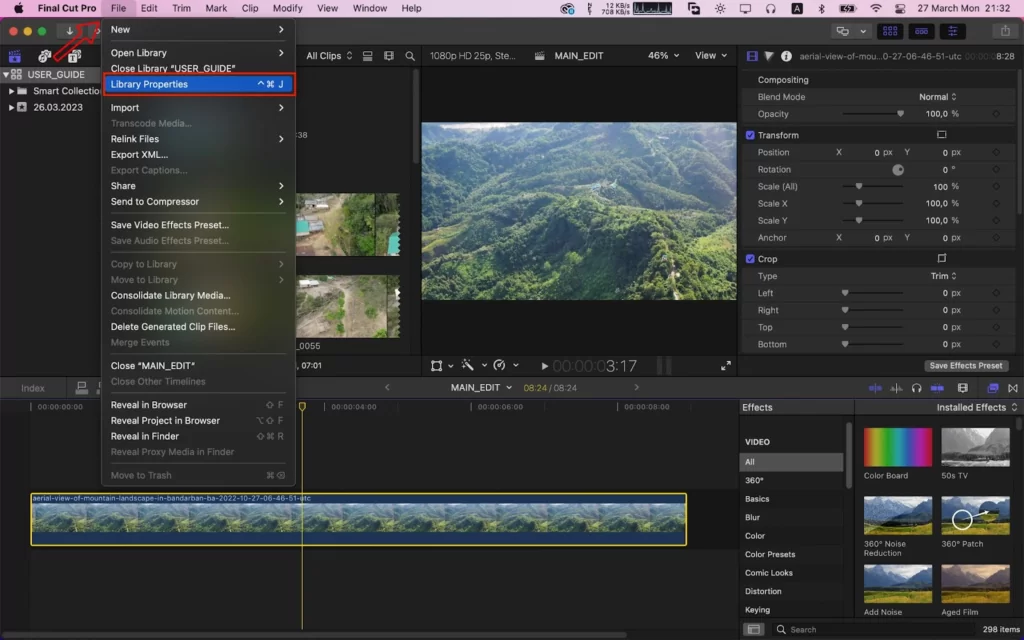
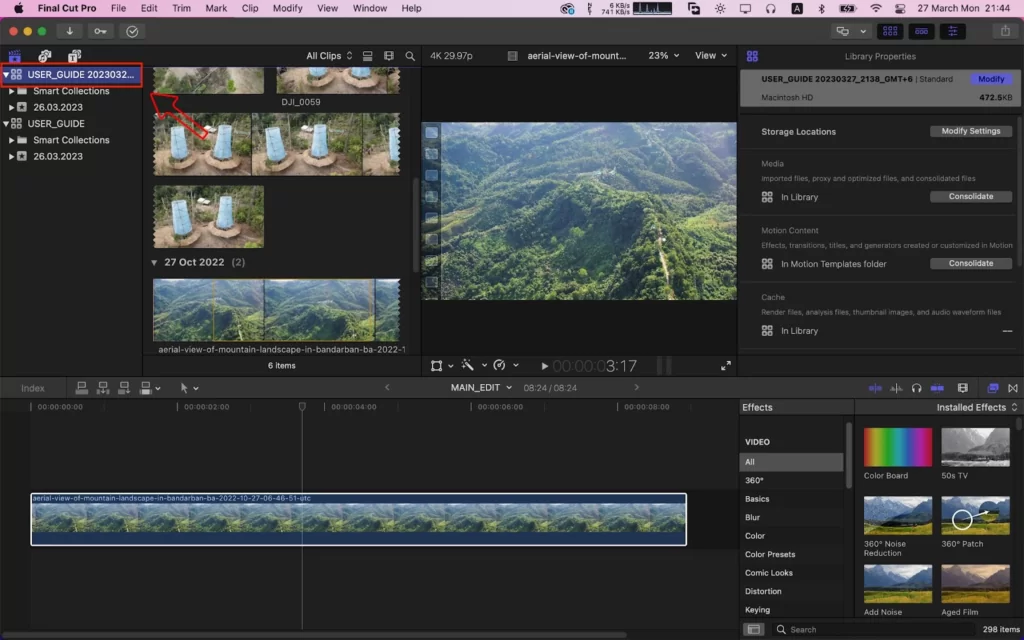
Using the keyboard shortcut Command + J, go to File > Library Properties to view the library. The right side of your software will then display a new panel.
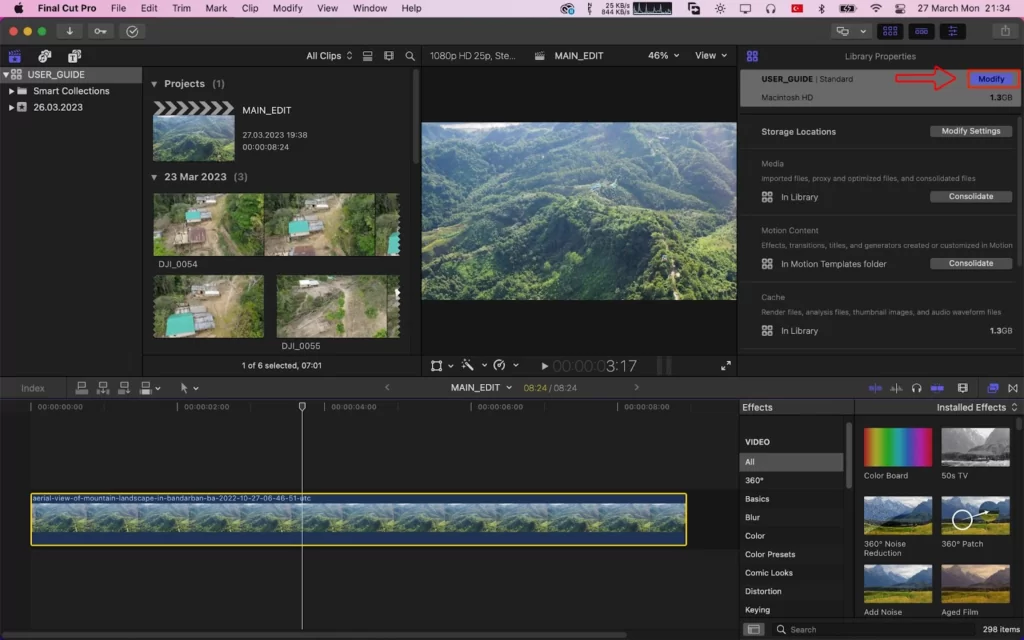
Step 2
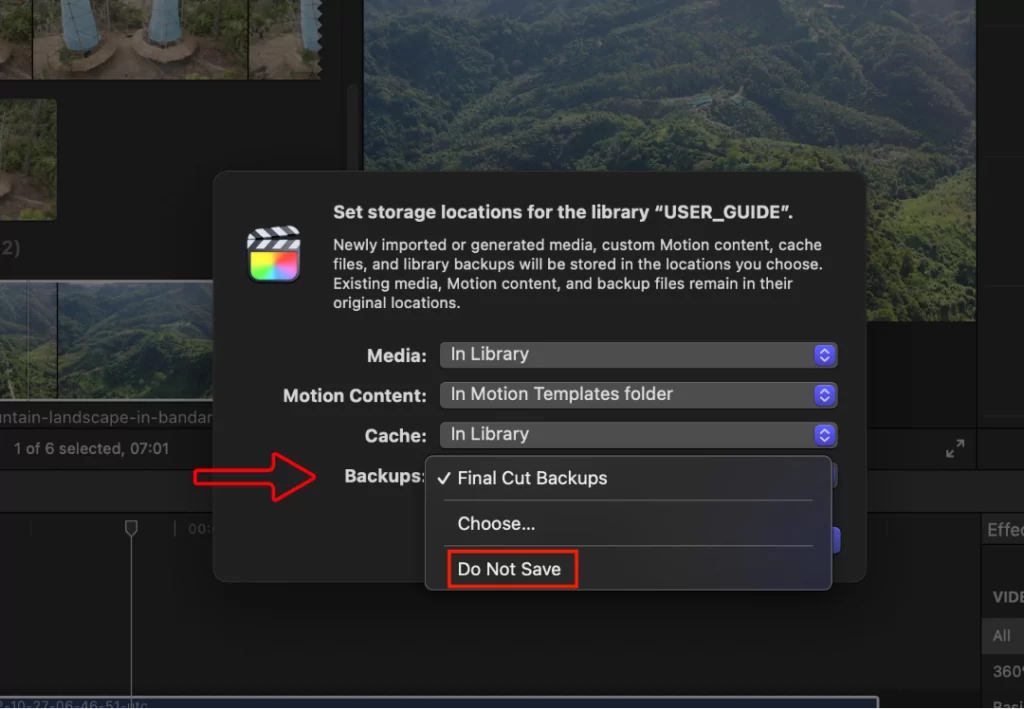
You can modify where your backup is stored by clicking Modify Settings. The cache and Motion content can also be kept in your Final Cut Pro library or elsewhere.
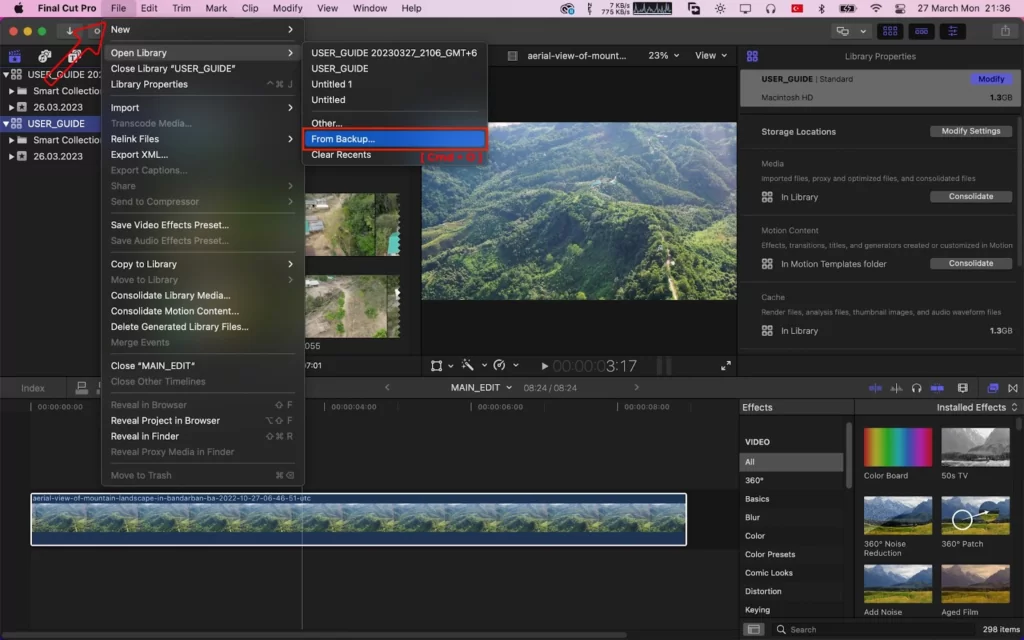
Step 3
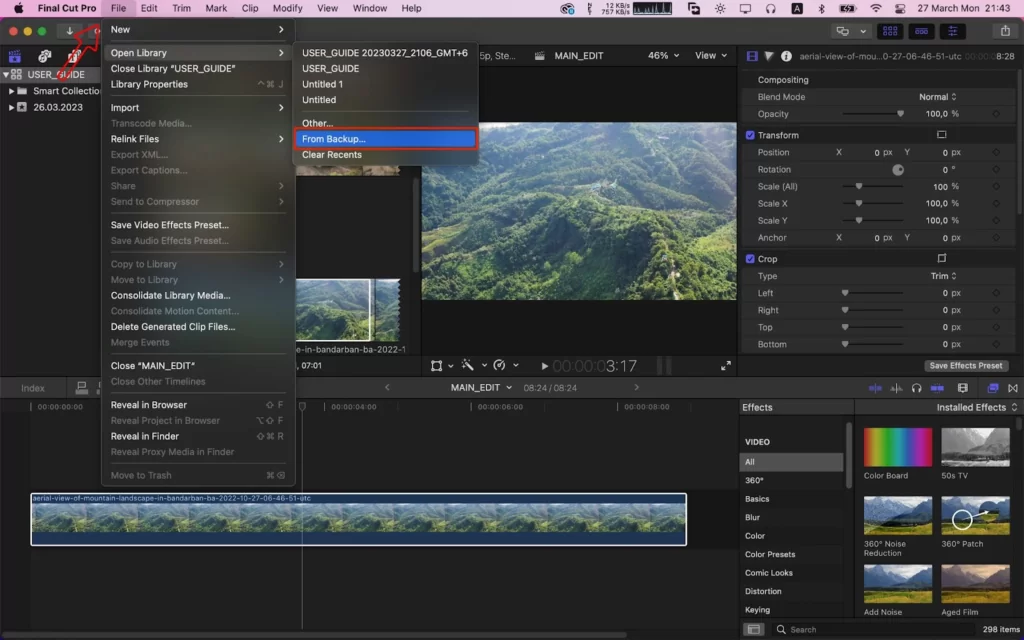
You can also choose to access older Final Cut Pro libraries. There is the option to restore a library that has already been saved. If the library is not listed in that tab under the most recently opened panels, choose it from your computer by selecting Open Library > From Backup… > Restore. You may employ Command + O as a shortcut to get your older versions.
Step 4
You can always duplicate your library using copy/paste. The shortcut for copy or paste is Command + C and Command + V. Depending on how big your collection is. This can take a while. So, you’ll need to exercise a little patience. However, the outcome will be the same, and you’ll have a fresh copy of your Final Cut Pro library.
You can check out my detailed article on how to use Final Cut Pro if you are having a hard time understanding these steps.
Deactivating Autosave in Final Cut Pro
It is not recommended to deactivate Autosave, but if you must, follow the steps below to achieve it.
Step 1
Go to “Files” and select “Library Properties” to open this menu.
Step 2
About five options can be found to the right of your screen once you’ve opened the Library Properties. You must locate the Storage Locations section and select Modify Settings to disable the autosave feature.
Step 3
Make sure to save your projects yourself because Final Cut Pro won’t save them anymore once these options are selected.
Step 4
It can become difficult always to remember to save your work if you choose to turn off the autosave feature. Instead, you can employ the simple trick: Click Command+Z whenever you want to stop saving a change you’ve just made.
How To Restore a Final Cut Pro Library
Final Cut Pro often does automatic library backups. Libraries’ databases are included in backups. The time and date are stored in the filename of the backups. Although you can modify the backup location, Final Cut Pro, by default, saves backups to the Final Cut Pro Backups folder. Final Cut Pro automatically deletes library backups older than a few days. Follow the steps below to restore a Final Cut Pro library.
Step 1
Choose the library you want to restore from the Libraries sidebar in Final Cut Pro.

Step 2
Select File > Open Library > From Backup from the menu.
Step 3
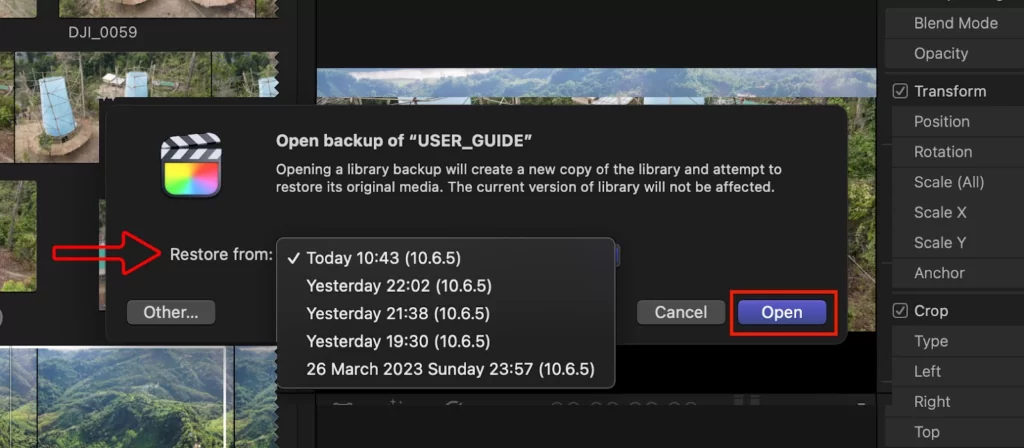
Select a backup from the Restore from the pop-up menu and a certain time and date, or click Other to select another backup file to open. Next, click Open.
Step 4
The backup is added to the Libraries sidebar as a library. Now that you know all there is know about saving on Final Cut Pro.
We also recommend these articles; how to Zoom in and out of Final Cut Pro and how to split clip in Final Cut Pro if you enjoyed reading this piece.