You’ve just finished your video and are ready to export. Exporting a video from Final Cut Pro is the final step in the video editing process, allowing you to share your work with others. However, it can sometimes be challenging for users. One common issue is not properly setting up the export settings, which can result in a low-quality or improperly formatted video.
It’s important to choose the right export settings based on your intended use and platform. Another issue is not having enough storage space on your computer or external hard drive to export the video. It’s important to regularly clean up and free up space to ensure that you have enough room to export your videos.
Whether you’re uploading to YouTube, sharing with a client, or just saving for personal use, we’ll go over the process of exporting a video from Final Cut Pro, including correctly setting up the export settings and choosing a location to save the exported file.
How To Export Final Cut Pro
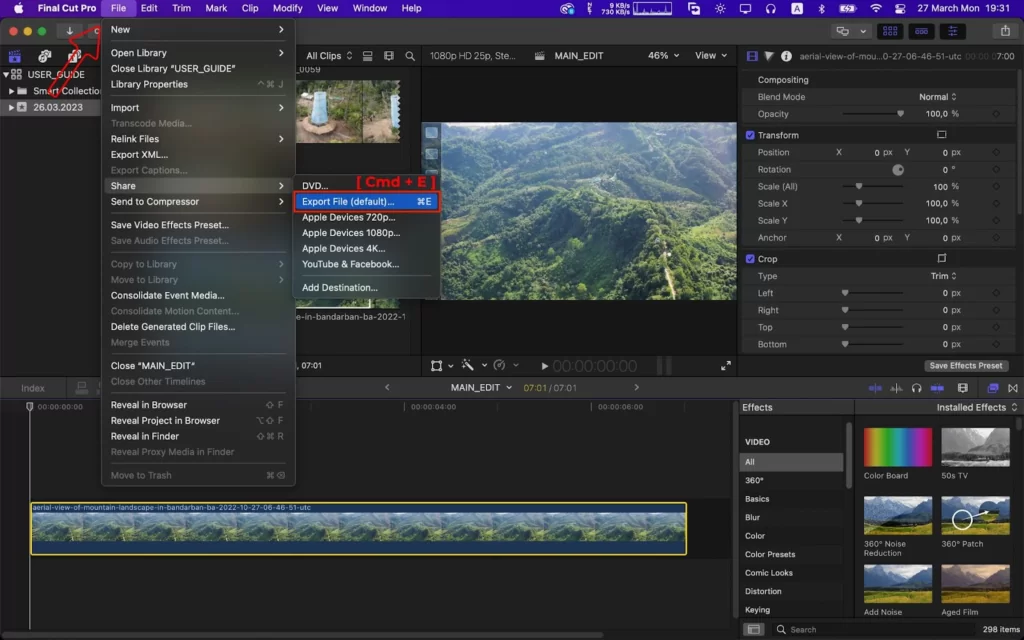
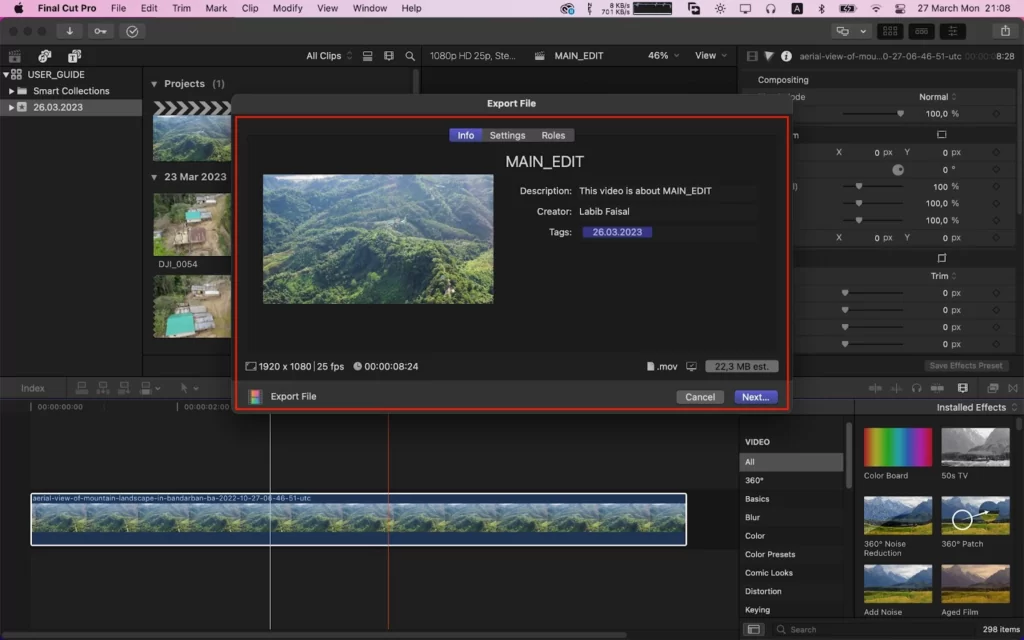
Go to File > Share > Master File (default) from the upper menu bar. There are many settings for exporting the video, but this is the easiest way, and this method is used for most of the video.

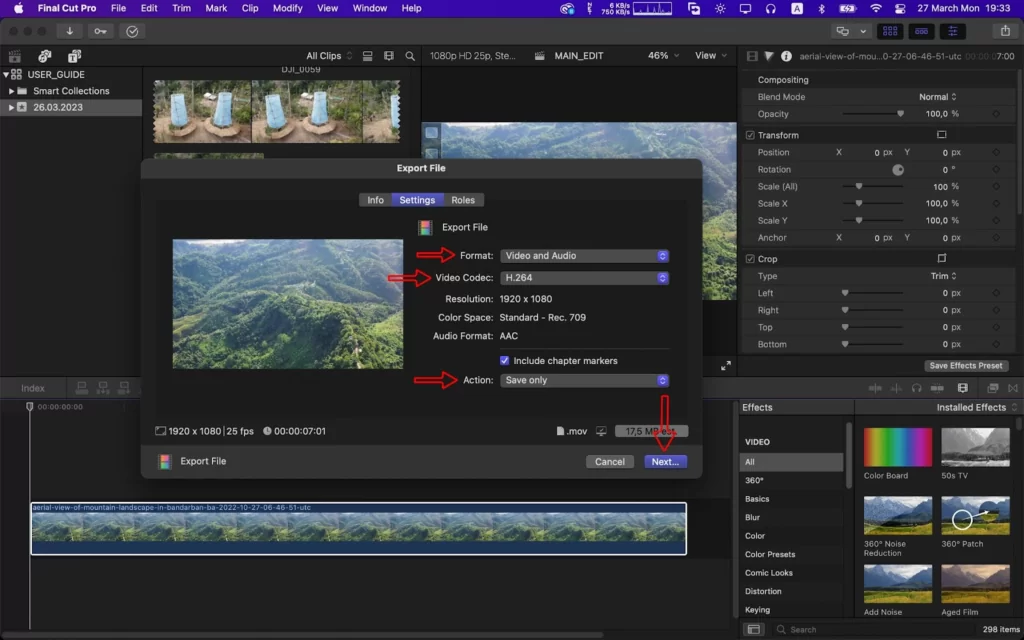
After clicking on Master File (default), the master File panel will open. Here you will find all the exporting settings of your video. Now click on settings.

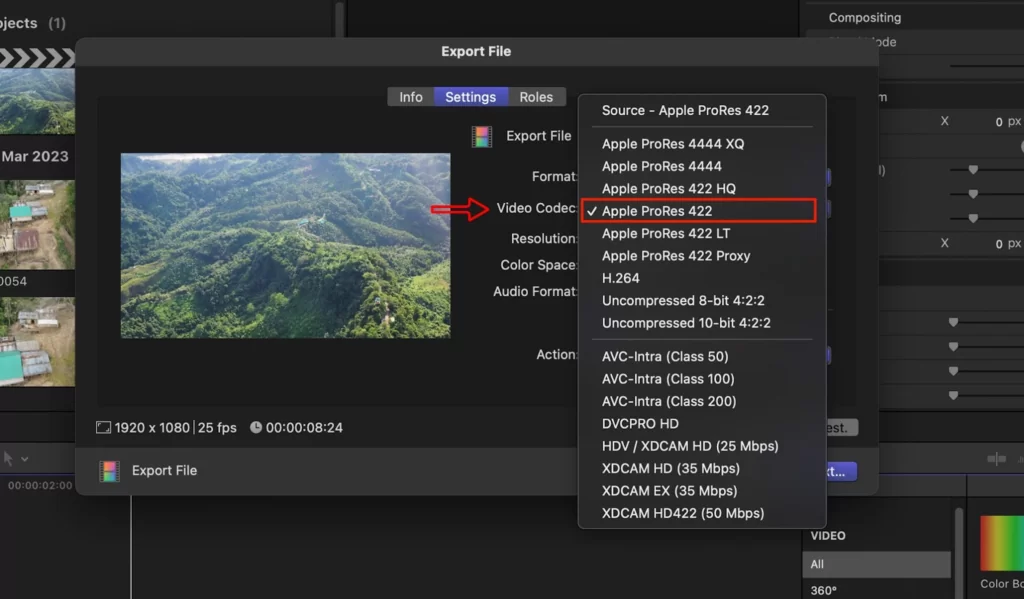
After Clicking settings, the video exporting setting will appear. Now select The Format > Video and Audio. Select the video Codec H.264, the most common video codec, and all the platforms that use this codec. And this codec file size is so small. You can choose your desired video codec. There are many video codecs in Final cut pro. Then Click Next, and your video will be exported.
How to Export a Section of Your Video Timeline
Sometimes you only have enough time to preview a small section of a project rather than the entire thing. Fortunately, there is an easy fix for that. If there is a particular area of your project that you’d like to render out separately, you can achieve it by following these instructions.
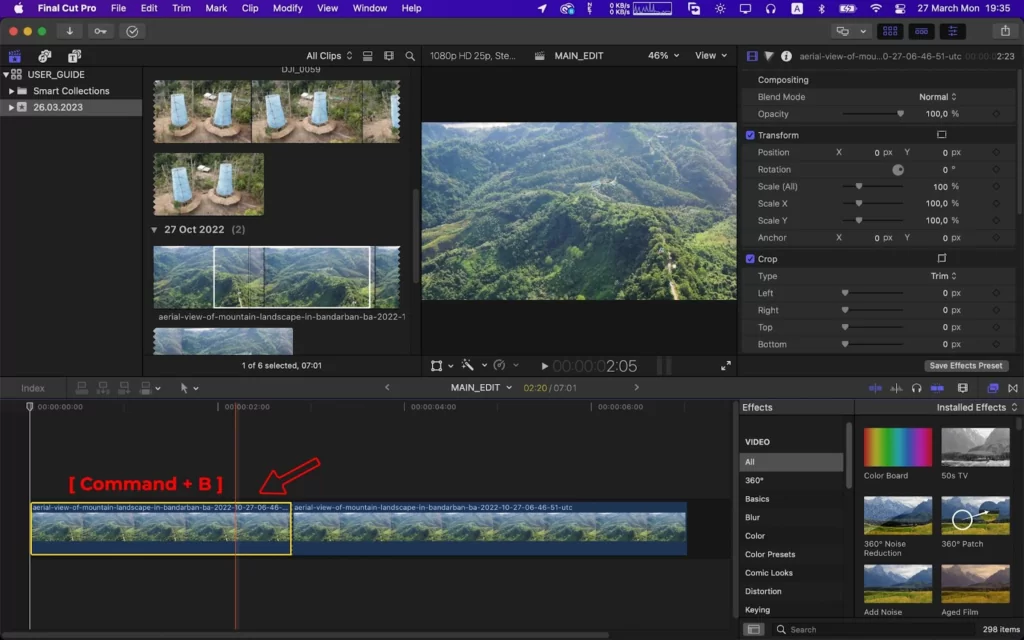
Step 1
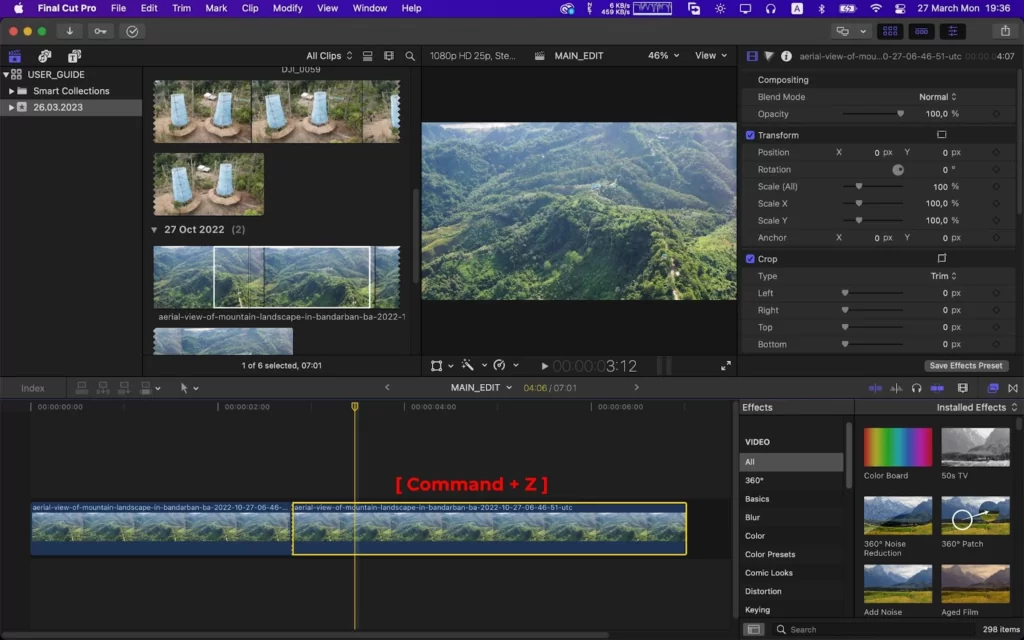
The segments of the clip you want to produce should be blasted. Use the Command + B keyboard shortcut to blast.
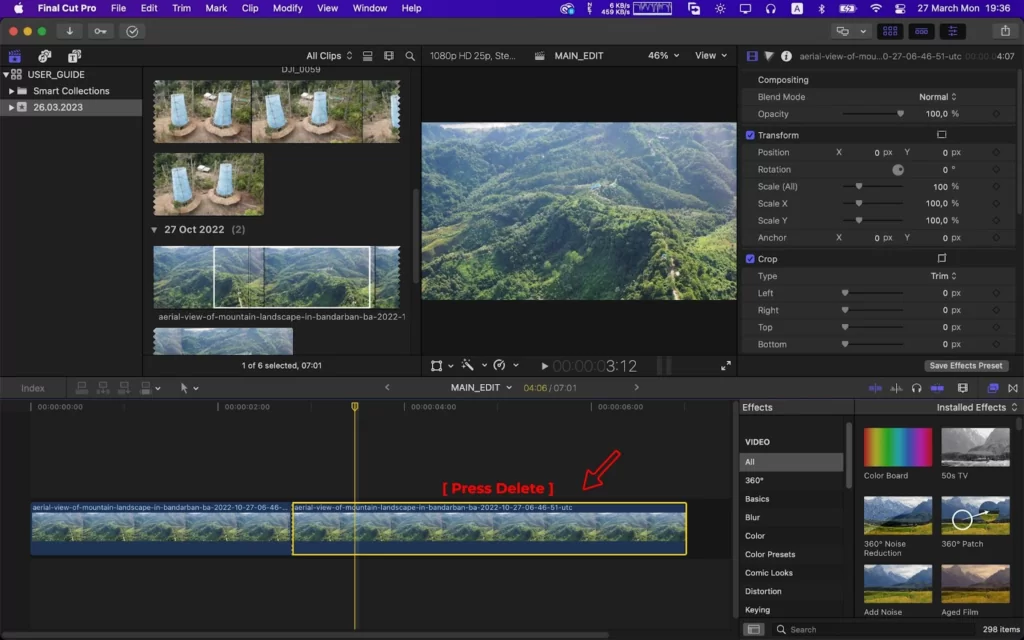
Step 2
Use the backspace or delete key to select the remaining portions of the project and press Delete. After the render, you will be able to restore it.
Step 3
To render the individual clip out, adhere to the export settings.
Step 4
Use the keyboard shortcut Command + Z to recover the destroyed project files once the clip has been rendered. If some of the instructions I’m giving here are difficult for you to understand, maybe you need to familiarize yourself with Final Cut Pro by reading our article on how to use Final Cut Pro.
How to Save Your Export Settings
You should retain that preset saved for convenience if a specific setting suits your video. To maintain consistency, presets can be used. You may find the Add Destination option under the file and Share menus. Follow the simple steps below to save your export settings.
Step 1
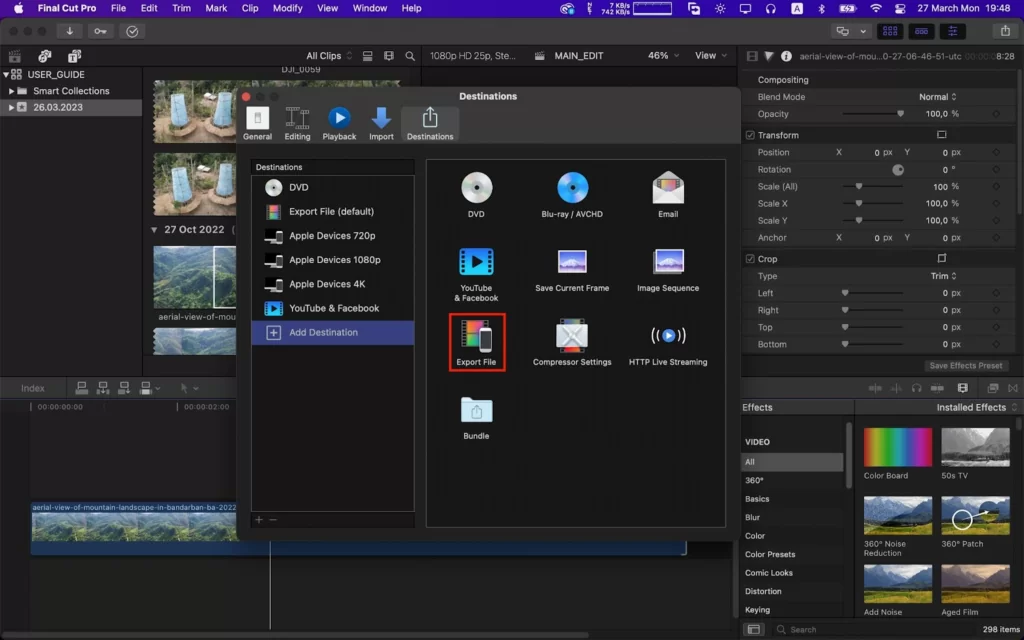
By selecting the Add Destination tab from the File menu, you may build your own preset.

Step 2
Adding destinations will give you several choices. You can export directly to Facebook, Vimeo, and YouTube; choosing the Export File is the safest option.
Step 3
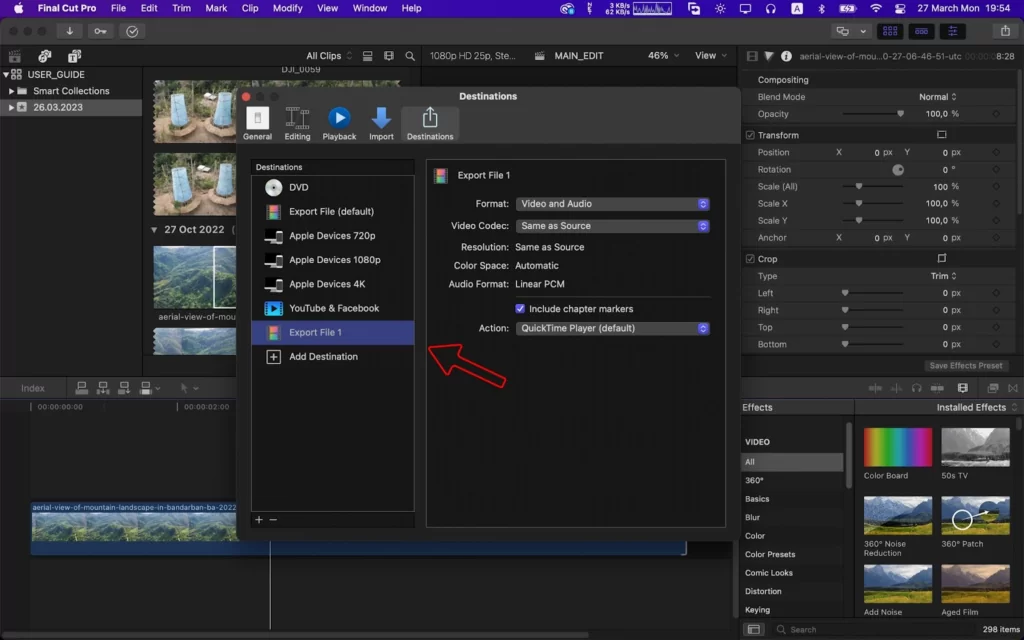
You can save this technique by double-clicking it while the menu is active.
Step 4
To set the Export method apart from the others, you need to give it a name.

How to Resize Dimensions For Easy Export
The delay in exporting your file will probably increase with the size of your video. Consider choosing a lower-resolution video if you are ready to forgo visual quality in exchange for a quicker wait time as the video builds in Final Cut Pro.
If your video is 4K, think about exporting it from Final Cut Pro at a resolution of 1920 x 1080. On the other hand, if your video is 1080p, you can export it from Final Cut Pro at a resolution of 1280 x 720. While we still on the topic talking of editing videos, did you know that Final Cut Pro can be used to rotate a video?

Choosing The Best Export Settings
Follow the steps below to choose the best export settings for your videos.
Step 1
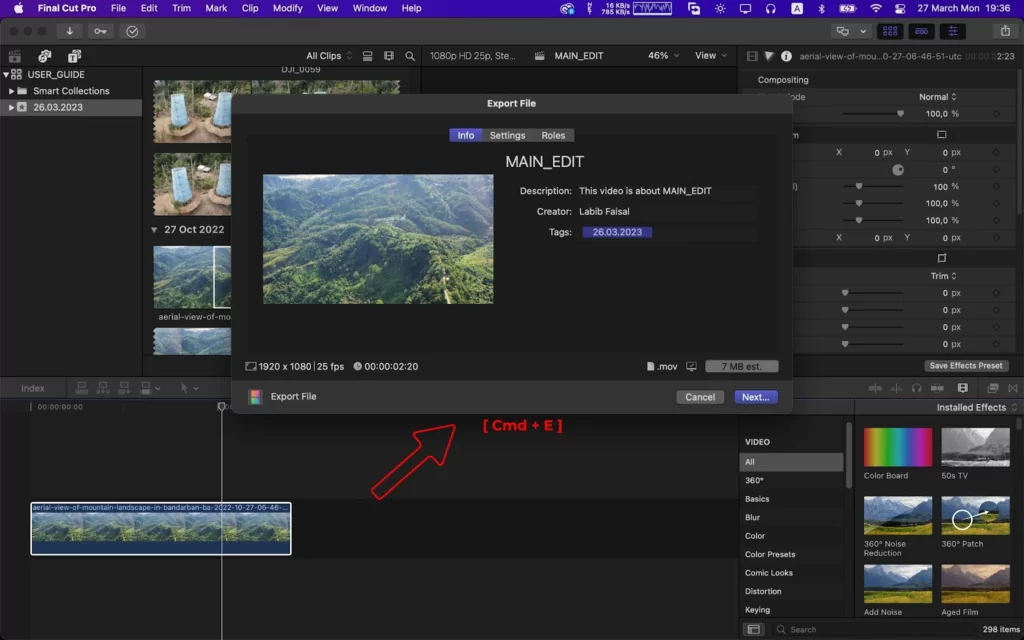
Once your timeline is complete, click the File tab.
Choose Share or Command + E from there.
Step 2
The Master File option should be your default choice when exporting. If that isn’t enough for you, there are other variations. The Settings panel can be accessed by choosing the Master File tab.
Codec Recommendations When Exporting in Final Cut Pro
Codecs help in directing your computer’s rendering of the video. Often, Codecs are frequently underestimated and disregarded. But the codec you choose can really make a difference to how well your video is exported!
The importance of codecs to the produced video file is almost equal to that of resolution. H.264 is the accepted format for online video uploads. A compressed file with little loss in playing quality is provided by H.264.

The Source – Apple ProRes 422 codec is most advised if your film depends on a bit of extra visual clarity or if the video’s subjects are badly lighted.
You may also like our in-depth article on how to fade audio in Final Cut Pro if you enjoyed reading this piece.