Splitting a clip in Final Cut Pro allows you to break a single clip into two separate clips. This can be useful for a variety of reasons, such as removing a section of footage, rearranging the order of your clips, or creating a transition between shots.
To split a clip in Final Cut Pro, you can use the blade tool or the modify menu. However, some users may face challenges when splitting clips. For example, if you’re working on a large project with many clips, it can be easy to lose track of your place or make mistakes.
I’ll show you how to split your clips in Final cut pro using very easy-to-follow steps.
How to Split Clip in Final Cut Pro
Splitting a clip is very simple and easy. Final Cut Pro has a rich history of being used in editing some big projects. I will show you how to split a clip on a timeline in two ways.
Method 1
Click the drop-down arrow by side of the Select tool. You will find the Select tool bottom left-side corner of your workspace area. Now select the Blade tool to split a clip.

Click on the timeline wherever you want to split your clip. And your clip will be split. Move the playhead where you want to split on the timeline for the perfect split.
Method 2
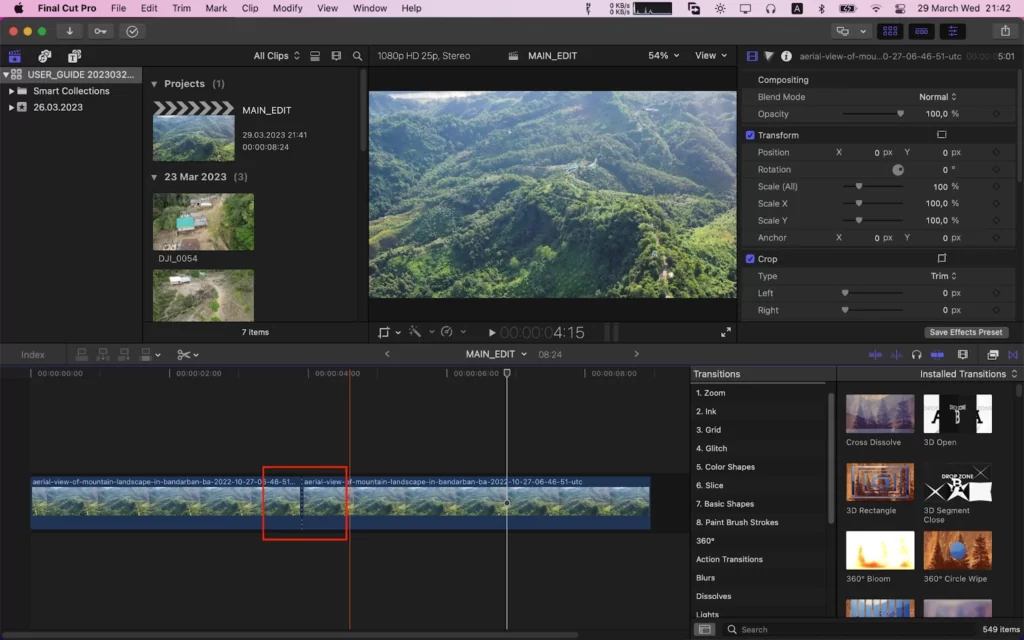
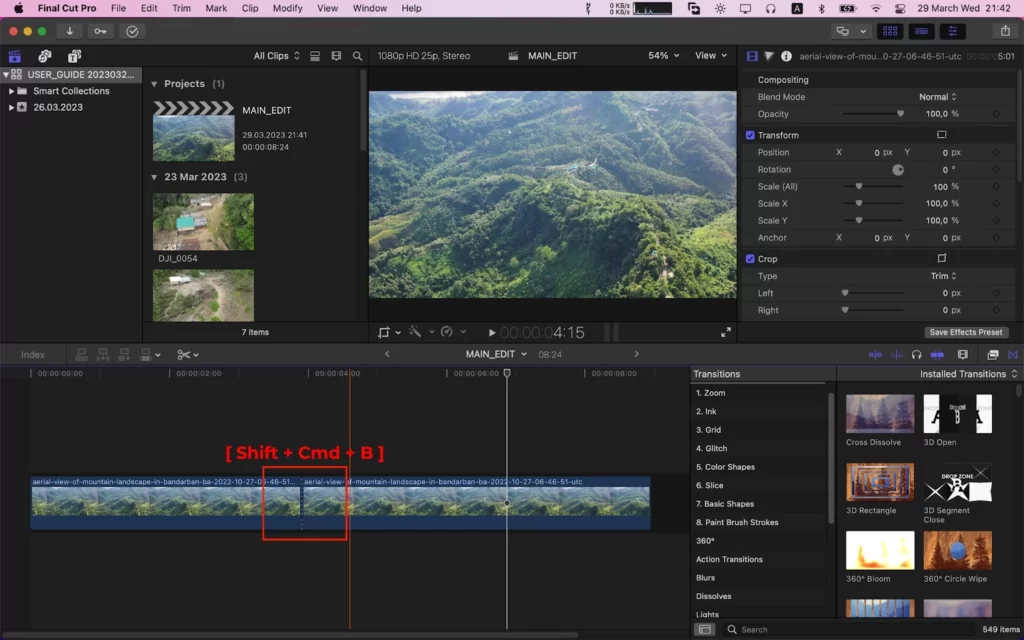
You can also use the short key to split your clip click [ Shift + Cmd + B ]. Make sure your playhead is placed there wherever you want to split. And your clip is ready to use.
How to Split Clips at The Playhead
Using a keyboard shortcut, you can divide a clip right at the Playhead. You’ll find these steps below if you’re previewing a video and want to cut quickly.
Step 1
Place the playhead at the start of the timeline or wherever you want your preview to start.

Step 2
To start playing back your video, press Space

.Step 3
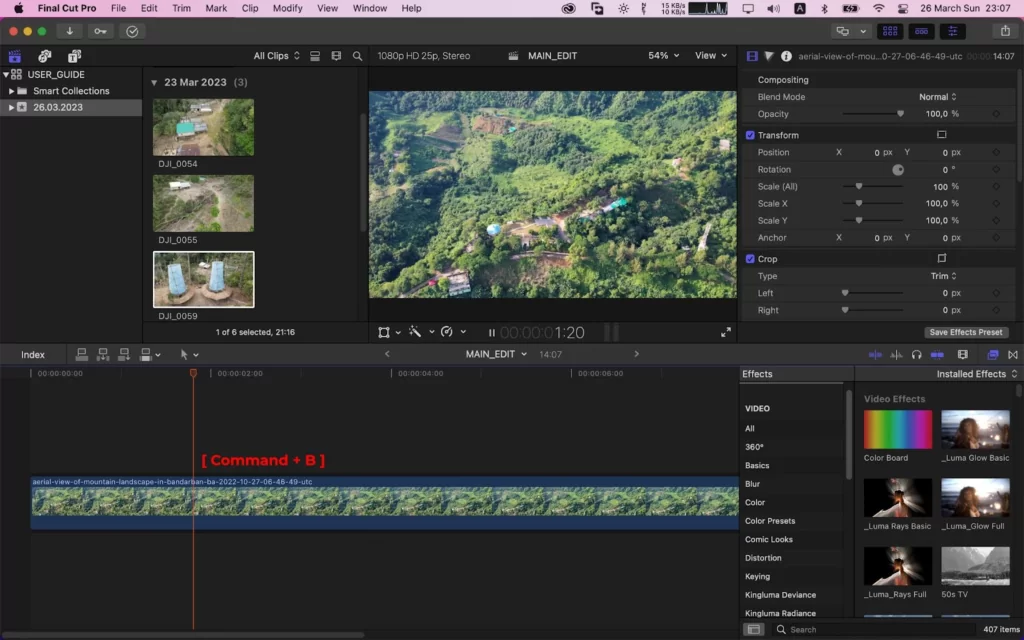
Press Command + B to cut a portion when the playhead reaches it.
Step 4
The playhead is where the clip should split. Voila!

How to Split Multiple Clips Together
You can divide all the clips on your timeline using one of the ways mentioned above. The ways mentioned cover the video, titles, music, and other elements. Holding Shift while using the Blade Tool or the Playhead in the same manner as you would for one clip is the only difference when splitting all clips.
This will come in handy if you need to put a break between parts one and two. You can just split them all in one click rather than splitting each one separately.

You can also see our step-by-step guide on how to fade audio using Final Cut Pro.
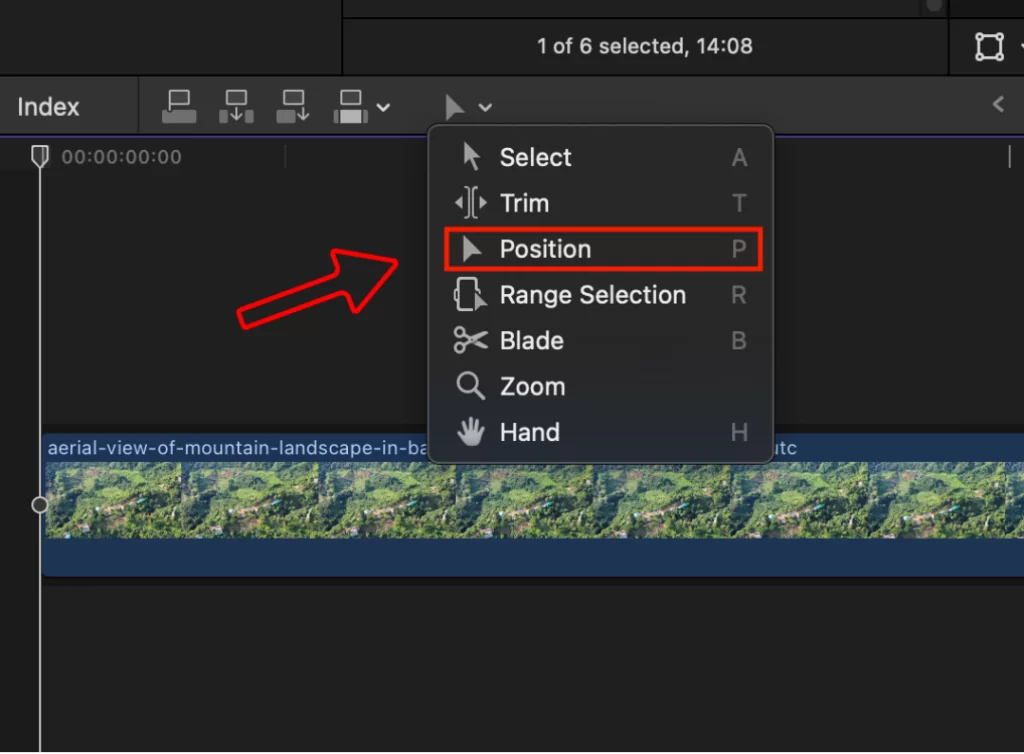
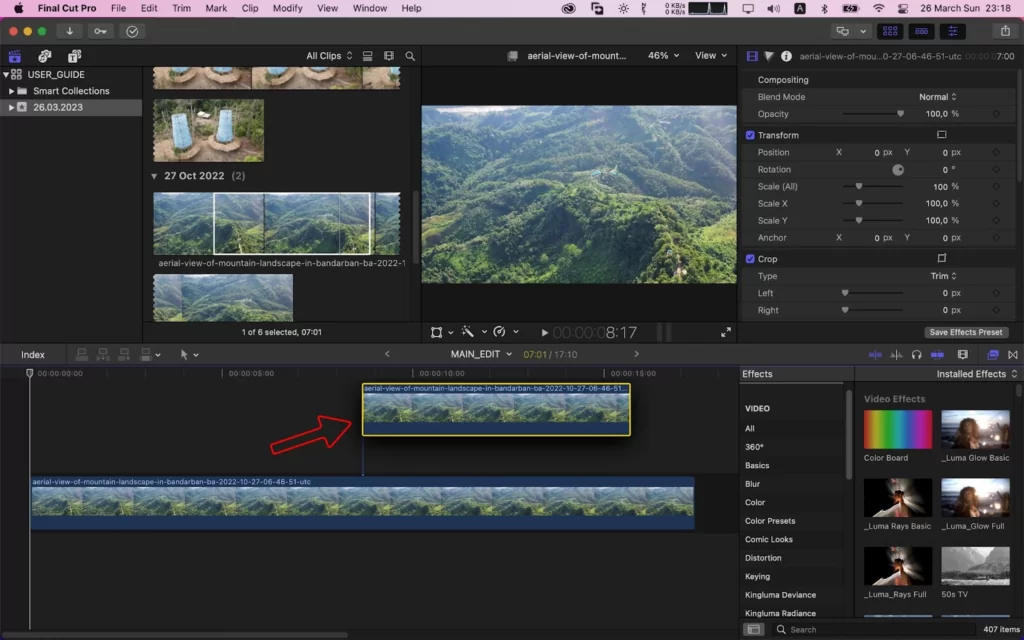
How to Split Clips Using The Position Tool
You can divide a clip in half and remove the center by dragging one clip into another using the Position tool. This is an excellent technique for introducing cutaway footage without changing the length of the clip.
Follow the steps below to split your clips using the position tool.
Step 1
Start by choosing the Position tool
Step 2
Move a clip by dragging it over a clip you want to split.
Step 3
The first clip should overwrite everything below the second by dividing it in half.
How to Split Clips By Inserting Another Clip
You can insert a clip into the timeline anywhere you’d like. You can insert a clip, even in the middle of another clip, using a direct keyboard shortcut. When you’re making a lot of modifications, keyboard shortcuts like this one can help you save time.
Step 1
Start by choosing the clip or clip range you want to insert in the browser.

Step 2
You can place the clip in the timeline by moving the Playhead there.
Step 3
Your chosen clip will show in the timeline when you press W, splitting the original clip in half.

In contrast to the Position Tool, this method preserves the middle of your original clip. Now that you know how to split clip by inserting another clip, you can also continue learning more about using Final Cut Pro by reading up on adding audio and adding LUTs in Final Cut Pro.
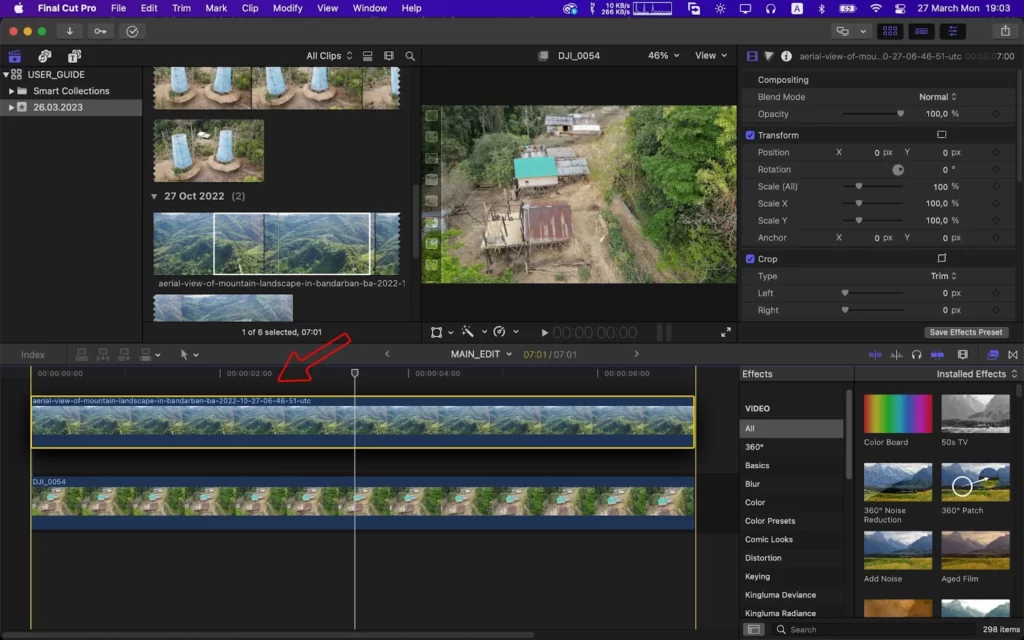
How to Create a Split Screen Project in Final Cut Pro
The split screen video effect is applied when playing two or more connected clips simultaneously on the same frame. Use these steps to make a split-screen video clip.
Step 1
Drag your media files into the Timeline after importing them.
Step 2
In order for your files to play simultaneously when you employ the split screen effect, stack them one on top of the other.
Step 3
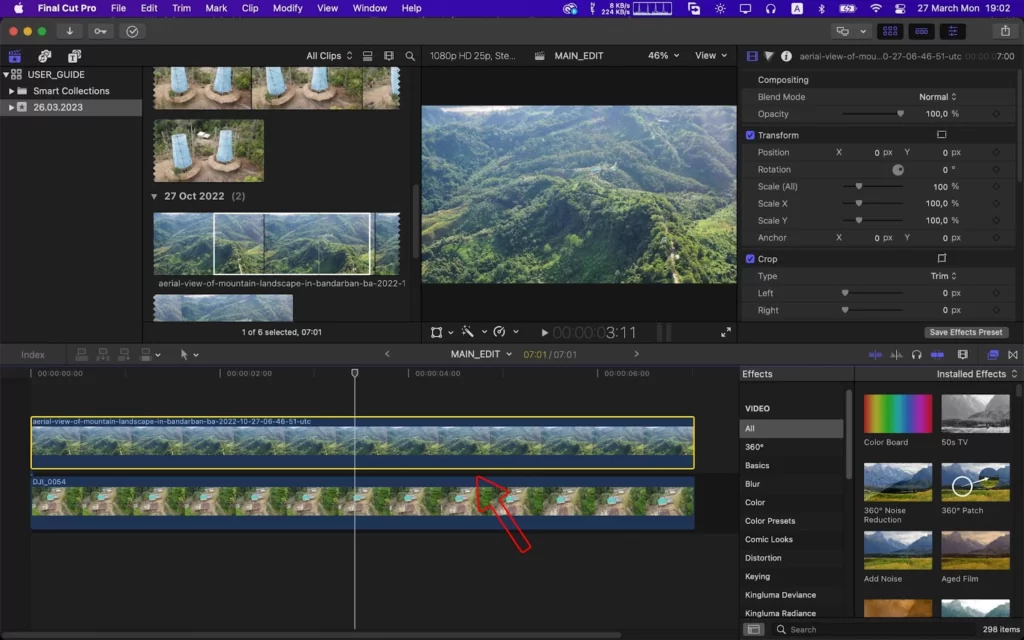
Press V to choose the video clips you won’t be editing first. You should only be able to see the footage you’ll be editing at this point.

Step 4
Select the video inspector from the list in the top right.

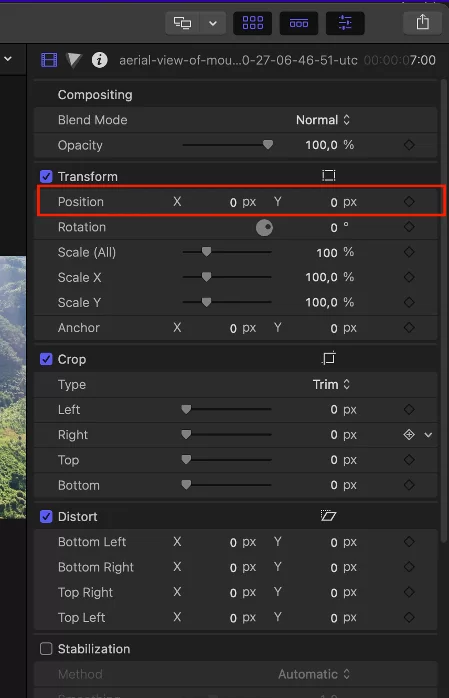
Step 5
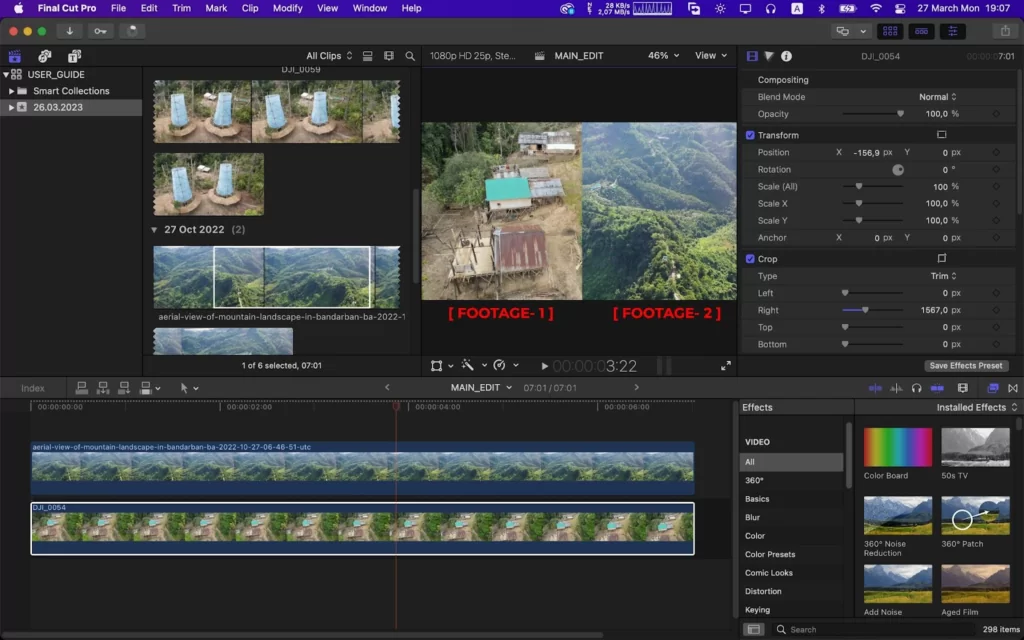
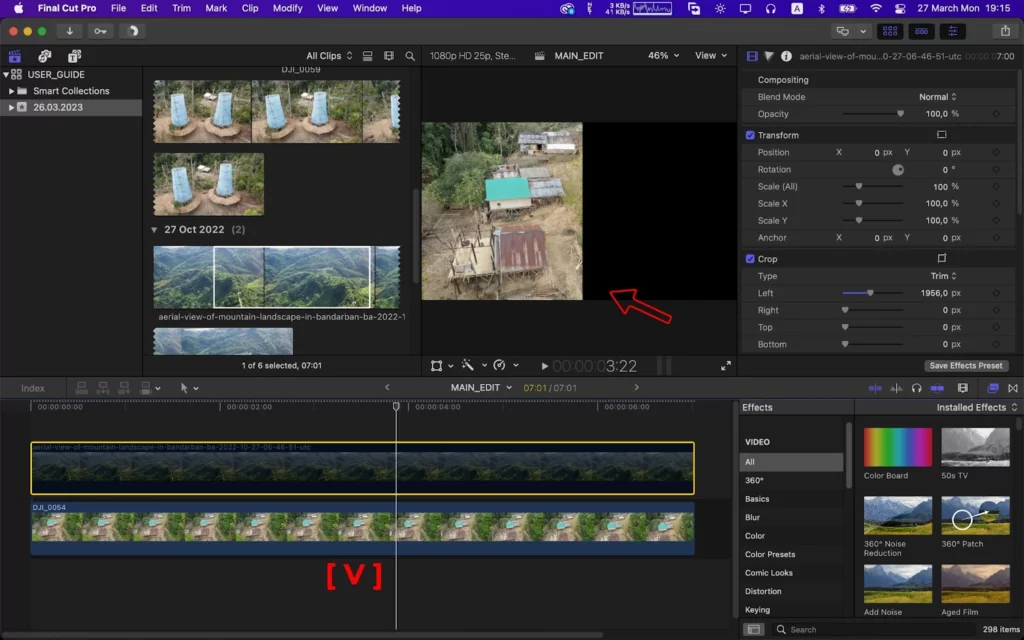
To change the video’s size, use the controls on the Left, Right, Top, and Bottom sides of the Crop video section.

Step 6
To prepare the split screen view, move the clip’s Position using the X and Y controls under Transform.
Step 7
When finished, press V to stop that video and move on to the next one.
Step 8
Choose the video you want to edit, enable it by pressing V, then go through the process again.

Step 9
Enable each video clip and run a project preview. The split-screen video ought to be fully functional at this point. You can also change the split screen size at this point.
Some users may experience technical issues or glitches when using the blade tool or modify menu. To avoid these challenges, it’s important to regularly save your work and troubleshoot any issues that may arise.