Adding subtitles to a video in iMovie is a great way to provide additional information or make your video more accessible to a wider audience. Subtitles can be especially useful for videos that contain dialogue, music, or sound effects that may be difficult for some viewers to understand.
I’ll show you how to add subtitles to your videos using iMovie, whether you’re using the app on a Mac or an iOS device. We will also cover some important tips and tricks to make sure that your subtitles look great and are easy to read.
How to Add Subtitles in iMovie
Step 1:
Click on the “Titles and Captions” button in the toolbar above the timeline (on the upper-left portion of your iMovie screen)
Select the “Subtitles” option.
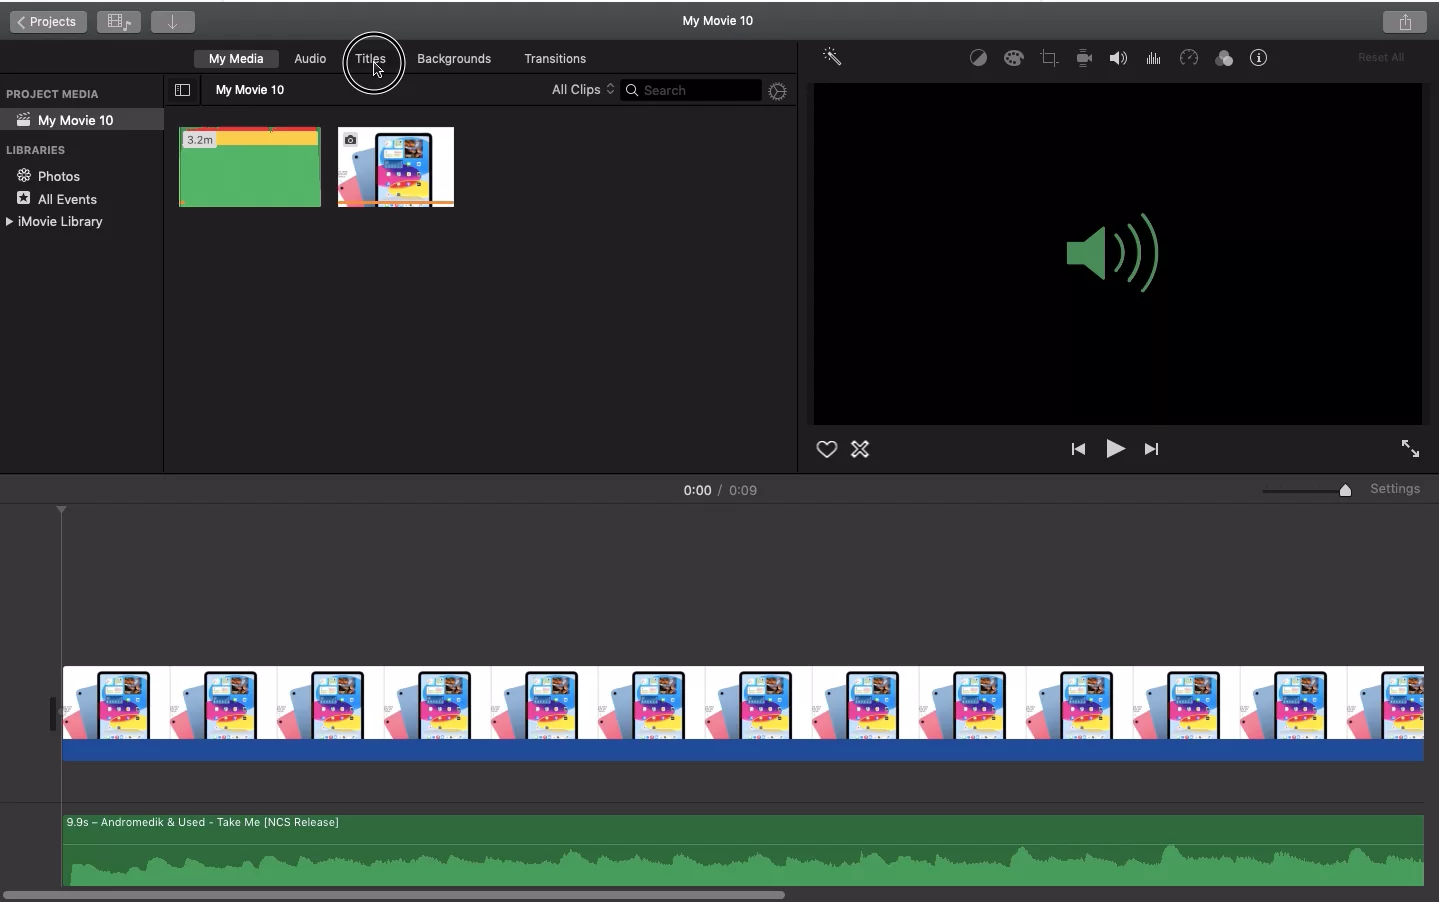
Step 2: Now you will be greeted with a plethora of title templates to choose from.
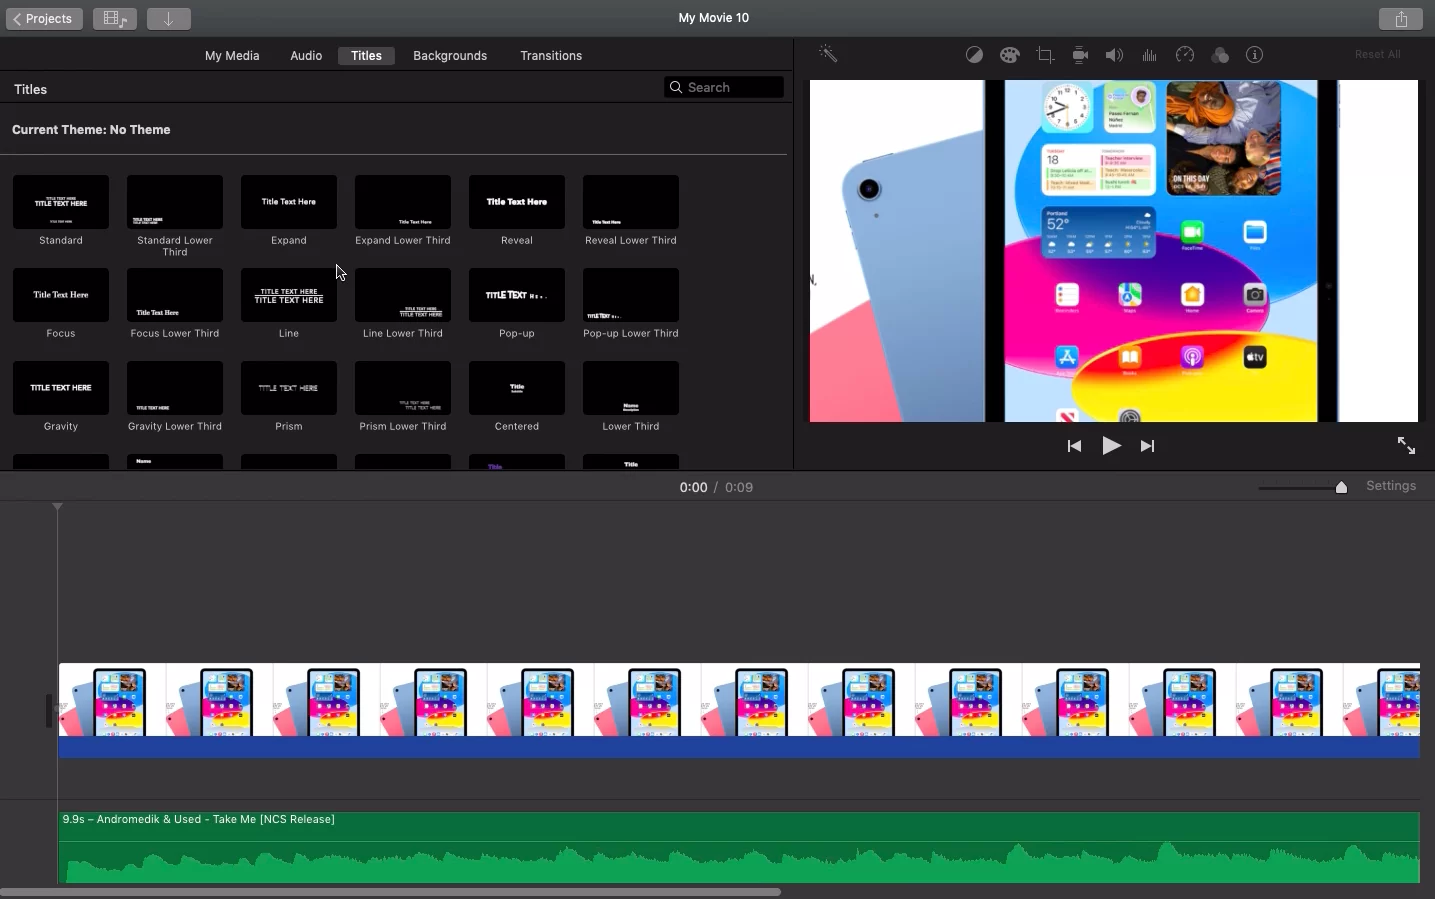
Step 3: For subtitles, you can choose any of the available Titles, we will be choosing Gravity Lower Third in this demo.

Step 4: Now drag the template on top of your existing video to have overlay/subtitle text.
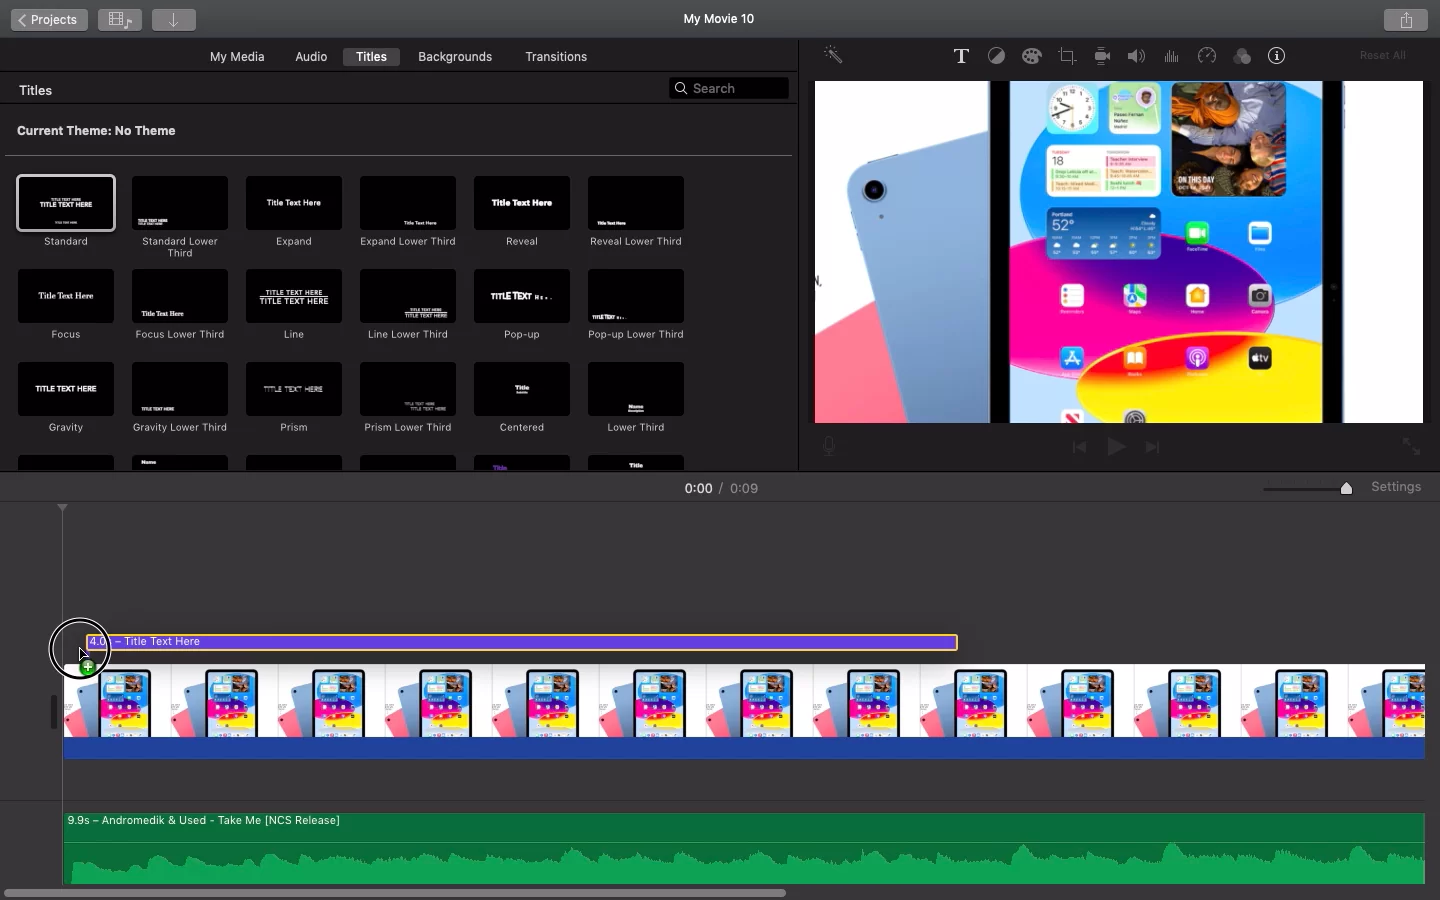
Tip: You can extend/shorten the subtitle by dragging it from the end.
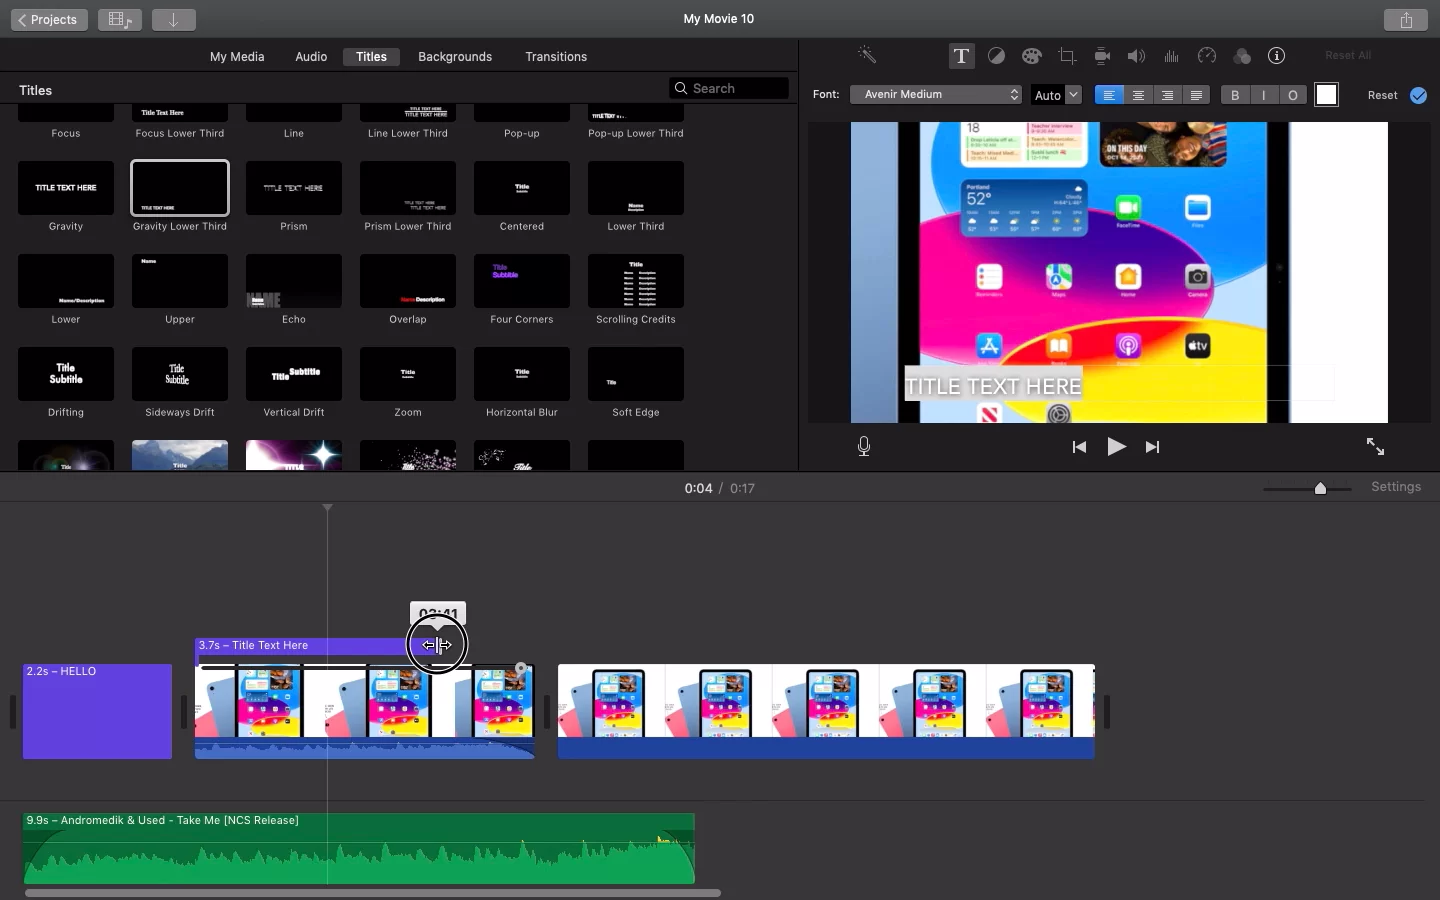
Step 4: Now you can click on your text element to open the text editor in your video view to edit the default text value.

Step 5: Now double-click on the “TITLE TEXT HERE” to edit the default value to whatever you like.
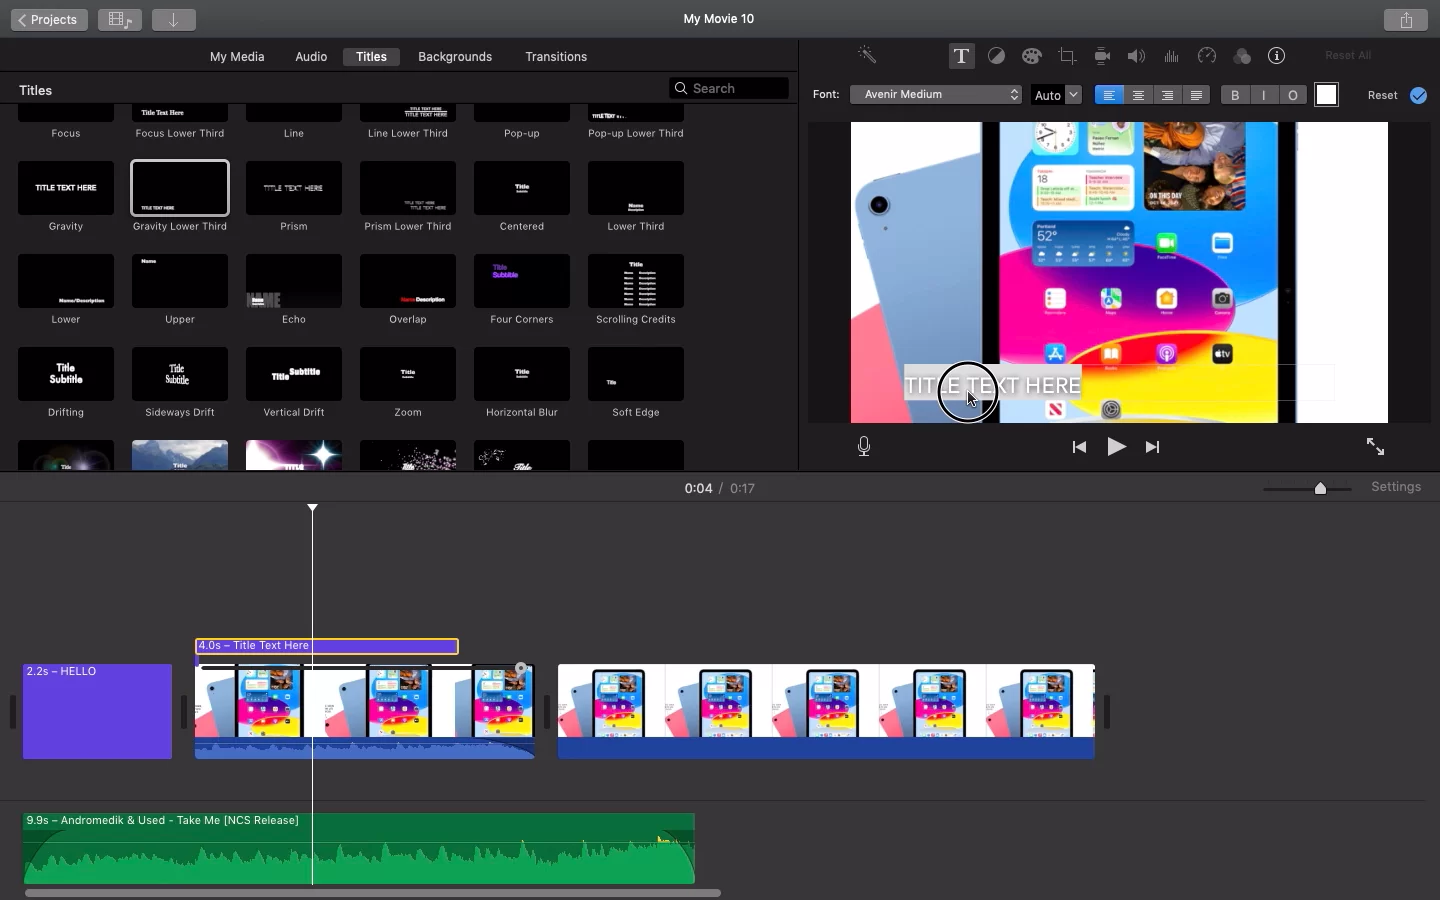
Step 6: You can now edit other attributes like font type, font size, text alignment & color
Check out our step-by-step guide on using aspect ratio in iMovie.
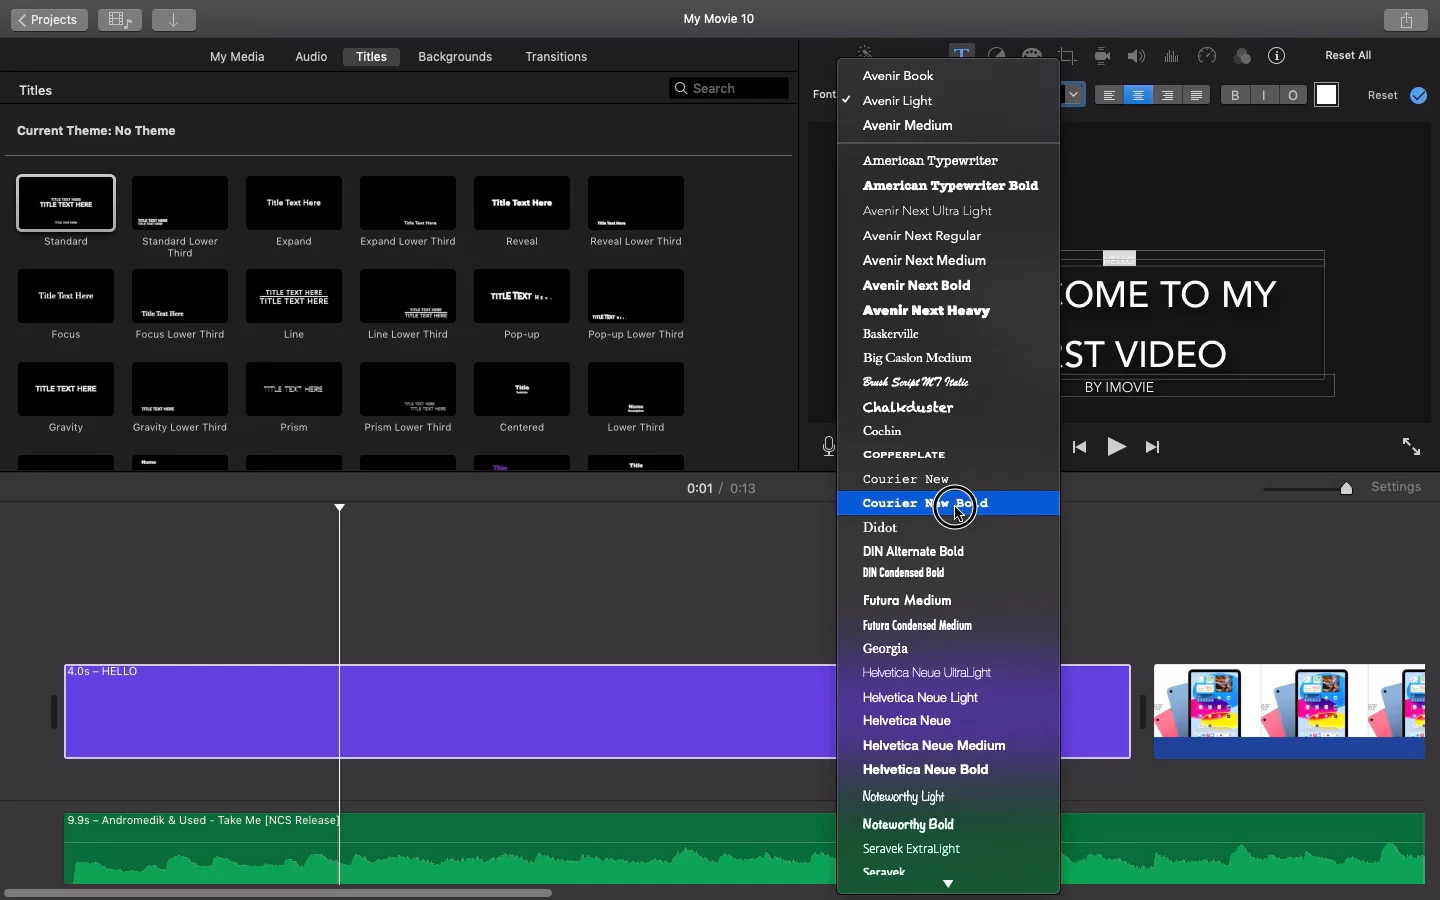
How to Add Subtitles on iMovie iPhone
With your iPhone and an iMovie app installed, you can carry out tasks such as rotating a video in iMovie and adding subtitles to your videos. Adding subtitles to a video in iMovie on iPhone is a straightforward process. Here’s a step-by-step guide on how to add subtitles to your videos using iMovie on iPhone:
- Open iMovie on your iPhone and start a new project or open the project that you want to add subtitles to.
- Tap on the video clip you want to add subtitles to, and then tap on the “Titles and Captions” button.
- Select the “Subtitles” option.
- Type in the subtitles in the text field. You can also copy and paste subtitles from another document.
- Use the “Timing” section of the subtitle editor to adjust when the subtitles appear and disappear.
- The “Style” section can be used to adjust the font, color, and size of the subtitles.
- Once you are satisfied with the subtitles, tap on “Done” to add them to the video clip.
- Preview your video to make sure the subtitles are synced correctly and make any necessary adjustments.
- When you’re happy with the final result, tap on the “Share” button to export your video.
By following these steps, you’ll be able to add subtitles to your videos using iMovie on iPhone, and make your videos more accessible to a wider audience.
Tips for Adding Subtitles in iMovie
Here are some tips to keep in mind when adding subtitles to your videos in iMovie:
- Keep the subtitles short and to the point. Avoid long sentences and try to keep each subtitle on one line.
- Use a simple font that is easy to read. Avoid using fancy or cursive fonts as they can be difficult to read on screen.
- Make sure the subtitles are synced correctly with the audio. If the subtitles appear too early or too late, it can be distracting and confusing for the viewer.
- Adjust the subtitle style to match the video. You can change the font, color, and size of the subtitles to match the style of the video.
- Use the “Timing” section to fine-tune the timing of the subtitles.
- Use the “Style” section to change the background color of the subtitles to make them stand out better.
- Preview your video to make sure the subtitles are synced correctly and make any necessary adjustments.
- Use the “File” menu and then “Export Movie” to save your subtitles. Hurray! You now know how to add subtitles to your iMovie. You can also check out our in-depth article on how to edit in iMovie.