Using the iMovie app, users can cut, trim, split, add transitions, insert audio, apply color correction and more. The editing process in iMovie allows the user to create a polished final product that is professional and engaging. This easy tutorial will explain the process of editing a video in iMovie, covering the necessary steps and tools required to achieve a quality outcome.
iMovie Edit Tutorial for Beginners
Use dedicated guides if any step feels unclear. We’ve written a lot of guides on features in iMovie such as cutting videos and splitting clips in iMovie. You can always check them out.
Let’s first understand some basic features & terminologies.
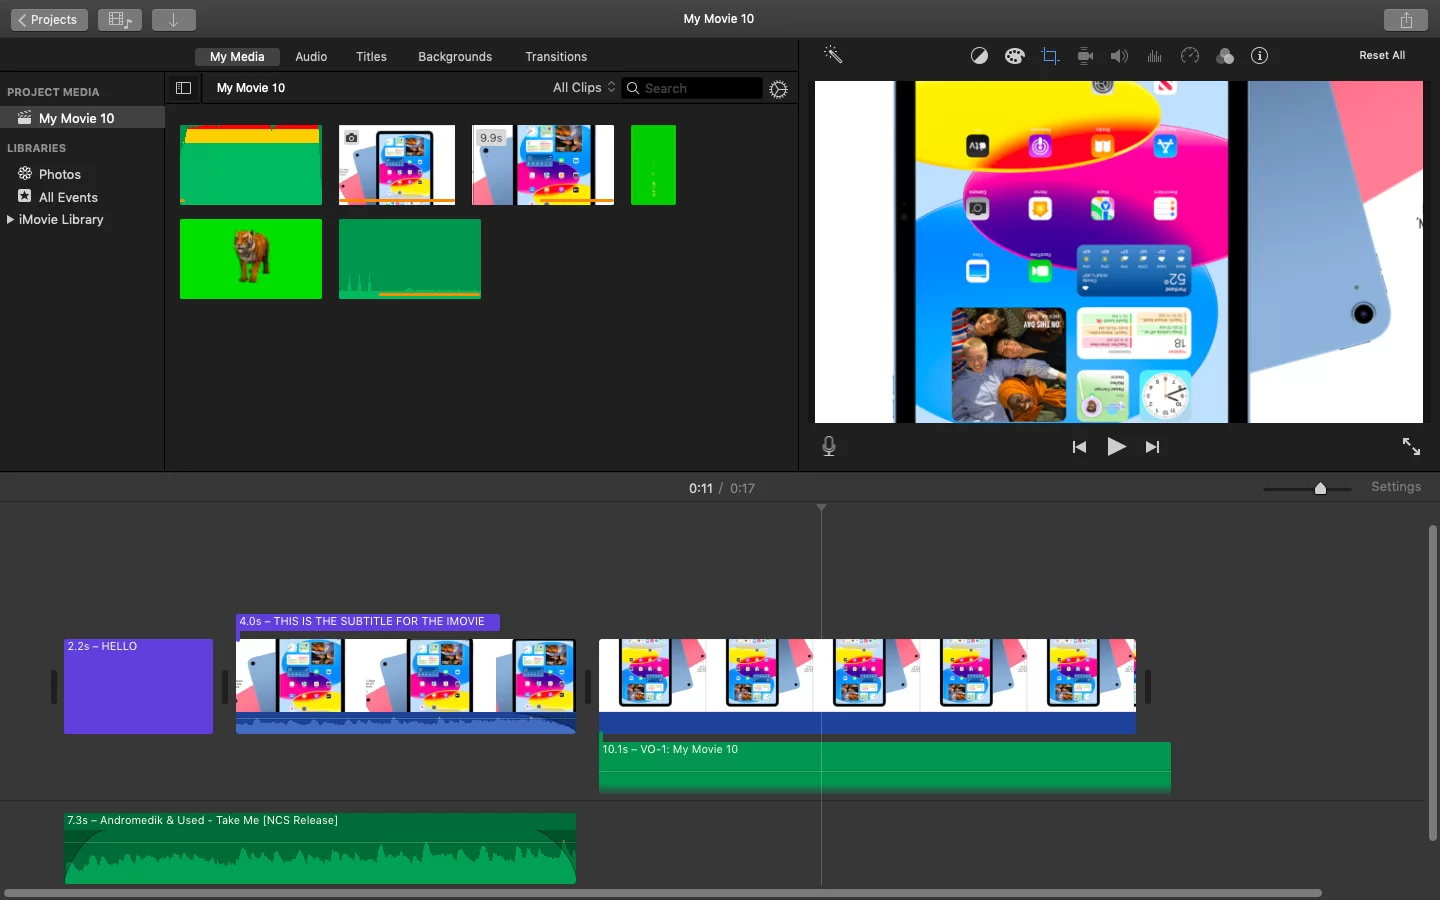
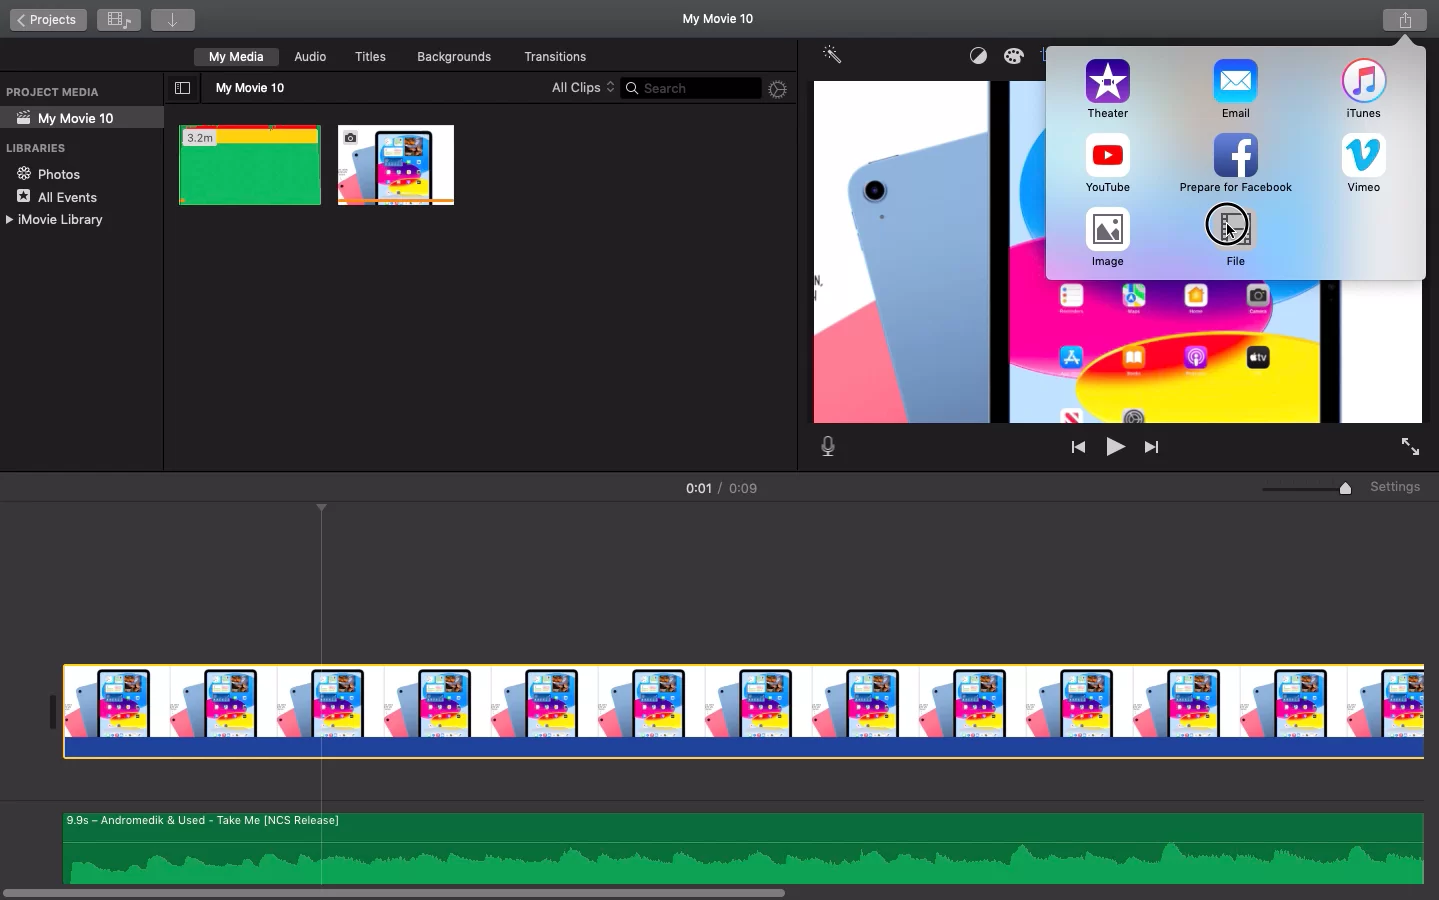
- The iMovie Project View: The image shown below represents an iMovie window. The below view is further divided into a few sections, which we will cover one by one.
- The Project Media View: The area shown inside the rectangular red box is called the Project Media. This contains all of your imported media, like images, videos, sounds, etc. You can also navigate to Audio, Titles, Backgrounds & Transition to see media available with iMovie by default.

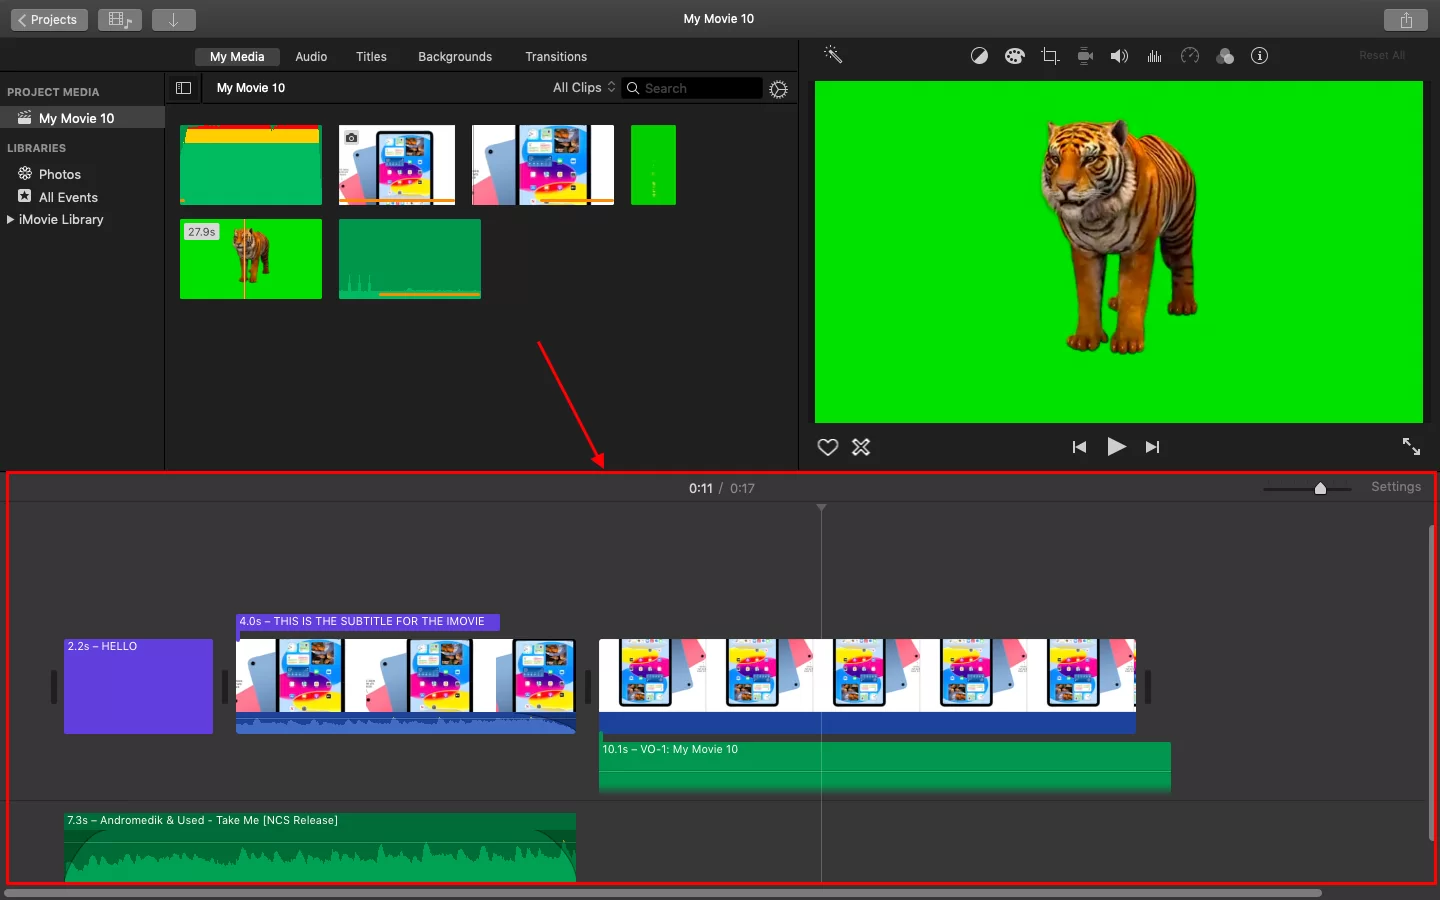
- The Video Timeline: The area shown inside the red rectangular box is called the video timeline. This is the place where your video is put together and exported as it is. The videos/images are shown in the upper half while audio is represented in the lower half.
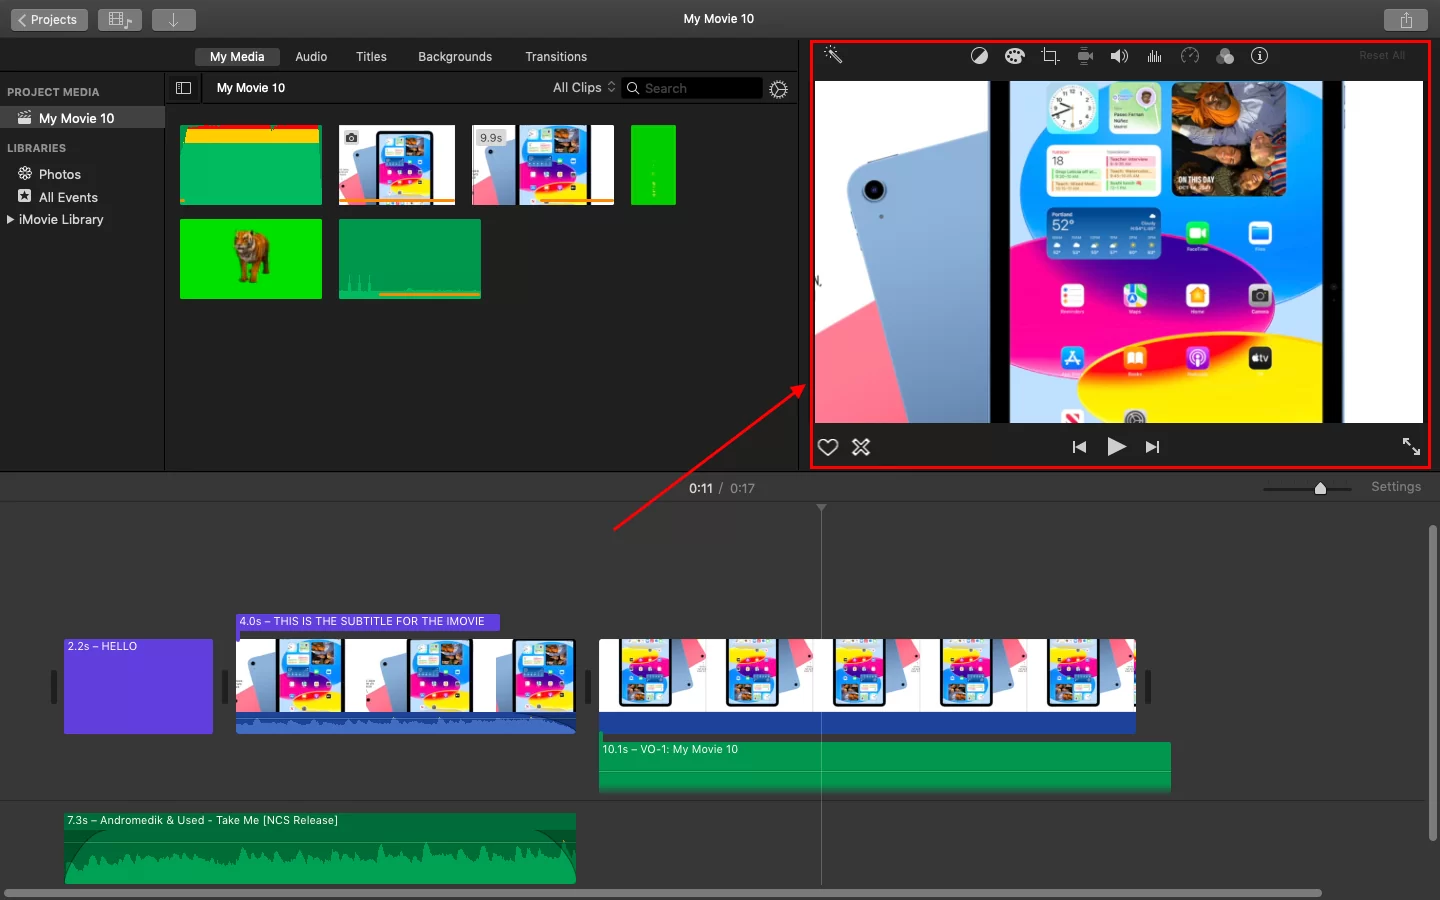
- The Video Playback & Adjustment Area: The area shown inside the red rectangular box is called the video timeline. Here you can playback your edited video in real-time. You can also select the available options at the top to apply color correction crop, sound enhancements, etc, to your videos.
Let’s now learn to edit your first video in iMovie quickly!
Step 1: Import your videos to iMovie
Tip: You can also directly drag videos from your device to your timeline to import them quickly


Step 2: Drag all the videos to your timeline and place them accordingly. Now you can add texts, split clips, fade audio, or even do a green screen.

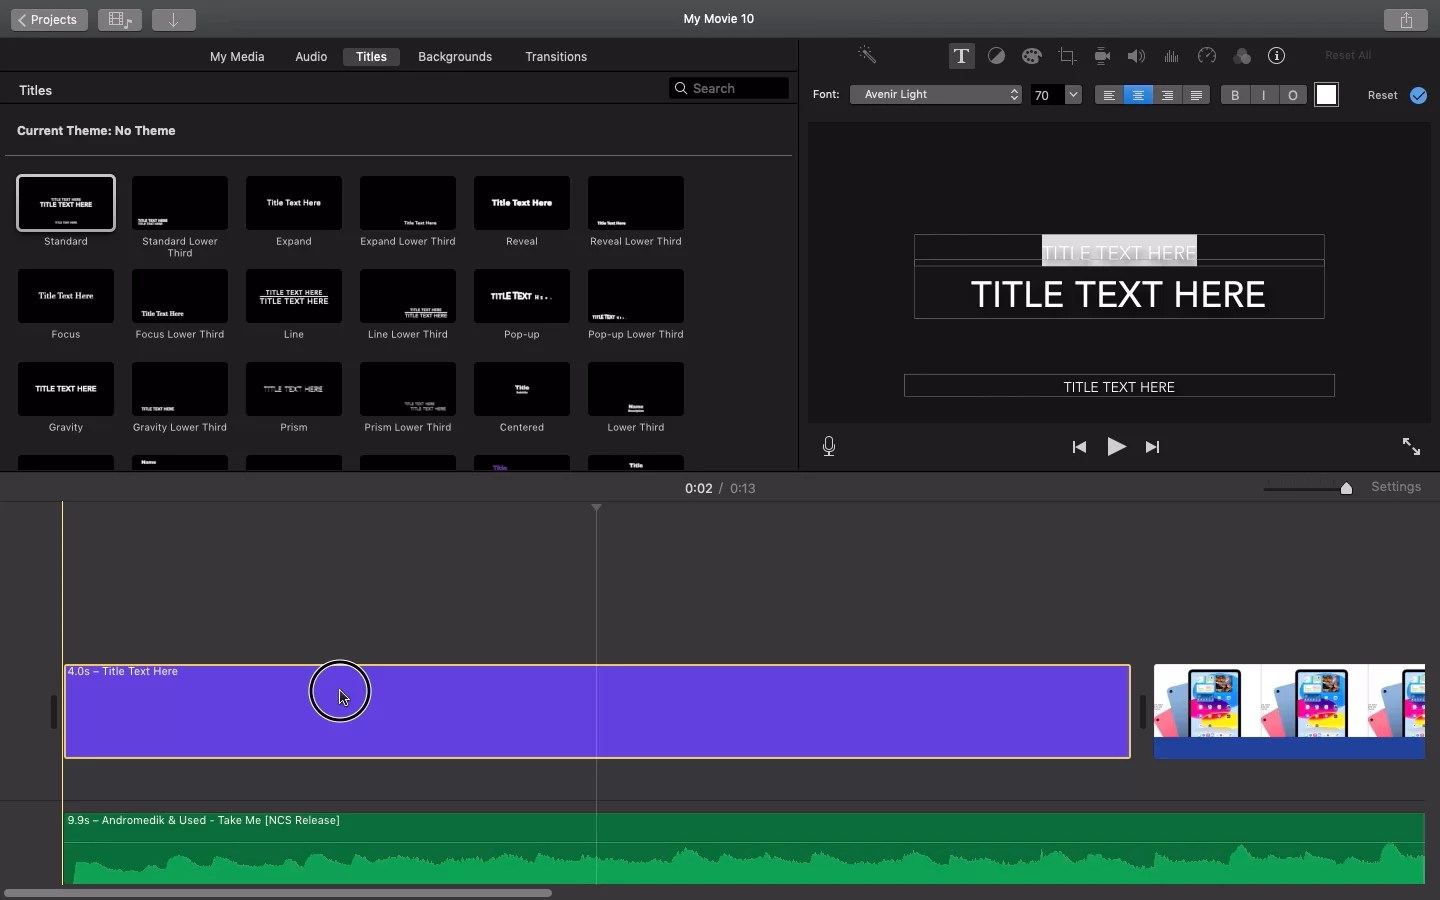
Step 3: Let’s add some text to our video. Click on the Titles tab on the upper-left portion of your iMovie screen. Now you will be greeted with a plethora of title templates to choose from.
You can also drag the template before/after any of your video clips to have an independent text element. Now you can click on your text element to open the text editor in your video view to edit the default text value.
Step 4: Once you are all done with your edit, and now you can export your video & select the appropriate export option for you. In the top-right corner, try locating the share button. In the pop-up menu, select the File option. Now you can give an appropriate name and description to your video file and then let it export.

Pros Of Editing Videos Using iMovie
Below are some of the advantages of editing using iMovie.
- 4k Resolution Videos
A high camera resolution is one of Apple devices’ key selling factors. When you save and export your videos with the video editor tool—iMovie– which supports 4k video resolution, they can display flawlessly on large displays. Compared to the traditional HD resolution of 1920 x 1080 pixels, a 4k video resolution is 3840 x 2160 pixels.
- Easy To Switch Across Different Devices
iMovie is a video editing program that can be used on Macs, iPads, and iPhones. This provides you the freedom to begin your project on your phone and switch to your desktop for improved functionality whenever you’d like, without having to start from scratch. This is a pretty awesome feature of iMovie.
- Advanced Editing Features
Any reputable video editing tool will provide basic editing options like adding background music or special effects. These features are also available in iMovie, but if you are serious about creating a professional video, there are some additional ones. Split-screen, picture-in-picture and green-screen effects are some of the cutting-edge editing features that iMovie provides.
- Original Files Can Be Saved
You can import whatever media you require to the video editor without losing the source files, whether you’re using iMovie on an iPhone or a macOS device. You don’t need to make duplicates of the images or films you’d need for your video production, so that saves you enough time.
How To Start a New Project on Your iMovie Using an iPhone
The simplicity of using iMovie on an iPhone is one of its main advantages. Wherever you are, you can produce respectable projects. To begin creating your video, follow these steps:
Step 1
Start your iPhone’s iMovie application.
Step 2
Click the plus sign.
Step 3
Select the Movie menu item.
Step 4
Decide which media to use in your video. You can scroll through all your iMovie clips or the media you created with your Photos app and select Create Movie.
Basic Editing Tasks in iMovie You Can Try
Below are some basic edits you can try with your iMovie right away.
- Voice-Over
If you wish to add a voice-over to your project you can follow the steps below.
Step 1
Click the plus sign in the left corner of the display.
Step 2
Choose the Voice-Over choice.
Step 3
Press Record.
Step 4
Make a voice-over recording.
Step 5
When you’re done recording, tap Stop.
Step 6
Should you be content with your voice-over, select the Accept option. You can review, Cancel, and Retake your voice-over.
Step 7
To change the voice volume, over speed, or duration, tap the purple Recording layer beneath your clip.
- Changing Themes
By tapping on the options icon on the right side of your screen, you can configure a theme for your video production. You can choose from the following theme options: Modern, Bright, Playful, Neon, Travel, Simple, and News.
Adding theme-related aspects to your projects, such as the theme song or fade-in-and-fade-out dark effects, is another option. When you’re finished, the theme you choose will show up in the timeline of your project as a green layer beneath your media.
The green layer can then be chopped, divided, or removed by tapping on it.
If you enjoyed reading this article, you will also like our extensive guide on adding text to a video playback.