iMovie allows users to easily cut and trim video clips or footage. The ability to cut a video allows for the removal of unwanted or unnecessary footage, enabling the creation of a polished and professional final product. The goal of this guide is to explain the process of cutting a video in iMovie, covering the necessary steps to achieve a precise and accurate cut that is of high quality.
How to Cut in iMovie
Step 1: Select the clip you want to cut into using your mouse cursor.
You may not understand some terminologies I’m going to use in this article unless you’ve read our in-depth article on how to edit in iMovie.
Tip: Once a clip is selected, you will notice a yellow border around it.

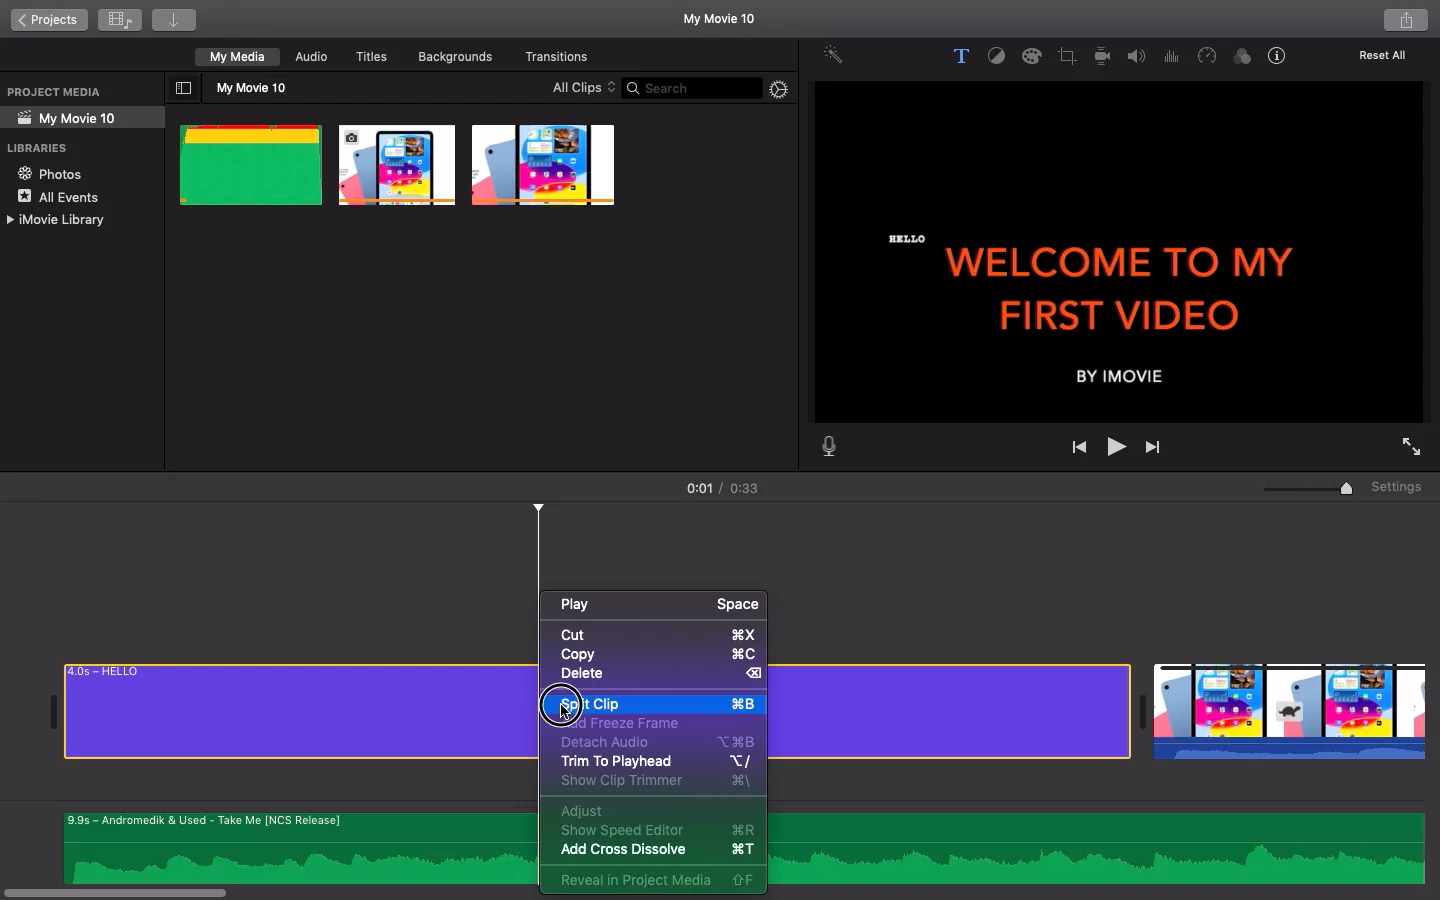
Step 2: Drag the playhead to the position you would like to cut your clip.

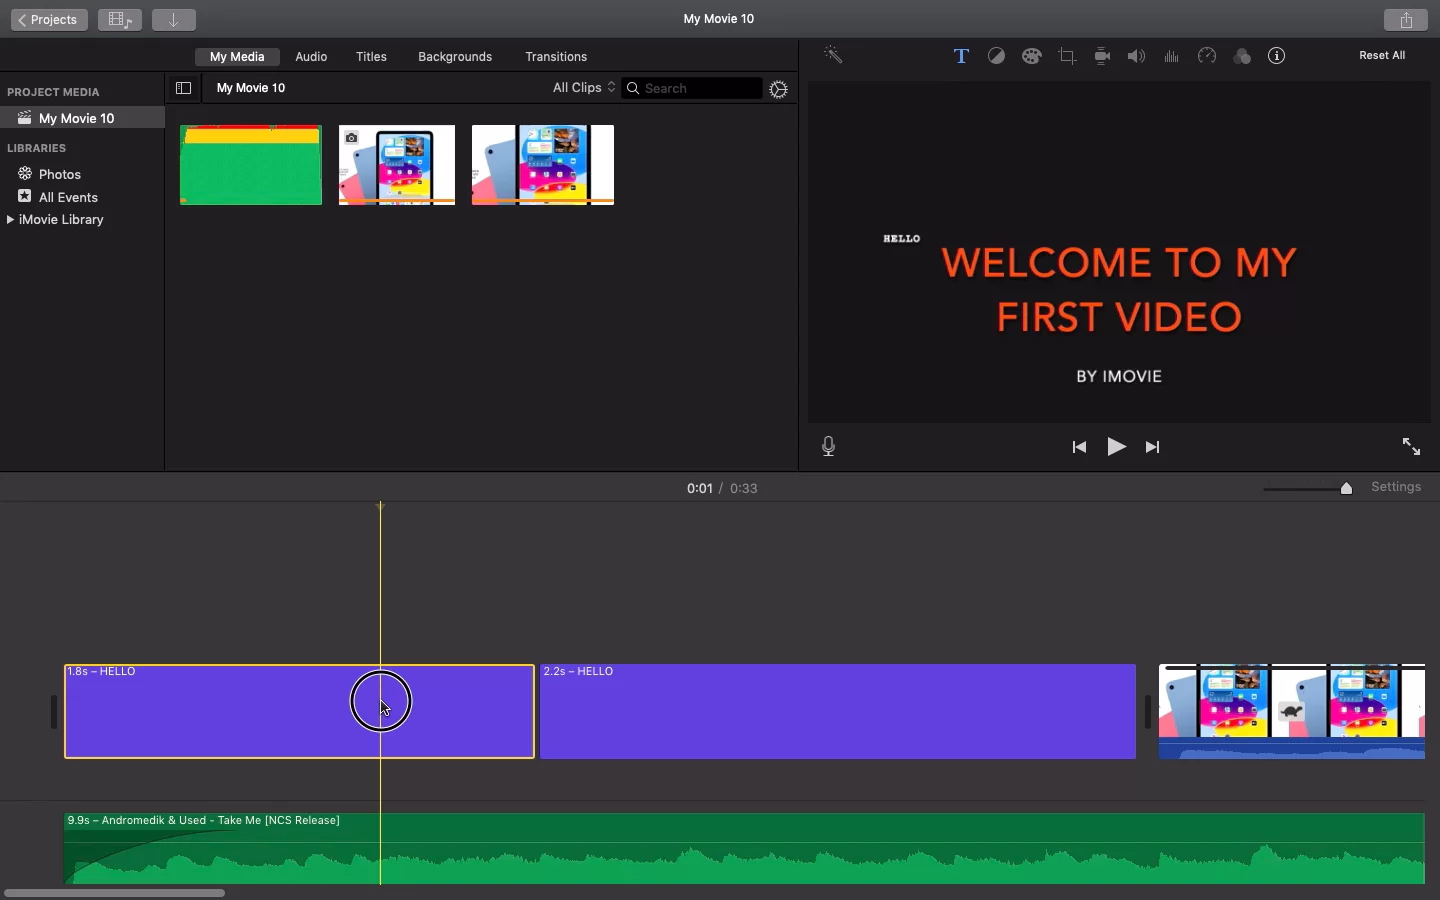
Step 3: Now you can right-click on your clip and select the Split Clip option from here.
Tip: Instead, you can use Command + B to split your clip quickly.

Step 4: Now you can delete the other clip from your timeline by selecting it and clicking on Delete
Tip: You can use the delete button on your keyboard to delete it quickly

How To Cut Videos in iMovie Using iPhone
iMovie on the iPhone is far less capable than iMovie on the Mac. But you may still use it to splice together pieces of a video. Even better, it is simple to understand because the method is not that different from the desktop version. Follow the steps to cut your videos in iMovie using the iPhone.
Step 1
The first step is to import the clip. To begin a new project after iMovie has launched, hit the huge Plus button under the Projects menu. From the subsequent tiny pop-up box, select Movie.
The media gallery that appears afterward lets you choose the video you want to clip. After that, select Create Movie to finish the import.
Step 2
The next step is to cut the clip. Slide the playback cursor to the start of the video segment that you wish to remove. Tap the Play button and pause at the appropriate time if you are unclear of the timestamp’s exact location. Tap the video in the timeline (thumbnail with yellow bars) once the playhead is in place to open the editing tools. The cutting tool will then be activated after you hit the button with the scissors icon.
At that time, tap Split to split the video in half. To divide the clip again and isolate the middle section, position the playhead at the conclusion. Then choose the undesirable clip and press Delete. Hit the below-circled Undo button if you make a mistake at any time during this procedure.
Step 3
The next step is to save and export the video. When you click Done, a screen with three buttons will appear. Touch the one in the center. Select Save Video from the options that appear after that. All you have to do is select your chosen output parameters. The iPad version of iMovie supports this technique.
How To Assemble Video Clips in iMovie
Before beginning work on your iMovie project, you must create a project and import video clips. Follow the steps below to assemble video clips in iMovie.
Step 1
Click the Project tab in iMovie’s menu bar at the top of the window.
Step 2
In the pop-up window, select Movie after clicking the Create New labeled blank thumbnail image.
Step 3
The name of the new project screen is set by default. Project names can be entered in the pop-up area by selecting Projects at the top of the screen.
Step 4
The next step is to select Media > File > Import.
Step 5
To import a video clip from your Photos library, open iMovie’s left panel and select Photos Library. Then, from the drop-down menu at the top of the screen, select the album containing the videos to display thumbnails of the video clips. The workspace at the bottom of the screen is the timeline. Click a video clip thumbnail and drag it there.
Step 6
If the video you want to use isn’t in the Photos application, go to the left panel of iMovies and click the name of your computer or another location. Then, find the video clip on your desktop, in your home folder, or somewhere else on your computer. Click Import Selected after highlighting it. To add more video clips to your iMovie project, simply repeat the procedure.
We also recommend that you read these articles; how to export your cut video and how to share your iMovie to YouTube or other social networks.