Shading is a critical aspect of digital art creation, as it adds depth and dimension to your illustrations and paintings. Krita provides a range of tools for creating realistic and stylized shading effects. It allows you to add subtle shadows to your artwork or create bold and dramatic shading effects and bring your digital creations to life.
This guide will introduce you to the basic concepts of shading in Krita and provide step-by-step instructions on how to effectively use the shading tools available in the software.
How to Shade in Krita
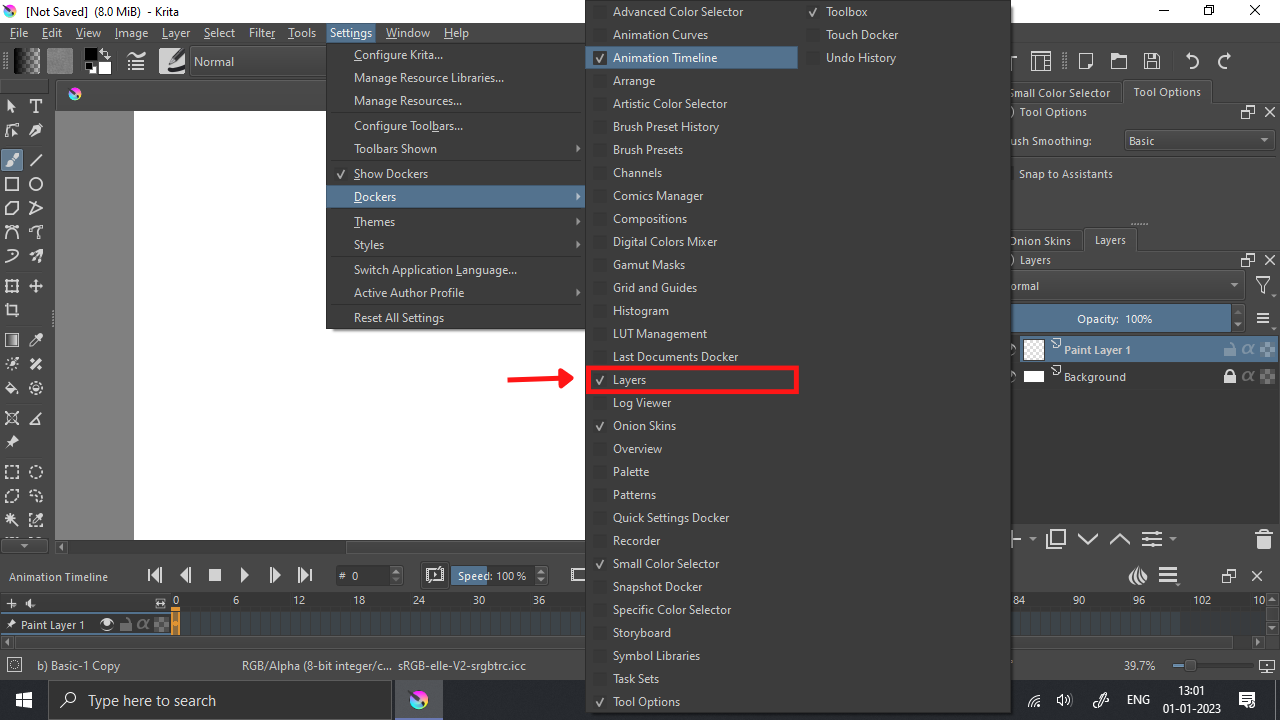
We use the layers panel/docker to shade in Krita. To open the Layers panel, go to Settings > Dockers > and turn on the Layers option.
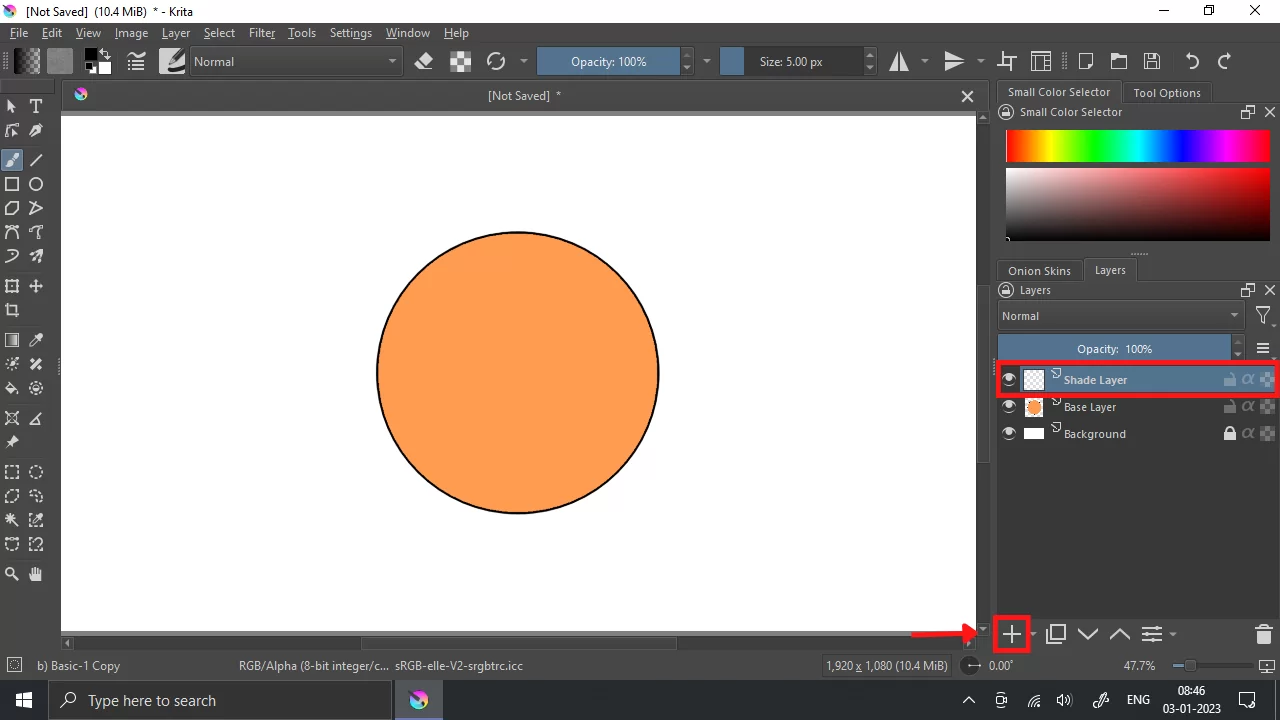
Step 1: Create the base drawing in the first layer.

Step 2: Create another layer above it by clicking on the ‘+’ icon in the layers panel. This will be our Shade Layer.
Step 3: Select both layers and Right click on the mouse.
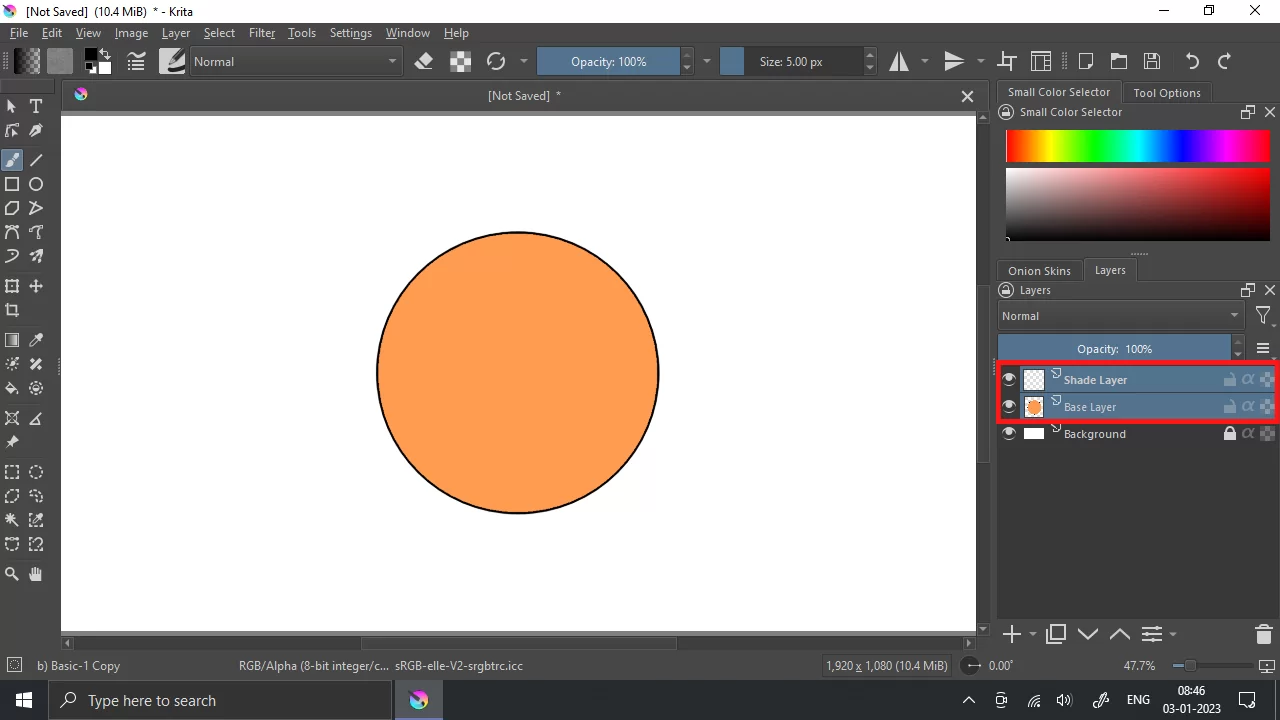
Step 4: A list will open after right-clicking. Choose Group > Quick Group to create a group of layers.

Step 5: Now turn on the Alpha icon of the shade layer. This will enable us to draw only on the filled area of the base layer(i.e. The layer below the shade layer), and anything that we draw outside will not be visible on the screen.

If this alpha icon is not turned on, then whatever we draw will be visible on the screen, and a shaded effect can not be given.
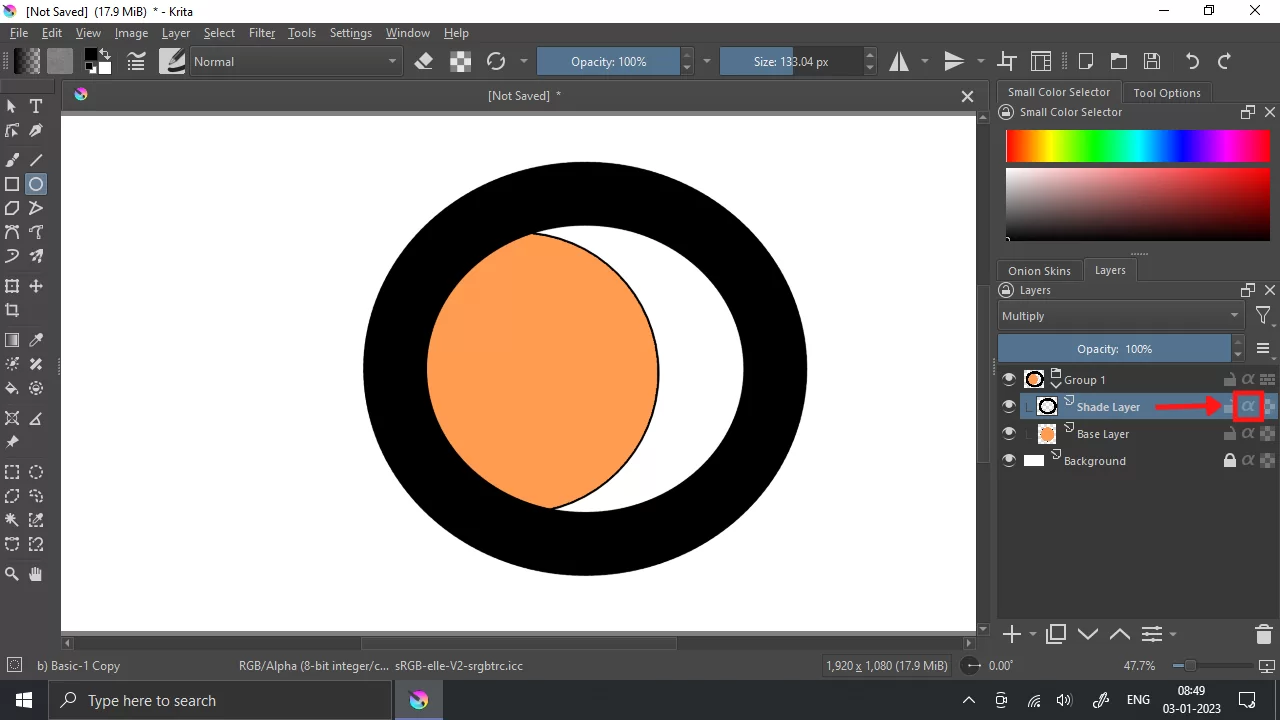
So, Keep in mind to turn this alpha icon ON.
Step 6: Now, turn the layer mode to Multiply and change the opacity of the shade layer by sliding the Opacity bar, and you will get the required shade effect.
We aalso recommend that you check our in-depth guide on how to change Font in Krita.

Understanding Layers
Since layers are a big part of shading, every Krita artist must understand what layers are all about. So, let’s get into it.
When you want to fill line art comfortably, It is advisable to use the layer stack. The layer stack is one characteristic that makes digital art incredibly practical. If you are an artist that has been involved in traditional drawing, then you know it is customary practice in traditional art to depict the entire background before drawing the subject. Computers operate similarly. So, even when you want to shade, layers should go first.
Take, for example, you instruct a computer to draw a larger red circle first, followed by instructions to construct a smaller yellow circle. You will observe that the smaller yellow circle will overlap the larger red circle. However, If you reverse the commands, the yellow circle will no longer be visible because it was drawn before the red circle and is therefore behind the red circle. Programmers will understand what I’m talking about. If you aren’t a programmer, I’m sorry.
Let us continue. What I just described above is known as “drawing order.” This means that a computer imitates a traditional artist in the sense that it will first draw the images behind everything. The computer will then layer the subject and foreground on top of the image. Layer stack can also blend the colors of different layers using blend modes.
You can also check out our detailed guide on making brushes in Krita.
Great Blending Techniques That Will Help You When Shading
Below are some blending techniques that will come in handy when you are shading your project in Krita.
- Smudge
The Color Smudge Brush Engine is a unique brush engine that enables you to mix the color of your current brush with the color(s) underneath your brush. The Color Smudge Brush Engine is used for smudging blends. Smudge is a powerful brush, giving whatever you are working on a lovely creative look. Although it has a balanced performance, it is slightly slower than the standard pixel brush.
- Smear
Smearing is similar to varnishing. However, smearing is only different from varnishing because smearing employs drawing layers with texture or patterns instead of using a semi-transparent layer.
Krita gives you the option to choose a Brush Tip, which may be used to produce textured effects like smears. You may produce engaging and artistic effects using smears.
If you liked reading this guide, you may also like our in-depth guide on How to make Brushes in Krita.