Making brushes in Krita is a key skill for digital artists looking to expand their toolset and create unique and personalized brushes. With its powerful brush engine, Krita allows you to create custom brushes from scratch, modify existing brushes, or import brushes from other sources. By learning how to make brushes in Krita, you’ll be able to add your own touch to your digital artwork and bring your creative visions to life.
How to Make Brushes in Krita
Krita provides numerous brushes that you can use for your artwork. These brushes can be modified as per the user’s requirement.
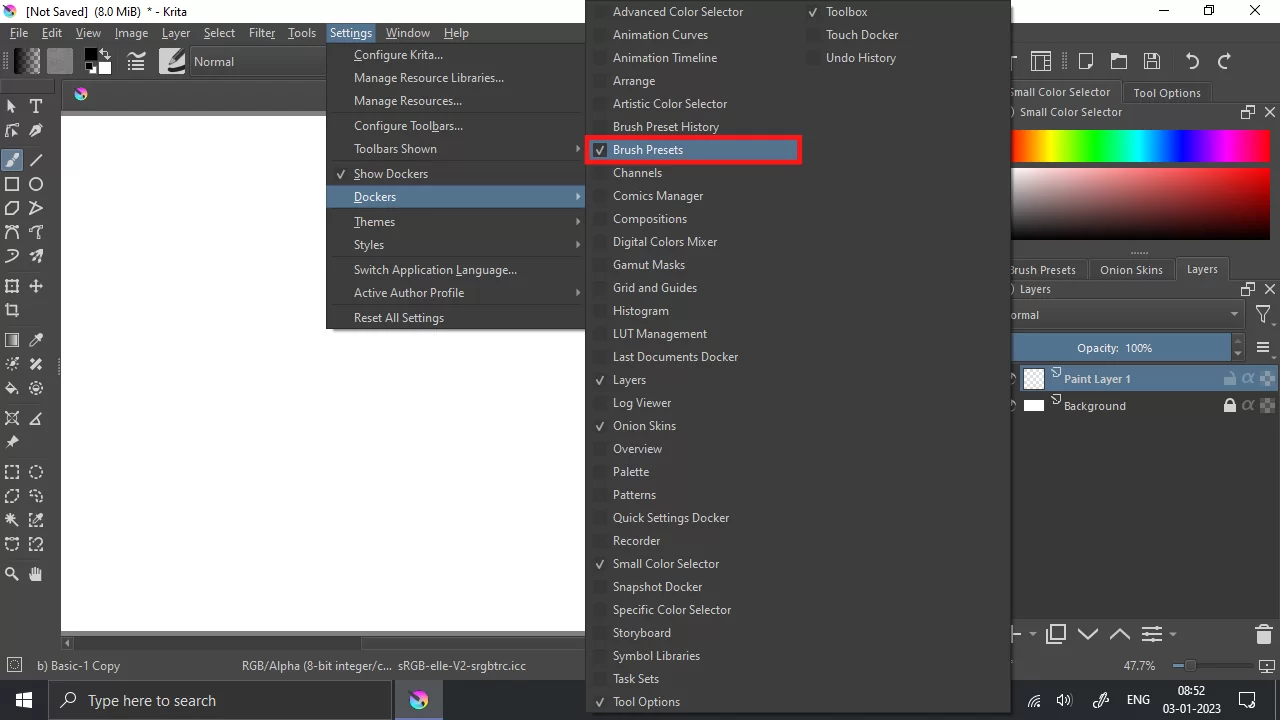
Step 1: Go to Settings > Dockers and turn on the Brush Presets panel to get these brushes.
Step 2: In this panel, you will get many different varieties of brushes.
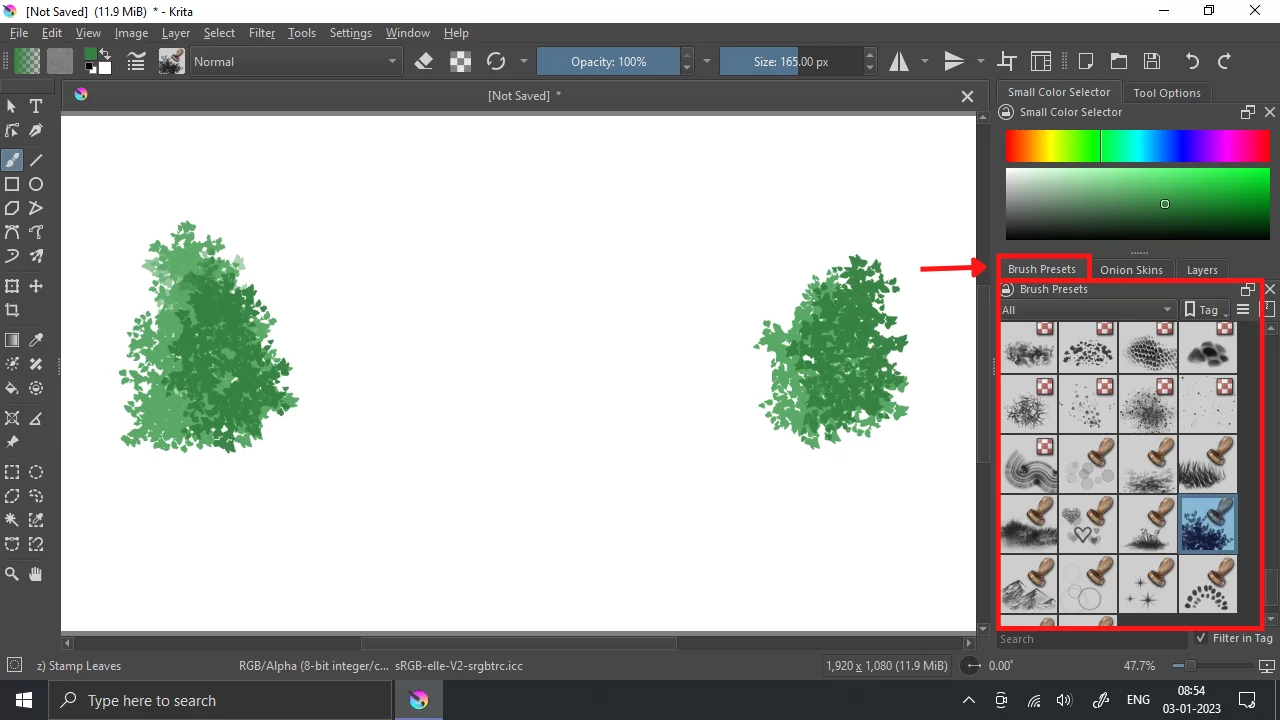
These brushes can also be selected from the upper ribbon’s brush icon.

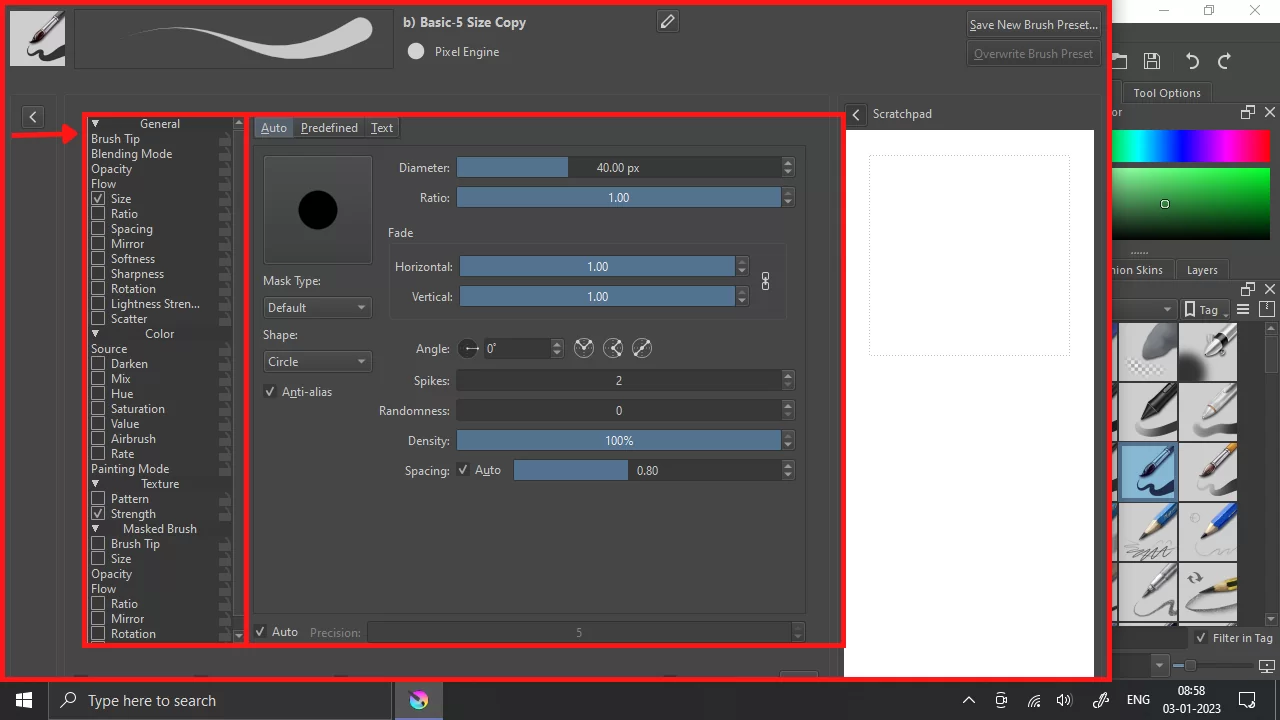
Step 3: To modify these brushes, click on the Edit brush settings icon.

A window/panel will open where you will get multiple options to modify the opted brush. Play with these settings and experiment by changing these values to get different types of brush designs instantly.
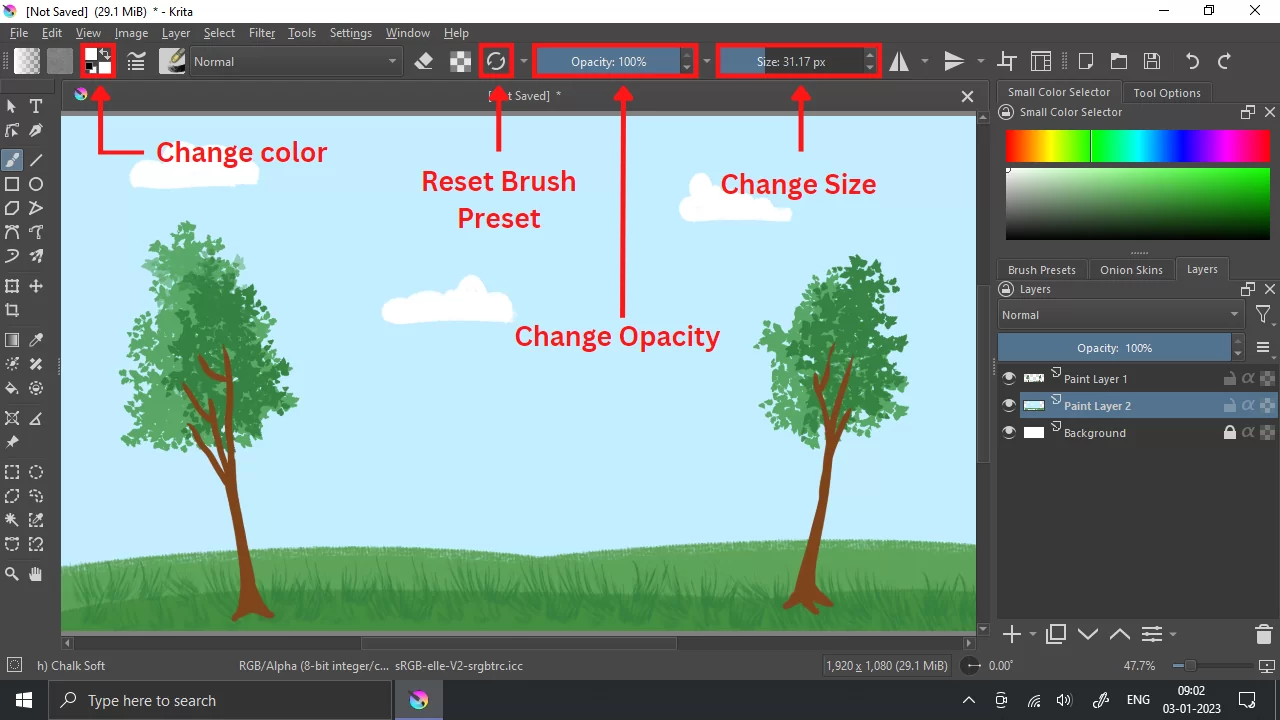
Step 4: To reset the brush modification, click on the Reload Original Preset icon, and you will get the original settings of the brush back. You can also change the Color, Opacity, and Size of the brush from the icons and bars given in the top ribbon.
This way, you can easily manipulate and use Brushes in Krita.
We also recommend that you see our step-by-step guide on how to edit text in Krita.
The Brush Settings Drop-Down
You can find the Brush Settings Editor panel between the Choose brush preset button on the right and the Fill Patterns button on the left. To begin using the drop-down menu, you need to find the Brush Settings Editor panel. Alternatively, you can open it by pressing the F5 key. In the Brush Settings Drop down menu, you’ll find:
- General Information
The general information contains Live Brush preview, Preset Icon, Preset Name, Engine name, etc. It also contains buttons for reloading, saving, and renaming.
Let us talk about the live brush preview for a little while. The live brush preview displays the current brush stroke as a small s-curve wiggle. The small s-curve has no pressure on the left, so it grows to full pressure as it moves to the right. The live brush preview can only display the impact of the Pressure, Drawing Angle, Distance, Fade, and Fuzzy Dab sensors. It also displays an alternate line pattern for the color smudge, filter brush, and clone tools since the effects of these brush engines are changed by the pixels already present on the canvas.
- Preset Chooser
You’ll also find the preset chooser in the Brush Settings Editor panel drop-down menu. The preset chooser is similar to the preset docker. The preset chooser is unique because it allows you to filter by an engine. The preset chooser is also where you can create brushes for an engine from scratch.
By default, the preset chooser is collapsed. If you want to select it, you must press the arrow at the top left of the brush engine.
- The Scratch Pad
When you are making some adjustments to your brush, you need to be able to check what each setting is doing. To the right drop-down settings, there is a scratch pad that you can use to monitor each tweak you apply to your brush.
The scratch pad is collapsed by default, so you must click the arrow in the upper right corner of the Brush Settings panel to display it. Also, you can load the dash area into the tiny Save New Brush Preset dialog’s tiny scratch pad by selecting the scratchpad icon when saving a new preset.
- Options List
The options list is where you see the different parameters, toggles, and knobs that you can use to make a brush set unique. The main things to use in the options list are sliders and checkboxes, which are toggled off. However, parameters such as flow and opacity are very fundamental to how a brush works, so they are always turned on.
Did you enjoy reading this article? you may also like How to Animate in Krita and How to move selection in Krita.