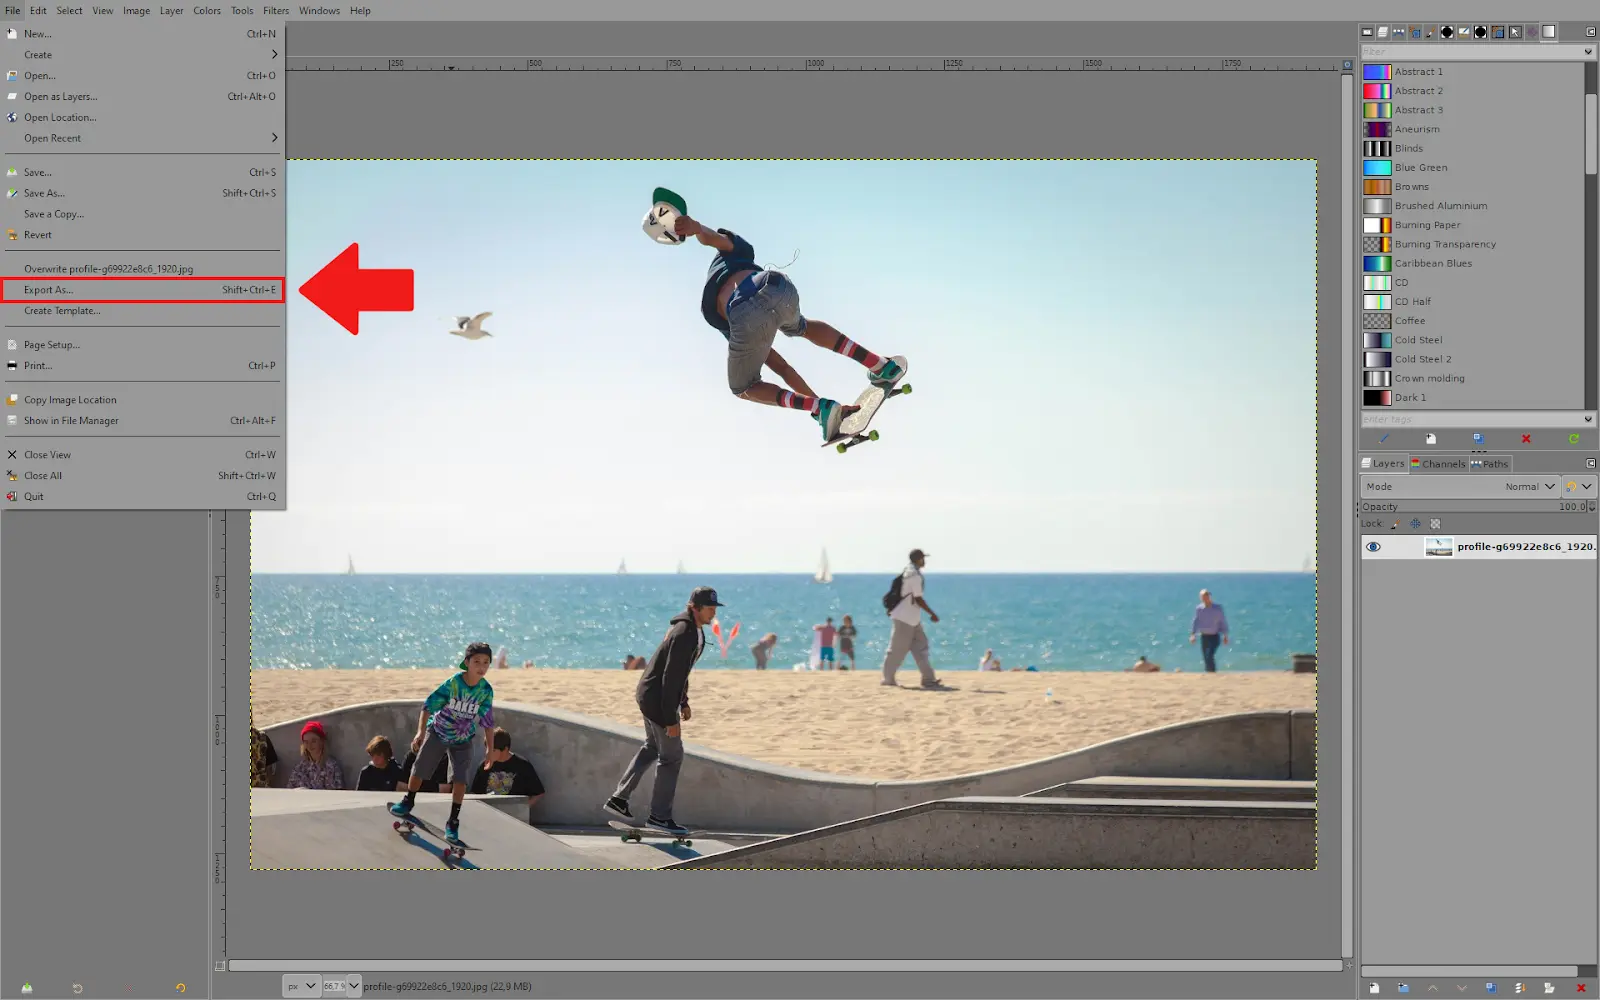
You may be trying to save your Gimp image as PNG, and it just isn’t working; you’re not alone because it happens to even the best of us. The experts that made Gimp restricted the saving format to XCF and then relocated the saving processes for other image formats.
When you realize that the “Save” command isn’t the place to be looking when you want to save your image as PNG, then saving your image as PNG becomes easy in Gimp. To save as PNG, you need to scroll down the menu and look for “Export As.”
How to Save GIMP File as PNG
1. To save your image as a PNG file, go to File – Export As
2. Once you choose your image’s location in the folders, you can simply type ”.png” in the name section or click on ”Select File Type” and scroll down until you find the PNG option. After that, click ”Export.”
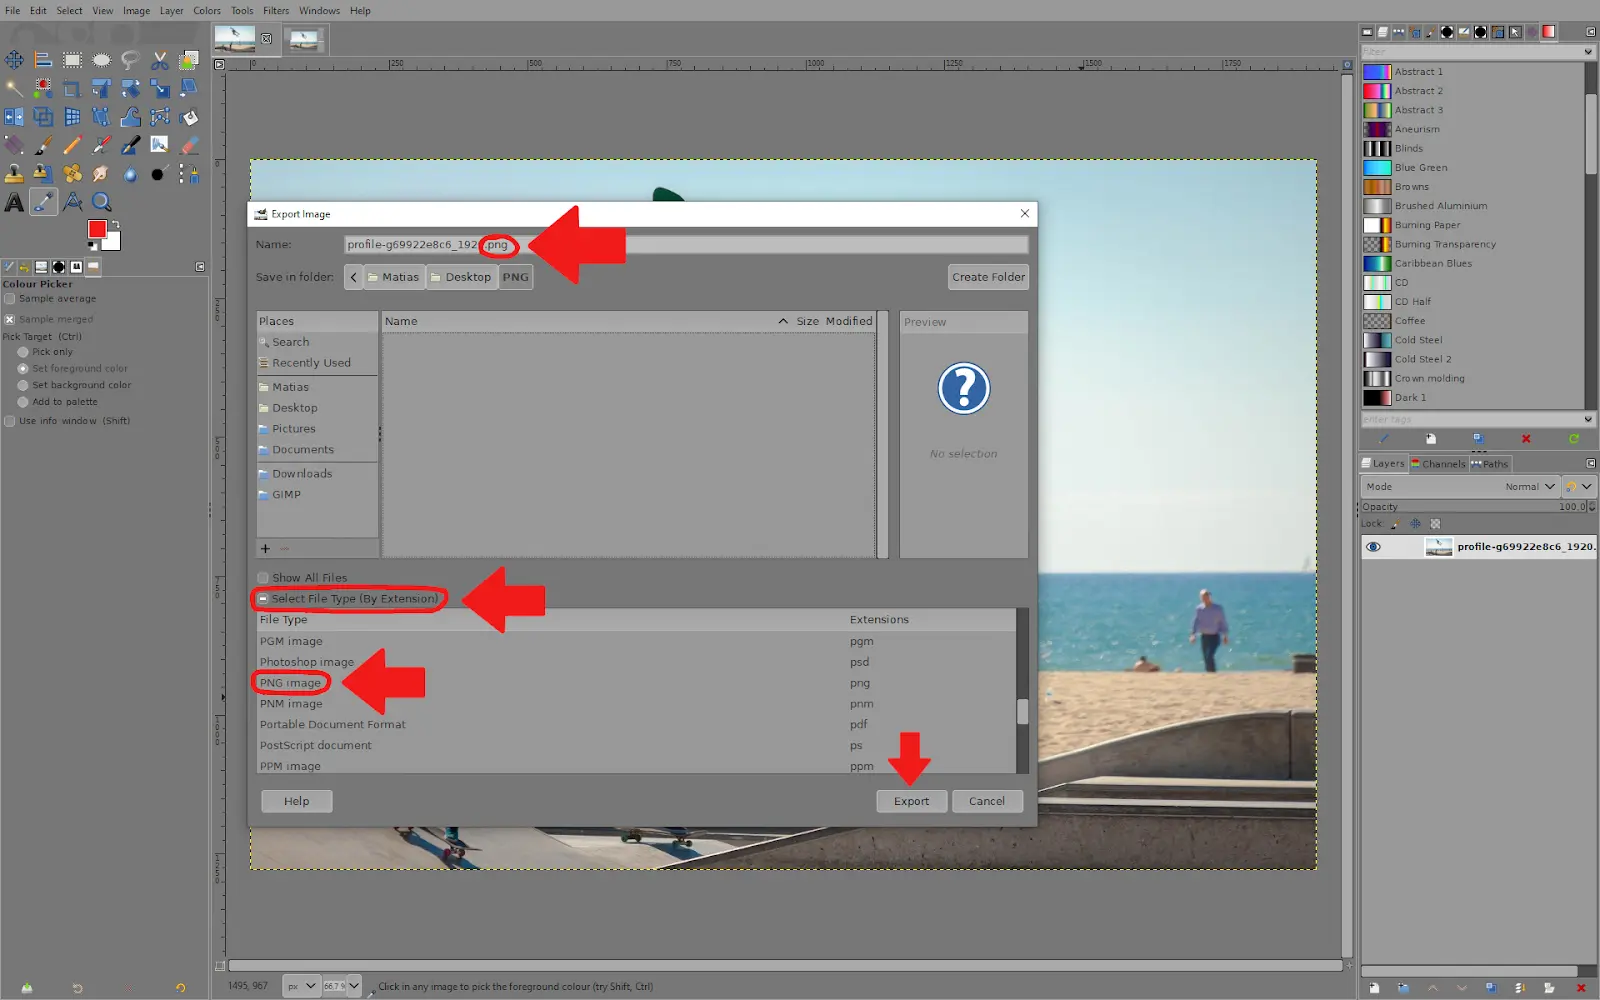
3. From the last menu, click on ”Export.”
How to Save PNG Image With Transparency
Simple binary transparency and alpha transparency are the two methods that visual file formats utilize to allow transparent image portions. The GIF format supports simple binary transparency; one color from the indexed color palette is designated the transparent color.
The PNG format also supports transparency using alpha values encoded in a different channel called the alpha channel. Below are the steps to save a PNG image with transparency on Gimp.
Step 1
Before you export an image with transparency, you must first have an alpha channel. The first step is to check if the image has an alpha channel. Go to the channel dialog and check that an entry for the “Alpha” exists apart from Red, Green, and Blue.
You can add an alpha channel if the above isn’t the case. You can add an alpha channel by going to Layer>Transparency>Add Alpha Channel. The Alpha Channel also plays a role when saving an image as GIF using Gimp.
Step 2
Background layers are present in the original XCF file and can be deleted. Look under Filters+Light and Shadow in GIMP to find the default gradient-supporting filters.
Step 3
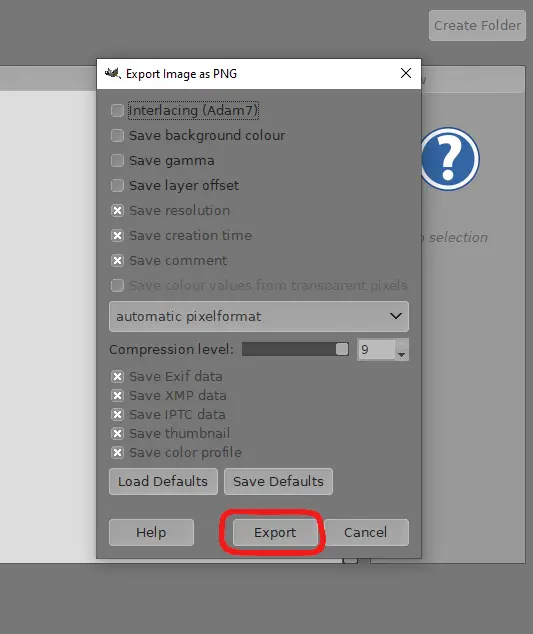
After you are done, you can export it in PNG format. Saving as PNG isn’t the only way to save an image in Gimp; you can also save your images as JPG.
What Should Compression Level Be Chosen For PNG in Gimp?
Because there is no concern about image quality loss, PNG compression is much simpler than JPEG. You can choose to include transparent areas in your image and maintain the quality of your image. However, when compressing your PNG, Larger final file sizes are the price to pay for the compromise.
Technically, saving a PNG at the highest compression level takes longer. When saving your file as PNG, remember that 0 is the lowest and 9 is the highest). It is advisable to leave your values at maximum by default.
Leave a Reply
You must be logged in to post a comment.