Creating a prototype in Figma is a great way to test the functionality of your design before you begin development. It allows you to see how your design will work in a real-world scenario, and make any necessary adjustments before the development process begins.
One of the most powerful aspects of Figma’s prototyping feature is its ability to link different screens together. This allows you to simulate the flow of a real app or website and make sure that the user experience is smooth and seamless. Additionally, you can also use triggers and image animations to create more interactive and engaging prototypes.
If you’re new to prototyping in Figma, don’t worry. It’s an intuitive and user-friendly tool that doesn’t require any coding or programming knowledge. With just a few steps, you can create a fully-functional prototype of your design.
In this guide I’ll show you how to create your first prototype in Figma.
How to Prototype in Figma
Prototyping in Figma isn’t as hard as it sounds. Prototyping in Figma is just also as simple as editing text or masking in Figma. Interactive prototypes allow you to demonstrate how a design will behave. This is useful for design critiques or for helping others visualize how a design might look and feel once the final product is built.
In order to assemble a prototype we’ll first need to have our design built. You can create your design on the design tab and create your prototypes in the prototype tab.
Step 1:
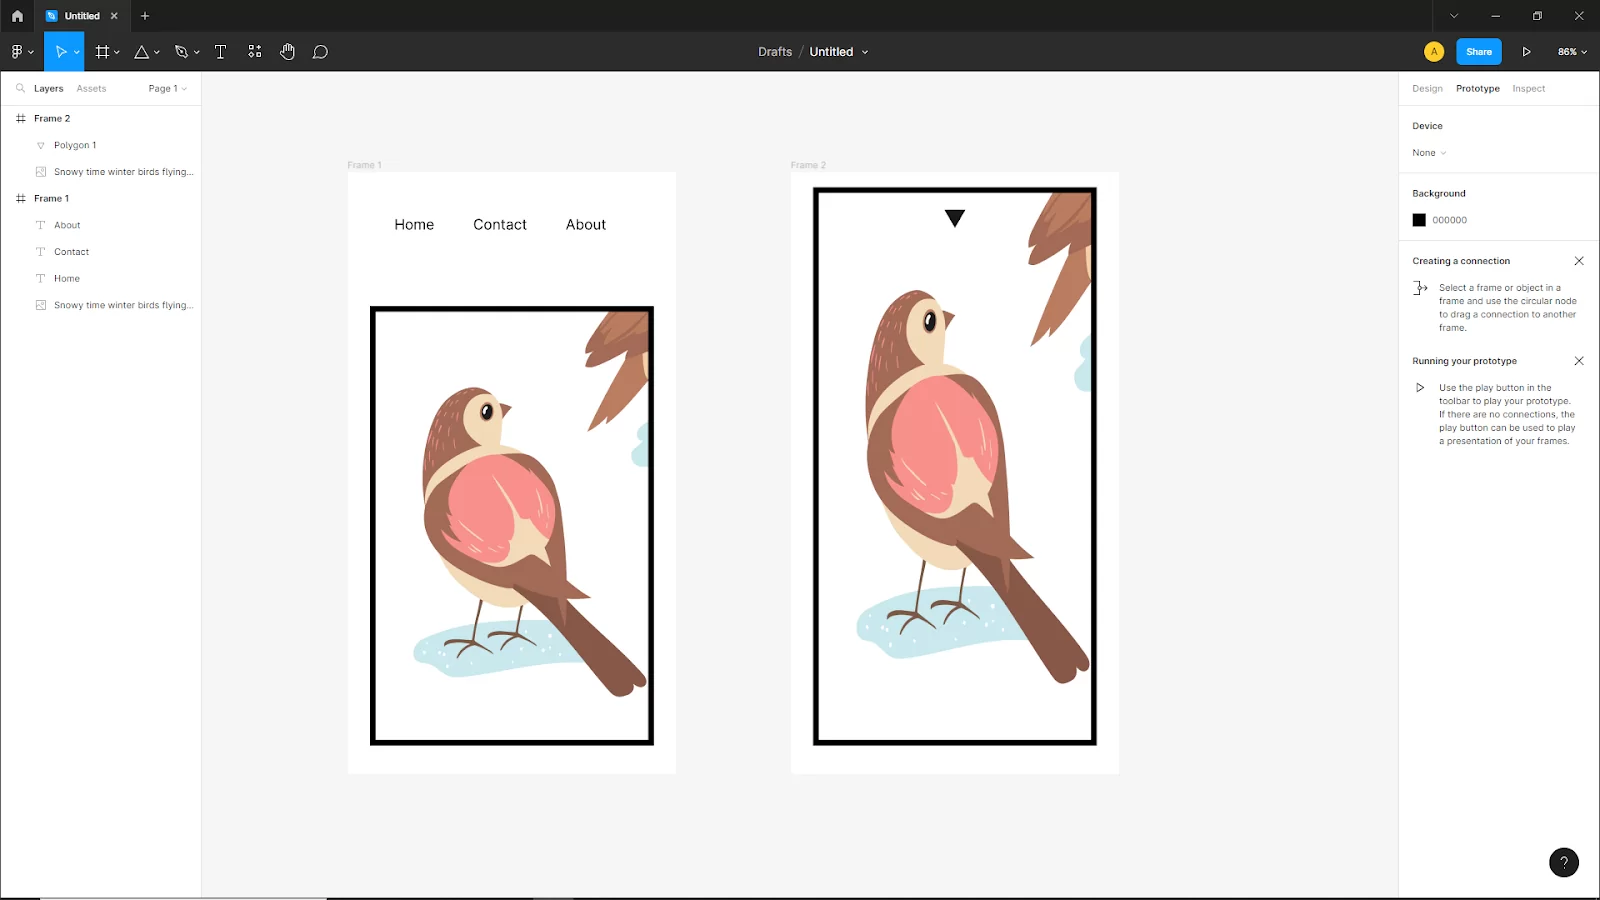
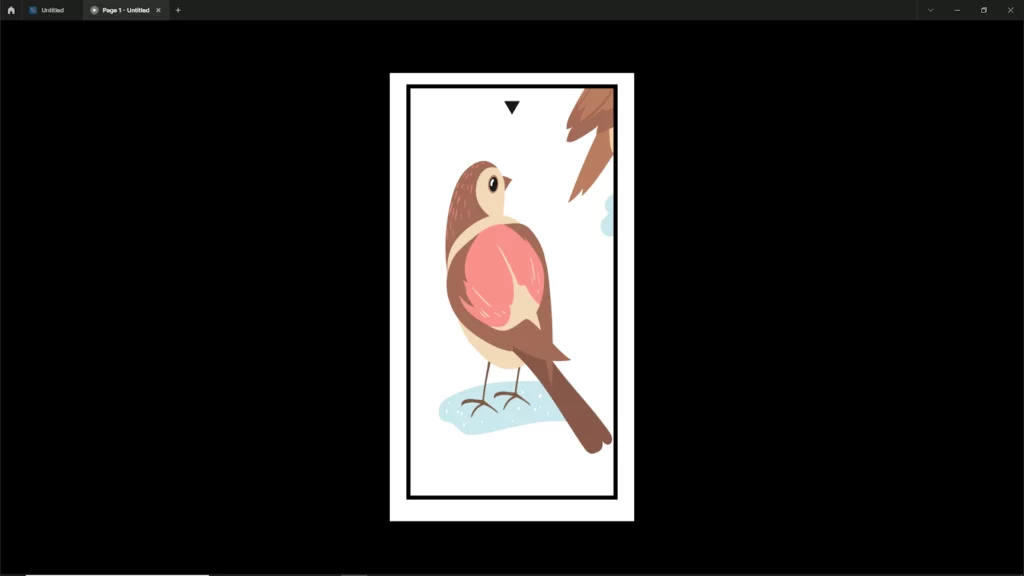
Click on the prototype by side of the design tab at the top of the properties panel. In this example, I will show you an image that is fullscreen open when we click the image. And when we click the down arrow icon in the image will go to the previous position.
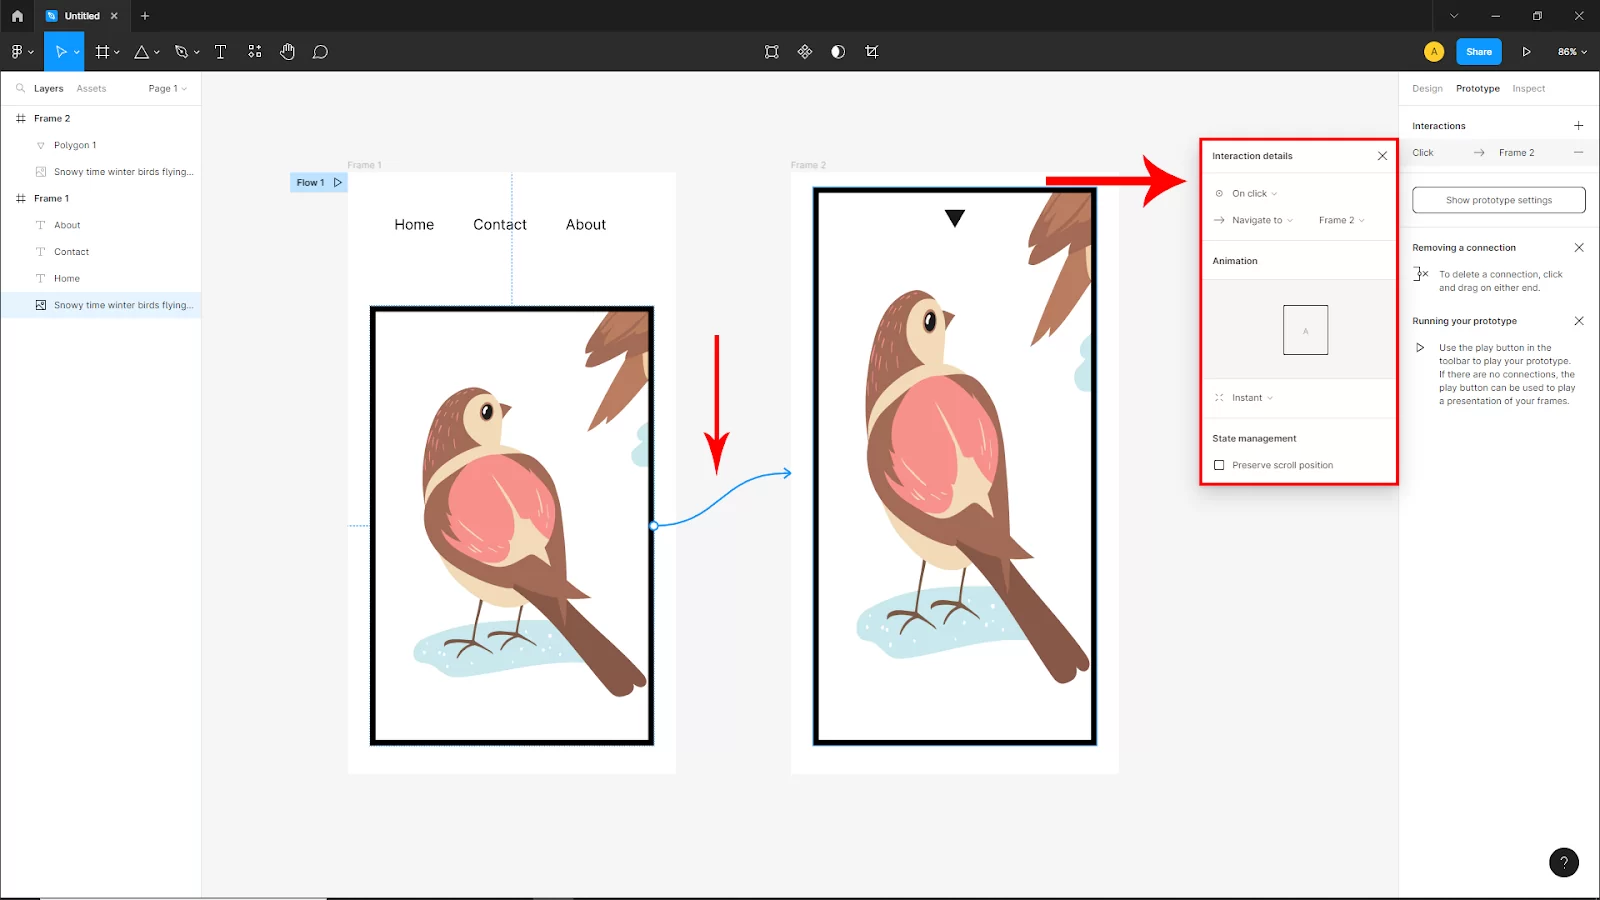
Now select the first Frame image and hover the mouse cursor on the anchor point of the image, and you will see a round plus icon now click and drag it to the second frame and release, and a blue arrow will appear. From the interaction, details are under the prototype. Set the animation type to instant and set the One-click.
Step 2:
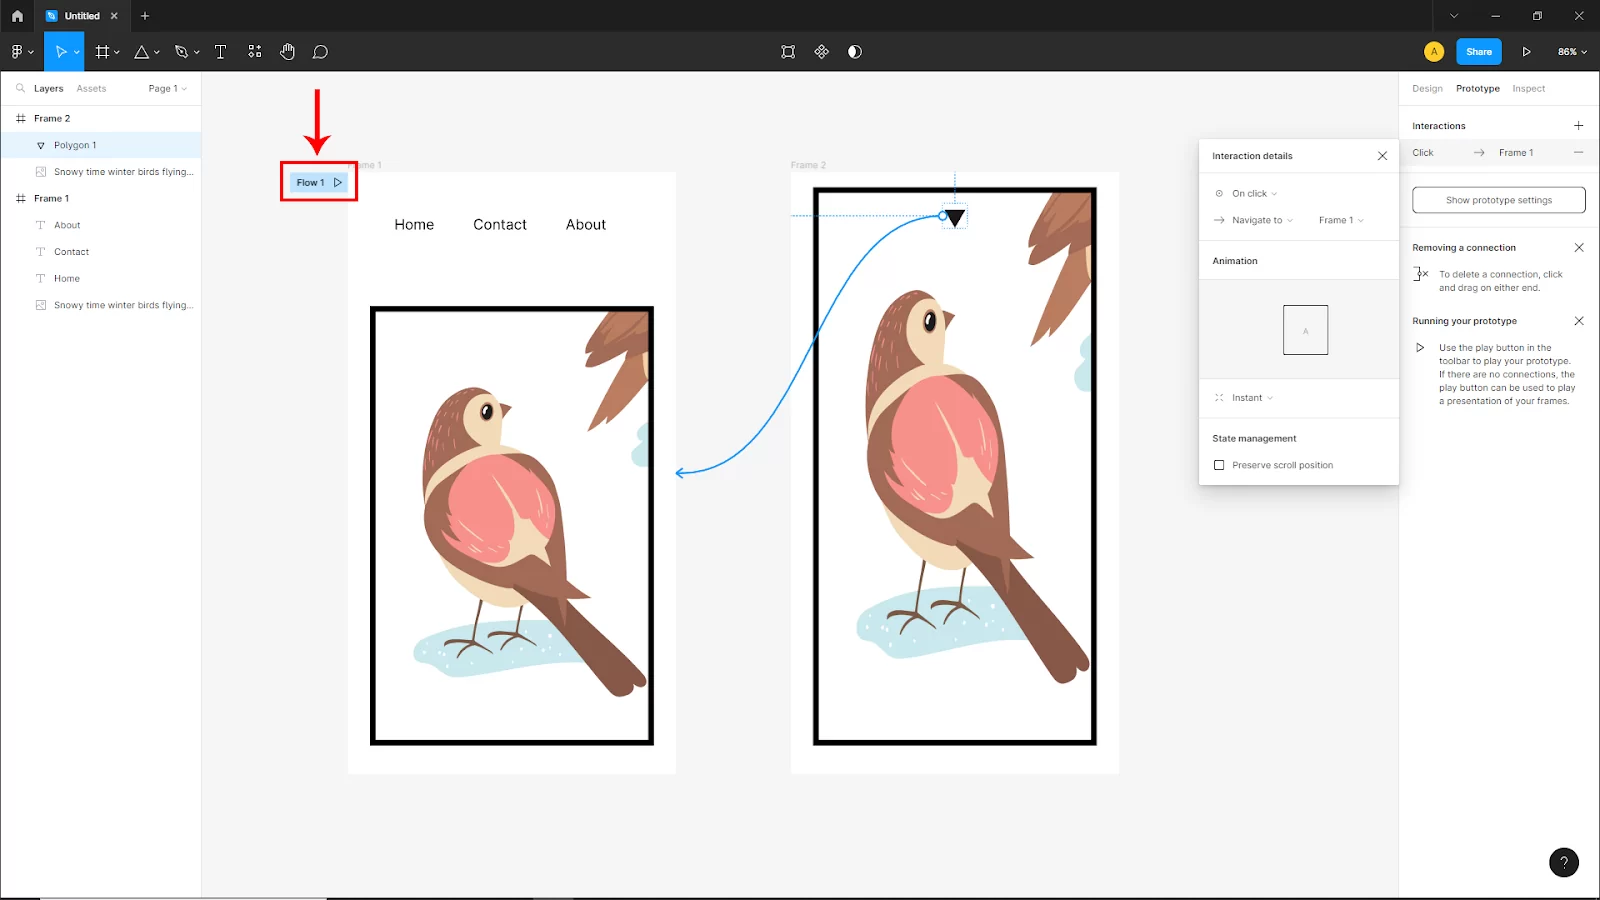
Now select the second frame arrow icon in the image and prototype it with the first frame as shown on the first one. Now to see the preview click on the Flow 1 video icon upper corner of Frame 1.
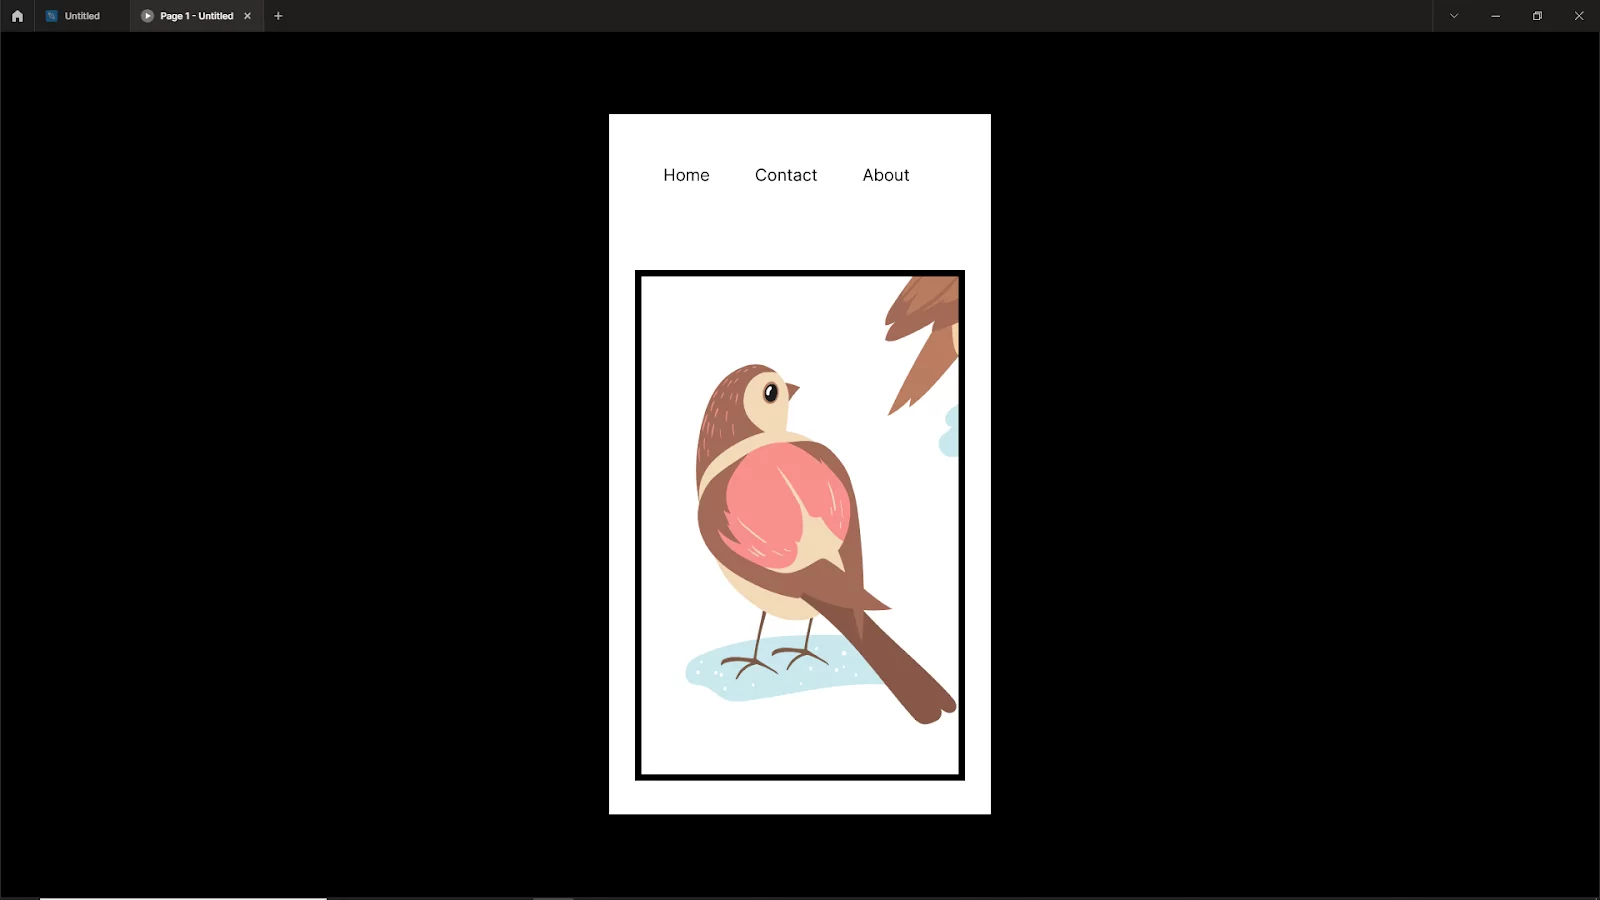
A new window will open and here you can see the action. When you click the image, it will appear whole screen and when will click on the drop-down arrow it will go to the preview position.
That’s how you prototype your design to see the final results of your design.
Prototyping: Flows and Starting Point
You may preview an entire journey and experience with your ideas by creating several flows for your prototype on a single page with Figma’s prototyping feature. So, what is a flow? A flow is a page’s network of frames and connections.
On the other hand, a prototype can show how a user might navigate your app or website from beginning to end, or it can use its flow to highlight a particular section.
For instance, your prototype includes every interaction that might occur on an e-commerce website. You can find flows for creating an account, adding things to a cart, and checking out within the prototype.
There are a few other ways to add a flow starting point to your prototype. Click in the Flow beginning point area of the right sidebar after selecting the starting frame. You can also click Add beginning point from the context menu by right-clicking the Frame. Finally, you can also copy a frame that already has a starting point.
Creating a prototype link to another page in Figma
In Figma, you can create a link between different pages or artboards in your prototype to simulate navigation within a website or mobile app.
Here’s how to do it:
- Select the object or element that you want to use as the link. It can be a button, an image, or any other object.
- In the “Prototype” tab, click on the “Link” button. This will open the “Link to” modal.
- In the “Link to” modal, you can choose to link to a specific page or artboard in your prototype. You can also link to a specific frame or a URL.
- Once you have selected the destination for your link, you can customize the transition animation and trigger. For instance: you can use the “tap” trigger, to change the screen when a user taps on the button.
- Preview your prototype by clicking the “play” button in the top right corner of the screen. Then you can test your link by clicking the object you linked to.
You can also use “On hover”, “On click” or “On drag” in the Triggers section to simulate various interactions that can happen on your prototype.
You should also know that if you are sharing your prototype with others you can generate a shareable link, so others can access your prototype without having to sign-in to Figma.
How to Troubleshoot Figma Prototype Not Working
If your Figma prototype is not working as expected, there are a few causes and things you can try to troubleshoot the issue:
Browser Problems
If you’re having trouble previewing your prototype in Figma, try accessing it in a different browser.
Refresh the page
Sometimes, a quick refresh fixes everything! If you are viewing the prototype via a shareable link, try refreshing the page or clearing your browser cache.
Check for Updates
Are running the latest version of Figma? Bugs can be fixed in the latest version.
Network Connection
Is your internet connection stable? Slow or unstable internet connections can cause issues when loading prototypes.
Check your links
Ensure that all of the links in your prototype are pointing to the correct destination. Also, if you’re using hotspots to create links, make sure that they are properly aligned with the elements they’re linked to.
Check your triggers
Check that the triggers for your animations and interactions are set up correctly. If you have set up a button to trigger a transition on hover, make sure that the button is set to the “Hover” trigger in the “Prototype” tab.
Review your animations
Make sure that your animations are set up correctly and that the duration of the animations is appropriate.
Once again, don’t ignore updates. If you’re using the Figma plugin to prototype, be sure that it is updated to the latest version, and if you still face the issue, try reinstalling the plugin.
Contact Figma support if you still can’t find the issue. They can help you troubleshoot the problem and provide additional assistance.