As digital designs become more interactive, animating elements on a screen has become a necessary skill for many designers. Being able to bring your design to life with animation can make all the difference in making your project stand out. Figma offers a simple and intuitive way to animate elements in your design, although its animation features are highly limited.
I’ll show you the process of creating simple animations in Figma.
How to Animate in Figma
There are many ways to animate in Figma. It depends on your design that what type of design you have created and how you want to animate the design. In this Figma Guide, I will show how to animate in Figma with Smart Animate.
Step 1:
In this method, I will show you how to animate a button. When you put the mouse cursor on the button, the button will be slightly bigger than before.

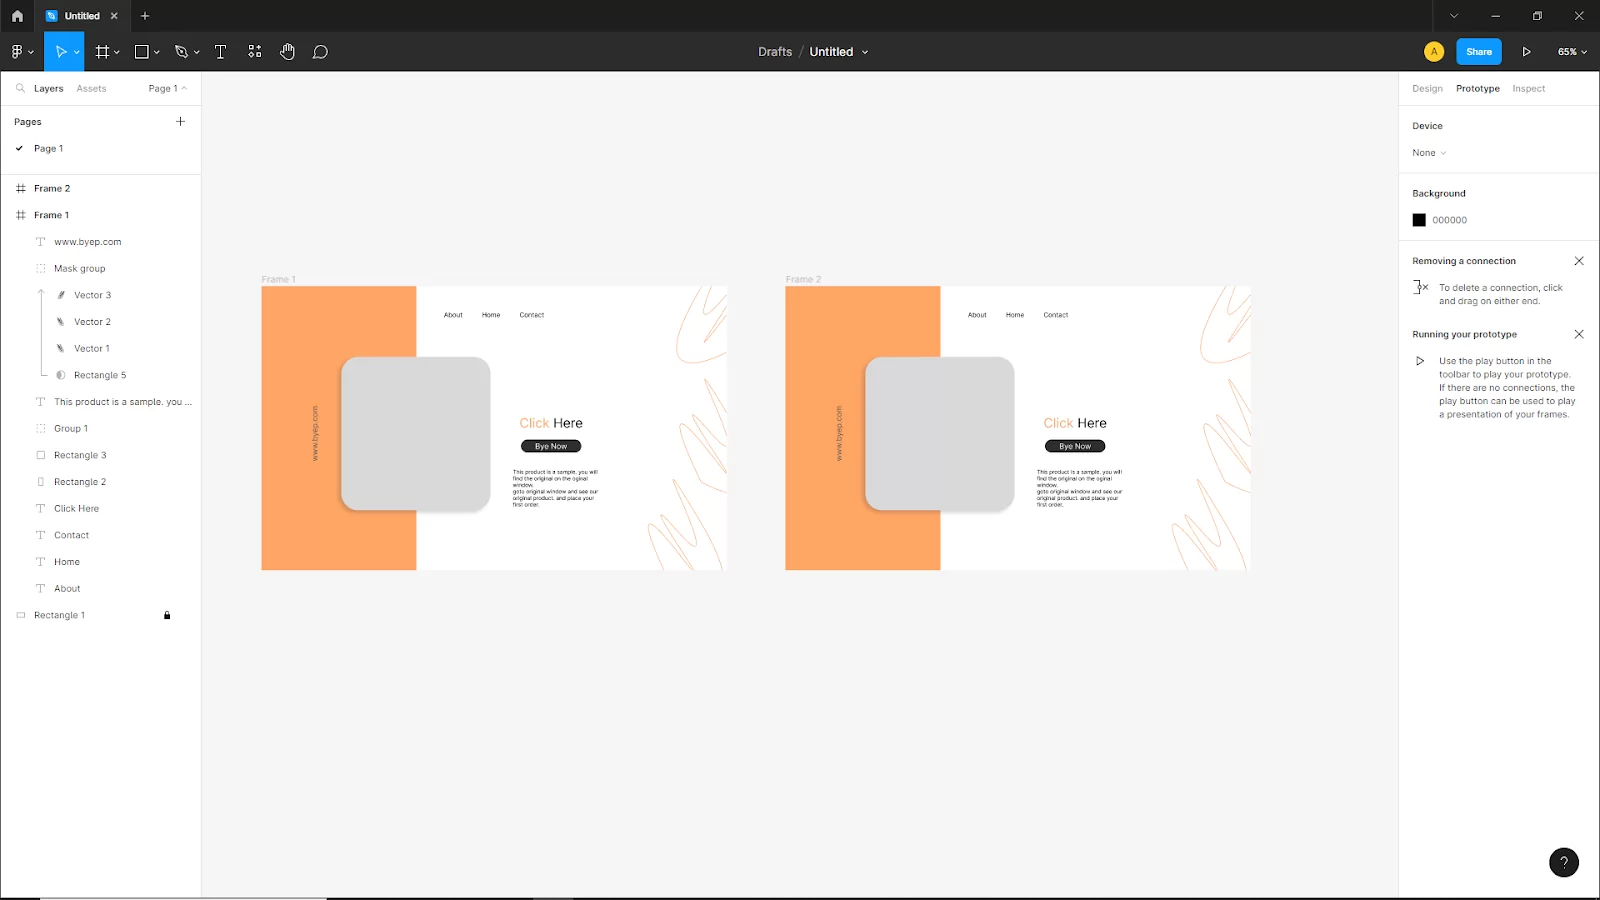
First copy the design hold Alt or Option and click and drag in the canvas to copy the design. And you will see the second copy in Frame 2.
Step 2:
Then select the button of frame 2 And increase the scale size of the button a little bit with the anchor points. Hold shift to scallop precisely.
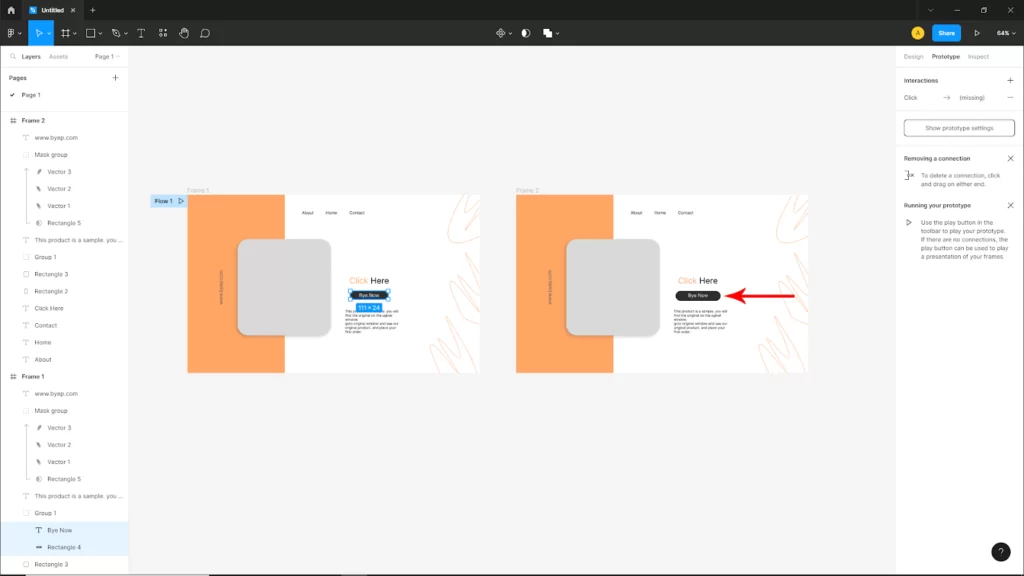
Now go to prototype in the upper right corner. And hover the cursor over the first frame button you will see a plus icon now click and drag the plus icon into frame 2. And you will see a blue arrow appear from the first frame button to the frame 2 side area.
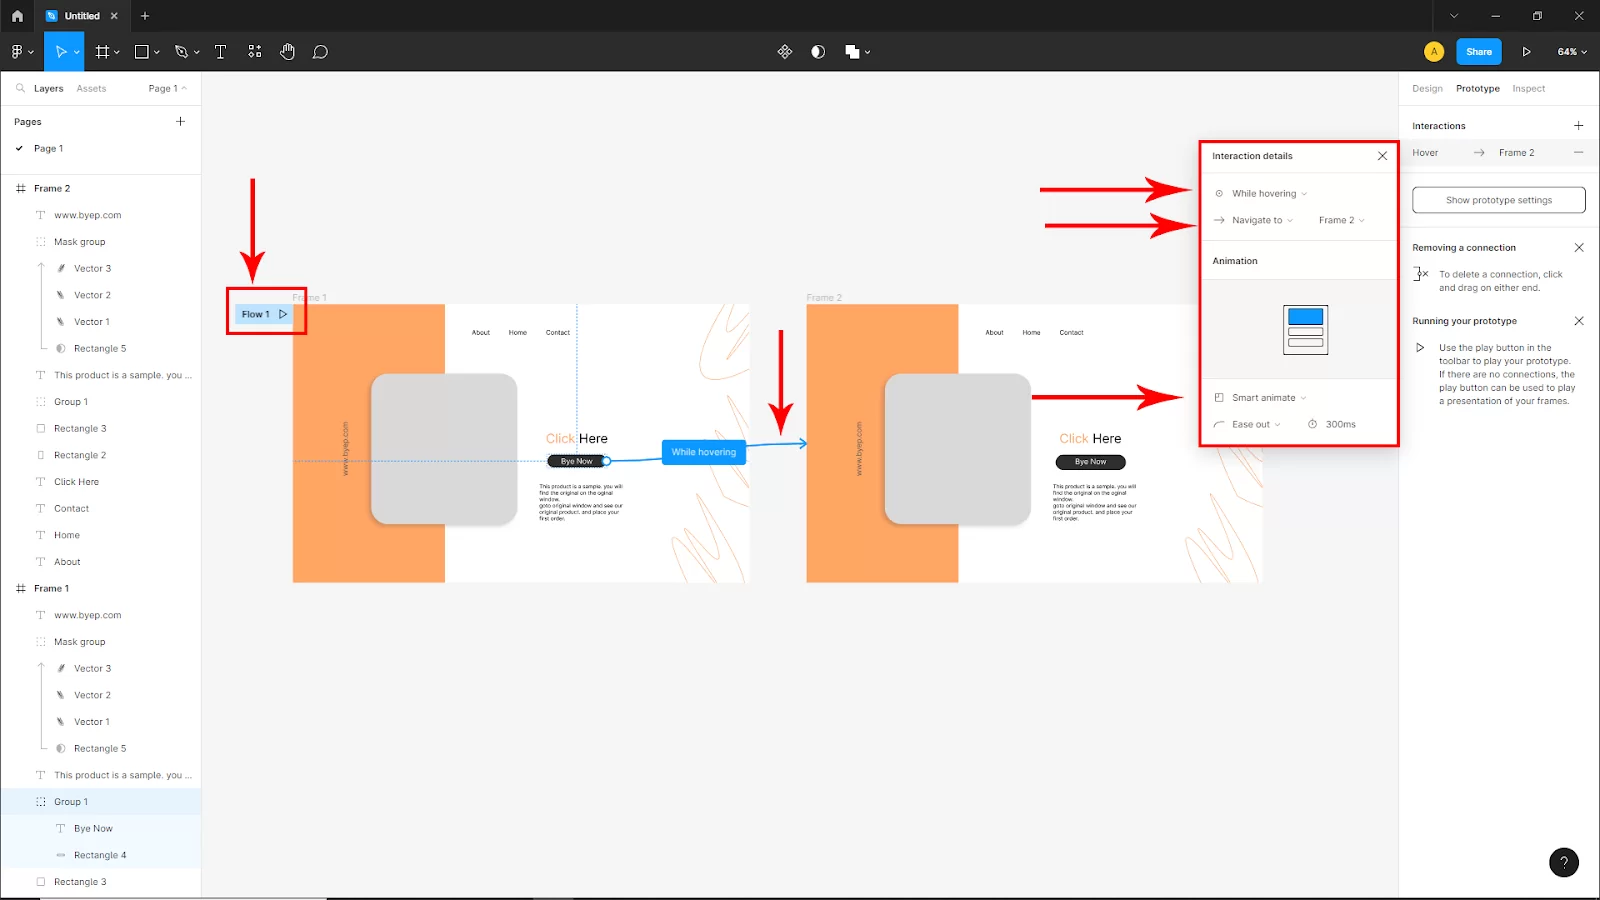
Click on Interaction Details Under the prototype. Now set the Navigation to Frame 2 and animation type Smart Animation. And select While Hovering; this is when your animation will happen.
Click on the first Frame upper corner Flow 1 video icon to see the preview.
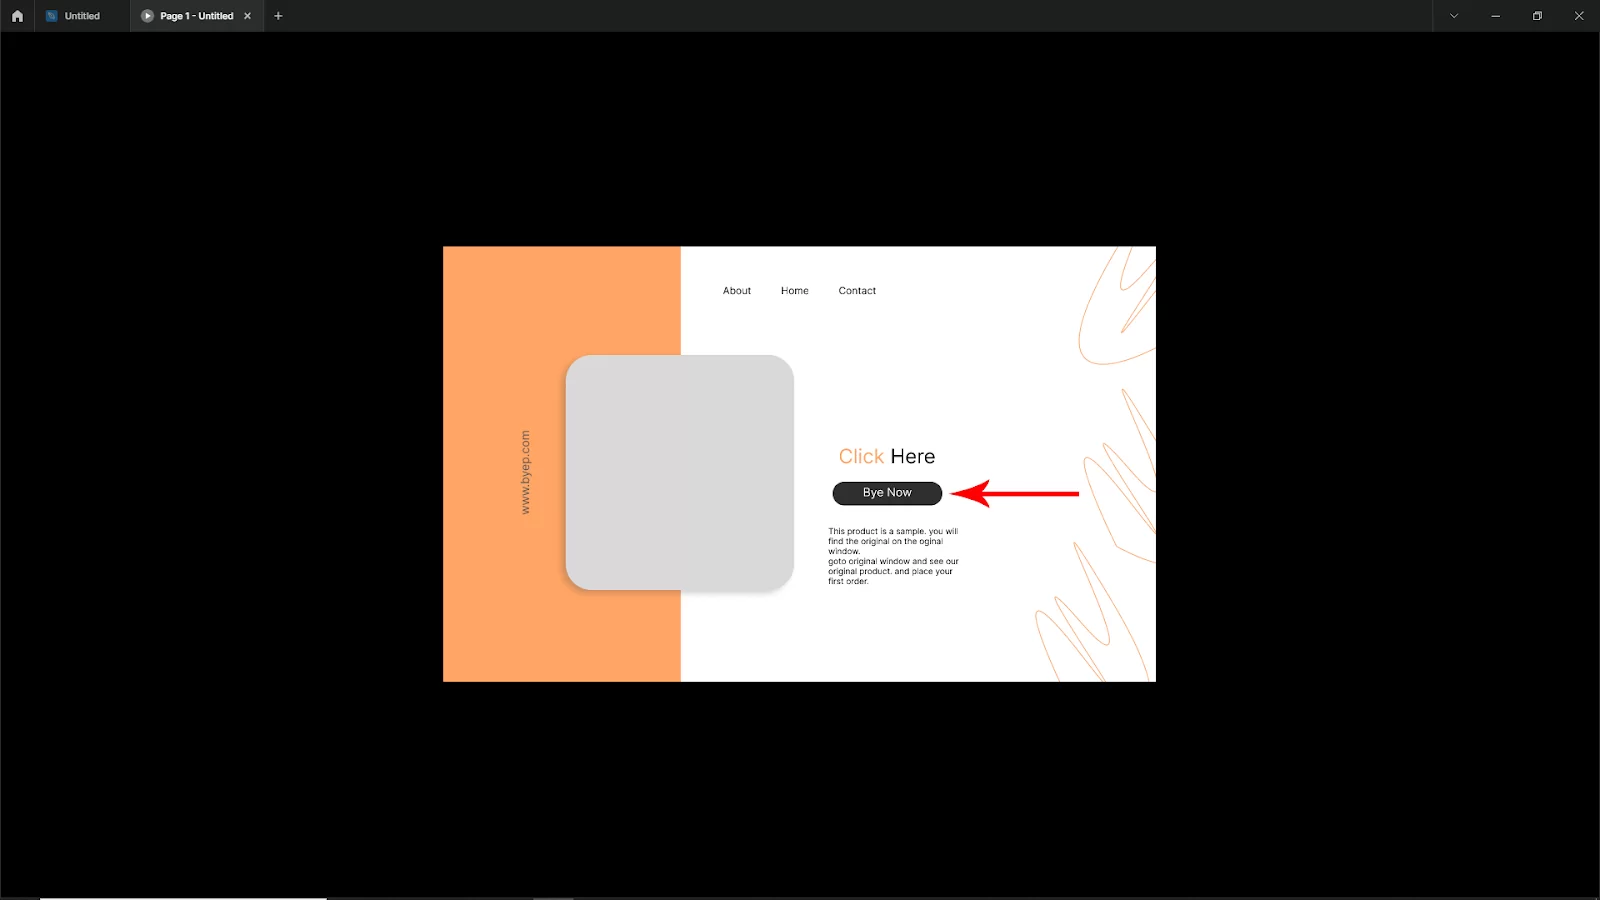
After clicking the Flow 1 video icon a new window will open in Figma and when you hover the mouse cursor the animation will happen.
Also, see our step-by-step guide on how to undo in Figma just in case you make a mistake during your animation.
Features of Smart Animate
In a prototype, Smart Animate searches for similar layers, picks out differences, and animates layers in between frames. When creating a prototype, you may choose Smart animate from the list of transitions.
To make animations that flow naturally, you can combine Smart animate with other transitions. You can make complex animations rapidly with Smart Animate. You can use Smart Animate for loading sequences, pulling for refreshing, touch gestures, parallax scrolling, etc.
Smart animation searches for corresponding layers that are present in several frames. Figma considers the name of the layer as well as its position in the hierarchy.
Also, Figma detects what has changed for layers that match between frames and uses transition to animate between them. Both entire objects or Components as well as specific layers inside a Component or group can be animated with smart animation. Below are the properties of a Smart Animate.
- Scale and Position
The size of an object will be animated by Figma if it varies between frames. Two frames of an animated image with an object with a varying scale are combined to create a smart animation.
Figma can determine if the x and y coordinates of an object have changed. The object will then move animatedly from its present position to that of the destination frame.
- Opacity
The opacity of a layer or object can also be detected by Smart Animate. You can make an object vanish between frames by adjusting its opacity. Instead of changing the layer’s visibility, set the layer’s opacity to 0%. The layer’s opacity will be animated using a dissolve transition applied by Figma.
Both the Layer property and the Fill properties of a layer allow you to change the opacity. To both layer property and Fill properties smart animate will apply. We advise changing the opacity of the layer as a whole. The Design tab’s opacity Layer option is located in the right sidebar.
- Rotation and Fill
The rotation and orientation of the layer are also taken into account by Smart Animate. Using the rotation field on the right sidebar or the canvas itself, you can rotate an object. When the rotation cursor appears, move your cursor over an object’s corner limits.
Rotate a layer at a time or a collection of layers around a central point. An animated graphic demonstrating an object rotating differently throughout two frames and the clever animation that results.
If the fill of an object changes, Figma will intelligently animate it. This enables animated transitions between gradients, solid colors, and even image fills.
You will also like our article on how to add fonts using Figma.