Text is an essential element in design, and Figma makes it easy to create, edit and format text in your designs. Whether you’re working on a website, mobile app, or any other type of project, having the ability to edit text in Figma is essential. In this guide, we’ll walk you through the process of editing text in Figma, from selecting and formatting text to using advanced typography techniques to make your designs stand out.
Editing text in Figma is an easy and straightforward process, you can select and edit any text elements directly on the canvas by simply double-clicking it. Once selected you have multiple options to format the text like changing the font, adjusting the size, line-height, letter-spacing and more.
How to Edit Text in Figma
Here are two steps to edit text:
Step 1:
First, double-click on the text you want to edit the text, Then write your text desired text. On the left side of the workspace area under the Design, you will find the layer and the text parameters.

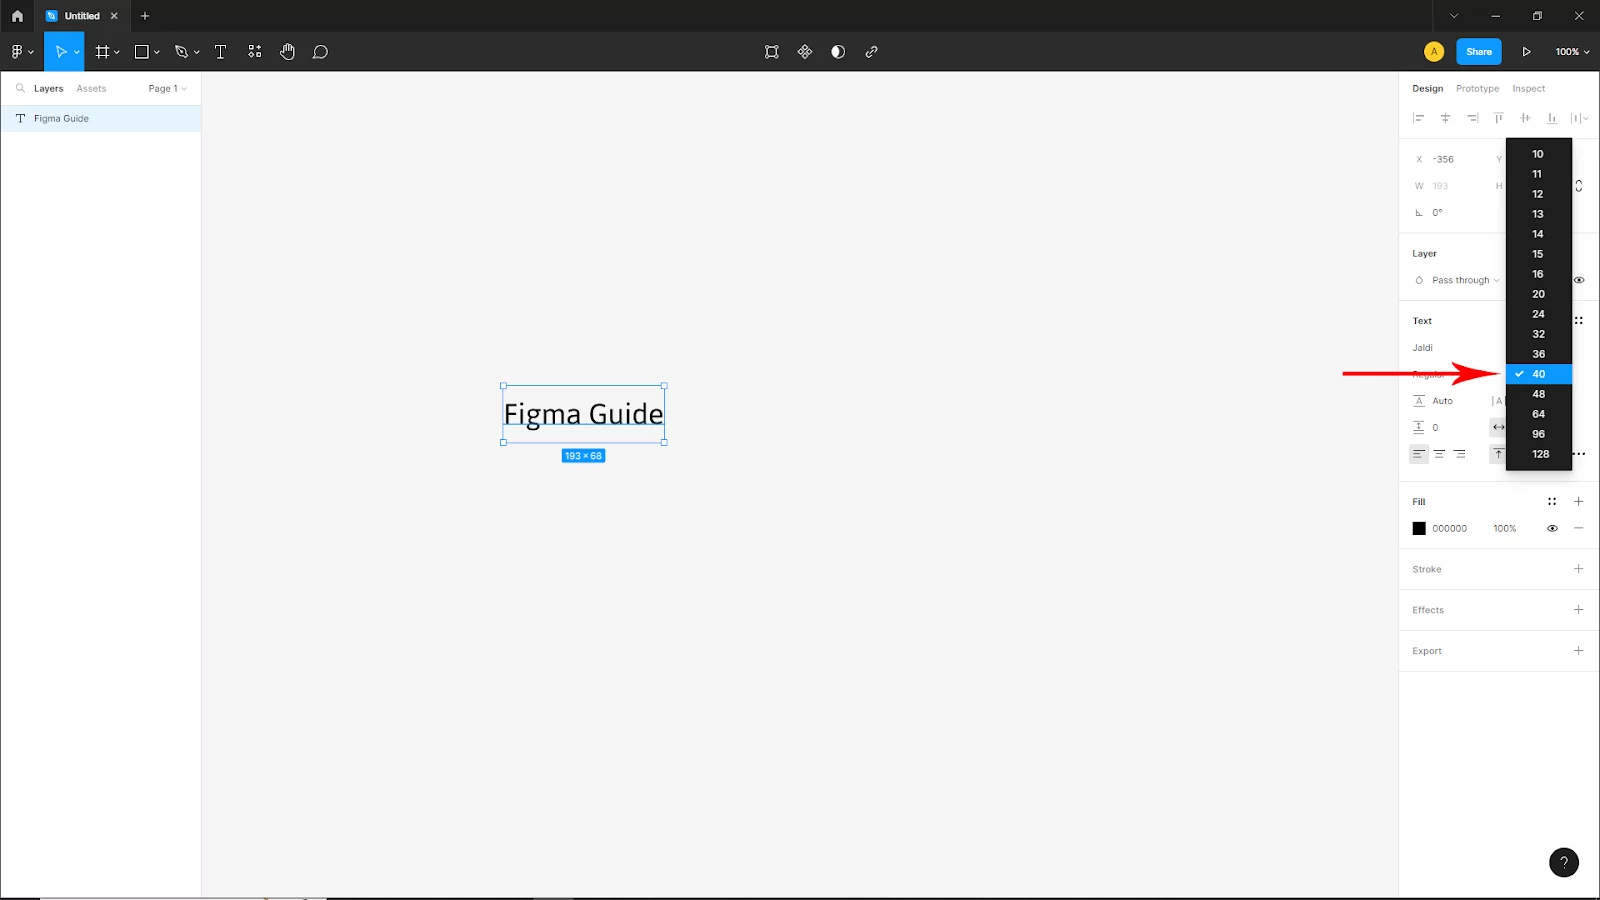
Now select your desired font from the font dropdown arrow. Click on the dropdown arrow on the font box and you will find all the installed fonts then select your font.

To increase the text size, click the box of the text size. On the left side under the font box and choose your text size value to increase or decrease. You can also adjust the text spacing and alignment under the text parameter.
Step 2:
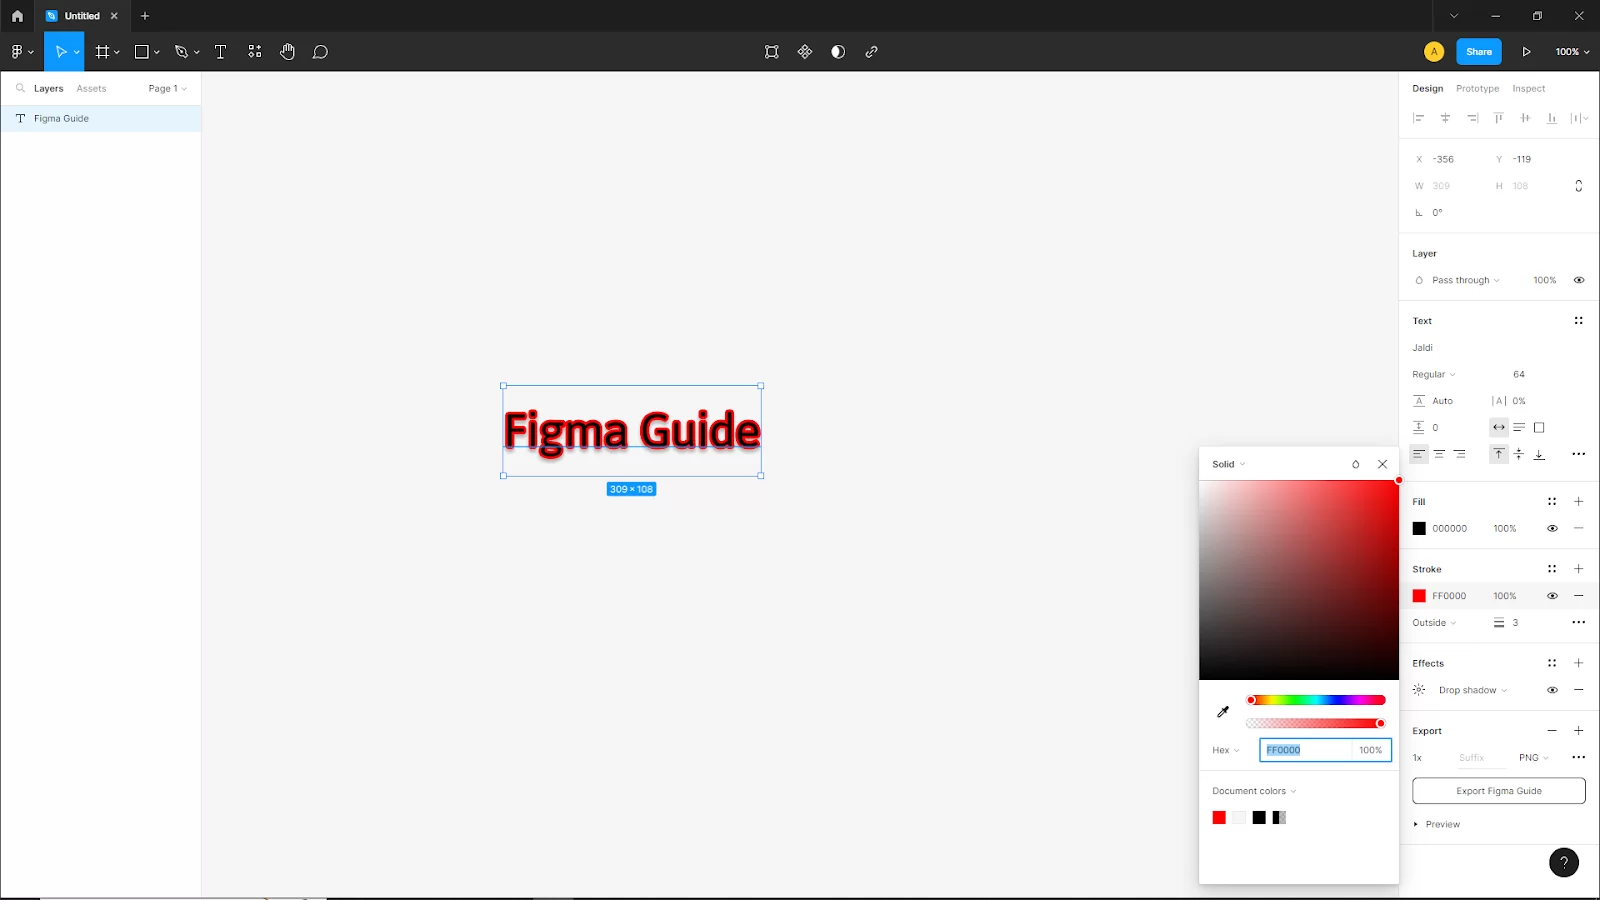
To change the color, click on Fill color pallet under the text panel and then choose your color. To apply stroke you will find the stroke under the Fill.
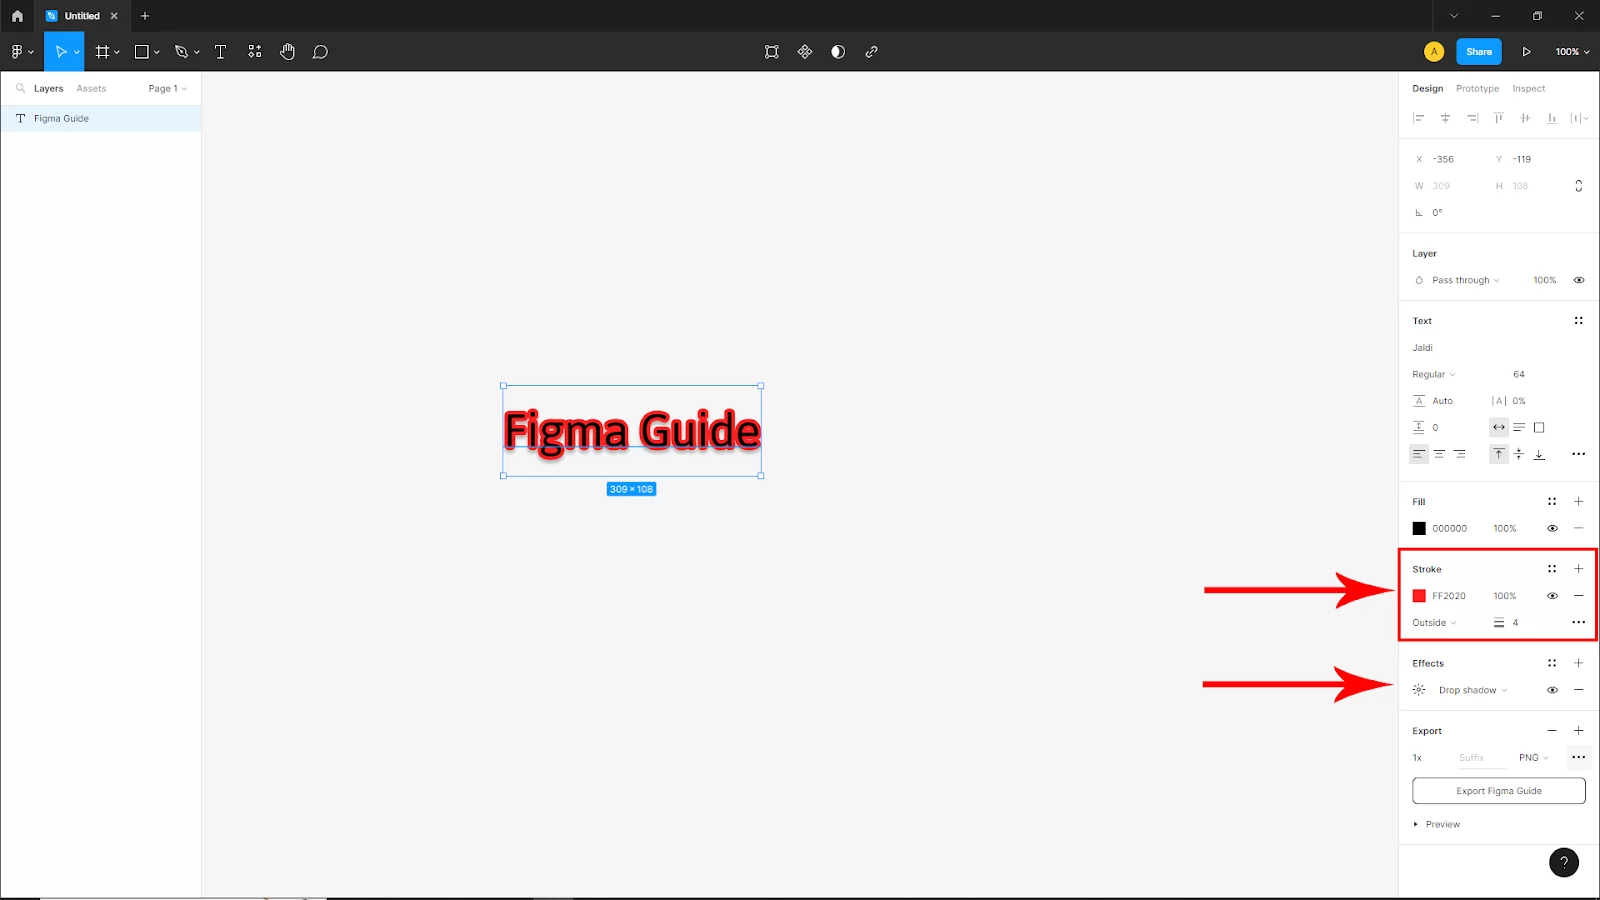
Just click on the stroke and your stroke will apply to the text. Then set the stroke value. To change the stroke color, click on the stroke color pallet and choose your color.
How to Add Edited Text in Figma
Text may be easily added to your Figma design. Simply select the Text tool from the left toolbar, then click any space on your canvas to add text. Then you can begin typing. Simply double-click on an existing piece of text to edit it; a text editing box will then open. After making your adjustments, press enter to finish.
You should know that it can be a little challenging to add or update text in Figma. Before attempting to do so, be sure you have a firm grasp of the software. If you don’t, you might get some undesirable outcomes.
In Figma, inserting text is as simple as styling it. Simply choose the text you wish to format, and then make use of the formatting options that show up in the top toolbar. Font size, font family, line height, alignment, and other choices are available in the top toolbar. By selecting the text you want to link and then clicking the Link icon in the top toolbar, you can also create links to your content. By doing so, a pop-up will appear where you may type in the URL you want to link to.
Check our step-by-step guide on masking in Figma.
Figma Text Tricks and Tips
Are you new to Figma, below are some text editing tricks and tips you should know.
Figma’s text editing feature is versatile and flexible, which makes it a powerful tool for creating polished and professional designs. Some stuffs you can do with Figma include image animations and cropping. Here are some tricks and tips to help you get the most out of the text editing feature in Figma:
Take advantage of keyboard shortcuts
There are a number of keyboard shortcuts that can help you quickly edit text in Figma. Some of my favourites include “Command + B” on a Mac or “Control + B” on Windows to bold text, and “Command + I” or “Control + I” to italicize text.
Use the Character Styles
Character Styles allow you to quickly apply a set of text formatting options to multiple text elements at once. This can be a great time-saver if you’re working on a project with multiple text elements that need to have the same formatting.
Use the Text Styles
Text Styles allow you to save and reuse your text formatting options across your design. With Text Styles you can quickly apply the same font, size, and line-height to multiple text elements throughout your design. How cool is that?!
Explore typography presets
Figma offers a wide variety of typography presets that can be used to quickly change the look and feel of your text. You can access these presets by selecting text on the canvas, then going to the “Text” option in the top toolbar and clicking on the “Styles” dropdown.
Use auto-layouts
Figma’s auto-layouts is great for quickly creating consistent spacing between text elements. With auto-layouts, you can create a set of constraints that define how elements should be spaced in relation to one another.
Utilize the spell checker
Figma’s built-in spell checker that can help you catch spelling errors in your text. To access the spell checker, go to the “File” menu and select “Spell check”
Use plugins
There are a number of plugins available in Figma’s plugin store that can be used to enhance the text editing feature. For example, some plugins can help you quickly find and replace text, while others can be used to add custom typography options to Figma.