Utilizing the Mask feature in Figma is a great way to add an extra level of design to your projects. It allows you to create interesting shapes and layouts, and also can be used to create a sense of depth and movement.
One of the most powerful aspects of Figma’s masking feature is its ability to be combined with other tools like Boolean Operations, Blending modes and vector networks to create more complex and interesting effects.
How to Mask in Figma
Here are two seps to mask in Figma:
Step 1:

Now open Figma and create a new project by clicking on New Design File. If you have an existing file then Open the File.
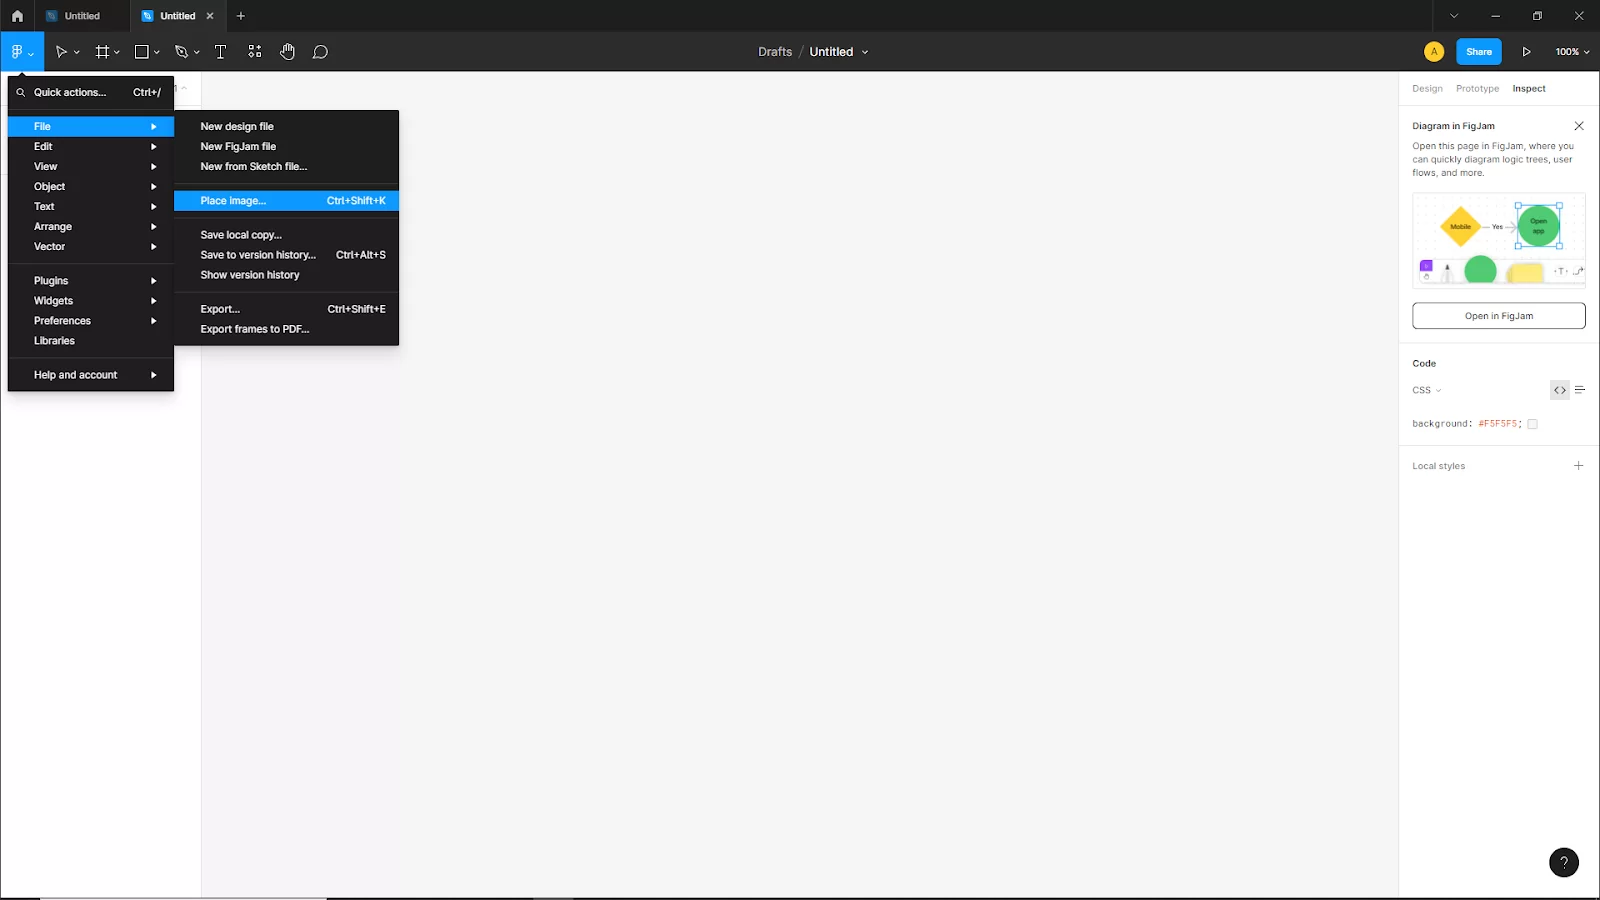
Go to File > Place Image or you can use the short key for Windows [ Ctrl + shift + K ] Mac [ Cmd + Shift + K ]. Now drag into the canvas to import the image as your desired size.
Now create the shape or object that you want to mask with the image. For this example, I created an Ellipse Shape to mask the image.
Step 2:
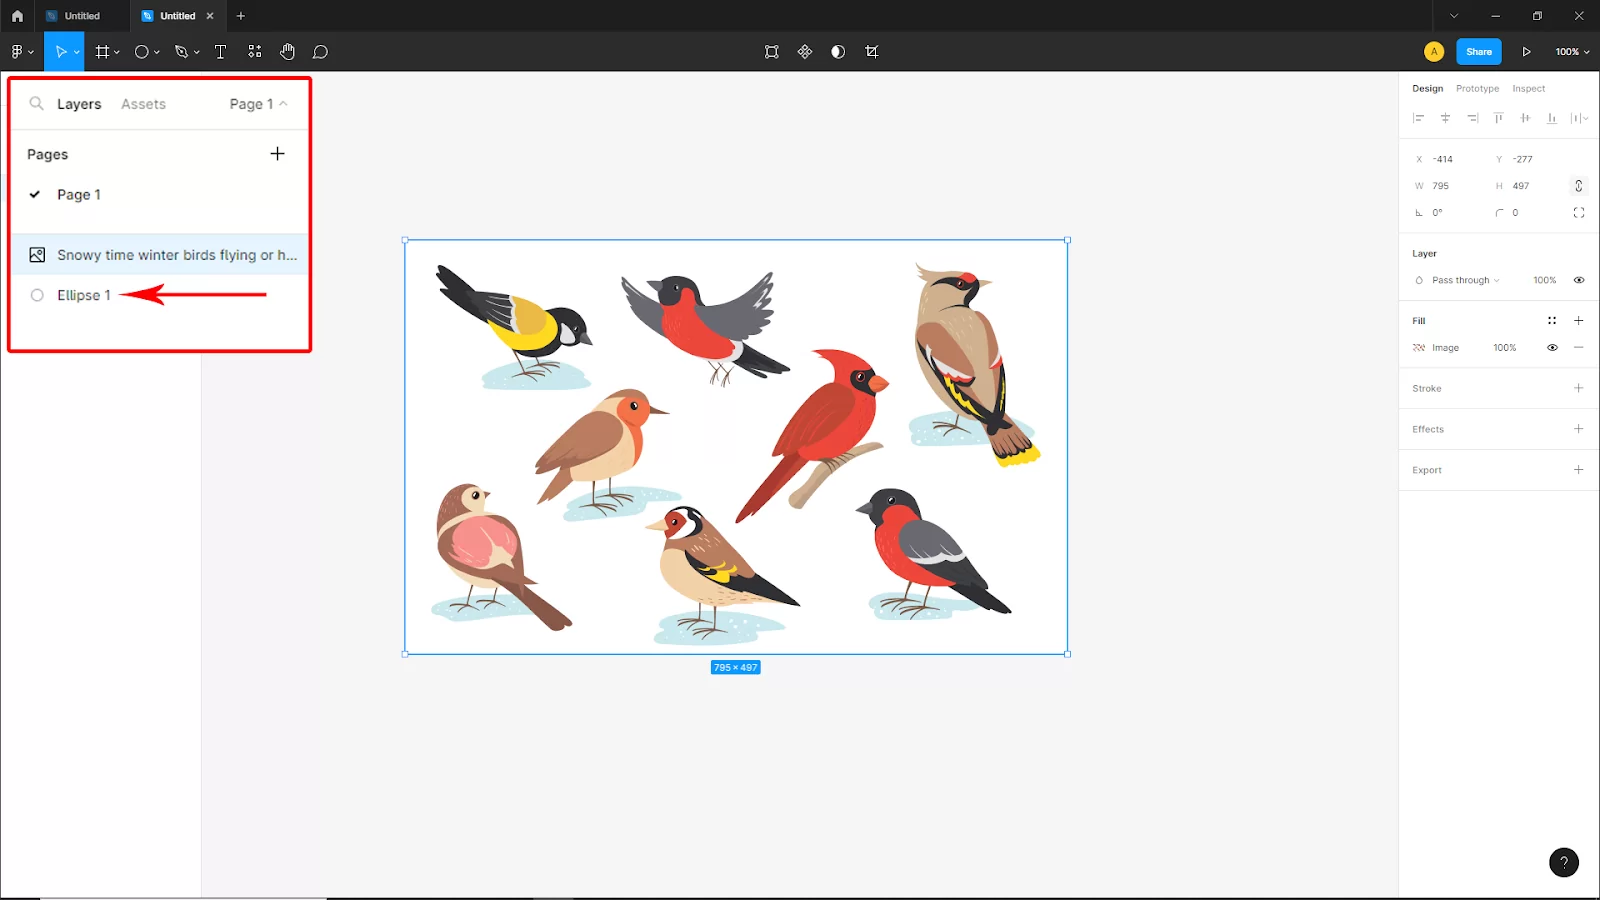
Make sure the shape or object that you created is under the image. Because if you want to mask the image into the shape you must put the shape under the image. Go to the layer panel on the left side upper corner and put the shape layer under the image.

Now Select both layers and right-click on them, then click Use As Mask. or you can use short key Win [ Ctrl + Alt + M ] or Mac [ Cmd + Option + M ].

You can use this method to mask any shape or object with your image. To mask an image with text make sure to convert the text into shape.
Check out this information packed article on how to use prototype in Figma.
How to Use Text as a Layer Mask
Text can be used as a layer mask, just like any other Figma forms or layers. Here’s how to use a text layer to mask an image.
Step 1
Use the key T or choose the text tool from the toolbar. Next, draw a text box on the canvas by clicking and dragging, then enter your text.
Step 2
Set the following options for the text area in the right sidebar: Font-family—Black font with a 100-point size for Inter.
Step 3
Next, use the Place Image tool to import a picture from your local files.
Step 4
500 pixels wide and 500 pixels high should be set for the image layer. After that, drag the image layer over the text layer. A layer hierarchy should have the image layer above the text layer.
Step 5
Now select both the picture and text layers before selecting the Use as mask tool in the top-left toolbar to add a text mask to the image.
Understanding the Mask in Figma?
A portion of a picture that is obscured from view is known as a mask. In Figma, a mask can be utilized to conceal a portion of a vector object or image. The option to add a mask to a newly created image is available when you are using Figma. You will then be able to hide specific portions of the image from view.
Masks are used for a variety of purposes. A mask, for instance, could be used to give an image a cutout appearance. A mask can also be used to make a transparent region in an image, you may use a mask. In Figma, there are two different kinds of masks: vector masks and raster masks. Raster masks are produced using raster images, and vector masks are produced using vector objects.
You may also like to read this article on how to crop an image in Figma.