Welcome to the wonderful world of design, where typography is king and boring default fonts are banished to the land of bland! Let’s face it, nothing says “meh” quite like using the same old, tired Figma fonts everyone else is using.
But don’t fret, because in this tutorial we’re going to show you how to spice up your designs by adding custom fonts to Figma. Say goodbye to the days of bland typography and hello to making your designs truly unique with just a few simple steps.
I’ll be your trusty guide as you navigate the world of custom fonts, giving you the tools to take your designs to new heights (or at least new font heights). So, grab your favorite typeface and let’s get started!
How to Add Fonts to Figma
Figma allows you to a lot editing and more. For example, using Figma you can crop images and even carry out image animations. I’m getting carried away, let us get back on track. (sorry, I just love talking about Figma) You can find all the installed fonts in Figma, and apply any of these installed fonts. But if your Figma software is based on the web browser or your operating system is Linux or Chrome, you can’t find the local fonts in Figma. You need to use google web fonts.
In this guide, I will show two steps to add fonts in Figma.
Step 1:
Make sure Figma is closed because you can’t find the installed font on Figma while it’s open or when the installation process happening.
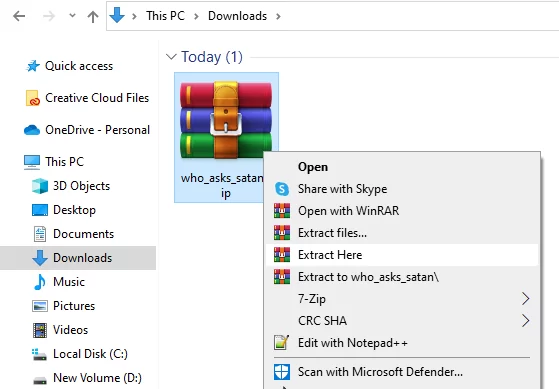
First, Download your font First then go to the file location where you have the font. If you downloaded the fonts in a zip file first we need to extract it.

Now Right-Click on it and click Extract Here or you can Extract your fonts file anywhere you want. You will see the zip file will extract there.
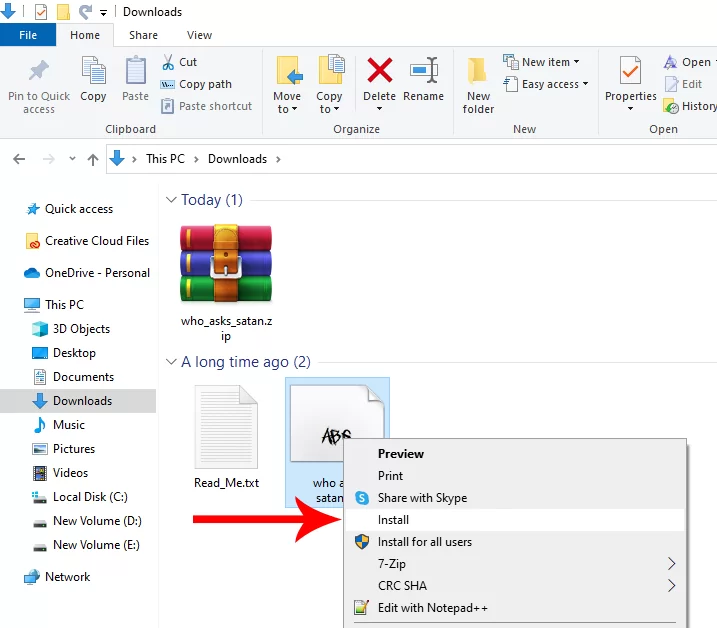
Right-click on the extrated Font File and click Install. If you have multiple files then select all and then click on Install. All fonts will be installed.
Step 2:
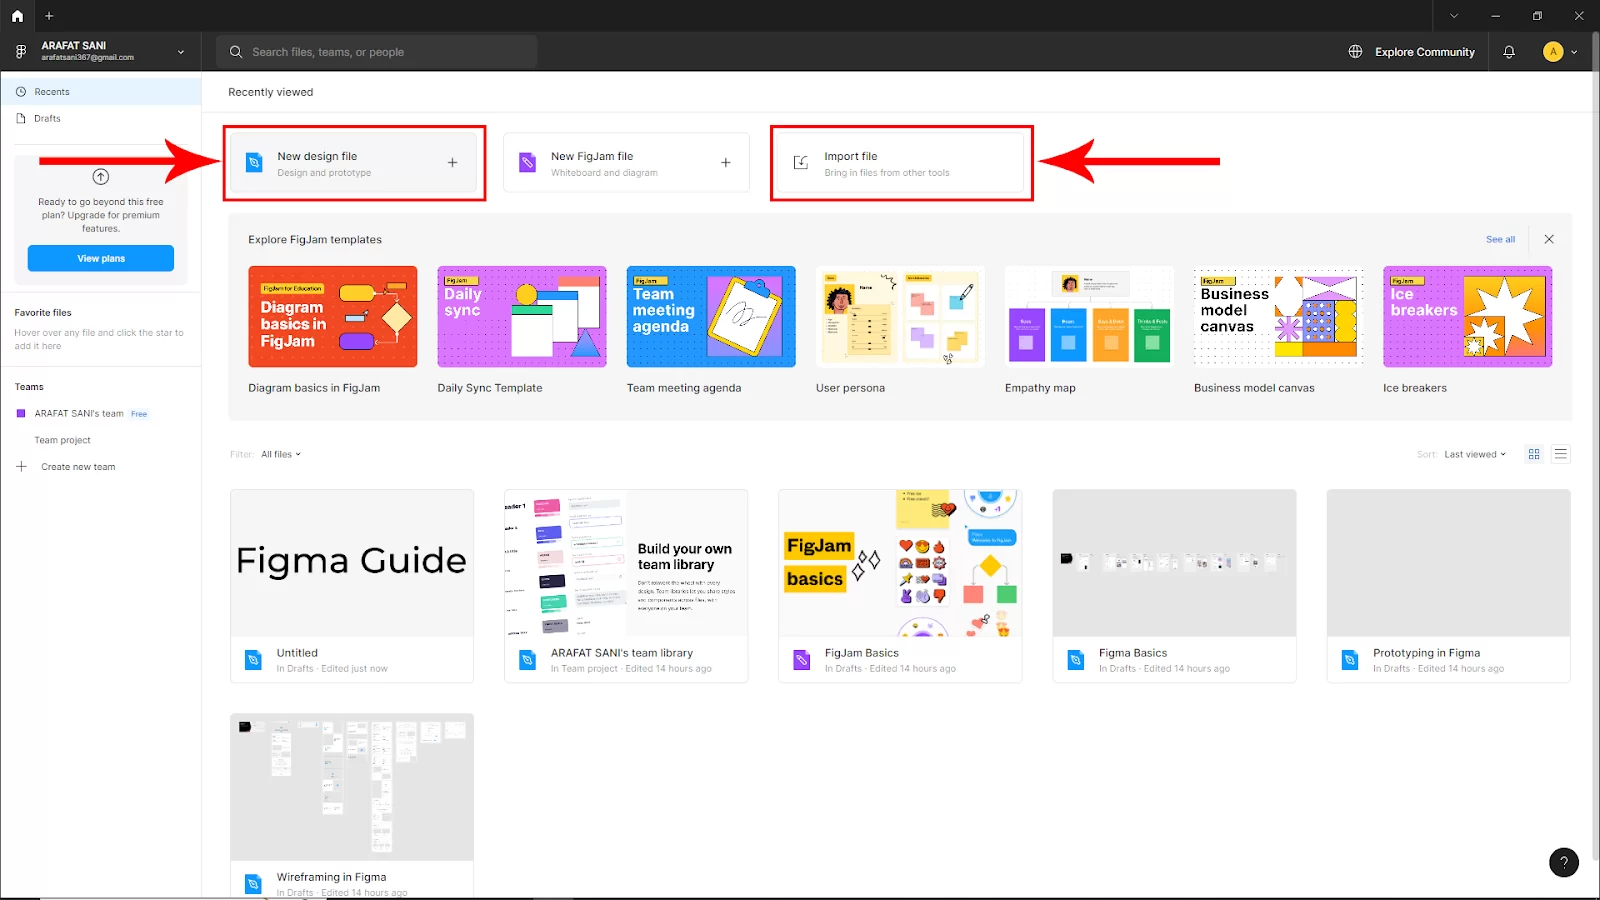
Now Open Figma and create a new project by clicking on New Design File. If you have an existing file then Open the File.
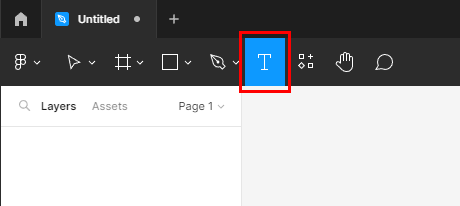
Select the text tool from the upper menu bar to create a text or you can press T to select the tool, Now click on the canvas and write your text.
You will find the text settings under the Design. Click the dropdown arrow of the font properties under the text parameter.
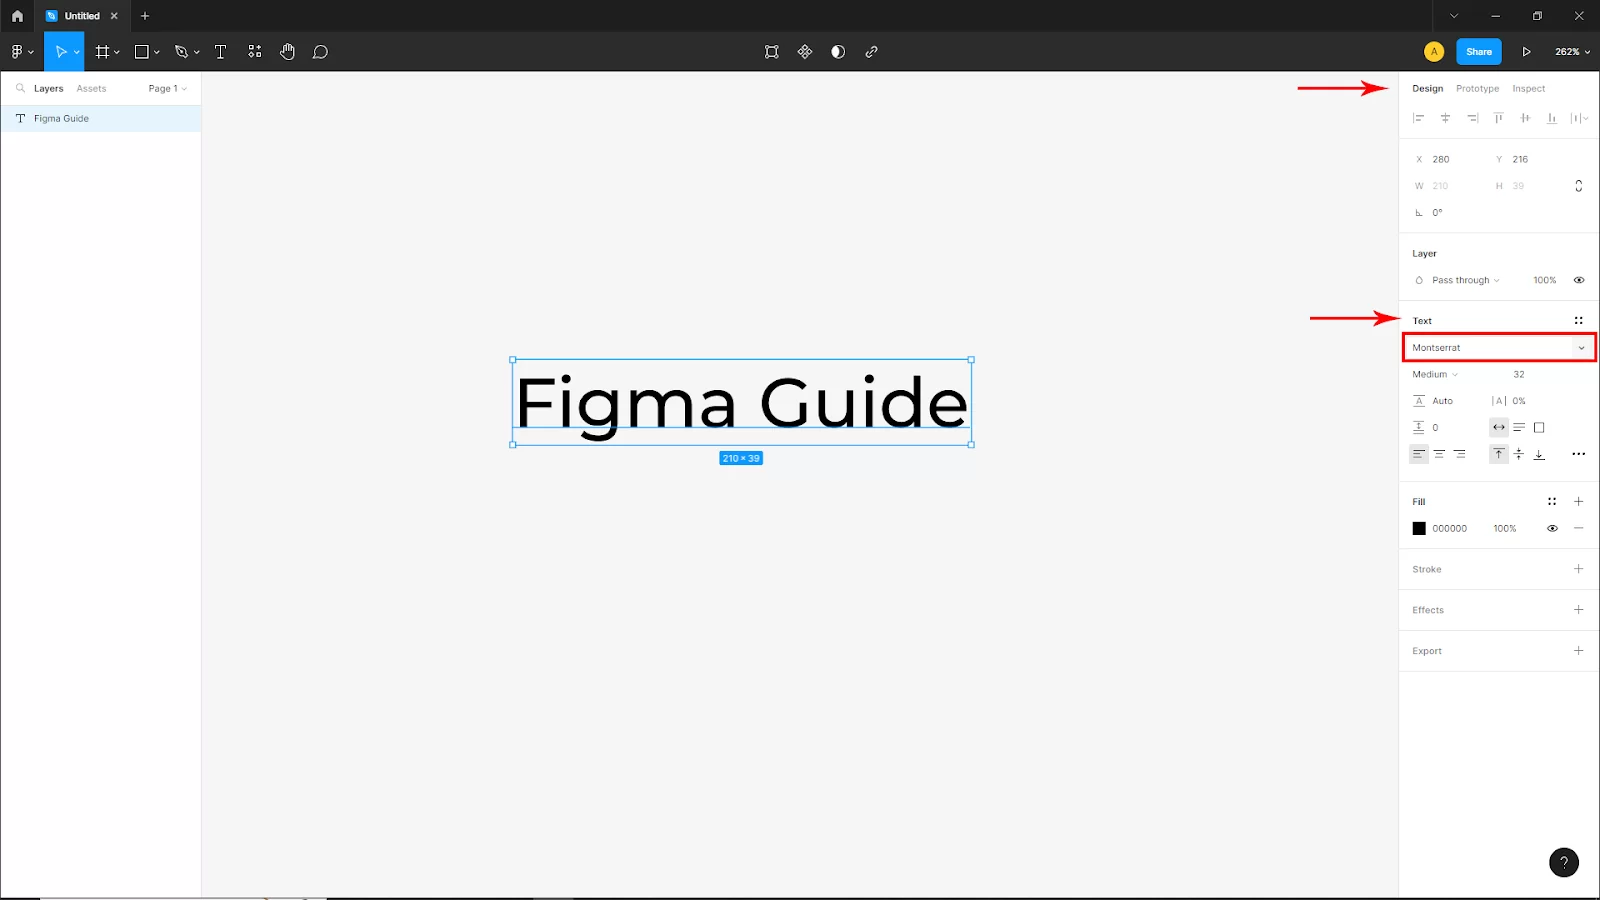
And you will find all the installed fonts. Now click your desired font to apply the text. And your font will be applied.

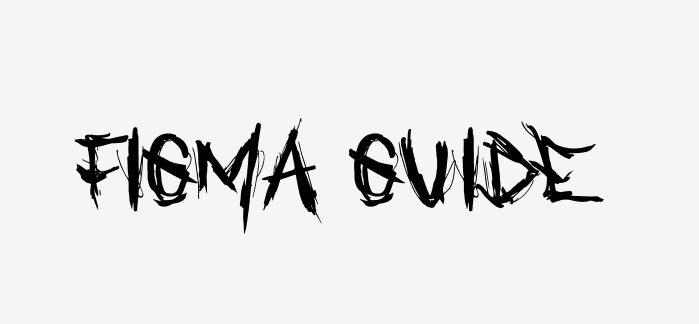
Here’s my newly uploaded font.
How to Add Fonts in Figma Using Mac
Follow the steps below to add fonts in Figma using Mac.
Step 1
Choose a font and download it. In Finder, look for the downloaded file.
Step 2
If required, uncompress the compressed file. Next, open the macOS folder containing the files.
Step 3
To use the font, double-click it. In the dialog, click the Install Font button.
The font will instantly show up in the font choice in your Figma app after it has been installed on your device. Restart the app if you can’t see it; it will then appear.
Your Mac’s Font Book program will contain the installed fonts. Any font can be made inactive or removed from this page by selecting it, and then choosing Edit from the menu bar’s options.
How to Add Fonts to The Figma Browser App
The browser app won’t by default display your local fonts, but you may fix this using a useful background service. Installing Figma’s font service, which is accessible on their website, is required. Follow the steps below to add your local fonts to the Figma browser app.
Step 1
For your Windows or macOS device, download the font service. Then, Install the program.
Step 2
Refresh your browser and Figma.
Step 3
The font choice will now display your local fonts.
Great Fonts to Use in Figma
Finding the ideal font becomes difficult with so many to choose from. Start your search with the top Figma fonts for UI design to save time. Fortunately, since these are Google fonts as well, everyone can use them. Figma also offers some advice on how to pair the most popular Google fonts. Some of the best San Serif fonts are:
- Lato
- Open Sans
- Roboto
- Montserrat
- Raleway
- Crimson Text
- Lora
- Playfair Display
- Merriweather
Tips For Choosing The Right Font For Your Figma Project
Choosing the right font for your project can make or mar the project. This is why you must carefully consider your font choices and how it affects your work. Below are some tips that will help you choose the right font for your projects.
- Readability
A font should be clear and accessible rather than obscure and difficult to understand. People will dismiss your design if they have to work harder to grasp what you have written. Large masses of text should not contain fancy fonts or uppercase text because doing so strains the reader’s eyes. Use fancy fonts solely for titles and headlines, if possible.
Additionally, it’s crucial to pick a typeface that reads well across all sizes and weights. You need to be sure the typeface you select is readable on tiny screens.
- Decisive Contrast
Make sure the font you select to employ has noticeable contrasting differences. This is important when you are using numerous fonts. To be clear, conflict and contrast are not the same things. The perfect font combination should produce harmony. You should find two fonts that are very distinct but have one thing in common as a general rule of thumb. Serif and and-serif fonts are frequently combined.
Establishing a clear hierarchy between the two fonts is crucial when mixing two extremely distinct typefaces; one font should be more noticeable than the other. And to accomplish this, each font’s size and weight can be changed. After you are done adding fonts, you can now proceed to add edited text in your Figma.