After Effects is a great tool for creating endless loops, stings, and transitions. With two simple steps, you’ll be able to quickly and easily repeat your animation without having to manually adjust keyframes over and over again.
2 Steps to Loop in After Effects
You have animated your object in After Effects, and now you want to loop the animation. Loop an animation in After Effect is very simple and easy.
Here are two steps to loop in After Effects.
Step 1:
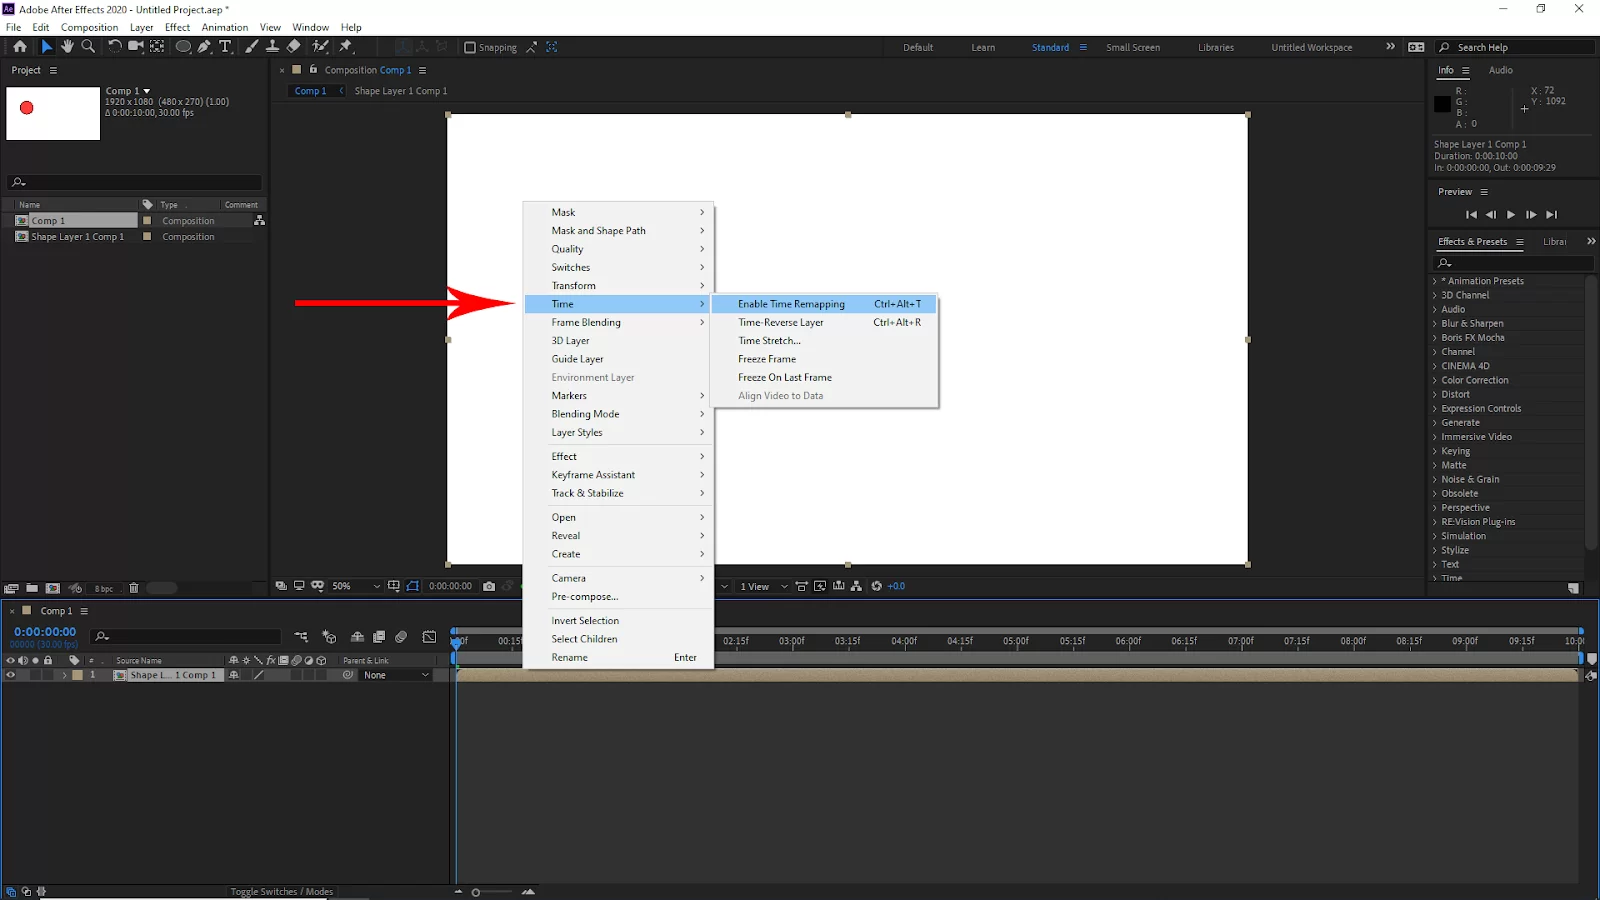
Select the composition that you want to loop. Right-click on it and then click on TIme > Enable Time Remapping. Or you can use the short key Win [Ctrl + Alt + T] or Mac [Cmd + Option + T].
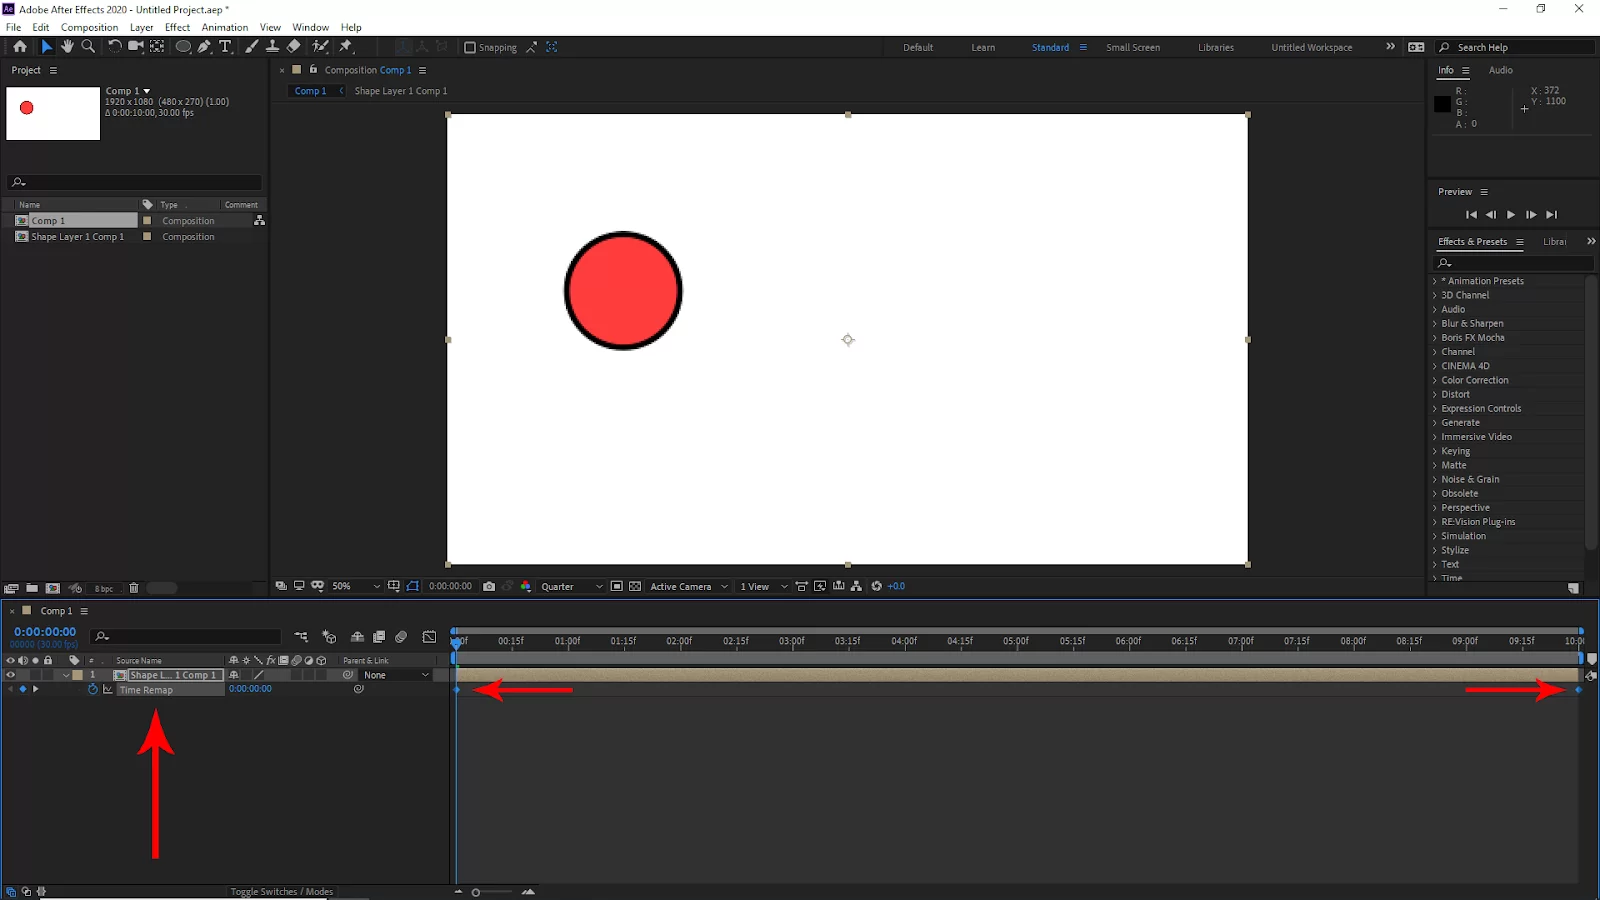
Now you will see under the layer the time remapping effect will be applied, and two keyframes are added.
Step 2:
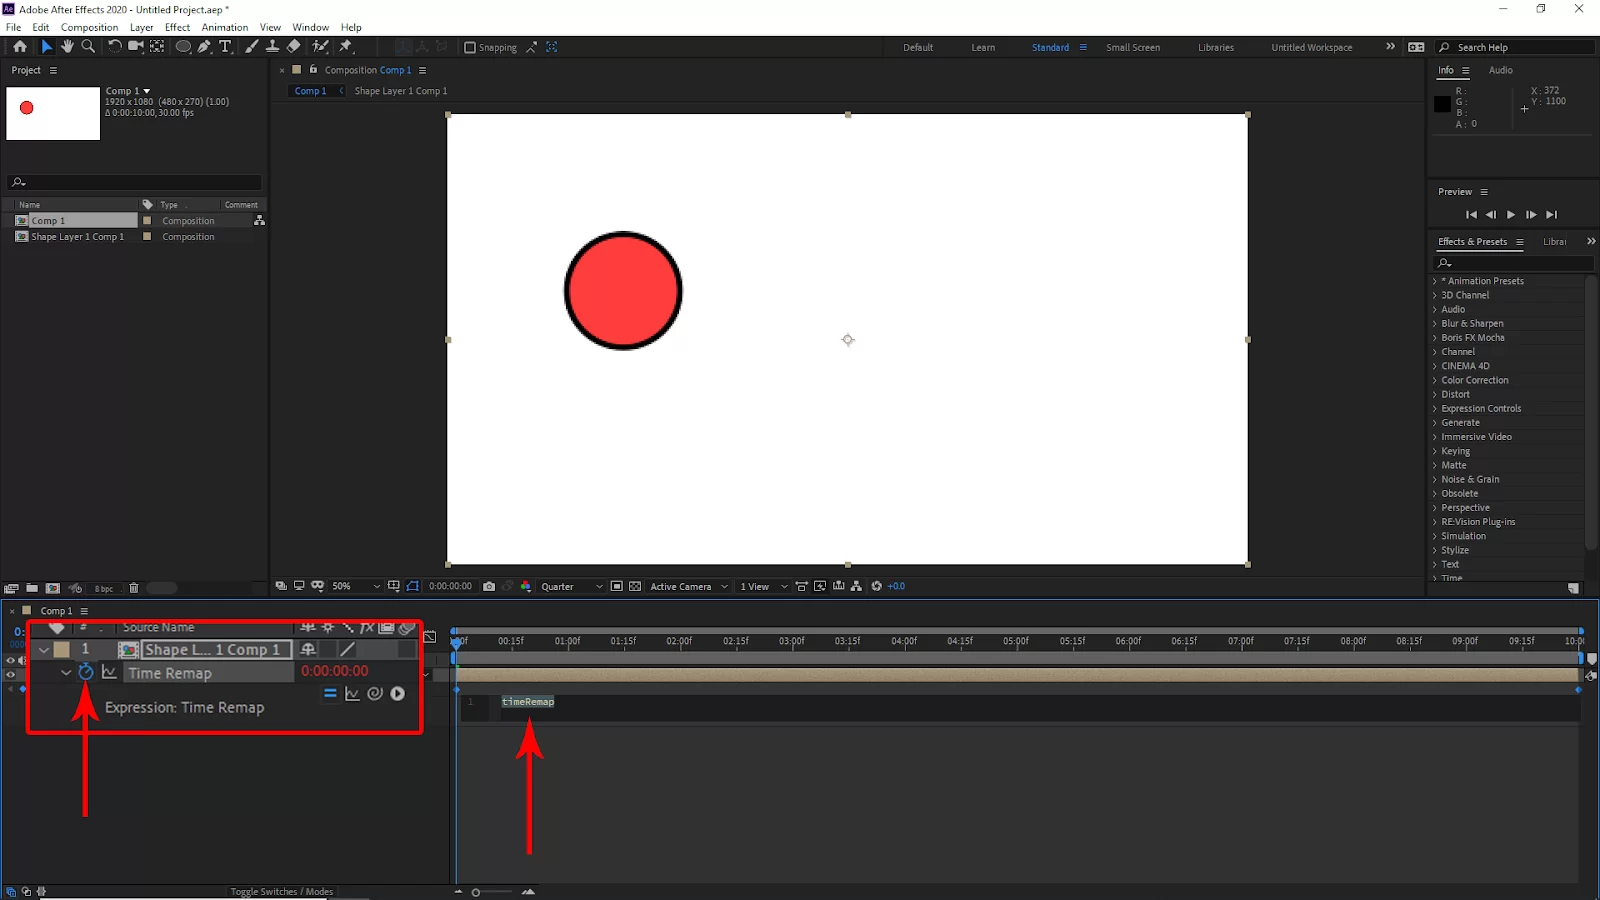
Hold Alt and click the time remapping Stopwatch icon under the layer. And then, you will see a search bar open in the timeline.
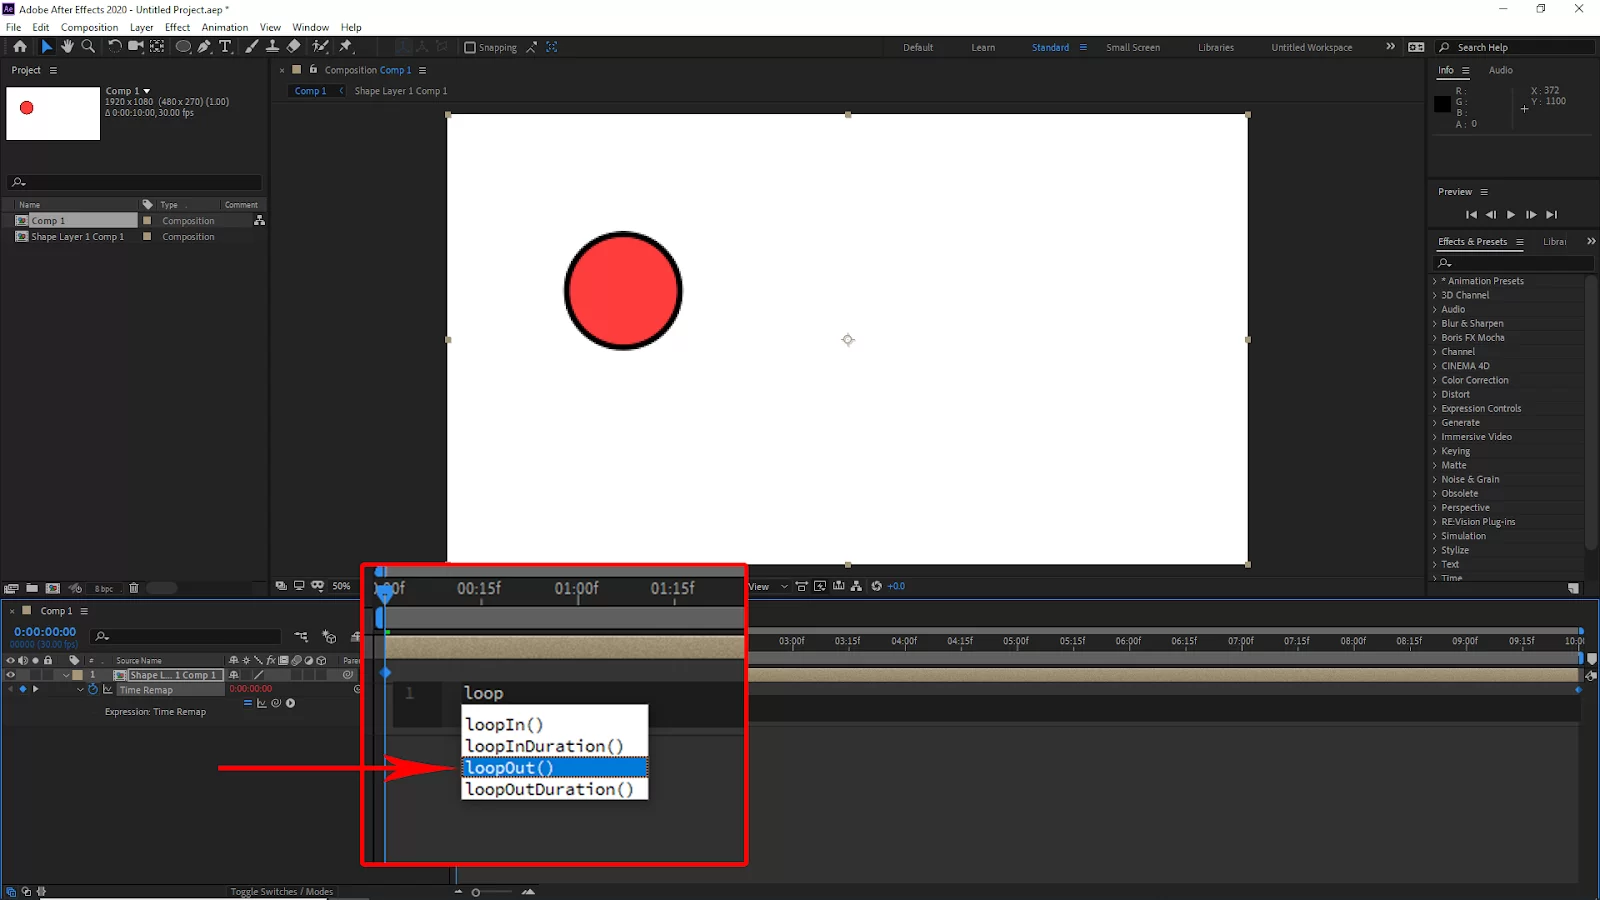
Search Loop out, then selects and enter. And your loop effect will apply to your composition.

If you bring the ending keyframe near the beginning, keyframe your loop animation will be faster. To slow the loop animation, bring the ending away from the beginning keyframe. And your loop is ready. You can use this method to loop other shapes or objects in the animation.
You will also enjoy reading our step-by-step guide on how to move anchor points in After Effects.
Looping on After Effects Composition
You can load precomps and compositions in After Effects using a LoopOut expression. Follow the steps below to loop on the After Effects composition.
Step 1
Start by placing your composition inside another composition.
Step 2
The next step is enabling time to remap. To enable time to remap, select your composition layer, right-click the layer, and select Time > Enable Time Remapping. Let’s move to the next step.
Step 3
When you are through with the second step, two keyframes will be added—one at the beginning of your composition and one at the end. A new property on your layer called Time Remap will also be added.
It’s important to note that your composition could be longer than the animation you wish to loop; if your composition is longer than the animation you want to loop, then you need to move your time marker to the point where you want to loop. Also, click the keyframe button on the time remap to create a new keyframe. Additionally, delete the last keyframe on the time remap property.
Step 4
We are now in the fourth step. You need to add the loopOut expression by clicking and holding the stopwatch that is found in the Time Remap property.
We also recommend that you see our very detailed guide on exporting videos in After Effects.
Problems You May Encounter When Looping Compositions
If you are an avid user of After Effects, you should know that every editing skill comes with its challenges, and “looping composition in After Effects” isn’t exempt.
- There’s a single black frame at the end of the loop
There is a simple solution to the problem mentioned here. All you need to do in this situation is move the time marker to the composition’s final keyframe. Then, move one frame back and make a new keyframe, and then delete the previous last keyframe. Simple as ABC.
- Animation Disappears After One Loop
You might need to expand the layer if this occurs. Move your cursor to the composition layer’s edge, then click and drag it along the timeline.
Looping Video Footage in After Effects
There are several ways to loop video material in After Effects. You can use the method for looping compositions in After Effects. However, there is also a much simpler approach that works. Follow the steps below.
Step 1
The first step is to import your footage into After Effects. You can import your footage by double-clicking on the project panel and finding the video file you wish to import.
Step 2
Now that your footage is selected in the Project panel click the interpret footage icon in the bottom left-hand corner.
Step 3
Next, you need to set the loop count. You should see a panel with further options at the very bottom of the interpret footage pop-up. The pop-up also includes a Loop option. Change the number from 1 to any number you want to loop by, such as 20 or 100! You can always change it later if the footage isn’t long enough.
If you enjoyed reading this, you will also enjoy our step-by-step article on rendering in After Effects.
Leave a Reply
You must be logged in to post a comment.