Exporting a video from After Effects is a key step in the post-production process, enabling you to share your final product with your audience. This is great for creating a short film, a commercial, or a motion graphic as it’s essential to know how to export your work in the correct format and resolution.
The process can be accomplished by following a few simple steps, which include configuring the settings to match your desired output format and quality and initiating the export process. I’ll show you two ways to export a video from After Effects.
2 Ways to Export a Video From After Effects
You have completed your project in After Effects. Now it’s time to render the project. There are two ways to export in After Effects.
Method 1: Exporting With After Effects software Encoding
Step 1:
Go to File > Export > Add To Render Queue, or you can use the short key WIn [ Ctrl + M ] or Mac [ Cmd + M ].

Now you will see a new window open on the timeline panel. Here you can change the render settings. Here you can set the output file destination and Output Module.
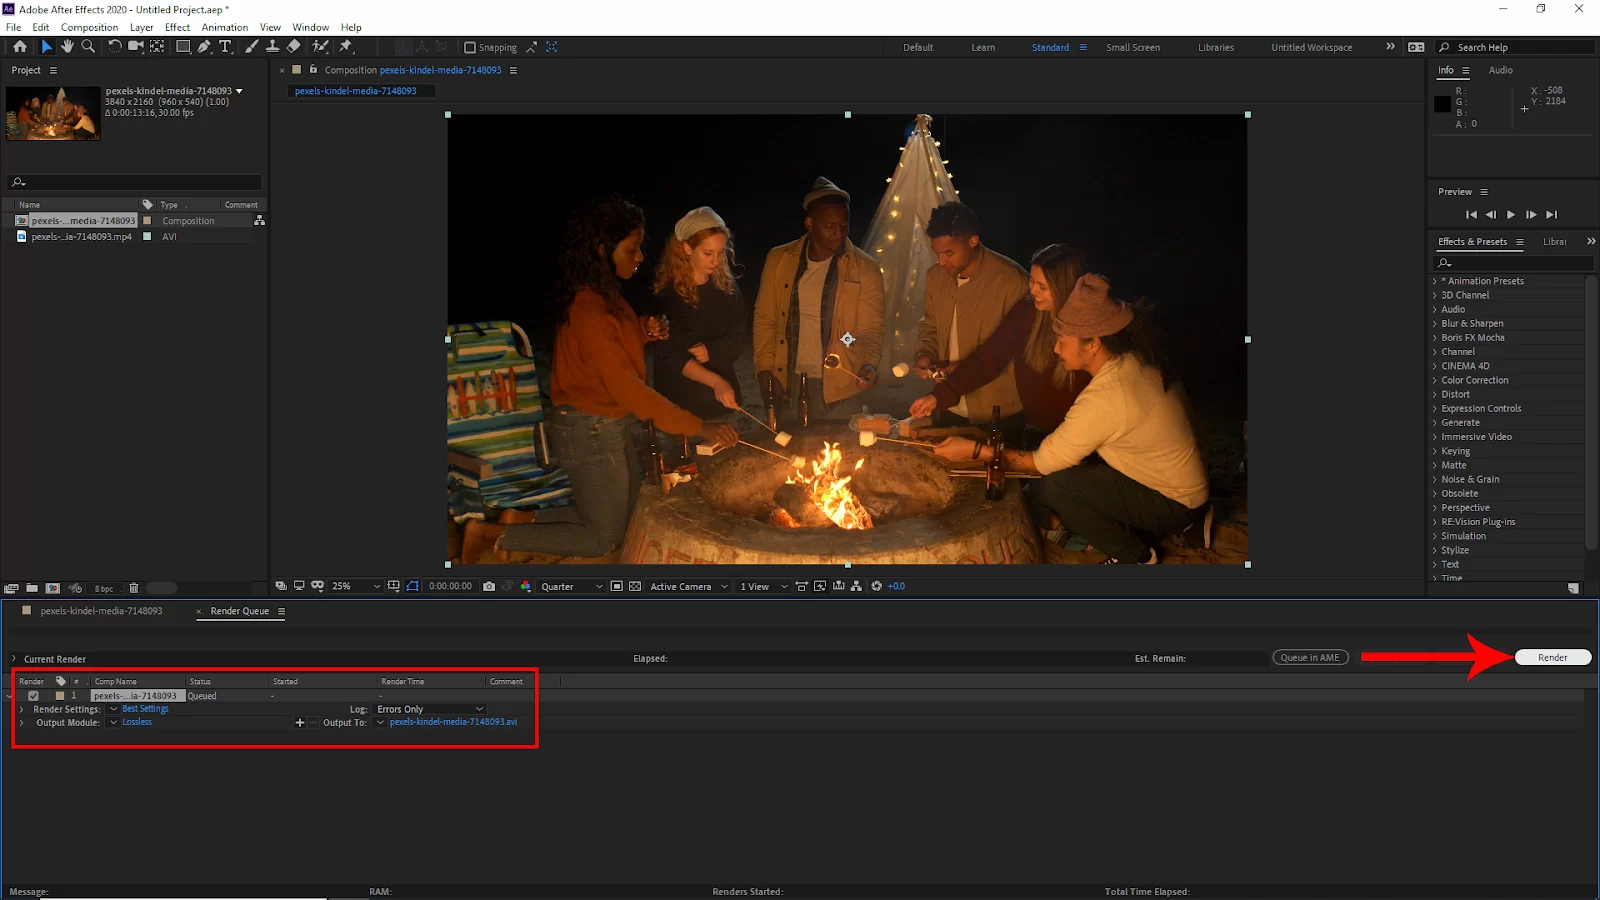
Click Render and your project will be Exported. It will take some time to render. It depends on your project.
Method 2: Rendering with Adobe Media Encoder
This method works only with the media encoder. If you don’t have Adobe Media Encoder, then first install it. Go to File > Export > Add To Adobe Media Encoder Queue or you can use the short key WIn [ Ctrl + Alt + M ] or Mac [ Cmd + Option + M ].
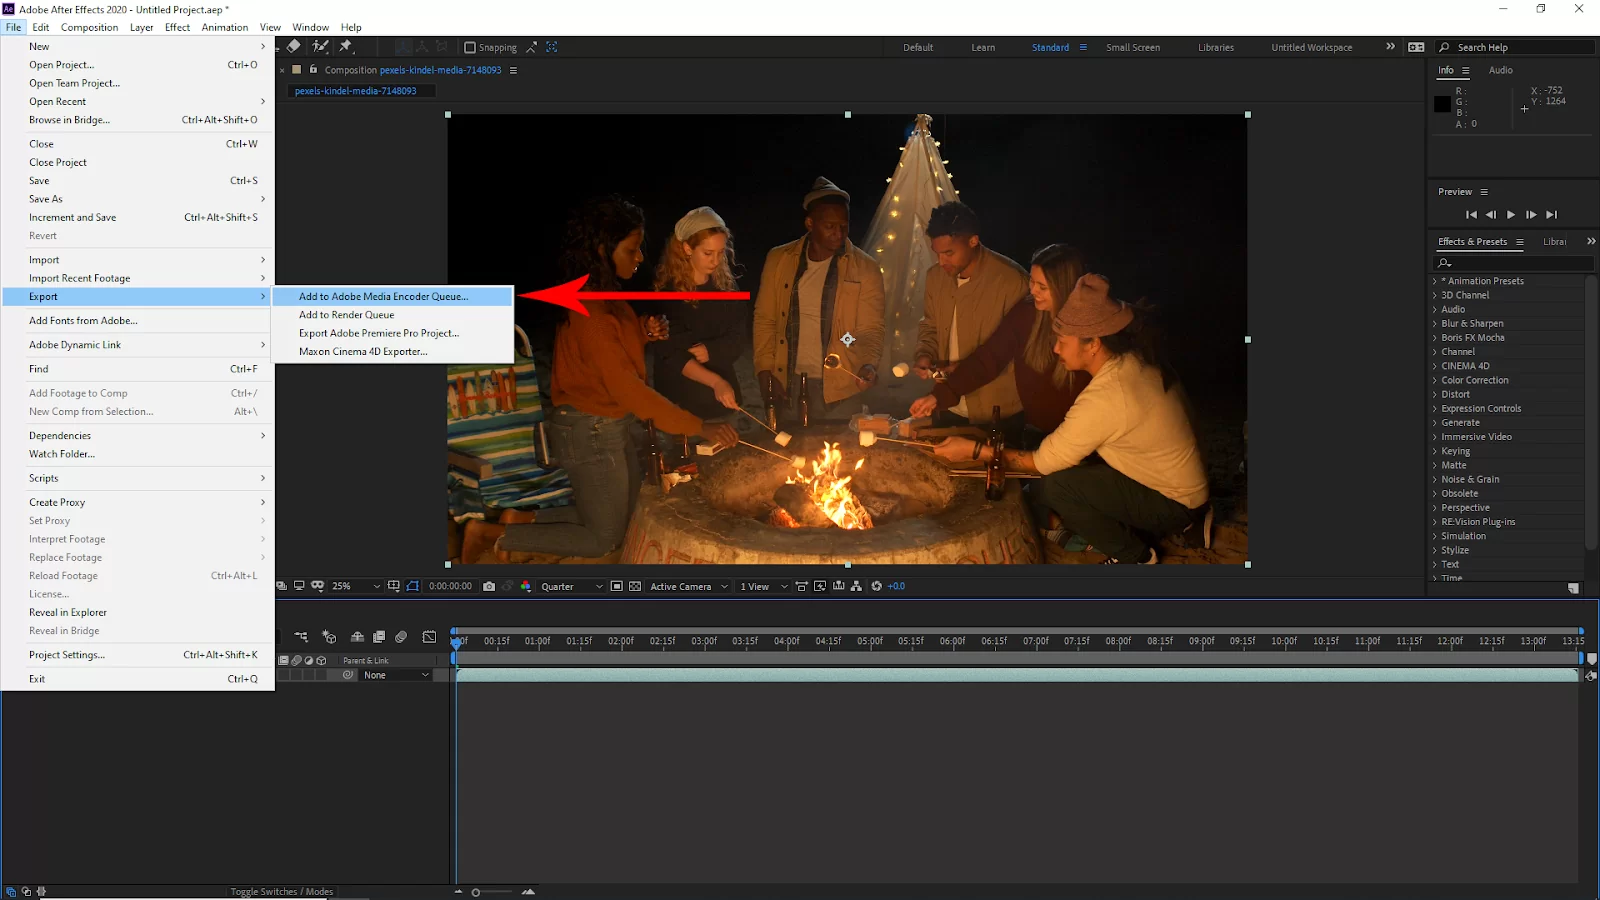
You will see the media encoder software will open, and your project will automatically go to the media encoder to render.


Now click on your project in the media encoder, set the file format Quicktime, set the output destination, and then click ok, and your project will render. It will take some time, depending on your project.
Check out our in-depth article on how to loop in After Effects.

How to Make Your Rendering Faster in After Effects
There is nothing as annoying as trying to export your video, and the process is moving at a snail’s speed. Thankfully, there are a few actions that you can take to speed up the process. I can hear you sighing because of relief! Below are some great tips to make your rendering go faster in After Effects.
- Turn on Multi-Processing
When you enable multi-processing After Effects employ many CPU cores to handle more than one frame at a time. This will significantly lower render time. By choosing Render Multiple Frames Simultaneously from the Preferences menu, you can enable multiprocessing and make changes from there.
- Keep Caplocks On
I know you are wondering what Caps Lock has to do with rendering and exporting a video. Hear me out. When you keep your Caps Lock on, the composition window will not refresh while you are rendering. This would also help to speed up the render time.
- Reduce Pre-comps
Pre-comps are an excellent organizational tool when used. However, as wonderful as pre-comps are, they could make the rendering process take longer. So, here is the simple solution: Pre-comps that aren’t being used should be either deleted before rendering or kept to a minimum while working.
- Choose Effects Selectively
Effects give composition vitality, but they can also prolong the rendering process. If your render time is too long, try eliminating one or two effects because some are more intense than others.
- Clean Up Compositions and Trim Layers Off Screen
You can speed up the rendering time by deleting unused layers. Furthermore, you can also trim layers that are outside of the screen area.
- Toggle Unused Features Off and Close Other Programs
It is a good idea to toggle off features that won’t be used in your final export. Some of the features you should consider toggling off are depth of field, motion blur, or 3D.
You can also make your computer’s rendering easier by closing other programs and leaving just After Effects running. Try to take the pressure off your computer and see it render faster.
Best Settings For After Effects Rendering
If you want the best render settings in After Effects, then you should typically set it on Best Settings and Lossless. Whether you’re editing videos of high-resolution video games, real movies, or video presentations for your online lectures Best Settings and Lossless are the ways to go.
These default settings should be okay for the majority of your render needs. They will also provide a nice balance of quality and file size so you’re not caught in limbo when exporting. These settings also ensure that you can only export high-quality video.
But, if you have specific goals in mind, you can tweak Best Settings and Lossless to achieve them. You can tweak Best Settings and Lossless if you need to change your render’s frame rate or color depth.
If you enjoyed reading this article, check out our in-depth article on exporting videos in After Effects.
Leave a Reply
You must be logged in to post a comment.